Advertisement
Table of Contents
Advertisement
Table of Contents

Related Manuals for NETGEAR DST6501


Summary of Contents for NETGEAR DST6501
- Page 1 Add-on DST Adapter Requires Nighthawk R7300 DST Router Model DST6501...
-
Page 2: Package Contents
Package Contents DST Adapter Ethernet cable... -
Page 3: Getting Started
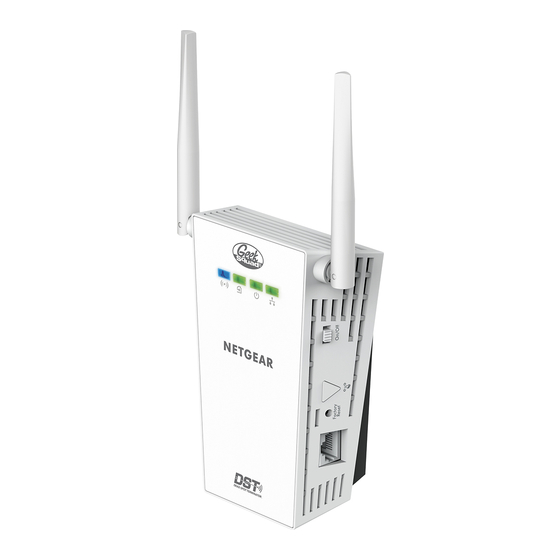
Getting Started You can add up to 16 DST adapter to extend your WiFi network to 16 more locations. The setup is simple and the connection is consistent and fast. To set up your add-on DST adapter, follow the instructions in this booklet. - Page 4 Meet Your DST Adapter Before you install your DST adapter, familiarize yourself with its LEDs, buttons, and port. WiFi LED DST LED Power On/Off switch Power LED Ethernet LED WPS and DST Router Sync button Factory Reset button Ethernet port...
-
Page 5: Led Descriptions
LED Descriptions LEDs Descriptions WiFi LED • Solid blue. The DST adapter is securely paired with a WiFi device. • Blinking blue. The DST adapter is pairing with a WiFi device. • Off. WiFi is disabled. DST LED This LED indicates when the DST adapter is connected to the electrical outlet with the strongest link performance, indicated by the color displayed by the LED: • Red. - Page 6 Add the DST Adapter to the DST Network After you set up your DST network, you can add up to 16 DST adapters to extend your DST network to 16 more locations. Room 3 Room 2 Room 1 DST router DST adapter DST adapter The following instructions assume that you already set up your DST...
- Page 7 2. If the Power LED does not light, slide the Power On/Off switch to the On position. 3. Update the encryption key to secure the connection between the DST adapter and the DST router: Press the WPS and DST Adapter Sync button on the DST router.
- Page 8 4. Log in to the DST router to update the DST adapter’s firmware and WiFi settings: Connect a computer or WiFi device to the DST router’s network. Launch a web browser. Enter www.routerlogin.net in the address field of the browser. A login window displays.
- Page 9 The DST adapter’s WiFi network name is based on the DST router’s WiFi network name with _EXT added at the end of the name. If more than one DST adapter is connected to the DST router, for every additional DST adapter after the first, a number is added before _EXT. The DST adapter’s WiFi password is the same as the DST router’s WiFi password.
- Page 10 Connect Devices to the DST Adapter You can connect devices using a wired Ethernet connection, a WiFi connection, or a WPS connection. Connect to the DST Adapter Using Ethernet ¾ To connect devices to the DST adapter using an Ethernet connection: Use an Ethernet cable to connect the Ethernet port on your device to the Ethernet port on the DST adapter.
- Page 11 2. Find and select your DST adapter’s WiFi network name (SSID). The DST adapter’s WiFi network name is based on the DST router’s WiFi network name with _EXT added at the end of the name. If more than one DST adapter is connected to the DST router, for every additional DST adapter after the first, a number is added before _EXT.
- Page 12 Connect to the DST Adapter Using WPS ¾ To connect devices to the DST adapter using WPS: 1. Press and hold the WPS and DST Router Sync button on the DST adapter. The WiFi LED on the DST adapter blinks. 2.
- Page 13 Change the DST Adapter WiFi Settings If you want to change the DST adapter’s WiFi settings, log in to the DST adapter using a web browser and change its WiFi settings. ¾ To change the DST adapter’s WiFi settings: 1. With an Ethernet cable, temporarily connect your computer to the Ethernet port on the DST adapter.
- Page 14 If the Password (Network Key) field displays, enter a security password or your DST WiFi network. Click the Apply button. Your changes are saved. Use the new WiFi settings to connect your WiFi devices to the DST adapter’s WiFi network.
-
Page 15: Troubleshooting Tips
Troubleshooting Tips Power LED is off. Make sure that power is supplied to the electrical outlet, and that the DST adapter is not plugged into an extension cord, power strip, or surge protector. DST LED is off. • If you already set network security, make sure that all DST adapters are using the same encryption key;... - Page 16 Support Thank you for purchasing this NETGEAR product. After installing your device, locate the serial number on the label of your product and use it to register your product at https://my.netgear.com. You must register your product before you can use NETGEAR telephone support.