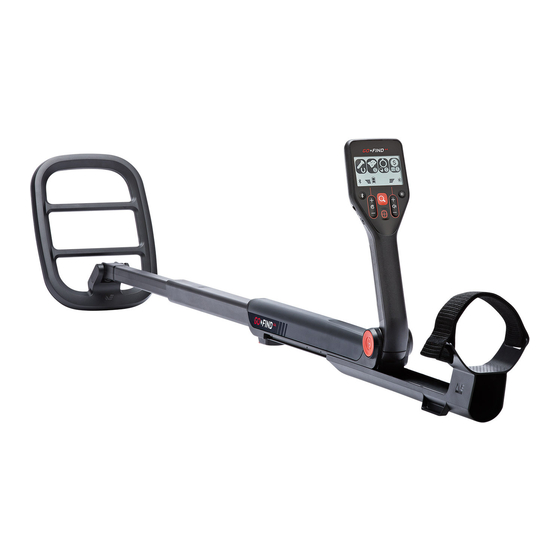
Advertisement
Quick Links
DETECTING BASICS
QUICK START GUIDE
STEP 1. POWER ON
Switch your detector on.
The LCD will light up with several icons.
STEP 2. BEGIN DETECTING
Sweep the coil over the ground in a side-to-side motion.
The detector will light up and beep when a metal object is found.
SWEEP LEVEL Keep the coil 1–2
inches (2–3 cm) above and parallel to
the ground at all times.
SPEED Sweep the coil over the
ground in a side-to-side motion, an
average sweep speed is 1–2 seconds
from left to right.
OVERLAP SWEEP Slightly overlap the
previous sweep to ensure full ground
coverage.
CONTROL PANEL
10
11
12
1
2
3
1) POWER SWITCH (ON/OFF)
2) EAR BUDS OUTPUT
3) SENSITIVITY
Increase for more detecting depth. You
may need to decrease this if there is high
noise interference or false signals.
4) PINPOINT (GO‑FIND 40/60 only)
Determine the exact location of a target.
5) VOLUME
6) BACKLIGHT (GO‑FIND 40/60 only)
7) FIND MODE
Detect and reject metal objects.
ON switch
ITEM FOUND The detector will
light up and beep when a target is
discovered.
ADJUSTMENT The detector should
be straight with your forearm and
feel light and comfortable when you
pick it up.
50 ft (15 m)
SPACE Recommended distance is
50 feet (15 m) apart when multiple
users are scanning an area.
9
8
7
6
5
4
8) DEPTH INDICATION
Shallow | Medium | Deep
9) TREASURE VIEW LED
Red and green LEDs help you quickly
identify treasure from trash.
(GO‑FIND 40/60 only)
10) FIND ICONS (x 4)
11) BATTERY LEVEL
12) BLUETOOTH (GO‑FIND 40/60 only)
AUDIO OUTPUT
1/8" connector with speaker at rear.
TREASURE VIEW
(GO‑FIND 40/60 only)
Treasure View LEDs light up when a metal object has been detected.
As you get closer to the target, more LEDs illuminate.
RED indicates an iron metal object (possibly trash).
GREEN indicates a non-iron metal object (possibly treasure).
ORANGE indicates Pinpoint mode for all metal objects.
LEDs will illuminate from left to right when Pinpoint is off.
LEDs will illuminate towards the center when Pinpoint in on.
This helps identify the exact location of the object.
ICON DESCRIPTIONS
When a metal object is detected, the corresponding icon will flash on
the control panel to indicate the target type. If the icon is turned off (not
visible) then these object types will not be detected.
E.g. Iron objects, nails and
horseshoes.
E.g. Aluminium foil and lower
value coins.
FIND MODES
FIND modes allow you to search for specific groups of metal objects by
accepting or rejecting detection. No need to dig the trash – just the treasure!
Cycle through the different modes using the Find button.
GO‑FIND 20
GO‑FIND 40
Select from 2 find modes:
Select from 3 find modes:
1)
1)
2)
2)
3)
DETECTOR SOUNDS
The detector beeps when an object is detected. This sound can be heard
through the detector speaker or through ear buds/headphones connected to
the audio output socket (refer to control panel diagram).
GO‑FIND 20
GO‑FIND 40
2 different audio tones:
3 different audio tones:
LOW TONE: Iron targets (such as nails) produce the lowest tone.
MID 1 TONE (GO‑FIND 40/60 ONLY): Less valuable metals produce a lower medium tone.
MID 2 TONE (GO‑FIND 60 ONLY): Higher value metals produce a higher medium tone.
HIGH TONE: Silver and copper targets produce the highest tone.
E.g. Rings, pull tabs and lower
value coins.
E.g. Low and high value coins
and screw caps.
GO‑FIND 60
Select from 4 find modes:
1)
2)
3)
4)
GO‑FIND 60
4 different audio tones:
Advertisement

Summary of Contents for Minelab Go-Find Series
- Page 1 DETECTING BASICS TREASURE VIEW (GO‑FIND 40/60 only) Treasure View LEDs light up when a metal object has been detected. QUICK START GUIDE As you get closer to the target, more LEDs illuminate. RED indicates an iron metal object (possibly trash). STEP 1.
-
Page 2: Code Of Ethics
If this This product has a 2 year limited warranty from the equipment does cause harmful interference to radio time of purchase. Please refer to www.minelab.com or television reception, which can be determined for further warranty information.


