Table of Contents
Advertisement
Quick Links
Advertisement
Chapters
Table of Contents

Related Manuals for Epson SC-P800


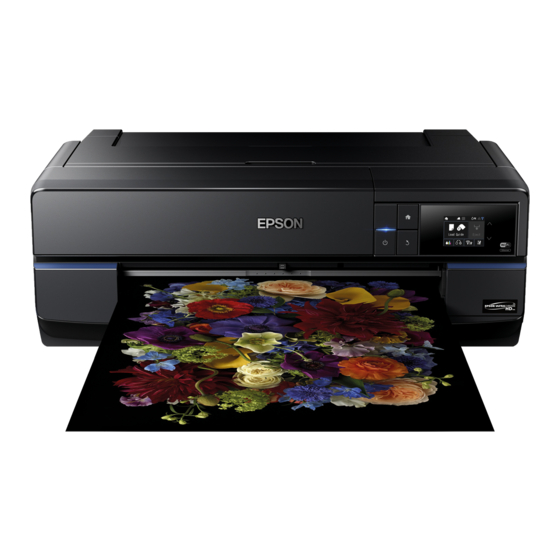
Summary of Contents for Epson SC-P800
- Page 1 User’s Guide CMP0031-01 EN...
-
Page 2: Copyrights And Trademarks
(excluding the U.S.) failure to strictly comply with Seiko Epson Corporation’s operating and maintenance instructions. Seiko Epson Corporation shall not be liable for any damages or problems arising from the use of any options or any consumable products other than those designated as Original Epson Products or Epson Approved Products by Seiko Epson Corporation. -
Page 3: Table Of Contents
Introducing the Supplied Software... . . 21 Using Epson Printer Utility 4....51 Contents of the Software Disc....21 Starting Epson Printer Utility 4. - Page 4 Print Quality/Print Results....109 Using Epson iPrint..... . 84 Unable to feed or eject paper..
- Page 5 SC-P800 Series User’s Guide Contents Help for Users in Hong Kong....136 Help for Users in Malaysia....136 Help for Users in India.
-
Page 6: Important Safety Instructions
SC-P800 Series User’s Guide Introduction ❏ Avoid electrical outlets controlled by wall switches Introduction or automatic timers. ❏ Keep the entire computer system away from potential sources of electromagnetic interference, Important Safety such as loudspeakers or the base units of cordless telephones. -
Page 7: When Using This Product
SC-P800 Series User’s Guide Introduction ❏ When connecting the printer to a computer or ❏ Shake new ink cartridges four or five times before other device with a cable, ensure the correct opening their packages. orientation of the connectors. Each connector has ❏... -
Page 8: Meaning Of Symbols
SC-P800 Series User’s Guide Introduction ❏ Only use a dry, soft cloth to clean the LCD screen. Do not use liquid or chemical cleansers. ❏ If the liquid crystal solution gets on your hands, wash them thoroughly with soap and water. If the liquid crystal solution gets into your eyes, flush them immediately with water. -
Page 9: Printer Parts
SC-P800 Series User’s Guide Introduction Printer Parts Front section Paper support Supports paper to prevent it from falling forward or backward. Edge guide Move left and right depending on the size of the paper that you want to load. This prevents paper being fed at a slant. -
Page 10: Back
SC-P800 Series User’s Guide Introduction Maintenance cartridge cover Open when replacing the maintenance cartridge. “Replacing the Maintenance Cartridge” on page 103 Control panel “Control panel” on page 12 “Using the Control Panel” on page 92 Print head Fires ink via high density nozzles while moving left and right to print. Do not move the print head by hand. - Page 11 SC-P800 Series User’s Guide Introduction Airflow vents Exhausts internal air. Do not cover the vents. USB port Connects the USB cable. LAN port Connects the LAN cable. Status light Indicates the network communication speed. On: 100Base-TX Off: Not connected, energy saving, or 10Base-T Data light Indicates the status of the network connection or receiving data.
-
Page 12: Control Panel
SC-P800 Series User’s Guide Introduction Control panel Note: You can change the angle of the control panel. P light (power light) : The power is on. : The power is off. P button (power button) Turns the power on and off. -
Page 13: Home Screen View
SC-P800 Series User’s Guide Introduction Home Screen View Indicates that the ink is running low or the maintenance cartridge is running out of space. Prepare a new cartridge. icons indicate the status. Indicates the selected black ink using the Press the icons to display menus for settings and following icons. - Page 14 SC-P800 Series User’s Guide Introduction Load Guide is displayed when paper is not loaded. Displays the operation mode, radio wave You can continue by checking the selected Load status, and connection status for the wire- Guide procedure on the screen.
- Page 15 SC-P800 Series User’s Guide Introduction You can perform printer maintenance and adjust Photo Black printer settings. Light Black “Menus” on page 92 Light Light Black Cyan (Cut/Eject) button Vivid Magenta You can eject paper that has been loaded. Light Cyan...
-
Page 16: Printer Features
The newly developed Epson UltraChrome HD ink inks from being broken down by light and ozone in the technology provides high definition for professional air. - Page 17 “Energy Saving Settings” on page 42 Supporting a variety of paper such as roll paper EPSON offers a wide variety of special media for high-quality printing. With this printer, you can now print on roll paper, which widens your printing options.
-
Page 18: Notes On Usage And Storage
SC-P800 Series User’s Guide Introduction requirements are met. For more details, see the Notes on Usage and manual supplied with the paper. Storage Also, when operating in dry areas, air conditioned environment, or under direct sunlight, maintain the appropriate humidity. -
Page 19: Notes On Handling Ink Cartridges
SC-P800 Series User’s Guide Introduction ❏ Store the printer after confirming that the print ❏ When loading ink cartridges, be sure all colors are head has been capped (the print head is positioned installed. The printer can only be used when all at the far right). -
Page 20: Notes On Handling Paper
❏ Avoid touching the printable surface of the paper constituents in the air. This also applies to Epson special with your bare hands. Moisture and oils from your media. However, with the correct storage method, the hands can affect print quality. -
Page 21: Introducing The Supplied Software
SC-P800 Series User’s Guide Introduction Introducing the Supplied Software Contents of the Software Disc The following Windows only software can be found on the supplied software disc. http://epson.sn for Mac OS X or if you do not have a disk drive. -
Page 22: Summary Of The Printer Driver
SC-P800 Series User’s Guide Introduction ❏ Allows the user to execute printer maintenance Summary of the Printer Driver functions to maintain print quality, and check the printer's status and so on. The main functions of the printer driver are described below. -
Page 23: Loading Paper
SC-P800 Series User’s Guide Basic Operations Basic Operations Loading Paper This printer provides four types of feeding methods. For cut sheets, the feeding methods vary depending on the media thickness. ❏ If the cut sheets are wavy or curled, flatten them before loading them in the printer. If wavy or curled cut sheets are loaded, this printer may not be able to detect the paper size or print correctly. -
Page 24: Displaying The Paper Setup Screen
SC-P800 Series User’s Guide Basic Operations Open and fully extend the paper support. Displaying the Paper Setup Screen When Paper Setup Display is set to On and paper is loaded correctly, the setup screen for paper type and paper size is automatically displayed. -
Page 25: Loading Fine Art Media
SC-P800 Series User’s Guide Basic Operations Fully extend the output tray. Note: If A3 or larger paper is not fed correctly, use the Extend the tray until you can see the line on the paper support edge guide (a) shown in the following left-hand side of the first section of the tray. - Page 26 SC-P800 Series User’s Guide Basic Operations Turn on the printer. Press the front cover. The front cover opens automatically when it is Important: pressed. An error may occur if you perform the following operations during initialization movement. ❏ Extend the front manual feed tray.
- Page 27 SC-P800 Series User’s Guide Basic Operations Load the paper vertically with the printable side When paper feeding is complete, check that the face up. printer is not operating, and then close the front manual feed tray. While aligning the right edge of the paper with...
-
Page 28: Loading Poster Board
SC-P800 Series User’s Guide Basic Operations “Displaying the Paper Setup Screen” on Press the front cover. page 24 The front cover opens automatically when it is pressed. Note: To eject the paper, press Eject on the control panel's Home screen, and then follow the on-screen instructions. - Page 29 SC-P800 Series User’s Guide Basic Operations Fully extend the output tray. Extend the tray until you can see the line on the left-hand side of the first section of the tray. While aligning the right edge of the paper with...
-
Page 30: Loading Roll Paper
SC-P800 Series User’s Guide Basic Operations Tighten the 2 screws on the unit. Loading Roll Paper For roll paper, attach the optional roll paper unit to the printer. Load roll paper on the spindle supplied with the unit, and then load the spindle into the unit. - Page 31 SC-P800 Series User’s Guide Basic Operations “Supported Media” on page 118 Align the triangle marks on the attachment and the flange, and press until the hooks click into place. Remove the black flange with the attachment from the spindle. Push out the two hooks that fit into the flange.
- Page 32 SC-P800 Series User’s Guide Basic Operations Insert the spindle into the roll paper core. Press the front cover. Insert the spindle from the right so that the end of The front cover opens automatically when it is the roll paper is hanging down towards you.
- Page 33 SC-P800 Series User’s Guide Basic Operations Only extend the second section of the output Load the spindle with the roll paper into the unit. tray. Load from the rear and make sure the gray (fixed) flange is on the left.
-
Page 34: Cutting Roll Paper
SC-P800 Series User’s Guide Basic Operations When you press Cut, follow the instructions on Important: the control panel's screen. If you continue inserting the roll paper after the screen has changed, the margin at the leading edge will be more than 50 mm. -
Page 35: Basic Printing Methods
SC-P800 Series User’s Guide Basic Operations Basic Printing Methods Important: Make sure the roll paper has been ejected and wound around the spindle when you remove This section explains how to print and how to cancel the spindle. If you try to remove the spindle printing. - Page 36 SC-P800 Series User’s Guide Basic Operations Select the Media Type, Color, Print Quality, When settings are complete, click Print. Mode, and Source according to the paper loaded in the printer. The Progress Bar is displayed, and printing starts. Screen while printing...
-
Page 37: Printing (Mac Os X)
SC-P800 Series User’s Guide Basic Operations Printing (Mac OS X) Note: If the page setting items are not displayed on the print screen, click File menu - Page Setup and so on You can make print settings such as paper size and paper in your application. -
Page 38: Canceling Printing (Windows)
SC-P800 Series User’s Guide Basic Operations Set the Media Type, Color, Print Quality, and Canceling Printing (Windows) other settings according to the type of paper loaded in the printer. Normally, you can print When the computer has finished sending data to the... -
Page 39: Canceling Printing (Mac Os X)
SC-P800 Series User’s Guide Basic Operations If the job has been sent to the printer, print data is Note: not displayed on the above screen. You cannot delete print jobs which are in the print queue on the computer using the above operation. See "Canceling Printing (Windows)"... -
Page 40: Printable Area
SC-P800 Series User’s Guide Basic Operations Printable area The printable area is shown in gray in the illustration below. Note, however, that owing to the design of the printer, print quality will drop in the areas with hatching. The arrow in the illustration indicates the direction of the ejected paper. -
Page 41: Changing The Type Of Black Ink
See the following section to select a suitable black ink for the media type. “Epson Special Media Table” on page 119 The time needed to switch from one type of black ink to another (from ink replacement until charging is complete) is given below. -
Page 42: Switching Manually
SC-P800 Series User’s Guide Basic Operations Energy Saving Settings ❏ The black ink type that can be used for printing varies depending on the media type. ❏ You can select the type of black ink from the This printer comes equipped with the following two printer driver when the media type selected types of power saving settings. - Page 43 Basic Operations Windows U “Summary of the Utility Tab” on page 48 Mac OS X U “Epson Printer Utility 4 Functions” on page 51 About Power Management using Power Off Timer You can adjust the time before Power Management is applied.
-
Page 44: Displaying The Settings Screen
SC-P800 Series User’s Guide Using the Printer Driver(Windows) The printer driver setting screen is displayed. Using the Printer Driver (Windows) Displaying the Settings Screen You can access the printer driver in the following ways: ❏ From Windows applications “Printing (Windows)” on page 35 Make the necessary settings. -
Page 45: Displaying Help
SC-P800 Series User’s Guide Using the Printer Driver(Windows) Displaying Help Right-click on the item you want to check You can access the printer driver help in the following Right-click the item, and then click Help. ways: ❏ Click Help ❏ Right-click on the item you want to check... -
Page 46: Customizing The Printer Driver
SC-P800 Series User’s Guide Using the Printer Driver(Windows) Enter any name in the Name box, and then click Customizing the Printer Save. Driver You can save the settings or change the display items as you prefer. Saving various settings as your Select Settings You can save all printer driver settings as a Select Setting. -
Page 47: Rearranging Display Items
SC-P800 Series User’s Guide Using the Printer Driver(Windows) ❏ Arrange in groups (folders). Click Custom Settings. Go to the Utility tab and click Menu Arrangement. Enter any name in the Name box, and then click Save. Select Edit Item. You can save up to 100 settings. You can choose a setting you have registered from the Media Type list box. -
Page 48: Summary Of The Utility Tab
SC-P800 Series User’s Guide Using the Printer Driver(Windows) ❏ Drag and drop unnecessary items to Not Summary of the Utility Display. You can perform the following maintenance functions from the printer driver's Utility tab. Note: When Delete Group is performed, the group (folder) is deleted, however the items in the deleted group (folder) remain. - Page 49 By right-clicking the icon, you can display the following Driver Update menu and perform maintenance functions. Visit the Epson website to check whether there is a EPSON Status Monitor 3 starts when the printer name is driver newer than the currently installed version. If a clicked from the displayed menu.
-
Page 50: Uninstalling The Printer Driver
❏ In Windows 7/Windows Vista, if an Administrator password or confirmation is Note: requested, enter the password and then You can also remove the Epson Network Utility by continue with the operation. clicking the Utility tab and selecting the Epson Network Utility. -
Page 51: Displaying The Settings Screen
Using the Printer Driver (Mac OS X) You can perform maintenance tasks such as Nozzle Check or Head Cleaning by using Epson Printer Utility 4. This utility is installed automatically when you install the printer driver. Displaying the Settings Starting Epson Printer Utility 4... - Page 52 SC-P800 Series User’s Guide Using the Printer Driver(Mac OS X) You can set the time to automatically turn off the printer EPSON Status Monitor You can check the printer's status, such as the remaining from Power Off Timer. ink level and error messages, from the computer's screen.
-
Page 53: Uninstalling The Printer Driver
When reinstalling the printer driver or upgrading, remove the target software first. Use the "Uninstaller" to remove the printer driver. Acquiring the Uninstaller You can download the "Uninstaller" from the Epson homepage. http://www.epson.com/ Using the Uninstaller Follow the steps provided when you acquire the... - Page 54 (PhotoEnhance) Select Color Management and then Document. Select Printer Manages Colors as the Color The printer driver for this printer comes with the Epson Handling setting, and then click Print. proprietary function PhotoEnhance that makes the most efficient use of the color reproduction area, corrects image data to improve colors before printing.
- Page 55 Setting example for Adobe Photoshop CS5 Note: Open the Print screen. EPSON Color Controls is unavailable in Adobe Photoshop CS3 or later, Adobe Photoshop Lightroom 1 or later, and Adobe Photoshop Elements 6 or later unless the setting in step 1 is...
-
Page 56: Correct Color And Print
The printer driver automatically and internally corrects colors to match the color space. You can select from the following color correction modes. ❏ EPSON Standard (sRGB) Optimizes the sRGB space and corrects the color. ❏ Adobe RGB Adobe RGB Optimizes the sRGB space and corrects the color. - Page 57 SC-P800 Series User’s Guide Printing Varieties Open the Print screen. If you opted to display the Color Controls screen in Step 2, adjust settings as desired. Select Color Management and then Document. Select Printer Manages Colors as the Color See the printer driver help for more details on Handling setting, and then click Print.
- Page 58 SC-P800 Series User’s Guide Printing Varieties Setting example for Adobe Photoshop CS5 Note: EPSON Color Controls is unavailable unless the Open the Print screen. setting in step 1 is made for the following applications. Select Color Management and then Document.
-
Page 59: Printing Black And White Photos
SC-P800 Series User’s Guide Printing Varieties Make the necessary settings. Printing Black and White See the printer driver help for more details on Photos each item. You can print black and white photos with rich gradation by adjusting the image data color by the printer driver. - Page 60 SC-P800 Series User’s Guide Printing Varieties Select Color Management and then Document. Click Advanced for Mode. Select Printer Manages Colors or No Color Management as the Color Handling setting, and then click Print. Make the necessary settings. Display the printer driver Main tab and select See the printer driver help for more details on Advanced B&W Photo as the Color.
- Page 61 SC-P800 Series User’s Guide Printing Varieties In other applications, set No Color Display the Print screen, select Print Settings Management. from the list, and then select Advanced B&W Photo as the Color. Note: “Printing (Mac OS X)” on page 37...
-
Page 62: Borderless Printing
SC-P800 Series User’s Guide Printing Varieties Make the necessary settings. Borderless printing See the printer driver help for more details on each item. You can print your data without margins on the paper. The types of borderless printing you can choose vary as shown below depending on the media type. -
Page 63: Supported Media Sizes For Borderless Printing
SC-P800 Series User’s Guide Printing Varieties Retain Size Create the print data larger than the paper size in the applications to produce borderless output. The printer driver does not enlarge the image data. Use settings such as Page Layout in the applications to set the size of the image data as follows. -
Page 64: Setting Procedures For Printing
Roll Paper or Roll Paper (Banner) is selected for Source. 16 inch roll paper 16.5 inch (42 cm) roll paper 17 inch roll paper Depending on the media type, the print quality may decline or borderless printing cannot be selected. “Epson Special Media Table” on page 119... - Page 65 SC-P800 Series User’s Guide Printing Varieties Making Settings for Mac OS X Select Auto Expand or Retain Size as the Open the Print screen and select the paper size Method of Enlargement. If you select Auto from the Paper Size option, and then select a Expand, set how much of the image goes beyond borderless printing method.
-
Page 66: Sizes Larger Approx
SC-P800 Series User’s Guide Printing Varieties Select Print Settings from the list, and then set Top edge Bottom Left and the Media Type. edge right Sizes larger Approx. 3.3 Approx. Approx. 4.5 than A3+ 5.0 mm Sizes larger Approx. 3.0 Approx. -
Page 67: Enlarged/Reduced Printing
SC-P800 Series User’s Guide Printing Varieties Enlarged/Reduced Fit to Page/Scale to fit paper size Printing Adjusting Settings in Windows When the printer driver's Page Layout screen is displayed, set the same paper size as the data's You can enlarge or reduce the size of your data. There paper size in Page Size or Paper Size. -
Page 68: Making Settings For Mac Os X
SC-P800 Series User’s Guide Printing Varieties Making Settings for Mac OS X Fit to Roll Paper Width Open the Print screen, select Paper Handling (Windows only) from the list, and then check Scale to fit paper size. Display the printer driver Main tab and select “Printing (Mac OS X)”... -
Page 69: Custom Scale Setting
SC-P800 Series User’s Guide Printing Varieties Select the scale within a range of 10 to 650 %. Select the width of the roll paper loaded in the printer from the Roll Width list. Check other settings, and then start printing. -
Page 70: Multi-Page Printing
SC-P800 Series User’s Guide Printing Varieties Enter the scale. Multi-Page Printing You can print multiple pages of your document on one sheet of paper. If you print continuous data prepared at A4 size, it is printed as shown below. Note: ❏... - Page 71 SC-P800 Series User’s Guide Printing Varieties Adjusting Settings in Windows Making Settings for Mac OS X When the printer driver's Page Layout screen is When the Print screen is displayed, select Layout from the list, and then specify the number of displayed, select the Multi-Page check box, select N-up, and then click Settings.
-
Page 72: Printing
SC-P800 Series User’s Guide Printing Varieties “Printing (Windows)” on page 35 Manual Double-Sided Printing (Windows only) You can easily print on both sides of the paper by printing out all even numbered pages and then flipping those pages over and reloading them manually to print the odd numbered pages. -
Page 73: Poster Printing (Enlarge To Cover Several Sheets And Print - Windows Only)
SC-P800 Series User’s Guide Printing Varieties Poster Printing (Enlarge Setting Procedures for Printing to cover several sheets Prepare the print data using applications. and print - Windows only) The printer driver automatically enlarges the image data when printing. The poster printing function automatically enlarges and When the printer driver's Page Layout screen is divides the print data. -
Page 74: Borderless Printing Method
If Borderless Poster Print is grayed out, the selected paper or the size does not support borderless printing. “Supported Media Sizes for Borderless Printing” on page 63 “Epson Special Media Table” on page 119 When with margins is selected: Clear Borderless Poster Print. -
Page 75: Joining The Output Paper Together
SC-P800 Series User’s Guide Printing Varieties Joining the output paper together The steps for joining the output paper together differ between borderless poster printing and poster printing with margins. Borderless poster printing This section describes how to join four printed pages together. - Page 76 SC-P800 Series User’s Guide Printing Varieties Join the left and right sheets together. While two pages are overlapping, cut them along the alignment marks (horizontal red line). Use an adhesive tape to stick the backs of the sheets together. Repeat steps 1 to 4 for the lower sheets.
-
Page 77: User-Defined Paper Sizes/Custom Paper Sizes
SC-P800 Series User’s Guide Printing Varieties Adjusting Settings in Windows User-defined Paper Sizes/ When the printer driver's Main screen is Custom Paper Sizes displayed, click User Defined. “Printing (Windows)” on page 35 You can also print on paper sizes that are not already available in the printer driver. - Page 78 SC-P800 Series User’s Guide Printing Varieties Enter the Width, Height for the Paper Size, and Note: enter the margins, and then click OK. ❏ To change the paper size you saved, select the paper size name from the list on the left.
-
Page 79: Banner Printing (On Roll Paper)
SC-P800 Series User’s Guide Printing Varieties You can now print as normal. Banner printing (on roll paper) You can print banners and panoramic pictures if you create and set print data for banner printing in your application. You need the optional roll paper unit to load roll paper. - Page 80 SC-P800 Series User’s Guide Printing Varieties Adjusting Settings in Windows Click User Defined and match the paper size to In the printer driver's Main screen, select Media the size of the data if necessary. Type. Note: “Printing (Windows)” on page 35...
-
Page 81: Layout Manager(Windows Only)
SC-P800 Series User’s Guide Printing Varieties “Printing (Mac OS X)” on page 37 Layout Manager (Windows only) The Layout Manager function allows you to place multiple pieces of print data created in different applications on the paper freely and print them at once. -
Page 82: Setting Procedures For Printing
SC-P800 Series User’s Guide Printing Varieties Placing the same data Open the file you want to print in your application. Select Layout Manager in the Main tab of the printer driver and choose an option for Size that matches the size of the document created in the application. -
Page 83: Saving And Calling Layout Manager Settings
SC-P800 Series User’s Guide Printing Varieties Arrange the objects on the Layout Manager Click the File menu on the Layout Manager screen. screen, and then click Print. You can drag objects to move and resize them, Printing starts. use tool buttons and the Object menu to align... -
Page 84: Printing From A Smart Device
The following screen may change without notice. Using Epson iPrint Epson iPrint is an application that allows you to print photos, Web pages, documents, and so on from smart devices such as smart phones and tablets. You can install Epson iPrint on your smart device using the following URL or QR code. -
Page 85: Using Airprint
SC-P800 Series User’s Guide Printing Varieties The selected photos or documents are displayed. Printing starts. Note: When printing from the document menu in iPhone, iPad, or iPod touch, send the document you want to print using the iTunes file sharing function, and then launch Epson iPrint. -
Page 86: Printing (Mac Os X)
SC-P800 Series User’s Guide Color Management Printing Color Management Print Color Management Settings Printing You can perform color management printing using this printer's printer driver in the following two ways. About Color Management Choose the best method according to the application... -
Page 87: Setting Profiles
SC-P800 Series User’s Guide Color Management Printing Setting color Setting profiles management with the Settings for the input profile, printer profile, and intent (matching method) vary between three types of color applications management printing since their color management engines are used differently. This is because color management usage differs between the engines. -
Page 88: Printer Driver
SC-P800 Series User’s Guide Color Management Printing Set color management to off. Setting color management with the For Windows In the Main screen, select Custom as the Mode printer driver setting, and select Off (No Color Adjustment). Color management printing by... - Page 89 Setting example for Adobe Photoshop CS5 Select Host ICM. Open the Print screen. When Epson special media is selected from Media Type in the Main screen, the printer Select Color Management and then Document. profile corresponding to the media type is...
-
Page 90: Icm(Windows Only)
SC-P800 Series User’s Guide Color Management Printing Select Color Matching from the list, and then Application Color Management click ColorSync. Settings Adobe Photoshop CS3 or Printer Manages Colors later Adobe Photoshop Lightroom 1 or later Adobe Photoshop Elements 6 or later... - Page 91 SC-P800 Series User’s Guide Color Management Printing In the printer driver's Main screen, select Intent Explanation Custom as the Mode, select ICM, and then click Advanced. Absolute Assigns absolute color gamut Colorimetric coordinates to the original and print data and converts the “Printing (Windows)”...
-
Page 92: Menus
SC-P800 Series User’s Guide Using the Control Panel Press an item to select it. Using the Control Panel Note: Depending on the item, press , and then swipe the screen to change the item displayed. Press the icons to display menus such as Settings and Checking. -
Page 93: Display
SC-P800 Series User’s Guide Using the Control Panel Setting Items for the Network Summary Display The following items can be set from the network summary display. Item Content Menu Wi-Fi/Network Settings See the Network Guide (PDF). Wi-Fi Setup Wi-Fi Direct Setup Wi-Fi Setup See the Network Guide (PDF). -
Page 94: Maintenance
SC-P800 Series User’s Guide Using the Control Panel Item Content Maintenance Print Head Nozzle Check Check whether the print head nozzles are clogged. Visually confirm the printed check pattern, and perform head cleaning if there are any blurred or missing sections. - Page 95 SC-P800 Series User’s Guide Using the Control Panel System Administration * indicates the default setting. Item Parameter Content Printer Settings Paper Source Paper Setup Automatically displays the media setup Settings Display screen when paper is loaded. When this is Off, AirPrint is unavailable. Also, Error Notice from Paper Source Settings becomes Off.
- Page 96 SC-P800 Series User’s Guide Using the Control Panel Item Parameter Content Common Settings LCD Brightness 1-9 (9*) You can adjust the brightness of the screen in nine stages. Sound Button Press High* Set whether or not to play a sound and the...
- Page 97 SC-P800 Series User’s Guide Using the Control Panel Item Parameter Content Wi-Fi/Network Wi-Fi/Network Print a network status sheet. View network Settings Status settings and connection status. Wi-Fi Setup Manual See the Network Guide (PDF). Push Button Setup (WPS) PIN Code Setup (WPS)
-
Page 98: Print Head Maintenance
Explanations in this section use the Windows printer driver as an example. Print Head Maintenance Use Epson Printer Utility 4 for Mac OS X. “Epson Printer Utility 4 Functions” on page 51 You need to adjust the print head if white lines appear in your print outs or if you notice the print quality has Place A4 plain paper in the auto sheet feeder. -
Page 99: Head Cleaning
From the computer Explanations in this section use the Windows printer driver as an example. Use Epson Printer Utility 4 for Mac OS X. If any segments are missing in the nozzle check “Using Epson Printer Utility 4” on page 51 pattern, perform head cleaning. -
Page 100: Print Head Alignment
Explanations in this section use the Windows printer driver as an example. From the printer Use Epson Printer Utility 4 for Mac OS X. Place several sheets of A4 Photo Quality Inkjet “Epson Printer Utility 4 Functions” on page 51 Paper in the auto sheet feeder. -
Page 101: Replacing Consumables
Select the pattern with the least number of Important: vertical lines for #2 to #12 in the same way. Epson recommends the use of genuine Epson ink cartridges. Epson cannot guarantee the quality or Follow the on-screen instructions to continue. - Page 102 SC-P800 Series User’s Guide Maintenance Press Open ink cover. Pull out the ink cartridge. The ink cartridge cover lock is released, and the cover rises approximately 8 mm. Open the ink cartridge cover. Important: Removed ink cartridges may have ink around the ink supply port, so be careful not to get any ink on the surrounding area.
-
Page 103: Replacing The Maintenance Cartridge
SC-P800 Series User’s Guide Maintenance Insert the new ink cartridge. Open the maintenance cartridge cover. Push the cartridge in until it clicks into place. Repeat steps 6 to 9 to replace other ink cartridges. Remove the new maintenance cartridge from the package. -
Page 104: Cleaning The Printer
SC-P800 Series User’s Guide Maintenance Place the old maintenance cartridge in the bag Cleaning the Printer supplied with the new cartridge, and then seal the bag. To keep the printer in optimum operating condition, make sure you clean it periodically (about once a month). -
Page 105: Cleaning Inside The Printer
SC-P800 Series User’s Guide Maintenance Cleaning Inside the Printer Turn off the printer, check that the screen display has turned off, and then unplug the printer. Unplug the power plug, and then wait for approximately one minute. Open the printer cover, and then use a soft cloth to wipe off any dirt and dust. -
Page 106: Messages
A periodic consumable part is reaching the end of its service Please contact Epson support soon. life. You can continue printing, but we recommend replacing the part as soon as possible to maintain optimum printing quality. Contact your local dealer or Epson Support to request replacement. -
Page 107: Troubleshooting
If the nozzle check pattern is not printed correctly, the Printers, Printers, or Printers and Faxes folder printer may require repair. (Windows)? Contact your dealer or Epson Support. If the printer icon is not listed, the printer driver is not installed. Install the printer driver. -
Page 108: Nothing Prints
The "Driver Version" shown on the test page is the Check the message in the screen. version number of the Windows internal driver. This “Messages” on page 106 differs from the Epson printer driver version that you installed. The printer stops printing. The printer sounds like it is... -
Page 109: Print Quality/Print Results
Are you using a genuine Epson ink cartridge? “Auto Correct Color and Print Photos This printer is developed for use with Epson ink (PhotoEnhance)” on page 54 cartridges. If you use non-Epson ink cartridges, the prints may smear, or the color of the printed image... - Page 110 Printer Settings - Paper Skew Check to On in the temperature? Setup menu. Epson special media should be used at normal room “Menus” on page 92 temperature (temperature: 15 to 25°C, humidity: 40 to 60 %). For information about paper such as thin paper from other manufacturers that requires special Vertical ruled lines are misaligned.
-
Page 111: Unable To Feed Or Eject Paper
Margins may appear if you set the amount of Is the paper damp? enlargement to Min. Do not use paper that is damp. Also, Epson special “Borderless printing” on page 62 media should be left in the bag until you intend to use it. -
Page 112: Printing
SC-P800 Series User’s Guide Problem Solver Slowly pull the jammed paper from the printer. Is paper jammed in the printer? Open the printer cover of the printer and check that there are no paper jams or foreign objects in the printer. -
Page 113: Jammed Fine Art Media
After removing the paper, close the printer cover and press Resume. If an error is still displayed after you have completed Step 3, turn off the printer, and then turn it back on. If you are unable to remove the paper, contact your dealer or Epson Support. -
Page 114: Jammed Poster Board
Step 3, turn off the printer, and then turn it back on. If you are unable to remove the paper, contact your dealer or Epson Support. Jammed Poster Board Follow the instructions on the control panel's screen, and remove any jammed paper by following the steps... -
Page 115: Roll Paper Jam
Step 3, turn off the printer, and then turn it back on. If you are unable to remove the paper, contact your dealer or Epson Support. Roll paper jam Follow the instructions on the control panel's screen, and remove any jammed paper by following the steps... -
Page 116: Others
If an error is still displayed after you have completed Step 4, turn off the printer, and then turn it back on. If you are unable to remove the paper, contact your dealer or Epson Support. Others The control panel’s screen keeps turning off. -
Page 117: Consumables And Optional Items
User’s Guide Appendix Appendix Consumables and Optional Items The following consumables and optional items can be used with this printer. (Current as of January, 2015) For the latest information, see the Epson Web site. Ink cartridges Model name Product name Product... -
Page 118: Supported Media
T8519 * Epson recommends the use of genuine Epson ink cartridges. Epson cannot guarantee the quality or reliability of non-genuine ink. The use of non-genuine ink may cause damage that is not covered by Epson's warranties, and under certain circumstances, may cause erratic printer behavior. -
Page 119: Epson Special Media Table
❏ Black ink: An abbreviation of the type of black ink supported by the media. PK: Photo Black/MK: Matte Black Epson Special Media Table Cut sheet Premium Glossy Photo Paper ICC Profile: SC-P800 Series Epson Premium Glossy.icc Media Type (Printer Size Capacity... - Page 120 SC-P800 Series User’s Guide Appendix Premium Semigloss Photo Paper ICC Profile: SC-P800 Series Epson Premium Semigloss.icc Media Type (Printer Size Capacity Source Borderless Black Driver) ✓ Epson Premium Semigloss 10 x 15 cm (4 x 6 in.) Auto sheet feeder Archival Matte Paper ICC Profile: SC-P800 Series Epson Archival Matte.icc...
- Page 121 Source Borderless Black Driver) ✓ UltraSmooth Fine Art Paper Front manual feed (fine art media) Epson Proofing Paper White Semimatte ICC Profile: SC-P800 Series Epson Proofing Paper White Semi-matte.icc Media Type (Printer Size Capacity Source Borderless Black Driver) ✓ Epson Proofing Paper...
-
Page 122: Usable Commercially Papers
Enhanced Matte Paper ICC Profile: SC-P800 Series Archival Matte.icc Media Type (Printer Driver) Size Core Borderless Black ink ✓ Epson Archival Matte 432 mm/17" 3 inch Usable Commercially Papers The following shows the specifications for non-Epson paper supported by this printer. -
Page 123: Plain Paper
❏ Although plain paper and recycled paper manufactured by other companies can be loaded and fed in the printer as long as they meet the following specifications, Epson cannot guarantee the print quality. ❏ Although other paper types manufactured by other companies can be loaded in the printer as long as they meet the following specifications, Epson cannot guarantee the paper feeding and print quality. -
Page 124: Thick Paper
SC-P800 Series User’s Guide Appendix Thick paper Cut sheets (paper thickness 0.29 to 0.7 mm) Driver Media Types Size Number of Loading Method Borderless Ink Type Sheets ✓ See the manual supplied Front manual feed PK/MK with the paper and adjust... - Page 125 SC-P800 Series User’s Guide Appendix Cut sheets (paper thickness 1.2 to 1.5 mm) Driver Media Types Size Number of Loading Method Borderless Ink Type Sheets See the manual supplied Front manual feed PK/MK with the paper and adjust tray (poster board) Letter settings as appropriate.
-
Page 126: Roll Paper
SC-P800 Series User’s Guide Appendix Roll paper Paper thickness: 0.25 to 0.7 mm Driver Media Types Size Roll Core Size Borderless Ink Type ✓ See the manual supplied with 13 to 17 inches wide 2 inches/3 inches PK/MK the paper and adjust settings W: 329 to 431.8 mm... -
Page 127: Notes On Moving And Transporting
SC-P800 Series User’s Guide Appendix Notes on Moving and Preparing the Printer for Transport Transporting To protect the printer from shock and vibration when Note the following points when moving or transporting transporting, attach protective material to the printer using commercially available tape, and repack it the the printer. -
Page 128: Notes Before Using The Printer Again
SC-P800 Series User’s Guide Appendix Put commercially available tape on the protective Keeping the printer flat, pack it in Styrofoam or material for transportation, and then secure it in other protective material and place it in the box. the bottom gap on the front manual feed. -
Page 129: Specifications Table
SC-P800 Series User’s Guide Appendix Specifications Table Printer Specifications External Storage dimensions: (W) dimensions 684×(D)376×(H) 250mm Printer Specifications Normal dimensions: (W) 684×(D) 963×(H) 550mm Printing method On-demand ink jet When optional items are attached Nozzle Black: 180 nozzles x 3 colors (Photo Storage dimensions: (W) 684×(D) -
Page 130: Standards And Approvals
See the date printed on the RSS-210 of the IC Rules. package and cartridge (at normal temperature) Epson cannot accept responsibility for any failure to Print quality Six months (after installing in the satisfy the protection requirements resulting from a... - Page 131 Epson cannot accept responsibility for any failure to and on, the user is encouraged to try to correct the satisfy the protection requirements resulting a interference by one or more of the following measures: non-recommended modification of the products.
-
Page 132: Technical Support Web Site
Support Technical Support Web Before Contacting Epson Site If your Epson product is not operating properly and you cannot solve the problem using the troubleshooting Epson's Technical Support Web Site provides help with information in your product documentation, contact problems that cannot be solved using the Epson support services for assistance. -
Page 133: Help For Users In North America
Days and hours of support are subject to change without notice. Toll or long distance charges may apply. (Phone: +0800212873) Our HelpDesk team can help you with the following Before you call Epson for support, please have the following information ready: over the phone: ❏ Product name ❏... -
Page 134: Help For Users In Australia
No.530, Sec. 4, Henan Rd., Nantun Dist., Taichung City 408, Epson Helpdesk Taiwan Epson Helpdesk is provided as a final backup to make 05-2784222 05-2784555 No.463, Zhongxiao Rd., East Dist., Chiayi City sure our clients have access to advice. Operators on the... -
Page 135: Help For Users In Thailand
SC-P800 Series User’s Guide Where To Get Help Service Center: 80 Truong Dinh Street, World Wide Web District 1, Hochiminh City (http://www.epson.com.sg) Vietnam Information on product specifications, drivers for download, Frequently Asked Questions (FAQ), Sales Enquiries, and Technical Support via e-mail are Help for Users in Indonesia available. -
Page 136: Help For Users In Hong Kong
❏ Sales enquiries and product information (Infoline) Internet Home Page Phone: 603-56288222 Epson Hong Kong has established a local home page in both Chinese and English on the Internet to provide ❏ Enquiries on repair services & warranty, product users with the following information: usage and technical support (Techline) ❏... -
Page 137: Help For Users In The Philippines
- 6PM) Prefix local STD code Help for Users in the Philippines To obtain technical support as well as other after sales services, users are welcome to contact the Epson Philippines Corporation at the telephone and fax numbers and e-mail address below:...