Sony PXW-FS7 Operating Instructions Manual
Solid-state memory
Hide thumbs
Also See for PXW-FS7:
- Operating instructions manual (119 pages) ,
- Quick reference manual (93 pages) ,
- Before using (79 pages)

Related Manuals for Sony PXW-FS7


Summary of Contents for Sony PXW-FS7
-
Page 1: Operating Instructions
4-562-025-12 (2) Solid-State Memory Camcorder Operating Instructions Before operating the unit, please read this manual thoroughly and retain it for future reference. PXW-FS7 © 2014 Sony Corporation... -
Page 2: Table Of Contents
Table of Contents Overview System Configuration ............... 6 Location and Function of Parts ..........7 Viewfinder ..............11 Eyepiece ............... 11 Lens (PXW-FS7K only) ..........11 Grip Remote Control ............ 11 Infrared Remote Control ..........12 Extension Unit (Option) ..........12 Screen Display ................. - Page 3 Inserting an SD Card ............ 30 Ejecting the SD Card ............ 30 Formatting (Initializing) SD Cards ......31 Checking the Remaining Capacity ....... 31 Using the XDCA-FS7 .............. 31 Attaching the XDCA-FS7 ..........31 Removing the XDCA-FS7 ........... 32 Attaching the Battery Pack ........... 32 Removing the Battery Pack ..........
- Page 4 One-touch Connection of NFC-enabled Devices (Using IFU-WLM3 Only) ........53 Displaying the Wi-Fi Remote Control ........54 Thumbnail Screen Thumbnail Screen ..............55 Screen Layout ............... 55 Playing Clips ................56 Playing Recorded Clips ..........56 Clip Operations ............... 57 Thumbnail Menu Operations ........
- Page 5 Appendix Usage Precautions ..............100 Output Formats and Limitations ........101 Video Formats and Output Signals ......101 Error/Warning Messages ............. 114 Error Messages ............114 Warning Messages ............. 114 Caution and Operation Messages ....... 115 Licenses .................. 116 MPEG-4 Visual Patent Portfolio License ....116 MPEG-2 Video Patent Portfolio License ....
-
Page 6: Overview
IFU-WLM3 (supplied) XQD Memory Card XQD Card Reader USB Wireless LAN Module BP-U30 (supplied), BC-U1 (supplied), BC-U2 BP-U60, BP-U60T, Battery Charger BP-U90 Battery Pack PXW-FS7 AC Adaptor (supplied) MPA-AC1 (USA/Canada) HXR-IFR5 AXS-R5 AC-NB12A (except USA/ Interface Unit Portable Canada) Memory... -
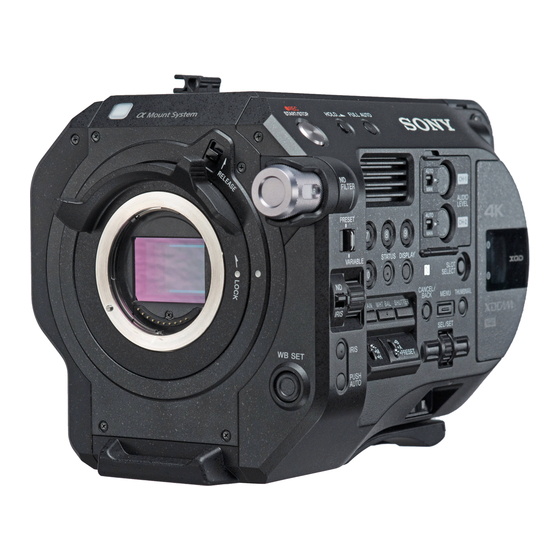
Page 7: Location And Function Of Parts
Location and Function of Parts For details about the usage and function of each part, see the referenced page. Handle (page 8) Handle record START/STOP button The record button cannot be operated when the Viewfinder connector (page 21) lock lever is in the lock position. REMOTE connector (page 24) Handle zoom lever (page 66) INPUT1 (LINE/MIC/MIC+48V) switch... - Page 8 Attaching the accessory shoe Removing the handle Lift the front edge of the shoe spring, and pull the Remove the four handle attachment screws, and spring in the opposite direction to the arrow engraved remove the handle from the camcorder. on the spring.
- Page 9 Record START/STOP button Right button Used to set numeric values and to move the ND FILTER dial (page 42) cursor to the right on thumbnail screens and ASSIGN (assignable) 1 to 3 buttons menus. (page 45) SEL/SET (select/set) dial PUSH AUTO IRIS button (page 41) Turn the dial to move the cursor up/down to select menu items or settings.
- Page 10 Headphone connector (page 40) INPUT1 (audio input 1) connector (page 43) XQD card slot A (page 29) INPUT2 (audio input 2) connector UTILITY SD card slot (page 30) (page 43) XQD (A) access indicator (page 29) SDI OUT 1 connector (page 96) SD card access indicator (page 30) SDI OUT 2 connector (page 96) XQD (B) access indicator (page 29)
-
Page 11: Viewfinder
Viewfinder Grip Remote Control For details about attaching the viewfinder For details about attaching the grip remote control (supplied) and eyepiece, see page 21. (supplied), see page 24. CONTRAST knob PEAKING button ZEBRA button MIRROR switch Eyepiece attachment hooks Eyepiece For details about attaching the eyepiece (supplied), see page 22. -
Page 12: Infrared Remote Control
Infrared Remote Control Extension Unit (Option) For details about attaching an extension unit (option), see page 31. DATA CODE button BATT RELEASE button Not used on this version. Battery compartment TC RESET button GENLOCK IN SCAN/SLOW button DC IN ./> (PREV/NEXT) buttons DC OUT PLAY button Recording indicator... -
Page 13: Screen Display
Screen Display Viewfinder Screen During shooting (recording/standby) and playback, the camcorder status and settings are superimposed on the image displayed in the viewfinder. You can show/hide the information using the DISPLAY button. You can also select to show/hide each item independently (page 78). The 17:9 aspect ratio picture captured by the image sensor is displayed in the viewfinder. - Page 14 Slot B icon and status indicators Slot A/B media status/remaining capacity indicator (page 30) Recording zRec Recording media when the left side of the icon is orange. Standby Stby Playback media when the green indicator on the top right of the icon is on. External RAW recording indicator Spirit level indicator (page 50)
-
Page 15: Status Screen
Information displayed on the screen during Status Screen playback The following information is superimposed on To display the status screen: the playback picture. • Push the STATUS CHECK button. To switch to the status screen: • Turn the SEL/SET dial. •... - Page 16 Audio Status screen Video Output Status screen Displays the input setting, audio level meter, and Displays the SDI, HDMI, and video output wind noise reduction filter setting for each settings. channel. SDI1 Output picture size Color space CH1 level meter Channel 1 audio level meter Screen display output CH1 Source...
- Page 17 Media Status screen SD card remaining Displays the remaining capacity Displays the remaining capacity and remaining capacity of media inserted in the UTILITY recording time of recording media (XQD memory SD card slot expressed in units of cards A and B). SD card life Displays the operating life of Media A...
-
Page 18: Preparation
You can use a battery pack or AC power supply Using a Battery Pack from an AC adaptor. For safety, use only the Sony battery packs and To attach a battery pack, plug the battery pack AC adaptors listed below. -
Page 19: Using Ac Power
Checking the remaining capacity Using AC Power When shooting/playing using a battery pack, the Connecting the camcorder to a power outlet remaining battery capacity is displayed in the allows use without worrying about the need to viewfinder (page 13). recharge the battery pack. Icon Remaining capacity DC IN connector... -
Page 20: Attaching Devices
AC adaptors Attaching Devices • Do not connect and use an AC adaptor in a confined space, such as between a wall and furniture. Attaching the Microphone Holder • Connect the AC adaptor to the nearest power outlet. If a problem occurs during operation, immediately disconnect the power cord from Notes the outlet. -
Page 21: Attaching The Viewfinder
Removing the microphone holder Adjusting the angle of the viewfinder Remove the stopper, and use the reverse Tilt the viewfinder up/down to adjust the angle of procedure of attaching the microphone holder. the viewfinder. Attaching the Viewfinder Note Attach/remove the viewfinder while the camcorder is turned off. -
Page 22: Attaching The Eyepiece
Opening the eyepiece Attaching the Eyepiece Press the button indicated by the arrow. Note Attach/remove the eyepiece while the camcorder is turned off. Attach the metal clips of the eyepiece to the eyepiece attachment hooks on the viewfinder. Open the eyepiece upwards when the lock disengages. -
Page 23: Attaching A Lens
SEL1635Z SELP18200 For details about lenses supported by the camcorder, contact your Sony service representative. Caution Do not leave the lens facing the sun. Direct sunlight can enter through the lens, be focused in the camcorder, and may cause a fire. -
Page 24: Attaching The Grip Remote Control
Connect the grip remote control cable Focus adjustments for lenses with focus to the REMOTE connector on the switch camcorder. • When the lens focus switch is set to AF/MF or AF, the focus is adjusted automatically and can also be adjusted manually from the camcorder. •... -
Page 25: Setting The Clock
Setting the Clock The initial settings screen appears in the viewfinder the first time the camcorder is turned on or after the backup battery has become completely discharged. Set the date and time of the internal clock using this screen. Time Zone Time Zone sets the time difference from UTC (Coordinated Universal Time). -
Page 26: Configuring Basic Camcorder Operation
G-series XQD memory cards recorded signals and output signals. When the shooting mode is set to Custom mode, The use of memory cards other than Sony XQD Color Space is set to “Matrix.” memory cards is not guaranteed. Matrix: Selects the color gamut using the Matrix... -
Page 27: Recommended Media
Recommended Media The recommended media varies depending on the Rec Format and Recording settings. Yes: Recommended media verified for normal operation No: Normal operation not guaranteed Format XQD G XQD N Discontinued XQD S XQD H (EB Stream) XQD S (non EB Stream) 32/64/128 GB 32/64 GB... - Page 28 Format XQD G XQD N Discontinued XQD S XQD H (EB Stream) XQD S (non EB Stream) 32/64/128 GB 32/64 GB 16/32/64 GB XAVC-L 3840×2160 – 59.94P 29.97P 23.98P 1920×1080 Normal mode or 59.94P S&Q (excluding HFR) 59.94i 29.97P 23.98P 1920×1080 S&Q (HFR mode) 59.94P...
-
Page 29: Inserting An Xqd Memory Card
Inserting an XQD Memory Card Switching Between XQD Memory Cards Press the media cover release button (page 10) to open the media cover of the When XQD memory cards are loaded in both card card slot section. slots A and B, you can switch the card used for recording by pressing the SLOT SELECT button Insert an XQD memory card with the (page 9). -
Page 30: Checking The Remaining Recording Time
Checking the Remaining Using a UTILITY SD Card Recording Time When shooting (recording/standby), you can You can save camera configuration data for the monitor the remaining capacity of the XQD camcorder on an SD card (available separately). memory card in each slot using the slot A/B Saved data files can be imported from the SD media capacity indicators in the viewfinder card. -
Page 31: Formatting (Initializing) Sd Cards
Formatting (Initializing) SD Cards Using the XDCA-FS7 SD cards must be formatted the first time they are used in the camcorder. You can add functions to the camcorder, such as SD cards for use in the camcorder should be a V-shoe battery or external sync signal, by formatted using the format function of the attaching an XDCA-FS7 Extension Unit (option) camcorder. -
Page 32: Removing The Xdca-Fs7
Tighten the two screws on the top of the XDCA-FS7 to secure the XDCA-FS7. Attaching the Battery Pack Insert the battery pack into the battery pack attachment on the XDCA-FS7. The following Sony genuine battery packs are supported. Lithium-ion battery packs BP-L80S BP-FL75... -
Page 33: Removing The Battery Pack
Removing the Battery Pack Using an HXR-IFR5 and Pull the battery pack out from the battery pack AXS-R5 attachment on the XDCA-FS7 while holding down the BATT RELEASE button. You can record RAW video (page 50) to an AXS-R5 RAW Recorder (option) using an HXR- Switching the Timecode Input/ IFR5 Interface Unit (option) and an XDCA-FS7 Output... -
Page 34: Using The Infrared Remote Control
Changing the battery of the remote Using the Infrared control Remote Control The remote control uses a standard CR2025 battery. Do not use a battery other than the CR2025. When using for the first time Push the tab in, and remove the battery Pull out the insulating sheet from the battery holder by placing a fingernail in the holder when using the supplied infrared remote... -
Page 35: Using Wi-Fi Remote Control
Playback screen Using Wi-Fi Remote • Status display • Playback buttons Control Play/Pause, Stop, F Fwd, F Rev, Next, Prev You can operate the camcorder from a web browser by connecting a smartphone, tablet, or other device that supports a web browser to the camcorder using a wireless LAN connection. - Page 36 Wi-Fi Remote screen (tablet) Assign screen Main screen • Status display • Assignable buttons Assignable buttons 1 to 6 • Shooting settings S&Q FPS, Shutter, White, Sensitivity/Gain/Exposure Index, Gamma, MLUT, Color Bars, Auto Black, Auto White, Rec Start/Stop, Lock, Iris, Focus, Zoom, Auto Iris, Auto Shutter, AGC, ATW Playback screen •...
-
Page 37: Shooting
Shooting Basic Operation Procedure Basic shooting is conducted using the following Recording continuously when changing procedure. memory cards (Relay Rec) Attach the necessary devices, and check When memory cards are inserted in both slots A that power is being supplied. and B, recording automatically switches to the second memory card just before the remaining Insert the memory card(s). - Page 38 Recording to memory cards A and B Changing the settings of the record simultaneously (Simul Rec) START/STOP buttons on the camcorder and handle You can simultaneously record using both memory cards A and B. When the simultaneous recording (Simul Rec) is enabled, you can start/stop recording to each Set Simul Rec >Setting in the Recording memory card independently using the record...
-
Page 39: Adjusting The Focus Automatically
Focus indicator Adjusting the Focus Automatically Indicates the focus state. • (Lit): Subject is in focus. A lens that supports auto focus is required. Set the • (Flashing): Subject is out of focus. Since FOCUS switch (page 9) on the camcorder to the focusing is not automatic, change the “AUTO”... -
Page 40: Monitoring Audio
Clips (recorded data) When you stop recording, the video, audio, and In-focus: Position of maximum reach of the bar accompanying data from the start to the end of the recording are saved as a single “clip” on an Note XQD memory card. The focus indicator may show little or no variation when Clip names you are shooting subjects with little surface variation or... -
Page 41: Changing Basic Settings
Adjusting the iris manually Changing Basic Settings Press the IRIS button to turn Auto Iris off, then adjust using the IRIS dial. You can change the settings based on the video You can also assign the IRIS function to an application or recording conditions. -
Page 42: Adjusting For Natural Colors (White Balance)
Shooting using auto shutter Adjusting for Natural Colors (White Balance) This function adjusts the shutter speed automatically in response to the image brightness. You can select the adjustment mode to suit the Press the SHUTTER button (page 9). shooting conditions. If the settings screen was displayed, press the ATW (auto tracing white balance) button again. -
Page 43: Setting The Audio To Record
• Auto white balance cannot be performed in Cine EI mode. • If the adjustment is not successful, an error message is displayed on the screen for about three seconds. If the error message persists after repeated attempts to set white balance, contact your Sony service representative. -
Page 44: Specifying Time Data
Select the input audio source. For CH3/CH4, set Audio Input > CH3 Level Control and CH4 Level Control in the Audio Set the INPUT1/INPUT2 (LINE/MIC/ menu to “Manual,” and then set the audio MIC+48V) switches to the devices recording level in CH3 Input Level and CH4 connected to the INPUT1/INPUT2 Input Level (page 73). -
Page 45: Useful Functions
• Color Bars • User Menu Useful Functions • Rec Lamp • S&Q Motion • Picture Cache Rec Assignable Buttons/Dials • Rec Review • Thumbnail There are six assignable buttons (page 9, • Shot Mark1 page 11) on the camcorder to which you can •... -
Page 46: Slow & Quick Motion
NTSC Area Slow & Quick Motion Format Resolution Frame High frame rate rate When the video format (page 88) is set to one of XAVC-I 2160 1 to 60 fps Not supported the following values, you can specify a different (59.94P, 29.97P, 23.98P) value for the recording frame rate and playback 1080... -
Page 47: Picture Cache Recording (Picture Cache Rec)
Picture cache recording Picture Cache Recording (Picture Cache Rec) When you press the record button, recording starts and video is written to XQD memory cards The picture cache recording function allows you starting from the video stored in the cache to capture video retroactively when you start memory. -
Page 48: Self Portrait Mode
Self Portrait Mode The image is flipped vertically. The information display is flipped vertically and You can flip the image in the viewfinder horizontally. (page 11) vertically or horizontally/vertically using the MIRROR switch. This allows you to turn the viewfinder 180° toward the lens. -
Page 49: Displaying Peaking
Obtaining Location Information (GPS) Set GPS to “On” in the System menu. is displayed when the camcorder is seeking GPS satellites. When positioning is established, location information is recorded when shooting video. Notes • The GPS setting in the System menu cannot be set to “On”... -
Page 50: Shooting In Cine Ei Mode
Check that the external recorder is Shooting in Cine EI Mode turned on, then press the record button on the camcorder. This mode mimics the way a film camera works, The supported RAW output formats are shown and assumes “developing” occurs in post- below. -
Page 51: Adding Audio Input Connectors
XLR adaptor is assigned to both CH1 and CH2, input from the INPUT1/INPUT2 connectors on For details about the Content Browser Mobile the camcorder can no longer be assigned to the application, contact your Sony sales or service channels. representative. Compatible devices You can use a smartphone, tablet, or computer to configure and operate the camcorder. -
Page 52: Attaching The Ifu-Wlm3
Attach the CBK-WA100 mounting Attaching the IFU-WLM3 bracket on the camcorder, and tighten the screws. Plug the IFU-WML3 into the USB wireless LAN module connector (page 7). After attaching the unit, set Wi-Fi >Wi-Fi (page 93) in the System menu to “Enable” to enable wireless LAN. -
Page 53: One-Touch Connection Of Nfc-Enabled Devices (Using Ifu-Wlm3 Only)
When connection is completed, the Touch the camcorder using the device. wireless LAN must be enabled by The device connects to the camcorder, setting Wi-Fi >Wi-Fi (page 93) in the launches a web browser, and displays the System menu to Enable. Wi-Fi remote control. -
Page 54: Displaying The Wi-Fi Remote Control
Displaying the Wi-Fi Remote Control The Wi-Fi Remote screen is automatically resized to match the screen size of the connected device. Connect the camcorder and device using a Wireless LAN connection (page 53). Launch a browser on the device and enter “http://IP address of camcorder (Wi-Fi >IP Address in System menu)/ rm.html”... -
Page 55: Thumbnail Screen
Thumbnail Screen Thumbnail Screen The thumbnail screen appears if you press the THUMBNAIL button (page 9). The thumbnail screen displays the clips stored on XQD memory cards as thumbnails (index pictures). You can select a clip on the thumbnail screen and start playback of that clip. The playback image can be displayed in the viewfinder and on an external monitor. -
Page 56: Playing Clips
Special recording information Displays the recording mode only if the clip was Playing Clips recorded using a special recording mode. For Slow & Quick Motion clips, the frame rate is displayed on the right. Playing Recorded Clips Clip duration Creation date You can play recorded clips when the camcorder is in recording standby (Stby) mode. -
Page 57: Clip Operations
Displaying the filtered clip thumbnail Clip Operations screen Select Filter Clips (page 84) in the Thumbnail On the thumbnail screen, you can operate the menu and select a clip flag type to display only those clips that have the specified flag. clips or check clip properties using the thumbnail To display all the clips, select Thumbnail View menu. -
Page 58: Menu Display And Settings
Menu Display and Settings Setup Menu Configuration and Hierarchy Press the MENU button to display the setup menu Setup Menu Organization in the viewfinder to specify various items for shooting, recording, and playback (menu can also be displayed on an external monitor). The setup User Country menu comprises the following menus. - Page 59 Video Output On/Off System Base Setting Output Format Codec Output Setting Rec Format Monitor LUT Genlock Output Display Assignable Button VF Setting Assignable Dial Peaking Rec Lamp Zebra Fan Control Marker HOLD Switch Setting Display On/Off Lens TC/UB Timecode Language TC Display Clock Set Users Bit...
-
Page 60: Setup Menu Operations
• If an item has a large range of available options: (Example: –99 to +99), the selection area is not Setup Menu Operations displayed. The current setting is highlighted to indicate that the value can be changed. • Selecting [Execute] for a function will execute Press the MENU button to display the setup menu the corresponding function. -
Page 61: Setup Menu List
Setup Menu List This section describes the function and settings of the items in each menu. Factory default settings are shown in bold (for example, 18dB User Menu User Item Sub-item setting Description Country See Country in the System menu. Region settings Base Setting See Base Setting in the System... -
Page 62: Edit User Menu
Edit User Menu The Edit User menu is displayed at the top level when “Edit User Menu” is selected in the User menu. Edit User Item Sub-item setting Description Add Item Adds a menu item to the User menu. Add an item to the User menu Customize Reset Restores the menu items registered in the User menu to the factory default. - Page 63 Camera Item Sub-item setting Description ISO/Gain<M> Sets the <M> gain preset value. (Same settings as ISO/ The default values are given below. Gain<H>) When Mode is set to ISO and dynamic range is 460%. ISO1600 When Mode is set to ISO and dynamic range is 800%. ISO3200 When Mode is set to ISO and dynamic range is 1300% (Gamma Category is set to S-Log2 or S-Log3).
- Page 64 Camera Item Sub-item setting Description Auto Exposure Level Sets the brightness level for the automatically detected –2.0 / –1.75 / –1.5 / –1.25 / exposure. Automatic –1.0 / –0.75 / –0.5 / –0.25 / 0 / exposure +0.25 / +0.5 / +0.75 / +1.0 / adjustment +1.25 / +1.5 / +1.75 / +2.0 settings...
- Page 65 Camera Item Sub-item setting Description Shutter Mode Selects the operating mode of the electronic shutter. Speed / Angle / ECS / Off Speed/Angle (standard mode): Electronic shutter Used for shooting fast-moving subjects clearly. Selects the operating mode for setting the shutter speed in seconds (Speed) or as condition settings a shutter angle (Angle).
- Page 66 Camera Item Sub-item setting Description Flicker Reduce Mode Sets the flicker correction mode. Auto / On / Off Flicker correction settings Frequency Sets the frequency of the power source supplying the lighting 50Hz / 60Hz that is causing the flicker. SteadyShot Setting Turns the image stabilization function on/off.
-
Page 67: Paint Menu
Paint Menu Paint Item Sub-item setting Description White Preset White Sets the white balance preset value. 2100K to 10000K (3200K) White balance settings Color Temp<A> Displays the white balance color temperature saved in 1500K to 50000K (3200K) memory A. Color Temp. Balance<A> Sets the white balance gain value saved in memory A (linked –99 to +99 (±0) to R gain and B gain). - Page 68 Paint Item Sub-item setting Description Offset White Offset White<A> Selects whether to add (On) or not to add (Off) an offset value On / Off to the white balance in memory A. White balance offset settings Warm Cool <A> Sets the offset added to the white balance in memory A as a –99 to +99 (±0) color temperature when Offset White<A>...
- Page 69 Paint Item Sub-item setting Description Gamma Select Selects the gamma table used for gamma correction. When Gamma Category is set to STD. STD1 DVW / STD2 x 4.5 / STD3 x 3.5 / STD4 240M / STD5 R709 / STD6 x 5.0 When Gamma Category is set to HG1 3250G36 / HG2 4600G30 / HG3 3259G40 / HG4...
- Page 70 Paint Item Sub-item setting Description White Clip Setting Turns the white clip adjustment function on/off. On / Off White clip Note adjustment Cannot be set when Gamma >Gamma Category is set to settings S-Log2 or S-Log3. Level Sets the white clip level. When Country is not set to PAL Area.
- Page 71 Paint Item Sub-item setting Description Skin Detail Setting Turns the skin detail correction function on/off. On / Off Skin detail correction settings Area Detection Detects the color used for skin detail correction. Execute / Cancel Execute: Run detection Area Indication Turns the function that displays zebra in areas of the color On / Off used for skin detail correction on/off.
- Page 72 Paint Item Sub-item setting Description Matrix Setting Turns the matrix correction function on/off. On / Off Matrix correction settings Adaptive Matrix Turns the adaptive matrix function on/off. On / Off Preset Matrix Turns the preset matrix function on/off. On / Off Preset Select Selects a preset matrix.
-
Page 73: Audio Menu
Audio Menu Audio Item Sub-item setting Description Audio Input CH1 Input Select Switches the input source for recording on channel 1. INPUT1 / Internal MIC / Audio input Shoe 1 settings CH2 Input Select Switches the input source for recording on channel 2. INPUT1 / INPUT2 / Internal MIC / Shoe 2 CH3 Input Select... - Page 74 Audio Item Sub-item setting Description CH4 Input Level Sets the audio input level for recording channel 4. 0 to 99 (49) Note If either CH3 Input Select or CH4 Input Select is set to “Internal MIC,” the CH4 Input Level is switched in conjunction with the CH3 Input Level setting.
- Page 75 Audio Item Sub-item setting Description Audio Output Monitor CH Selects the audio channel output to the headphone connector CH1/CH2 / CH3/CH4 / MIX and built-in speaker. Audio output ALL / CH1 / CH2 / CH3 / CH4 settings Note If audio for multiple channels is set for simultaneous output, the output level for each channel is reduced for output to prevent clipping.
-
Page 76: Video Menu
Video Menu Video Item Sub-item setting Description Output On/Off Turns SDI output on/off. On / Off Video output settings HDMI Turns HDMI output on/off. On / Off Output Format Sets the SDI and HDMI output resolution. For details about settings, see “Video Formats and Output Output format HDMI Signals”... - Page 77 When creating a LUT using RAW Viewer, select F55/F5 as the output format. Create the following folder on the SD card and store LUT files in the folder. \PRIVATE\SONY\PRO\CAMERA\PMWF55_F5 Look Profile Select Selects the type of Look profile, when Monitor LUT 1: LC-709 >Category is set to Look Profile.
-
Page 78: Vf Menu
VF Menu Item Sub-item setting Description VF Setting Brightness Adjusts the brightness of the viewfinder image. –99 to +99 (±0) Viewfinder settings Color Mode Selects the display mode of the viewfinder in E-E/recording Color / B&W mode. Peaking Setting Turns the peaking function on/off. On / Off Peaking settings Note... - Page 79 Item Sub-item setting Description Marker Setting Turns the display of all markers on/off. On / Off Marker display settings Color Selects the marker signal color. White / Yellow / Cyan / Green / Magenta / Red / Blue Center Marker Turns the center marker on/off.
- Page 80 Item Sub-item setting Description Display On/Off Setting Selects the items to display in the viewfinder. On / Off Display item settings Shutter Setting On / Off ND Filter Position On / Off Gain Setting On / Off Rec/Play Status On / Off HXR-IFR5 Rec Control On / Off Color Temp.
- Page 81 Item Sub-item setting Description AE Mode On / Off Auto Exposure Level On / Off White Balance Mode On / Off SDI/HDMI Rec Control On / Off Rec Format On / Off Gamma On / Off Timecode Lock On / Off Wi-Fi Condition On / Off Video Signal Monitor...
-
Page 82: Tc/Ub Menu
TC/UB Menu TC/UB Item Sub-item setting Description Timecode Mode Sets the timecode running mode. Preset / Regen / Clock Preset: Timecode settings Starts running from a preset value. Regen: Starts running from the timecode of the end of the previous clip. -
Page 83: Recording Menu
Recording Menu Recording Item Sub-item setting Description S&Q Motion Setting Turns Slow & Quick Motion on/off. On / Off When set to On, the following functions are disabled. Slow & Quick • Auto iris Motion mode • Auto focus settings (page 46) High Frame Rate Mode Enables higher speed imaging than 60P. -
Page 84: Thumbnail Menu
Thumbnail Menu Thumbnail Item Sub-item setting Description Display Clip Displays the clip properties screen. Properties Display clip properties screen Set Index Sets the index picture of a clip. Picture Clip index picture settings Thumbnail Essence Mark Thumbnail Displays thumbnails of frames with essence marks. All / Rec Start / Shot Mark1 / View Shot Mark2 / Shot Mark3 /... -
Page 85: Media Menu
Media Menu Media Item Sub-item setting Description Update Media Media (A) Updates the management file on the XQD memory card in slot Execute / Cancel Update memory Execute: Update card cards Media (B) Updates the management file on the XQD memory card in slot Execute / Cancel Execute: Update card Format Media... -
Page 86: File Menu
File Menu File Item Sub-item setting Description All File Load SD Card Loads an ALL file. Execute / Cancel Execute: Load file Settings related to ALL files. Save SD Card Saves an ALL file. Execute / Cancel Execute: Save file File ID Assigns a name to the file. - Page 87 File Item Sub-item setting Description Monitor 3D Current Settings Displays a list of the current monitor 3D LUT file settings (file names). Monitor 3D LUT Load SD Card Loads monitor 3D LUT settings on an SD card into internal file settings Execute / Cancel memory.
-
Page 88: System Menu
System Menu System Item Sub-item setting Description Base Setting Shooting Mode Sets the shooting mode. Custom / Cine EI Base settings Color Space Sets the color space. S-Gamut/SLog2 / S-Gamut3.Cine/SLog3 / S-Gamut3/SLog3 / Matrix Codec Select Sets the recording/playback mode. RAW / RAW &... - Page 89 System Item Sub-item setting Description Rec Format Video Format Sets the recording format. Recording format • For NTSC systems: • For PAL systems: settings When Codec >Select is set to When Codec >Select is set to XAVC-I. XAVC-I. 4096×2160 50P 4096×2160 59.94P 4096×2160 25P 3840×2160 50P...
- Page 90 System Item Sub-item setting Description RAW Output Format Sets the recording format for an external RAW recorder. • For NTSC systems: When Codec >Select is set to an item that includes RAW. 4096×2160 59.94P 4096×2160 29.97P 4096×2160 23.98P 2048×1080 59.94P 2048×1080 29.97P 2048×1080 23.98P •...
- Page 91 System Item Sub-item setting Description Push AGC: Enables the AGC function while the button is pressed. SHUTTER: Switches the shutter between Auto and Manual. Auto Exposure Level: Opens the Auto Exposure Level screen. Spotlight: Switches between Spotlight and Standard. Backlight: Switches between Backlight and Standard.
- Page 92 System Item Sub-item setting Description Assignable Assignable Dial Assigns functions to the assignable dial on the grip remote Off / ISO/Gain/EI / IRIS / control. Dial Focus / Audio Input Level ISO/Gain/EI: Adjusts the gain or EI. Settings for IRIS: Adjusts the iris. assigning Focus: Adjusts the focus.
- Page 93 Sets a desired user name (1 to 16 alphanumeric characters). (admin) SET: Set the value. Authentication Basic network Password Sets a password (1 to 16 alphanumeric characters). authentication (pxw-fs7) SET: Set the value. settings Wi-Fi Wi-Fi Selects whether to enable or disable Wi-Fi connection. Enable / Disable Wireless LAN connection SSID &...
- Page 94 Displays the type of battery connected to the XDCA-FS7. If a battery is connected to the XDCA-FS7, “Info Battery,” “Sony Battery,” or “Other Battery” is displayed. If a DC source is connected, “DC IN” is displayed. If powered by a battery or DC source connected to the camcorder, “...
- Page 95 System Item Sub-item setting Description Version Number Displays the software version of the camcorder. x.xx Display version Version Up Upgrades the camcorder.* Execute / Cancel Execute: Upgrade * Upgrading updates the camcorder software. Ext. Unit Version Number Displays the software version of the XDCA-FS7. x.xx Ext.
-
Page 96: External Device Connection
External Device Connection Connecting External Monitors and Recording Devices To display recorded/playback pictures on an HDMI OUT connector (Type A connector) external monitor, select the camcorder output signal and use an appropriate cable for the Turn the output on/off and set the output format monitor to be connected. -
Page 97: External Synchronization
Notes External Synchronization • If the selected recording format is 1280×720 60P, you must supply both a video signal and a time signal. • If the reference signal is unstable, genlock cannot be achieved. When shooting using multiple camcorder units, •... -
Page 98: Managing/Editing Clips Using A Computer
• If the external timecode source is disconnected, the timecode may shift by one frame per hour with respect Managing/Editing Clips to the reference timecode. To release external lock using a Computer Change the Timecode setting in the TC/UB menu, or turn the camcorder off. - Page 99 On Windows, check that the card is added as a removable disk in the “My Computer” window. On Macintosh, check that a folder called “NO NAME” or “Untitled” (editable) is created on the Desktop. Notes • Do not perform the following operations if the access lamp is lit red.
-
Page 100: Appendix
Periodic inspections are recommended to keep the unit working properly and to prolong its usable lifetime. Contact a Sony service or sales representative for more information about inspections. -
Page 101: Output Formats And Limitations
Output Formats and Limitations Video Formats and Output Signals Factory default settings are shown in bold (for example, 2048×1080P (Level A)). Note No playback picture is output if the video output resolution is higher than the resolution of the picture. SDI OUT connector output formats When Country >NTSC/PAL Area in the System menu is set to NTSC Area When using basic configuration (XAVC-I / XAVC-L / MPEG HD) - Page 102 Recording format settings SDI/HDMI output settings SDI output signal (Rec Format >Video Format in the (Output Format >SDI and System menu) HDMI in the Video menu) HDMI 1920×1080 59.94P 2048×1080P – 2048×1080 59.94P Level-A (Level A) 2048×1080P – 2048×1080 59.94P Level-B (Level B) 1920×1080P 1920×1080P...
- Page 103 When using extension unit (RAW) Recording format settings SDI/HDMI output settings SDI output signal (Rec Format >RAW Output Format (Output Format >SDI and and Video Format in the System HDMI in the Video menu) menu) HDMI RAW Output Format 2048×1080P –...
- Page 104 Recording format settings SDI/HDMI output settings SDI output signal (Rec Format >RAW Output Format (Output Format >SDI and and Video Format in the System HDMI in the Video menu) menu) HDMI RAW Output Format 2048×1080PsF – 2048×1080 23.98PsF 4096×2160 23.98P 1920×1080PsF –...
- Page 105 Recording format settings SDI/HDMI output settings SDI output signal (Rec Format >Video Format in the (Output Format >SDI and System menu) HDMI in the Video menu) HDMI 3840×2160 25P – 4096×2160P No output – 3840×2160P No output 1920×1080PsF 1920×1080i 1920×1080 25PsF 1920×1080 50P 2048×1080P –...
- Page 106 Recording format settings SDI/HDMI output settings SDI output signal (Rec Format >RAW Output Format (Output Format >SDI and and Video Format in the System HDMI in the Video menu) menu) HDMI RAW Output Format 2048×1080P – 2048×1080 50P Level-A (Level A) 4096×2160 50P Video Format (fixed value) 2048×1080P...
- Page 107 HDMI OUT connector output formats When Country >NTSC/PAL Area in the System menu is set to NTSC Area When using basic configuration (XAVC-I / XAVC-L / MPEG HD) Recording format settings SDI/HDMI output settings HDMI output signal (Rec Format >Video Format in the (Output Format >SDI and System menu) HDMI in the Video menu)
- Page 108 Recording format settings SDI/HDMI output settings HDMI output signal (Rec Format >Video Format in the (Output Format >SDI and System menu) HDMI in the Video menu) HDMI 1920×1080 59.94i 1920×1080i 1920×1080i 1920×1080 59.94i – 720×480i 720×480 59.94i – 720×480P 720×480 59.94P 1920×1080 29.97P 2048×1080PsF –...
- Page 109 Recording format settings SDI/HDMI output settings HDMI output signal (Rec Format >RAW Output Format (Output Format >SDI and and Video Format in the System HDMI in the Video menu) menu) HDMI RAW Output Format 2048×1080P – No output (Level A) 4096×2160 59.94P Video Format (fixed value) 2048×1080P...
- Page 110 When using extension unit (ProRes 422) Recording format settings SDI/HDMI output settings HDMI output signal (Rec Format >Video Format in the (Output Format >SDI and System menu) HDMI in the Video menu) HDMI 1920×1080i 1920×1080i 1920×1080 59.94i 1920×1080 59.94i 1920×1080PsF 1920×1080i 1920×1080 29.97P 1920×1080 29.97PsF 1920×1080P...
- Page 111 Recording format settings SDI/HDMI output settings HDMI output signal (Rec Format >Video Format in the (Output Format >SDI and System menu) HDMI in the Video menu) HDMI 1920×1080 50i 1920×1080i 1920×1080i 1920×1080 50i – 720×576i 720×576 50i – 720×576P 720×576 50P 1920×1080 25P 2048×1080PsF –...
- Page 112 Recording format settings SDI/HDMI output settings HDMI output signal (Rec Format >RAW Output Format (Output Format >SDI and and Video Format in the System HDMI in the Video menu) menu) HDMI RAW Output Format 2048×1080P – No output (Level A) 2048×1080 50P Video Format (fixed value) 2048×1080P...
- Page 113 HDMI output settings for HDMI devices Output Setting >HDMI Target Output Display >SDI/HDMI in HDMI output Device in the Video menu the Video menu OSD On/Off MLUT On/Off Recorder (default) SDI=On, HDMI=On (default) – Follows SDI1 * Grayed out, cannot be selected. SDI=On, HDMI=Off SDI=Off, HDMI=Off Monitor...
-
Page 114: Error/Warning Messages
Turn off the camcorder, and check for any problem with connected devices, cables, or media. If the error persists when the camcorder is turned on again, contact your Sony service representative. (If the camcorder does not turn off when the POWER switch is set to OFF, remove the battery or disconnect the DC IN supply.) -
Page 115: Caution And Operation Messages
Fan Stopped The built-in fan stopped. Avoid use at high temperatures, disconnect the power, and contact your Sony service representative. Invalid setting value was reset: The Clip Naming format setting was reset because an invalid ALL file Media/Clip Naming/Camera Position was loaded. -
Page 116: Licenses
The source code is provided on the internet. Use MPEG-4 VIDEO. the following URL and follow the download instructions. NO LICENSE IS GRANTED OR SHALL BE http://www.sony.net/Products/Linux/common/ IMPLIED FOR ANY OTHER USE. search.html ADDITIONAL INFORMATION INCLUDING THAT RELATING TO PROMOTIONAL,... -
Page 117: End User License Agreement
GRANT OF LICENSE limited to any license that, as a condition of SONY grants you a limited license to use the distribution of the software licensed under such SOFTWARE solely in connection with the... - Page 118 OPEN SOURCE SOFTWARE may be provided by third parties COMPONENTS included in the SOFTWARE over which SONY has no control. USE OF THE from time to time, and the applicable terms and CONTENT SERVICE REQUIRES AN conditions governing its use.
- Page 119 INFORMATION, LOCATION DATA, DATA IN TERMS OF ITS CORRECTNESS, SECURITY ACCURACY, RELIABILITY, OR You acknowledge and agree that SONY and its OTHERWISE. affiliates, partners and agents may read, collect, transfer, process and store certain information NO ORAL OR WRITTEN INFORMATION OR...
- Page 120 Information to protect itself and third parties improvement of functions, at such time as you from illegal, criminal or harmful conduct. interact with SONY’ s or third parties’ servers, or otherwise. Such updates or modifications may Certain services available through the...
-
Page 121: Open Software Licenses
CD-ROM. TERMINATION Without prejudice to any of its other rights, SONY may terminate this EULA if you fail to comply with any of its terms. In case of such termination, you must: (i) cease all use, and destroy any copies, of the SOFTWARE; (ii) comply with the requirements in the section below entitled “Your Account Responsibilities”. -
Page 122: Specifications
XAVC Long AVC/H.264 High Profile Specifications QFHD: VBR, 150 Mbps max., 4:2:0 Long HD: VBR, 50 Mbps max., 4:2:2 Long General MPEG HD422 MPEG-2 Long GOP Mass Approx. 2.0 kg (4 lb 6.5 oz) (body only) HD422 mode: CBR, 50 Mbps, MPEG-2 Dimensions 422P@HL (Unit: mm (inch), body only) - Page 123 Recording/playback time 29.97P XAVC Intra 4096×2160/3840×2160 Approx. 118 minutes: Using 59.94P QD-G128A Approx. 22 minutes: Using Approx. 59 minutes: Using QD-G128A QD-G64A Approx. 11 minutes: Using 23.98P QD-G64A Approx. 147 minutes: Using QD-G128A Approx. 26 minutes: Using Approx. 74 minutes: Using QD-G128A QD-G64A Approx.
-
Page 124: Camera Section
ProRes 422 HQ ND filters 59.94i/29.97P 1: Clear Approx. 60 minutes: Using 2: 1/4ND QD-G128A 3: 1/16ND Approx. 30 minutes: Using 4: 1/64ND QD-G64A Sensitivity 50i/25P Video Gamma: T14@24p Approx. 72 minutes: Using (2000 lx, 89.9% reflectance, 3200K) QD-G128A ISO sensitivity Approx. -
Page 125: Input/Output Section
Distortion Media Slot Section 0.08% or lower (–40 dBu input level) Built-in speaker XQD card slots for video recording (2) Monaural UTILITY SD card slot (1) Internal microphone Monaural Supplied Accessories Input/Output Section Viewfinder (including eyepiece, eyecup, rod, clamp) Inputs Grip remote control INPUT 1/2: USB wireless LAN module (IFU-WLM3) - Page 126 • SONY WILL NOT BE LIABLE FOR CLAIMS OF ANY KIND MADE BY USERS OF THIS UNIT OR MADE BY THIRD PARTIES. • SONY WILL NOT BE LIABLE FOR THE LOSS, REPAIR, OR REPRODUCTION OF ANY DATA RECORDED ON THE INTERNAL STORAGE SYSTEM,...
-
Page 127: Software Downloads
Software Downloads Trademarks When the unit is used with a PC connection, • XDCAM is a trademark of Sony Corporation. download device drivers, plug-ins, and • XAVC and are registered trademarks application software, where applicable, from the of Sony Corporation.