Table of Contents
Advertisement
TABLE OF CONTENTS
SECTION 1 -FORWARD & SAFETY INTRODUCTION ............... 2 - 6
IMPORTANT SAFETY INFORMATION ........................................................ 3
PROTECTIVE APPAREL ......................................................................... 4 - 6
SECTION 2 - CONTROLS & FEATURES............................. 7 - 15
LOCATION OF PARTS & CONTROLS .................................................... 7 - 8
IGNITION SWITCH/STEERING&HANDLEBAR LOCK ................................. 9
INSTRUMENTS ........................................................................................... 10
RIGHT HANDLEBAR SWITCH ................................................................... 11
LEFT HANDLEBAR SWITCH ...................................................................... 12
SEATLOCK/MET-IN BOX ........................................................................... 13
HELMET POSTS ......................................................................................... 14
FUEL LEVEL INSPECTION/REFILLING .................................................... 15
SECTION 3 - OPERATION ................................................ 16 - 28
BREAK-IN RECOMMENDATIONS ..................................................... 16 - 17
TROUBLESHOOTING ................................................................................ 17
PRE-RIDE INSPECTION ............................................................................ 18
STARTING THE ENGINE WITH STARTER BUTTON ....................... 19 - 21
STARTING THE ENGINE WITH KICK STARTER ...................................... 22
RIDING YOUR MOTORCYCLE .......................................................... 23 - 26
STOPPING &PARKING YOUR MOTORCYCLE ................................ 27 - 28
SECTION 4 - MAINTENANCE .......................................... 29 - 50
THE IMPORTANCE OF MAINTENANCE ................................................... 29
MAINTENANCE SCHEDULE .............................................................. 30 - 31
ENGINE OIL ........................................................................................ 32 - 35
CLUTCH PANEL INSPECTION & ADJUSTMENT ..................................... 35
AIR CLEANER FILTER ELEMENT ............................................................. 36
THROTTLE OPERATION & ADJUSTMENT ............................................... 37
DRIVE CHAIN INSPECTION /ADJUSTMENT ............................................ 37
SPARK PLUG .............................................................................................. 38
BRAKE FLUID LEVEL INSPECTION .......................................................... 39
BRAKE INSPECTION .......................................................................... 40 - 41
BRAKE LEVER FREE PLAY INSPECTION & ADJUSTMENT ................... 41
BATTERY .................................................................................................... 42
FUSES ......................................................................................................... 42
TIRES .................................................................................................. 43 - 45
CHASSIS INSPECTION .............................................................................. 46
CLEANING .................................................................................................. 47
WASHING YOUR MOTORCYCLE...................................................... 47 - 48
REMOVING ROAD SALT ............................................................................ 48
PAINTED ALUMINUM WHEEL MAINTENANCE ........................................ 48
EXHAUST PIPE MAINTENANCE ............................................................... 48
STORAGE GUIDE ................................................................................ 49 - 50
SECTION 5 - SPECIFICATION ........................................................... 51
SECTION 6 - EXHAUST EMISSION CONTROL SYSTEM ....... 52 - 53
1
Advertisement
Table of Contents

Related Manuals for KYMCO VISA R 110


Summary of Contents for KYMCO VISA R 110
-
Page 1: Table Of Contents
TABLE OF CONTENTS AIR CLEANER FILTER ELEMENT ............. 36 SECTION 1 –FORWARD & SAFETY INTRODUCTION ....2 - 6 THROTTLE OPERATION & ADJUSTMENT ..........37 IMPORTANT SAFETY INFORMATION ............3 DRIVE CHAIN INSPECTION /ADJUSTMENT ..........37 PROTECTIVE APPAREL ................. 4 - 6 SPARK PLUG .................... -
Page 2: Section 1 -Forward & Safety Introduction
SECTION 1 - FORWARD & SAFETY INTRODUCTION Thank you for purchasing this KYMCO VISA R 110 motorcycle, and welcome to the KYMCO riding family. Please read this Owner's Manual carefully before riding so that you will be thoroughly familiar with the proper operation of your motorcycle’s controls, its features, its capabilities, and its limitations. -
Page 3: Important Safety Information
Never exceed load limits, and only use There is much that you can do to protect yourself when you accessories that have been approved by KYMCO for this ride. You will find many helpful recommendations motorcycle. -
Page 4: Protective Apparel
SECTION 1 - FORWARD & SAFETY INTRODUCTION PROTECTIVE APPAREL For your safety, always wear an approved motorcycle or motorcycle helmet, eye protection, boots, gloves, long pants, and a long- sleeved shirt or jacket whenever you ride your motorcycle. Helmets and protection Your helmet is your most important piece of riding gear be cause it offers the best protection against head injuries. - Page 5 SECTION 1 - FORWARD & SAFETY INTRODUCTION These general guidelines may help you decide how to Loading guidelines add accessories to your motorcycle and how to load it properly. Improperly loading your motorcycle will affect its stability and Load limits handling.
-
Page 6: Section 1 –Forward & Safety Introduction
The addition of unsuitable accessories to your motorcycle can lead to unsafe operating conditions. It is not possible for KYMCO to test each available accessory on the market, or combinations of all such available accessories; however, your KYMCO dealer can assist you in the selection and installation of quality accessories. -
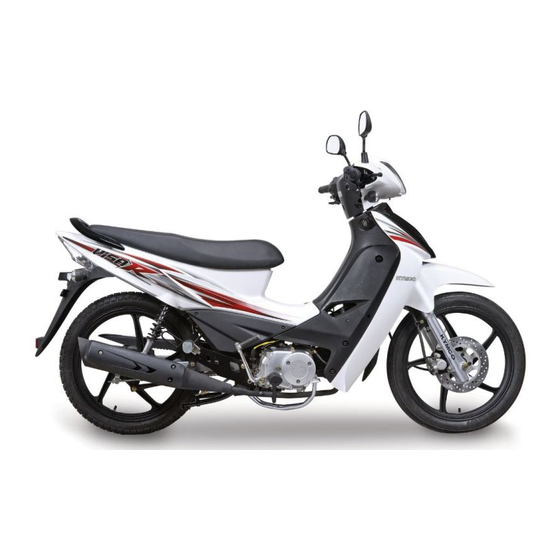
Page 7: Section 2 - Controls&Features
SECTION 2 - CONTROLS&FEATURES Location of parts & controls Gear Shifter Main Stand Tool Box Air Cleaner Side Stand Headlight Comp Drive Chain Left Front Turn Signal Light Instruments NOTE: Your motorcycle may differ slightly in appearance from the images in this manual. - Page 8 SECTION 2 - CONTROLS&FEATURES Location of parts & controls Kick Starter Starter Motor Button Ignition Switch Front Brake Lever Fuel Filler (under seat) Choke Exhaust Muffler Tail Light & Stop Light ...
-
Page 9: Ignition Switch/Steering&Handlebar Lock
SECTION 2 - CONTROLS&FEATURES (1) IGNITION SWITCH/STEERING&HANDLEBAR LOCK ON : At th is position, power is connected to start the engine. The key cannot be taken out. OFF :At this position, power is cut off and the engine stops. -
Page 10: Instruments
SECTION 2 - CONTROLS&FEATURES (2) INSTRUMENTS MILEAGE COUNTER: The total riding mileage is indicated by kilometer. The figure in black and white is an unit of 1OOm. TURN SIGNAL INDICATOR: When the tum signal switch is operated, this indicator will wink. HIGH BEAM INDICATOR: This indicator comes on when the long distance light is turned on. -
Page 11: Right Handlebar Switch
SECTION 2 - CONTROLS&FEATURES (3) RIGHT HANDLEBAR SWITCH ELECTRIC STARTER BUTTON Turn the ignition switch “ON” and press the electric starter button to activate the starter motor. During engine running, do not push the electric starter button to avoid engine damage. Tum the headlight switch off and turn signal switch off before using the electric starter button. -
Page 12: Left Handlebar Switch
SECTION 2 - CONTROLS&FEATURES (4) LEFT HANDLEBAR SWITCH Dimmer switch: " " Dimmer switch position turns the headlight low beam on, and the high beam indicator light on the dash is activated. " " Dimmer switch position turns the headlight high beam on. -
Page 13: Seatlock/Met-In Box
SECTION 2 - CONTROLS&FEATURES SEATLOCK/MET-IN BOX To open the seat (passenger section) 1. Insert the ignition switch key into the seat lock and rotate it clockwise to open the seat latch. 2. Lift up on the back edge of the passenger seat and remove it from the motorcycle. -
Page 14: Helmet Posts
SECTION 2 - CONTROLS&FEATURES (6) HELMET POSTS Your VISA R 110 motorcycle has two helmet posts so you can secure your helmet(s) outside of the under seat storage compartment. To use the posts, unlock the seat. With the seat up, put the helmet’s retaining ring onto the post. -
Page 15: Fuel Level Inspection/Refilling
SECTION 2 - CONTROLS&FEATURES (7) FUEL LEVEL INSPECTION/REFILLING When the fuel level gauge needle approaches “E” (indicating the tank is nearly empty), refill the tank with unleaded gasoline. 1. Stop the engine and turn the ignition switch to “OFF”. 2. Unlock and raise the seat. 3. -
Page 16: Section 3 - Operation
SECTION 3 - OPERATION Break-in recommendations It is essential that some stress be placed on these components during break-in to allow for this mating process. The first 1,600 km of riding are the most important in the life Do not, however, apply excessive load on the motorcycle's of your motorcycle. -
Page 17: Troubleshooting
Unless you have formal training as a service technician and have access to KYMCO technical reference materials, it is strongly suggested that you have the initial service performed by a KYMCO dealer. Breaking in the new tires New tires need proper break-in to assure maximum performance, just as your motorcycle's engine does. -
Page 18: Pre-Ride Inspection
If you detect any problem, be sure to address it immediately, or have it corrected by your KYMCO dealer. Performing pre-ride inspections does not take the place of regular maintenance. Follow the maintenance... -
Page 19: Starting The Engine With Starter Button
SECTION 3 - OPERATION Starting the engine with starter button NOTE: Always check the engine oil level and the fuel To start your VISA R 110 motorcycle, follow the procedure level BEFORE attempting to start your motorcycle’s listed on the following pages. - Page 20 SECTION 3 - OPERATION 3. The engine must be started with the transmission in the 5. For cold starting, pull down the choke knob. After the neutral position. When the transmission is in “NEUTRAL” engine warms up, restore the choke knob to its original the neutral indicator on the dash will illuminate.
- Page 21 SECTION 3 - OPERATION 6. Keep the throttle closed while the engine warms up. Allow the engine to warm until the idle speed is stable and smooth. NOTE: If the motorcycle’s engine is warm and does not start immediately, rotate the throttle grip 1/8 to 1/4 open to help the engine start.
-
Page 22: Starting The Engine With Kick Starter
SECTIO ON 3 - OPERA ATION Starting th he engine with kick starter 1. Place the m motorcycle on its main stand on level ground 2. Depress the e kick starter with forc When the engi ine is cold and does s not start after the k kick starter is depre... -
Page 23: Riding Your Motorcycle
SECTION 3 - OPERATION Riding your motorcycle This allows time for the lubricating oil to reach all critical engine components. Before each ride, follow the pre-ride inspection guidelines listed on pages 18 of this manual. NOTE: Review all of the safety recommendations that are listed in this manual before you ride. - Page 24 SECTION 3 - OPERATION Moderate riding habits will prolong the service life of your motorcycle. Aggressive riding will prematurely wear items such as the clutch and The throttle grip must be returned to the fully the brake pads. closed position each time you shift. Press During the first 1000 km of riding, keep your...
- Page 25 SECTION 3 - OPERATION 7. When approaching a corner or turn, close the throttle fully and slow the motorcycle down by simultaneously applying both the front and rear brakes. 8. After completing the turn, open the throttle gradually to accelerate the motorcycle.
-
Page 26: Riding Your Motorcycle
SECTION 3 - OPERATION 10. When riding your motorcycle on wet or slippery surfaces, be especially cautious. When riding in wet or rainy conditions or on slippery surfaces, your ability to maneuver and stop will be reduced. For your safety: •... -
Page 27: Stopping &Parking Your Motorcycle
SECTION 3 - OPERATION Stopping &Parking your motorcycle 4. Remember to return the turn signal switch to the Use care when concluding your ride and parking your center (off) position after completing your stop. motorcycle. 5. After you have come to a full stop, turn the ignition 1. -
Page 28: Section 3 – Operation
SECTION 3 - OPERATION 6. Squeeze the front brake lever, flip the side stand down and dismount the motorcycle from the left side. 7. Turn the handlebars to the left and rotate the ignition key in the ignition switch to lock the steering. Remove the key. -
Page 29: Section 4 - Maintenance
If your motorcycle tips over or becomes involved in a economical and trouble-free riding. Proper maintenance crash, be sure your KYMCO dealer inspects all major parts, even if you are able to make some repairs. will also help reduce air pollution and maximize fuel Improperly maintaining this motorcycle or failing to economy. -
Page 30: Maintenance Schedule
A: ADJUST I: INSPECTION The maintenance schedule on the opposite page specifies the maintenance required to keep your VISA R 110 motorcycle in peak operating condition. Maintenance work should be performed in accordance with KYMCO standards and specifications by properly trained and equipped technicians. Your KYMCO dealer meets all of these requirements. -
Page 31: Maintenance Schedule
SECTION 4 - MAINTENANCE Maintenance schedule FREQUENCY WHICHEVE ODOMETER READING [NOTE (1)] COMES FIRST REFER X 1000 km PAGE NOTE MONTH ITEM * AIR CLEANER NOTE 2 * SPARK PLUGS NOTE 3 THROTTLE * OPERATUON * VALVE CLEARANCE * FUEL LINE **... -
Page 32: Engine Oil
SECTION 4 - MAINTENANCE Engine oil Engine oil recommendation Use a premium, quality 4-stroke engine oil to ensure longer service life of your motorcycle. Only use oils that have a SJ rat ing per the API service classification. Engine oil capacity: 1.0 L Engine oil viscosity: SAE 15W-40... - Page 33 SECTION 4 - MAINTENANCE NOTE: Change the engine oil with the engine at normal operating temperature, with the motorcycle positioned Do not overfill the engine with oil. Overfilling the en- on its main stand to assure complete and rapid draining. gine can cause oil leaks and/or oil contamination of the air filter element.
- Page 34 SECTION 4 - MAINTENANCE NOTE: Park your motorcycle on the main stand, on level Remove the drain bolt to drain the oil. ground. Replace the drain bolt. Tighten it to the specified torque. Remove the dipstick and visually inspect the oil level Oil drain bolt torque: 18 lb-ft (25 N.m) on the stick.
-
Page 35: Clutch Panel Inspection & Adjustment
If it is hard to adjust, p please go to a K KYMCO Do not throw t the oil or oil filter in the trash. Do not po distributo or or service station for inspection. -
Page 36: Air Cleaner Filter Element
SECTION 4 - MAINTENANCE Air cleaner filter element Take out the air cleaner and visually check if it is dirty or clogged. 1. Remove the screws attaching the air cleaner cover and remove the air cleaner cover. 2. Remove the air cleaner element. Soak the element in clean engine oil and squeeze out the excess oil and then install the element and air cleaner. -
Page 37: Throttle Operation & Adjustment
SECTIO ON 4 - MAIN NTENANCE Throttle op peration & adju ustment Drive Ch ain Inspection n/Adjustment Before each r ride and during p periodic maintenanc The chain s should have a slack k of 1-2cm in its ce enter check for smoot th throttle grip rotati on from the fully op... -
Page 38: Spark Plug
has a colder heat range (usually a higher number; consult with your KYMCO dealer when selecting an alternate spark 3. If the spark plug has only been removed once it is plug). -
Page 39: Brake Fluid Level Inspection
Worn brake pads should be replaced immediately. If the master cylinder reservoirs on the handlebars per the brake pads are not worn, have your KYMCO dealer in- maintenance schedule. spect the brake system for fluid leaks. Do not ride your motorcycle unless the brakes are in perfect working ... -
Page 40: Brake Inspection
SECTION N 4 - MAINT TENANCE Brake inspe ection Rear bra ake lever free pl ay: 20 - 30 mm Ride your moto orcycle at low spee d on a dry road a alternately apply y the front and rear r brakes to check th heir performance. -
Page 41: Brake Lever Free Play Inspection & Adjustment
Adjust the rear r brake pedal free pla ay with the brake adju usting Contact your K KYMCO dealer imme diately if you have a nuts. brake-related s service needs. After adjustme nt, fully apply the rea... -
Page 42: Battery
NOTE: If you have to replace a blown fuse, get a new for cleaning. After cleaning, apply a thin coat of grease or spare fuse immediately. See your KYMCO dealer for Vase line to battery terminals and then install the battery. -
Page 43: Tires
SECTION 4 - MAINTENANCE Tires NOTE: Check the tire inflation pressure and tire tread condition at the periods listed in the periodic Failure to follow these warnings may result in an acci- maintenance schedule. For maximum safety and good dent due to tire failure. The tires on your motorcycle tire life, the tire pressures should be inspected more are a crucial link between your scooter and the road. -
Page 44: Tire Inspection
SECTION 4 - MAINTENANCE Tire inspection Tire tread wear limit: FRONT 1.6 mm The condition of your motorcycle’s tires is vital for REAR 2.0 mm operational efficiency and your safety. Check the tires’ inflation pressure, the tread depth, and look for damage before each ride. - Page 45 NOTE: When you replace a tire on your motorcycle, be Consult your KYMCO dealer for replacement tire sure to replace it with a tire of the specified size. If you service.
-
Page 46: Chassis Inspection
SECTION 4 - MAINTENANCE Chassis inspection Complete the pre-ride inspection of your motorcycle by checking items on its chassis. Front suspension & rear shock absorber: Check the operation of the suspension by pressing down on the handlebars and seat. Make sure the suspension returns in a smooth fashion. -
Page 47: Cleaning
SECTION 4 - MAINTENANCE Cleaning Washing your motorcycle Clean your motorcycle regularly to protect the surface Rinse the motorcycle thoroughly with cool water to finishes and inspect for damage, wear, and oil, coolant or remove any loose dirt. brake fluid leakage. 2. -
Page 48: Washing Your Motorcycle
SECTION 4 - MAINTENANCE Test the brakes before riding the motorcycle. Several Dry the motorcycle and protect painted and metal applications of the brakes may be necessary to restore surfaces with wax or polish. normal braking performance. NOTE: Due to water on the brake components, braking Painted aluminum wheel maintenance efficiency may be temporarily impaired immediately Even if protected by paint, aluminum may corrode from con... -
Page 49: Storage Guide
SECTION 4 - MAINTENANCE STORAGE GUIDE Remove the spark plug from the engine and store it in a safe, dry place. Do not connect the spark plug to the spark plug cap. Extended storage, such as for the winter months, requires Pour a tablespoon (15 - 20 cc) of clean engine oil into the that you take certain steps to reduce the effects of cylinder and cover the spark plug hole with a piece of cloth. -
Page 50: Removal From Storage
SECTION 4 - MAINTENANCE Removal from storage Uncover and clean the motorcycle. Change the engine oil if more than 1 month has Gasoline is highly flammable and explosive. You can be passed since the start of storage. burned or seriously injured when handling fuel. Stop the engine and keep heat, sparks, and flame away. -
Page 51: Section 5 - Specification
SECTION 5 - SPECIFICATION Dimensions Chassis Overall length ............1930 mm Tire size, front………………………………………… . 2.5 - 17 Overall width ............670 mm Tire size, rear………………………………………… 2.75 - 17 Overall height ............1100 mm Brake (front) ............Disc type Wheel base ............1265 mm Brake (rear) ............ -
Page 52: Section 6 - Exhaust Emission Control System
1. Make sure the air cleaner filter element is kept in good Be aware that only an authorized KYMCO dealer has condition (see page 36). the tools, the expertise and the technical resources to properly diagnose and repair the emission system 2. -
Page 53: Section 6 – Exhaust Emission Control System
Do not modify the engine, intake or exhaust components, as doing so will affect compliance with these noise level requirements. Please do not modify or change any KYMCO-designed components that may alter the sound or emission levels from your V I S A R 1 1 0 motorcycle.