
Related Manuals for Nektar impact LX49


Summary of Contents for Nektar impact LX49
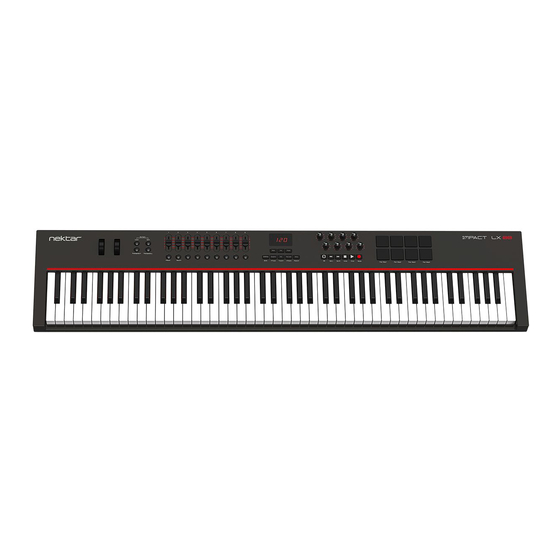
- Page 1 User Guide www.nektartech.com www.nektartech.com Nektar Impact LX49, LX61 & LX88 User Guide...
-
Page 2: Table Of Contents
Pitch Bend and Modulation Wheels Foot Switch Switching Wheels and Foot Switch On/Off for Layer/Split (LX88 only) Controlling MIDI Software 15-16 Mixer, Instrument and Presets Global Controls Function Buttons Shift/Mute Snapshot Null Pad Learn Nektar Impact LX49, LX61 & LX88 User Guide www.nektartech.com... - Page 3 Impact firmware, software and documentation are the property of Nektar Technology, Inc and subject to a License Agreement. © 2014 Nektar Technology, Inc. All specifications subject to change without notice. Nektar is a trademark of Nektar Technology, Inc. Studio One is a trademark of PreSonus Software, Ltd., registered in the U.S. and other countries www.nektartech.com...
-
Page 4: Introduction
DAWs. This means that for supported DAWs, the setup work has largely been done and you can focus on expanding your creative horizon with your new controller. The Nektar DAW support adds functionality that makes the user experience more transparent when you combine the power of your computer with Nektar Impact LX. Throughout this guide we refer to Impact LX where the text is applicable to LX49, LX61 and LX88. -
Page 5: Getting Started
PDF for any additional setup as well as learn how the integration works. Since the initial release of Impact LX there have already been several updates to Nektar DAW integration files. If you want to make sure you have the latest installer, register your product and download the files by following the link at the bottom of the page. -
Page 6: Installing And Setting Up Studio One Artist
Back in the “Options” window, click “Add” to open the “Add Device” Window Locate the Nektar folder, click the expand arrow and the click on the Impact LX Control option. Image In the “Receive From” field select Port 2 or MIDIIN2. The window should now look like image 4 ... -
Page 7: Studio One And Impact Lx Working Together
If every thing at this point is working correctly, you are ready to learn more about how Impact LX works with Studio One Artist. If you are not getting the results described, please check your installation one more time as well as the Nektar support tab on our website www.nektartech.com... -
Page 8: Studio One Mixer Control
You can control the Master Volume fader of the Studio One mixer by pressing [Fader button 9) and then move fader 9 while the button is pressed. Upon release of the button, fader 9 will revert to control the current channel volume. Nektar Impact LX49, LX61 & LX88 User Guide www.nektartech.com... -
Page 9: Studio One Instrument Control
Each of Impact LX’s controls are pre-mapped to Studio One’s built-in instruments with envelopes typically mapped on the faders and controls that have the biggest impact on sound are mapped to the pots such as Cutoff, Resonance, Filter Env etc. Happy tweaking. www.nektartech.com Nektar Impact LX49, LX61 & LX88 User Guide... -
Page 10: Viewing Assigned Controls
With multiple effect plug-ins inserted on a track, press [Shift]+[Fader button 7] to go to previous insert and [Shift]+[Fader button 8] to go to next insert (see image below). When you are done controlling insert effects, close the window by pressing [Shift]+[Fader button 6]. Nektar Impact LX49, LX61 & LX88 User Guide www.nektartech.com... -
Page 11: Studio One Drum Instrument
To help make that process easier, the default parameters assigned to Impact LX’s controls are volume. To mix the 16 sounds you can therefore use the faders 1-8 to control volume for pads 1-8 and the pots 1-8 to control volume for pads 9-16. www.nektartech.com Nektar Impact LX49, LX61 & LX88 User Guide... -
Page 12: Keyboard, Octave And Transpose
Shift Octave up/down (Impact LX88 only) -/+ 2 Sends out MIDI program change messages 0-127 Change the Global MIDI Channel 1 to 16 Select any of the 5 control presets 1 to 5 Nektar Impact LX49, LX61 & LX88 User Guide www.nektartech.com... -
Page 13: Layer & Split (Impact Lx88 Only)
MIDI channel assigned to the selected zone. The program number you are sending is indicated on the display. You can also send out a specific MIDI program change message. This is described in the Setup section. www.nektartech.com Nektar Impact LX49, LX61 & LX88 User Guide... -
Page 14: Wheels And Foot Switch
Pitch bend, modulation wheel and foot switch can each be on and off for the layer, split and the regular keyboard zones. Read the section about Setup on page 20, for further information about how to do that. Nektar Impact LX49, LX61 & LX88 User Guide www.nektartech.com... -
Page 15: Controlling Midi Software
With 16 MIDI channels available it means you can create 16 unique setups and just change the MIDI channel to switch between them. A list of controller assignments for each of the 5 presets is available on pages 26-30. www.nektartech.com Nektar Impact LX49, LX61 & LX88 User Guide... -
Page 16: Global Controls
The 6 transport buttons in addition, are also global controls and assignments are stored over power cycling. As you change presets or adjust your preset controls, global controls remain unchanged. This makes sense since Transport and keyboard controls typically are set up to do one thing specifically. Nektar Impact LX49, LX61 & LX88 User Guide www.nektartech.com... -
Page 17: Function Buttons
Press [Mixer] or [Inst] followed by pressing [Null] to set the setting for each of these options. If you are using Nektar Integrated DAW support, please make sure to check the setup instructions for your DAW. Null is in some cases required to be off because Impact LX uses a different method to avoid parameter jumping. -
Page 18: Pads
You can choose between 4 velocity curves and 3 fixed velocity value options. For more information about the velocity curves and how to choose them, read about the Setup Menu and go to page 24 for details about pad velocity curves. Nektar Impact LX49, LX61 & LX88 User Guide www.nektartech.com... -
Page 19: Pad Maps Default Settings
Data 3 Chan Global Global Global Global Global Global Global Global Map 4 Note Note No. Data 1 Data 2 Data 3 Chan Global Global Global Global Global Global Global Global www.nektartech.com Nektar Impact LX49, LX61 & LX88 User Guide... -
Page 20: Setup Menu
LX display (in parentheses), when a key is pressed. Menu keys are the same for both Impact LX49, LX61 and LX88 but value entry using the keyboard is one octave higher on LX61 and LX88. Refer to the screen printing on the unit to see which keys to press to enter values. -
Page 21: Assigning Controls To Midi Messages
Setup menu after making changes, those changes remain active You can also enter a specific value using the white number keys spanning G3–B4 (G4-B5 on LX61). Press Enter (C5) to accept the change www.nektartech.com Nektar Impact LX49, LX61 & LX88 User Guide... - Page 22 Setup menu after making changes, those changes remain active You can also enter a specific value using the white number keys spanning G3–B4 (G4-B5 on LX61). Press Enter (C5) to accept the change Nektar Impact LX49, LX61 & LX88 User Guide www.nektartech.com...
-
Page 23: Drawbar (On/Off)
You can also enter a specific preset number (1-5) using the white number keys spanning G3–D4 (G4-D5 on LX61). Press Enter (C5) to load the selected Preset location (only applicable when loading using the number entry option) www.nektartech.com Nektar Impact LX49, LX61 & LX88 User Guide... -
Page 24: Global Functions And Options
Setup menu after making changes, those changes remain active You can also enter a specific selection (1-7) using the white number keys spanning A3–G4. Press Enter (C5) to accept Nektar Impact LX49, LX61 & LX88 User Guide www.nektartech.com... -
Page 25: Pads Velocity Curves
(C5) to accept the change and send out the selected MIDI program message You can also enter a specific selection (0-127) using the white number keys spanning G3–B4. Press Enter (C5) to accept www.nektartech.com Nektar Impact LX49, LX61 & LX88 User Guide... -
Page 26: Bank Lsb
Make sure the Impact LX is the output destination of the MIDI track containing the backup data. The display will read {SyS} when data is received. Once the data has transmission has been completed, the backup has been restored. Nektar Impact LX49, LX61 & LX88 User Guide www.nektartech.com... -
Page 27: Midi Out From Usb (Lx88 Only)
(C3/C#3) Press Enter (C5) to accept the change Note: If you are using Nektar DAW integration it’s not possible to route the second port to another application. Both ports are required for the DAW integration to work correctly. www.nektartech.com... -
Page 28: User Presets 1-5 Default Settings
Control Change (Vibrato Rate) MIDI CC Global Control Change (Vibrato Depth) MIDI CC Global Note: B9 is assigned to MIDI cc 65 on all presets intended to be available for a global function Nektar Impact LX49, LX61 & LX88 User Guide www.nektartech.com... - Page 29 MIDI CC CH Pan MIDI CC CH Pan MIDI CC CH Pan Note: B9 is assigned to MIDI cc 65 on all presets intended to be available for a global function www.nektartech.com Nektar Impact LX49, LX61 & LX88 User Guide...
- Page 30 MIDI CC CH Pan MIDI CC CH Pan MIDI CC CH Pan Note: B9 is assigned to MIDI cc 65 on all presets intended to be available for a global function Nektar Impact LX49, LX61 & LX88 User Guide www.nektartech.com...
- Page 31 MIDI CC Global MIDI CC Global MIDI CC Global MIDI CC Global Note: B9 is assigned to MIDI cc 65 on all presets intended to be available for a global function www.nektartech.com Nektar Impact LX49, LX61 & LX88 User Guide...
- Page 32 MIDI CC Global MIDI CC Global MIDI CC Global MIDI CC Global Note: B9 is assigned to MIDI cc 65 on all presets intended to be available for a global function Nektar Impact LX49, LX61 & LX88 User Guide www.nektartech.com...
-
Page 33: Factory Restore
Make sure your Impact LX is switched off Press the [Octave up]+[Octave down] ([Layer]+[Split] on LX88) buttons and hold them Switch your Impact LX on www.nektartech.com Nektar Impact LX49, LX61 & LX88 User Guide... - Page 34 Nektar Impact LX49, LX61 & LX88 User Guide www.nektartech.com...
- Page 35 Nektar Impact LX49, LX61 & LX88 User Guide...
- Page 36 Designed by Nektar Technology, Inc, California Made in China Nektar Impact LX49, LX61 & LX88 User Guide www.nektartech.com...