Linksys EZXS55W User Manual
V3 instant etherfast series 10/100 fast ethernet switch
Hide thumbs
Also See for EZXS55W:
- User manual (10 pages) ,
- Product data (2 pages) ,
- Quick installation (1 page)

Related Manuals for Linksys EZXS55W


Summary of Contents for Linksys EZXS55W
-
Page 1: Fast Ethernet
Instant EtherFast ® Series Fast Ethernet Switched 10/100 Network In a Box Use this guide to install : Model No.: FESWSK05 v3 User Guide... - Page 2 LIMITED WARRANTY Linksys guarantees that every Fast Ethernet Switched 10/100 Network In a Box is free from physical defects in material and workmanship under normal use for ONE year from the date of purchase. If the product proves defective during this warranty period, call Linksys Customer Support in order to obtain a Return Authorization number.
-
Page 3: Table Of Contents
Table of Contents Introduction The Linksys Fast Ethernet Switched 10/100 Network In a Box Package Contents Getting to Know the Fast Ethernet Switched 10/100 Network In a Box The EtherFast ® 10/100 LAN Card The EtherFast ® 10/100 5-Port Workgroup Switch... -
Page 4: Introduction
The Linksys Fast Ethernet Switched 10/100 Network In a The Linksys Fast Ethernet Switched 10/100 Network In a Box comes with everything you need to get a network up and running in minutes. Plug in the cards, attach the pro-... -
Page 5: Getting To Know The Fast Ethernet Switched 10/100 Network In A Box
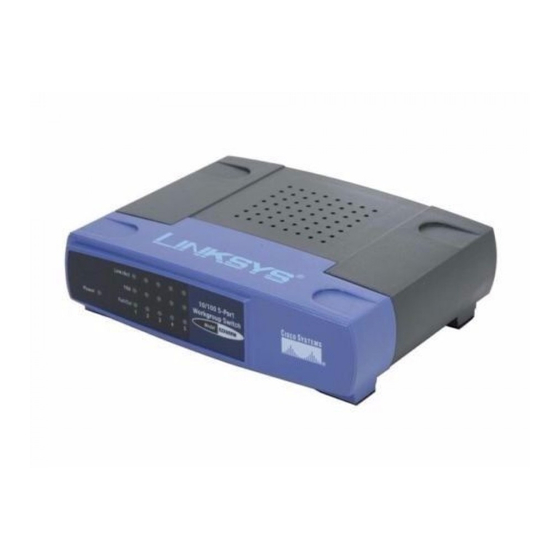
10/100 5-Port Workgroup Switch Your network revolves around your switch. You cannot connect your comput- ers directly to one another. You must connect them through your switch. The Switch’s LEDs The Power LED will illuminate when the the switch is receiving power. -
Page 6: Installing The Fast Ethernet 10/100
PCI slot! puter will automatically recognize the LAN Card and assign it a unique IRQ ("interrupt") and I/O address. Workgroup Switch. • For Windows 95 installation instructions, turn to page 8. • For Windows 98 installation instructions, turn to page 12. -
Page 7: Installing The Workgroup Switch
To connect a computer directly to the Switch, plug one end of a standard net- work cable into an open port on the back of the Switch (not the Uplink port), then plug the other end of the cable into the computer's LAN Card. -
Page 8: Installing The Driver In Windows 95 Version B
Installing the Driver in Windows 95 Version B 1. While the Update Device Driver Wizard window is visible, insert the ® EtherFast 10/100 LAN Card Driver Disk into your floppy drive and click the Next button. 2. Windows 95 will fail to find the driver. Click the Other Locations button to browse for the driver. -
Page 9: Installing The Drivers For Windows 98
At this point, the installation may require files from your Windows 95 CD- ROM. If prompted, insert your Windows 95 CD-ROM into your CD-ROM drive and enter d:\win95 in the box that appears (where “d” is the letter of your CD-ROM drive). If you were not supplied with a Windows 95 CD- ROM, your Windows files may have been placed on your hard drive by your computer manufacturer. - Page 10 4. Select Search for the best driver for your device (Recommended). Click Next. 5. Select Specify a location and enter a:\win98 in the drop down box. Click Next to continue. N N o o t t e e : : Windows 98 may ask you for a c c o o m m p p u u t t e e r r o o r r w w o o r r k k g g r r o o u u p p n n a a m m e e . If so, skip ahead to the section C C o o n n f f i i g g u u r r i i n n g g t t h h e e L L A A N N C C a a r r d d .
-
Page 11: Installing The Drivers For Windows Millennium
Next. 5. A window will open, notifying you that Windows is searching for the Linksys LNE100TX Fast Ethernet Adapter driver. When the window notifies you that it is ready to install the driver, click Next. 5. Windows will begin installing the driver. At this point, the installation may require files from your Windows Millennium CD-ROM. -
Page 12: Overview
d:\win9x in the box that appears (where “d” is the letter of your CD-ROM drive). If you were not supplied with a Windows Millennium CD-ROM, your Windows files may have been placed on your hard drive by your com- puter manufacturer. While the location of these files may vary , many man- ufacturers use c:\windows\options\install as the path. - Page 13 N N o o t t e e : : If you install the T T C C P P / / I I P P p p r r o o t t o o c c o o l l , refer to your system administrator or your Windows NT documentation when installa- tion steps that aren’t listed in this User Guide appear. Linksys does not provide technical support for the configuration or troubleshooting of the TCP/IP protocol.
- Page 14 8. A list of services will appear. Click Next to approve these services, fol- lowed by Next again. 9. Windows NT will probably ask you to supply your original Windows NT CD-ROM or setup disks. If so, place your Windows NT CD-ROM in your CD drive.
-
Page 15: Installing The Lan Card Driver If Networking Is Already Installed
• If you need to install the TCP/IP protocol, refer to your system adminis- trator or your Windows NT documentation. Linksys does not provide technical support for the configuration or troubleshooting of the TCP/IP... - Page 16 N N o o t t e e : : If you install the T T C C P P / / I I P P p p r r o o t t o o c c o o l l , refer to your system administrator or your Windows NT documentation when installation steps that aren’t listed in this User Guide appear. Linksys does not provide technical support for the configura- tion or troubleshooting of the TCP/IP protocol.
-
Page 17: Windows 2000 Installation And Setup
• If you need to install the TCP/IP protocol, refer to your system adminis- trator or your Windows NT documentation. Linksys does not provide technical support for the configuration or troubleshooting of the TCP/IP... - Page 18 Series Fast Ethernet Switched 10/100 Network In a Box ® 5. When the Found New Hardware Wizard box appears, insert the Linksys EtherFast ufacturer’s files from“ field, type “A:\Win2000”. Click OK. 6. The Driver File Search Results dialog box will appear. Click Next.
-
Page 19: Configuring The Lan Card
The Windows 2000 driver installation is complete. If you want to share files or printers, refer to your Windows 2000 documentation or check with your system administrator. Return now to the section called Installing the Workgroup Switch to complete the installation of your Network In A Box. Instant EtherFast... - Page 20 3. Click the File and Print Sharing button. The File and Print Sharing win- dow will appear. 4. If you'd like others to be able to access the files on your PC's hard drive, select I want to be able to give others access to my files. 5.
-
Page 21: Novell Netware Server Setup
Network Neighborhood, then the Windows 98 net- work configuration is complete. Return now to the section called Installing the Workgroup Switch to complete the installation of your Network In A Box. • Continue with Sharing Your Files and Printers in the Appendix if you want your PC’s data or printer to be available to others on the... -
Page 22: Installing A 4.X Server
6. At the server command line, type (for example): LOAD c:\LNE100TX\NBI31X.NLM LOAD c:\LNE100TX\MSM31X.NLM LOAD c:\LNE100TX\ETHERTSM.NLM LOAD c:\LNE100TX\LNE100.LAN FRAME = <frame type in use> 7. Bind a protocol to the driver. For example: BIND IPX TO LNE100TX NET=XX where XX is the logical network address for your network. -
Page 23: Troubleshooting
15. Your PC will examine the network. This may take a few minutes. 16. You may be prompted several times for a network on which to bind IPX to LNE100_1. Accept the default numbers if you are not sure which val- ues to assign. - Page 24 Windows’ networking. To do this, click on Start, Settings, Control Panel, then double-click on Network. Click once on the component entry with the words TCP/IP and Linksys or TCP/IP on its own, then click on the Remove button. Click OK when finished and restart your PC.
-
Page 25: Running The Lan Card's Diagnostics
PCI slot. 4. The word “pass” will appear next to each successful test. If the card fails the Link Status Test check your cabling and switch connections. If the card fails the Loopback test, check your computer’s settings, then contact Linksys Customer Support for help. -
Page 26: Appendix
Appendix Sharing Your Files and Printers Overview By sharing your files and printers, other PCs on your network will be able to access the resources on your PC. Before sharing your files and printers, you should prepare your computer to be used with any file servers that may be on the network. -
Page 27: Installing The Driver In Windows 95 Version A
Installing the Driver in Windows 95 Version A ® 1. Windows 95 will detect the EtherFast 10/100 LAN Card and display a New Hardware Found window. 2. Insert the EtherFast ® 10/100 LAN Card Driver Disk into drive A. 3. Select Driver from disk provided by hardware manufacturer, then click OK. 4. -
Page 28: Windows 95, 98 Or Millennium Client For Windows Nt
Windows 95, 98 or Millennium Client for Windows NT ® If you are installing the EtherFast 10/100 Network LAN Card in a Windows 95, 98 or Millennium PC that you plan on logging into a Windows NT domain server, follow the directions below. 1. - Page 29 4. Remove any instance of the name Linksys in the box. This includes IPX/SPX…Linksys, NetBEUI…Linksys, and TCP/IP…Linksys. Also remove Client for Microsoft Networks, Client for NetWare Networks, and File and Printer Sharing for Microsoft Networks. In some cases, removing one of these components may in turn automati- cally remove other components as well.
- Page 30 8. Scroll down to the LAN Cards item and expand it by clicking on the open [+] sign. 9. Remove all devices with the name Linksys in its description. (If at any point you are asked to restart the computer, Click No).
- Page 31 5. Right-click on EtherFast 10/100 LAN Card. A content menu should open (below). 6. First, choose Disable. 7. When asked if you want to Disable the device, click Yes. Manually Installing the Network Components in Windows 95 & 98 Instant EtherFast Series ®...
-
Page 32: Manually Installing The Network Components In Windows 95, 98 And Millennium
Wake-On-LAN using the 3-pin connection, it will not be able to access Wake- On-LAN features through the LAN Card. If you have an earlier release of this product, the adapter may be the LNE100TX v4, which has the 3-pin con- nection. Go to www.linksys.com for more information on the LNE100TX v4. -
Page 33: Installing And Configuring Wake-On-Lan
1. Turn your PC off and disconnect it from the network either by turning off the switch or hub. 2. Wait about ten seconds, then turn on the switch. The PC should wake up. Fast Ethernet Switched 10/100 Network In a Box Instant EtherFast ®... -
Page 34: Glossary
For informa- tion on where to find device drivers and setup instructions for Linux and other freeware OSes, visit the support pages and FAQ files on the Linksys website at www.linksys.com. - Page 35 Port - A pathway into and out of the computer or a network device such as a switch or router. For example, the serial and parallel ports on a personal com- puter are external sockets for plugging in communications lines, modems and printers.
-
Page 36: Specifications
Specifications for LNE100 ver. 5 Model No: Standards: Protocol: Ports: Cabling Type: Speed (Mbps): WOL Support Bus Type: LEDs Specifications for EZXS55W ver. 2 Model Standards Protocol Ports Speed Per Port (Mbps) 10Mbps (10BaseT) Cabling Type Topology LEDs LNE100TX ver.5 IEEE 802.3, IEEE 802.3u,... -
Page 37: Environmental
FROM THE PRODUCT'S PACKAGING ON HAND WHEN CALLING. RETURN REQUESTS CANNOT BE PROCESSED WITHOUT PROOF OF PURCHASE. IN NO EVENT SHALL LINKSYS’ LIABILITY EXCEED THE PRICE PAID FOR THE PRODUCT FROM DIRECT, INDIRECT, SPECIAL, INCIDEN- TAL, OR CONSEQUENTIAL DAMAGES RESULTING FROM THE USE OF THE PRODUCT, ITS ACCOMPANYING SOFTWARE, OR ITS DOCU- MENTATION. -
Page 38: Contact Information
Fast Ethernet Switched 10/100 Network In a Box Contact Information For help with the installation or operation of this product, contact Linksys Customer Support at one of the phone numbers or Internet addresses below. Sales Information 800-546-5797 (LINKSYS) Tech Support... - Page 39 h t t p : / / w w w. l i n k s y s . c o m...