Brother PDS-5000 User Manual
Hide thumbs
Also See for PDS-5000:
- Quick setup manual (18 pages) ,
- Quick start manual (15 pages) ,
- Service manual (148 pages)
Table of Contents
Advertisement
Quick Links
Advertisement
Table of Contents
Troubleshooting

Related Manuals for Brother PDS-5000


Summary of Contents for Brother PDS-5000
- Page 1 User’s Guide PDS-5000/PDS-6000 PDS-5000 PDS-6000 Version 0...
-
Page 2: Using The Documentation
Using the documentation Thank you for buying a Brother machine! Reading the documentation will help you make the most of your machine. Symbols and conventions used in the documentation The following symbols and conventions are used throughout the documentation. CAUTION CAUTION indicates a potentially hazardous situation which, if not avoided, may result in minor or moderate injuries. -
Page 3: Table Of Contents
Table of Contents Scanning Software Choose your scanning software .......................1 General Information Scanner overview .............................2 Control panel ............................3 Control panel overview ........................3 LED indications ...........................4 Scanner status messages ........................4 Document Information Acceptable documents ..........................5 Unacceptable documents .........................6 Documents recommended for use with the Carrier Sheet ................7 Scan Preparation Set up your scanner ..........................8 Load documents ............................9... - Page 4 Scan (Macintosh) Scan using the control panel ........................61 Assign a profile to the Scan button ....................61 Scan a document ..........................61 Scan using your computer ........................62 Scan with DS Capture ........................62 Change scan settings using the TWAIN driver ..................63 Functional overview ..........................63 DS Capture screen overview ......................64 Profile tab ............................65 Image tab ............................66...
- Page 5 Appendix B Contact Brother .............................122 Register your product ........................122 Frequently Asked Questions (FAQs) ....................122 For customer service ........................123 For Brother accessories & supplies ....................123 Technical support (for PageManager) ....................124...
-
Page 6: Scanning Software
After installing Brother’s scanner drivers, select a scanning application for saving scanned images to your computer. Brother has supplied several options for you on Brother’s installation DVD; use this table to help determine which of the included scanning applications will work best for you:... -
Page 7: General Information
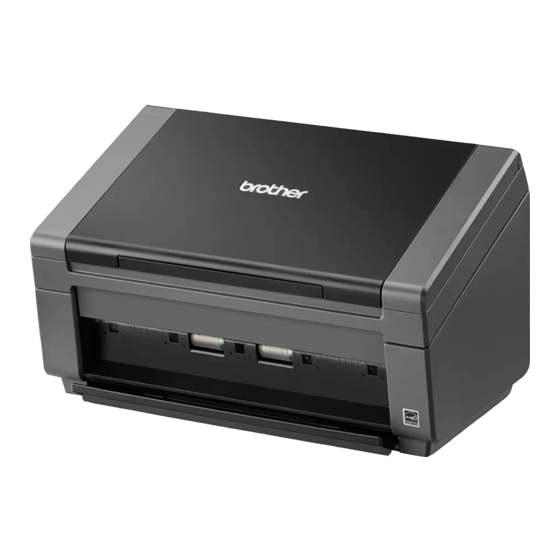
General Information Scanner overview 1 Top Cover 2 Cover Extension 3 Document Guide Stopper 4 Document Guides 5 Automatic Document Feeder (ADF) 6 ADF Cover 7 Output Tray 8 Document Stopper 9 Control Panel 10 Cover Release Lever 11 Kensington Security Slot 12 USB Connector 13 AC Power Connector... -
Page 8: Control Panel
General Information Control panel This scanner has one Liquid Crystal Display (LCD), five buttons and one Light Emitting Diode (LED) on the control panel. The LCD is a 16 character two-line display. Control panel overview 1 Liquid Crystal Display (LCD) Displays messages to help you set up and use your scanner. -
Page 9: Led Indications
When Button Manager is running on your computer, Function X changes to a Button Manager function number and name. For more information, see the Button Manager V2 User’s Guide. See your model’s Manuals page on the Brother Solutions Center at http://support.brother.com to download the Button Manager V2 User’s Guide. -
Page 10: Document Information
´ Document Information Acceptable documents Standard Paper Length 54 to 356 mm Width 51 to 218 mm Weight 28 to 400 g/m To scan thinner documents, use the Carrier Sheet (see Load documents using the Carrier Sheet on page 13). Maximum Number of Pages 100 sheets (with 28 to 80 g/m paper) -
Page 11: Unacceptable Documents
Document Information Plastic Cards Length 70 to 95 mm Width 51 to 55 mm Standard Size (ISO) 85.6 × 54.0 × 0.76 mm Material Plastic (PET) Type Plastic card such as a driver’s license or an insurance card Thickness (ISO) Less than 0.76 mm Up to 1.25 mm (with Embossed) Maximum Number of Pages... -
Page 12: Documents Recommended For Use With The Carrier Sheet
Documents recommended for use with the Carrier Sheet NOTE The Carrier Sheet is an optional item. To purchase a Carrier Sheet, see For Brother accessories & supplies on page 123. Use the optional Carrier Sheet when you scan the following: ... -
Page 13: Scan Preparation
Scan Preparation Set up your scanner Open the Top Cover (1), pull the Cover Extension (2) out and then unfold the Document Guides (3). Pull the Output Tray (1) out of the machine and then unfold the Document Stopper (2). -
Page 14: Load Documents
Scan Preparation Load documents IMPORTANT • The ADF can hold up to 100 pages and feeds each sheet individually. Use 80 g/m paper and always fan the pages before placing them in the ADF. • DO NOT pull on the document while it is feeding. •... - Page 15 Scan Preparation NOTE Slide up the Document Guide Stopper (1) and extend the Document Guide (2) when you set the documents with punch holes such as continuous form paper. Set your document, face down, top edge first in the ADF between the Guides until you feel it touch the inside of the machine.
-
Page 16: Loading Multiple Differently-Sized Documents
Scan Preparation Loading multiple differently-sized documents To scan multiple pages that are different sizes, follow these steps: NOTE Make sure that the narrowest document is wide enough to touch the ADF’s feed rollers, to avoid a document jam. Stack the documents on top of each other, making sure that the top edge and the left side of each document is aligned. - Page 17 Scan Preparation Combinations of multiple different-sized documents Maximum size LTR (P) A4 (P) B5 (P) A5 (P) B6 (P) A6 (P) B7 (P) A7 (P) B8 (P) A8 (P) Carrier Sheet A5 (L) B6 (L) A6 (L) B7 (L) A7 (L) B8 (L) A8 (L) Width (mm) (*1)
-
Page 18: Load Documents Using The Carrier Sheet
Load documents using the Carrier Sheet The Carrier Sheet is an optional item that you can use with your scanner. To purchase a Carrier Sheet, see For Brother accessories & supplies on page 123. IMPORTANT • Do not write on the Carrier Sheet, as the writing may be seen in scanned documents. If the Carrier Sheet becomes dirty, wipe it with a dry cloth. - Page 19 Scan Preparation Adjust the Document Guides (1) to fit the width of the Carrier Sheet. Set the Carrier Sheet in the ADF between the Guides until you feel it touch the inside of the machine. NOTE To avoid document jams, do not load the Carrier Sheet upside down.
-
Page 20: Loading Documents Wider Than Letter/A4 Size
Scan Preparation Loading documents wider than Letter/A4 size You can scan documents that are wider than Letter/A4 size by using the Carrier Sheet. Before scanning, see Load documents using the Carrier Sheet on page 13 for basic usage instructions and notes about the Carrier Sheet. - Page 21 Scan Preparation Set the Carrier Sheet in the ADF between the Guides until you feel it touch the inside of the machine. NOTE To reduce the white space in the center of a scanned page, be sure to position the folded edge of the original document closer to the right edge of the Carrier Sheet.
-
Page 22: Scan (Windows )
Scan (Windows Scan using the control panel Customize the Scan button on your Brother machine’s control panel to scan using your preferred scanning software. Assign a scanning application to the Scan button Confirm that the machine is connected to your computer via a USB cable. - Page 23 ® Scan (Windows Click the Events tab, and then select an event number from the Select an event drop-down list. The Button # you select from this list directly corresponds with the function numbers (Function X) displayed on the machine’s LCD.
- Page 24 ® Scan (Windows Select Start this program from Actions, and then select the scanning application you want to launch when you press the Scan button on your machine’s control panel. Click OK.
- Page 25 When you use Button Manager V2 application, you can syncronize the machine’s LCD and application’s function names by assigning Brother Button Manager to all the Button # in the Select an event drop-down list. For more information, see the Button Manager V2 User’s Guide.
-
Page 26: Scan A Document
Press a or b to select a Function. NOTE When Brother’s Button Manager is running on your computer, the machine’s LCD displays a Button Manager function number and name. For more information, see the Button Manager V2 User’s Guide. Function 1 1.Scan to File... -
Page 27: Scan Using Your Computer
If the DS Capture icon is not visible on your desktop, click Start > All Programs > Brother PDS-XXXX Scanner (where XXXX is your model name) > DS Capture. The Select Scanner Model dialog box appears. Under Scanner Model, select your PDS scanner model, and then click OK. - Page 28 ® Scan (Windows DS Capture launches. Click Setup to change the scan settings, if needed. For more information on changing settings, see Change scan settings using the TWAIN driver on page 24. Set your document in the ADF. Click Scan .
-
Page 29: Change Scan Settings Using The Twain Driver
® Scan (Windows Change scan settings using the TWAIN driver The TWAIN driver provides various settings and useful functions that you can use when scanning, as listed in the overview table below. In this guide, we use the DS Capture application in our examples. Instructions for other scanning software will be similar. -
Page 30: Ds Capture Home Screen
® Scan (Windows DS Capture home screen (6)(7) Name Description Default Fast scan mode / Switch the scan mode if needed. Fast scan mode Fast display mode Fast scan mode (select from the File Fast scan mode gives priority to scanning speed. menu) Thumbnails are displayed after scanning is complete. - Page 31 ® Scan (Windows Name Description Default File Format Change the file format. JPEG Select the format you want from the drop-down list. NOTE To save multiple documents as one file, select Multi-page PDF (MPDF) or Multi-page TIFF (MTIFF) from the drop-down list. Path Specify the directory where you want to save scanned \My Documents\My Scan\...
-
Page 32: Scanner Properties Dialog Box
® Scan (Windows Scanner Properties dialog box Click Setup on the DS Capture home screen to display the Scanner Properties dialog box. Use the Scanner Properties tabs to configure the scanner’s settings. Name Description Tabs Image, Compression, Color Dropout, Paper, Multi-Feed Detection, Preview, Rotation, Enhancement, More Settings, Digital Imprinter, Information Defaults... -
Page 33: Image Tab
® Scan (Windows Image tab Click the Image tab to set basic scan settings, to assign values for the front or back of your document and to specify the image type. (10) (11) Name Description Default Image Selection check Select the check box(es) to specify the type of scan Front B&W boxes for the front (and back) of your document. - Page 34 ® Scan (Windows Image Selection check boxes Select the check boxes to customize the scan type. The Image Selection check box(es) are used to select the color mode with which the front or back of your document will be scanned. For example, to scan both the front and back of a color document page in color, select the Front Color and Back Color check boxes.
- Page 35 ® Scan (Windows Conversion Methods Description Error Diffusion Select Error Diffusion for a type of Halftone. Error Diffusion results in good image texture and makes text in images more legible than Halftone 1-5, above. Halftone Diffusion Document Type (Gray mode only) When you select Gray as the image type for your scanned document, you can choose from three document types.
- Page 36 ® Scan (Windows Sensitivity / Threshold Sensitivity (available when you select Dynamic Threshold or Auto Color Detection) Sensitivity of Dynamic Threshold: If your document contains small dots or speckles and you want to remove them, increase the sensitivity value by moving the bar to the right. Sensitivity of Auto Color Detection: If your document contains primarily black and white text with a small amount of light or pale color that you do not want to be recognized as color, reduce the sensitivity value by moving the bar to the left.
- Page 37 ® Scan (Windows 2 in 1 Use 2 in 1 to scan documents wider than Letter/A4 size. The machine scans both sides of the folded document, and merges the images onto a single page. • Merge Vertically check box Select this check box to align both sides horizontally.
-
Page 38: Color Profile
® Scan (Windows Click Add..., and then type the name of the profile you want to save. Click Save. The new profile will appear in the Profiles drop-down list. NOTE You can Delete, Rename, or Reset profile names in the Edit Your Profile dialog box. Color Profile Use the Color Profile settings to achieve accurate color reproduction for scans. -
Page 39: Compression Tab
® Scan (Windows Compression tab Click the Compression tab to adjust the scanned image size but maintain image quality. NOTE The Compression options available may differ depending on the scanning application you use. Name Description Default Compression Select a Compression mode. None JPEG Quality Change the JPEG quality. -
Page 40: Color Dropout Tab
® Scan (Windows Color Dropout tab Click the Color Dropout tab to remove the red, blue, or green color from your scanned image resulting in a gray or black and white document. Color Dropout is available only when you select Gray or B&W from the Image Selection group. -
Page 41: Custom Settings
® Scan (Windows When you select Custom from the Remove Color drop-down menu, the Color Dropout tab changes as follows: Name Description Default RGB values Display the RGB value for the color selected. Color palette Select the color you want to remove from a full color wheel. Remove Color Select one of the following from the Remove Color drop-down list: ... -
Page 42: Paper Tab
® Scan (Windows Paper tab Click the Paper tab to define values relating to image output and auto scan. Name Description Default Cropping Capture a portion of the document being scanned. Automatic (Deskew ON) Carrier Sheet Mode Select this check box if using the Carrier Sheet. (not selected) Scan Area / Page Size Select the paper size. - Page 43 ® Scan (Windows Cropping Cropping allows you to capture a portion of the document being scanned. Options include: Automatic (Deskew ON) This option automatically adjusts the cropping window according to document size. Use this option for batches of mixed-sized documents. NOTE •...
- Page 44 ® Scan (Windows Scan Area / Page Size This field name changes based on your selection in the Cropping drop-down list. Choose the paper size you want from the drop-down list. None US Legal - 8.5" × 14" US Letter - 8.5"...
- Page 45 ® Scan (Windows X-Offset / Y-Offset / Width / Length / Center When you select Fixed Area (Deskew OFF) from the Cropping drop-down list, you can adjust the scan area manually using the following values: X-Offset Adjust the distance from the left edge of the scanner to the left edge of the area in the document that you want to scan.
-
Page 46: Multi-Feed Detection Tab
® Scan (Windows Multi-Feed Detection tab Click the Multi-Feed Detection tab to detect pages that overlap when fed through the ADF. A multi-feed usually occurs due to stapled documents, adhesives on documents, or electrostatically charged documents. Name Description Default Additional Length Define the page length if it exceeds the scan area. - Page 47 ® Scan (Windows Ultrasonic Detection Ultrasonic Detection detects overlapping pages by measuring paper thickness. If you select this detection method, scanning stops immediately upon multi-feed detection and a Warning appears on your computer monitor. Display window This window displays a preview of the Additional Length Detection value. Select Stop Scanning after Multi-Feed check box to stop the ADF, stop scanning immediately, and display a Warning on your computer monitor when a multi-feed is detected.
-
Page 48: Preview Tab
® Scan (Windows Preview tab Click the Preview tab to preview your image (at a low resolution) before your final scan. This preview image is useful for determining your scan area and checking your color processing results. Name Description Default Scan Area Select the paper size. - Page 49 ® Scan (Windows NOTE Scan Area, Portrait / Landscape, Display window, X-Offset / Y-Offset / Width / Length and Unit are disabled under the following settings: • When Cropping is set to Automatic (Deskew ON) in the Paper tab (see Paper tab on page 37). •...
-
Page 50: Display Window
® Scan (Windows Scan Area Choose the paper size you want from the drop-down list. None US Legal - 8.5" × 14" US Letter - 8.5" × 11" Photo 6" × 4" Photo 5" × 3" ... - Page 51 ® Scan (Windows X-Offset / Y-Offset / Width / Length You can adjust the scan area manually using the following values: X-Offset Adjust the distance from the left edge of the scanner to the left edge of the area in the document that you want to scan.
-
Page 52: Rotation Tab
® Scan (Windows Rotation tab Click the Rotation tab to change values related to image rotation. Name Description Default Rotation Degrees Rotate the scanned image. None Split Image Separate the scanned image. None Flip Side Rotation Change the orientation of the reverse side of the output Book page. - Page 53 ® Scan (Windows Split Image When you split an image, the scanner creates two separate images aligned either horizontally or vertically. This is useful for documents containing an image that spans two pages, because you can save both images as a single image on a single page. ...
-
Page 54: Enhancement Tab
® Scan (Windows Enhancement tab Click the Enhancement tab to improve the appearance of your scanned image. Name Description Default Punch Hole Removal Remove punch hole markings. (not selected) Background Setting Remove or smooth the background color. None Edge Fill Add a white or black edge around the border. - Page 55 ® Scan (Windows Punch Hole Removal Select the Punch Hole Removal check box to remove punch hole markings on scanned images. This feature removes the punch hole markings by filling hole marks with the surrounding color. Original Punch Hole Removal NOTE Punch Hole Removal is not available when Automatic Cropping is disabled.
- Page 56 ® Scan (Windows Edge Fill Select White or Black and set a value (in Millimeters) to add a white or black edge around the border of your scanned image. Select the Edge Extend check box to add a white or black edge outside the border of your scanned image. NOTE •...
- Page 57 ® Scan (Windows Despeckle This function allows you to remove small dots or specks called “noise,” from the background of scanned images. Removing unwanted speckles provides a clear image for OCR processing, and helps to reduce compressed file size. Define the noise you want to remove by specifying Noise Number (size) and Noise Radius (range). Before Despeckle After Despeckle (Noise Number: 0, Noise Radius: 1)
-
Page 58: More Settings Tab
® Scan (Windows More Settings tab Click the More Settings tab to configure additional scanning options. Name Description Default Cache Assign a specified amount of memory from the available Memory Size RAM to process the image data. Energy Saving Change settings related to energy saving. Energy Saver: 15 minutes Control Power Off: 240 minutes... - Page 59 ® Scan (Windows Cache This option allows you to assign a specified amount of memory from the available RAM to process the image data. By specifying a smaller memory size, you free more memory for other applications you are running. By specifying a larger memory size, you have more memory to process the image data, which is useful especially when you have a large amount of documents to scan.
-
Page 60: Digital Imprinter Tab
® Scan (Windows Digital Imprinter tab Click the Digital Imprinter tab to print the date, time, document count, or a custom messages on your scanned image. (10) (11) Name Description Default Digital Imprinter Select to activate this feature. (not selected) Print All Print on every page of the scanned image. -
Page 61: Font Attributes
® Scan (Windows Digital Imprinter Select the Digital Imprinter check box to use the digital imprinter to print custom text on your scanned image. Print All Select the Print All check box to print the text on every page of the scanned image. Clear the check box to print the text only on the first page of the scanned image. - Page 62 ® Scan (Windows String Orientation Select Normal, Rotated, Vertical, Vertical Inversion, 90 Degrees CW, or 90 Degrees CCW from the String Orientation drop-down list to specify the text’s print direction. Normal Rotated Vertical Vertical Inversion 90 Degrees CW 90 Degrees CCW Print Position Select Top, Middle, Bottom, or Custom from the Position drop-down list.
- Page 63 ® Scan (Windows More Click the More button to select additional font properties. Size Move the slider to select font size (Default: 5). Density Move the slider to select font density (Default: 0). Transparency Move the slider to select a transparency value from 0% (not transparent) to 100% (completely transparent). This is useful if you want a partially transparent watermark.
-
Page 64: Information Tab
® Scan (Windows Information tab Click the Information tab to display system and scanner information, such as scanner driver version and firmware version. You can also view the Roller count and reset the count in this window. Name Description Default Reset Roller Reset the roller count. -
Page 65: Scan Using The Isis Driver
If you are working with an ISIS driver, you may want to use the scanning application QuickScan Pro, which is an optional installation on Brother’s installation DVD. To install, select QuickScan Pro from the Additional Applications screen on Brother’s installation DVD. Using QuickScan Pro is different from DS Capture because the compact interface of QuickScan Pro resembles the TWAIN interface. -
Page 66: Scan (Macintosh)
Scan (Macintosh) Scan using the control panel Customize the Scan button on your Brother machine’s control panel to scan using your preferred scanning software. Assign a profile to the Scan button Confirm that the machine is connected to your computer via a USB cable. -
Page 67: Scan Using Your Computer
Scan (Macintosh) Scan using your computer To scan using your computer, launch a TWAIN-compatible application on your computer, such as DS Capture ® ® or Adobe PhotoShop . This guide uses DS Capture as an example. Scan with DS Capture Confirm that the machine is connected to your computer via a USB cable. -
Page 68: Change Scan Settings Using The Twain Driver
Scan (Macintosh) Change scan settings using the TWAIN driver The TWAIN driver provides various settings and useful functions that you can use when scanning, as listed in the overview table below. In this guide, we use the DS Capture application in our examples. Instructions for other scanning software will be similar. -
Page 69: Ds Capture Screen Overview
Scan (Macintosh) DS Capture screen overview Launch the TWAIN user interface using your scanning software. This guide uses the DS Capture user interface to explain the TWAIN user interface. Click the tab menus to configure the scanner’s settings. Name Description Tabs Profile, Image, File, Color Dropout, Paper, Rotation, Enhancement, Setting, Imprinter, Information... -
Page 70: Profile Tab
Scan (Macintosh) Profile tab Click the Profile tab to assign specific scan profiles to specific buttons on the scanner’s control panel. Name Description Default Profile View all scan profiles saved in DS Capture. Duplex, B&W, PDF Click on a Profile to view its settings in the Duplex, Color, JPEG Description field. -
Page 71: Image Tab
Scan (Macintosh) Image tab Click the Image tab to set basic scan settings, to assign values for the front or back of your document and to specify the image type. (10) (11) (12) Name Description Default Image Selection check Select the check box(es) to specify the type of scan for the Front B&W boxes front (and back) of your document. - Page 72 Scan (Macintosh) Image Selection check boxes Select the check boxes to customize the scan type. We added this sentence to clarify the difference between Image Selection check boxes and Image Selection group. For example, to scan both the front and back of a color document page in color, select the Front Color and Back Color check boxes.
- Page 73 Scan (Macintosh) Conversion Methods Description Error Diffusion Select Error Diffusion for a type of Halftone. Error Diffusion results in good image texture and makes text in images more legible than Halftone 1-5, above. Halftone Diffusion Document Type (Gray mode only) When you select Gray as the image type for your scanned document, you can choose from three document types.
- Page 74 Scan (Macintosh) Sensitivity / Threshold Sensitivity (available when you select Dynamic Threshold) If your document contains small dots or speckles and you want to remove them, increase the sensitivity value by moving the bar to the right. Threshold (available when you select Fixed Processing or Document) A low threshold value produces a lighter image, and can be used to subdue backgrounds and unneeded information.
- Page 75 Scan (Macintosh) 2 in 1 Use 2 in 1 to scan documents wider than Letter/A4 size. The machine scans both sides of the folded document, and merges the images onto a single page. • Merge Vertically check box Select this check box to align both sides horizontally. Clear this check box to align both sides vertically.
- Page 76 Scan (Macintosh) Profile Click Profile to save your frequently used scan settings. To create a scan profile: Choose your scan settings using any of the tabs. When finished, click the Image tab, and then click the button on the right of the Profile field. The Add A New Profile dialog box appears.
-
Page 77: File Tab
Scan (Macintosh) File tab Click the File tab to set the directory path, file name and file format of your scanned images. Name Description Default Directory Specify where you want to save scanned images. /Users/xxx/Documents (where xxx is your user name) File Name options Specify the default file name of scanned images. - Page 78 Scan (Macintosh) When file names are identical Choose an automatic action for the scanning software to execute if file names are duplicated in your default directory. Increase sequence number Increase the sequence number of the new scanned image file, and save both new and old files. ...
-
Page 79: Color Dropout Tab
Scan (Macintosh) Color Dropout tab Click the Color Dropout tab to remove the red, blue, or green color from your scanned image. If your image contains a red watermark or background, choose the Red channel to remove any red watermark or background color. - Page 80 Scan (Macintosh) Advanced Processing Select the Advanced Processing check box to adjust details that can optimize your scan result. Mode Select Quality to configure detailed settings for the filter threshold value. Mode is available only when Remove Red, Remove Green, Remove Blue, or Automatic is selected in the Remove Color drop-down list.
-
Page 81: Paper Tab
Scan (Macintosh) Paper tab Click the Paper tab to define values relating to image output, overlapping pages, and auto scan. Name Description Default Page Size Capture a portion of the document being scanned. Automatic When you select Automatic, scanned images are automatically deskewed if the images are crooked. - Page 82 Scan (Macintosh) Page ize Choose the paper size you want from the pop-up list. Automatic US Legal - 8.5" × 14" US Letter - 8.5" × 11" Photo 6" × 4" Photo 5" × 3" ISO A4 - 210 ×...
- Page 83 Scan (Macintosh) X-Offset / Y-Offset / Width / Length You can adjust the scan area manually using the following values: X-Offset Adjust the distance from the left edge of the scanner to the left edge of the area in the document that you want to scan.
-
Page 84: Rotation Tab
Scan (Macintosh) Rotation tab Click the Rotation tab to set specifications related to image rotation. Name Description Default Rotation Degrees Rotate the scanned image. None Split Image Separate the scanned image. None Mirror Reverse the right and left sides of your image. (not selected) Rotation Degrees To rotate the scanned image, select the rotation angle from the pop-up list:... - Page 85 Scan (Macintosh) Split Image When you split an image, the scanner creates two separate images aligned either horizontally or vertically. This is useful for documents containing an image that spans two pages, because you can save both images as a single image on a single page. ...
-
Page 86: Enhancement Tab
Scan (Macintosh) Enhancement tab Click the Enhancement tab to improve the appearance of your scanned image. Name Description Default Punch Hole Removal Remove punch hole markings. (not selected) Background Setting Remove or smoothen the background color. None Edge Fill Add a white or black edge around the border. White Millimeters: 0 Despeckle... - Page 87 Scan (Macintosh) Punch Hole Removal Select the Punch Hole Removal check box to remove punch hole markings on scanned images. This feature removes the punch hole markings by filling hole marks with the surrounding color. Original Punch Hole Removal NOTE Punch Hole Removal is available when the paper size is set to Automatic.
- Page 88 Scan (Macintosh) Edge Fill Select White or Black and set a value (in millimeters) to add a white or black edge around the border of your scanned image. NOTE • The maximum edge fill the value of the shorter side of a selected paper size. For example, if you select a Letter size, which is 8.5 ×...
- Page 89 Scan (Macintosh) Blank Page Removal Threshold Select the Blank Page Removal check box to remove blank pages from your scanned image. Move the slider to change the threshold, or level of pixels, that determines a blank page. Barcode Detection Select the Barcode Detection check box to split multi-page scanned files whenever a barcode is detected. ...
-
Page 90: Setting Tab
Scan (Macintosh) Setting tab Click the Setting tab to configure additional scanning options. Name Description Default Image Count Specify the number of pages to scan. Infinite Energy Saver controls Change settings related to saving energy. Enable Energy Saver: 15 minutes Power Off Time: 240 minutes Image Count This option allows you to specify the number of pages to scan. -
Page 91: Imprinter Tab
Scan (Macintosh) Imprinter tab Click the Imprinter tab to print the date, time, document count, or a custom messages on your scanned image. (2) ~ (6) (10) (11) Name Description Default Digital Imprinter Select to activate this feature. (not selected) Print All Print on every page of the scanned image. - Page 92 Scan (Macintosh) Digital Imprinter Select the Digital Imprinter check box to use the digital imprinter to print custom text on your scanned image. Print All Select the Print All check box to print the text on every page of the scanned image. Clear the check box to print the text only on the first page of the scanned image.
- Page 93 Scan (Macintosh) String Orientation Select Normal, Rotated, Vertical, Vertical Inversion, 90 Degrees CW (clockwise), or 90 Degrees CCW (counter-clockwise), from the String Orientation pop-up list to specify the text’s print direction. Normal Rotated Vertical Vertical Inversion 90 Degrees CW 90 Degrees CCW Print Position Select Top, Middle, Bottom, or Custom from the Print Position pop-up list.
- Page 94 Scan (Macintosh) More Click the More button to select additional font properties. Size Move the slider to select font size (Default: 5). Density Move the slider to select font density (Default: 0). Transparency Move the slider to select a transparency value from 0% (not transparent) to 100% (completely transparent). This is useful if you want a partially transparent watermark.
-
Page 95: Information Tab
Scan (Macintosh) Information tab Click the Information tab to display system and scanner information, such as scanner driver version and firmware version. You can also view the Roller count and reset the count in this window. Name Description Default Reset Roller Count Reset the roller count. -
Page 96: Scanner Maintenance
Scanner Maintenance IMPORTANT Do not use any solvents or corrosive liquids, such as alcohol or kerosene, to clean any part of the scanner, or the plastic may be permanently damaged. Clean the outside of your scanner To prevent dust accumulation, we recommend cleaning the exterior of your scanner periodically. Wipe the outside of the scanner with a dry, soft, lint-free cloth. -
Page 97: Clean The Inside Of Your Scanner
Scanner Maintenance Clean the inside of your scanner A spot of dirt or correction fluid on the glass strip may cause poor-quality scans. Clean the inside of the scanner if a vertical line appears in the scanned data, or if areas are missing in the scanned data. Unplug the machine from the AC power outlet. - Page 98 Scanner Maintenance Press and hold the buttons (1) on the inside of the ADF Cover and then pull the Reverse Roller Cover (2) down. Pinch the Reverse Roller and pull it out of the machine. Clean the Reverse Roller with a soft lint-free cloth moistened with water. Pinch the Reverse Roller and reinstall it in the machine.
- Page 99 Scanner Maintenance Pinch the Pick-up Roller and pull it out of the machine. Pull the blue hook on the Separation Roller down. Pinch the Separation Roller and pull it out of the machine.
- Page 100 Scanner Maintenance Clean the Pick-up Roller and the Separation Roller with a soft lint-free cloth moistened with water. Pinch the Separation Roller and reinstall it in the machine. Lift the blue hook that you pulled down in the step Pinch the Pick-up Roller and reinstall it in the machine. Close the Roller Cover (1).
- Page 101 Scanner Maintenance NOTE In addition to cleaning the glass strips with a non-flammable glass cleaner, run your fingertip over the glass to see if you can feel anything on it. If you feel dirt or debris, clean the glass again concentrating on that area.
-
Page 102: Replace Parts
Scanner Maintenance Replace parts A warning message appears on your computer monitor when your scanner detects that scanner parts are nearing their end-of-life period. This section outlines the steps to follow when a warning appears. If the warning message warns you to replace the Pick-up Roller, the Separation Roller, or the Reverse Roller, order parts and then replace the used parts with new ones. - Page 103 Scanner Maintenance These parts are available at most Brother retailers. If you cannot find the part you need, you can order parts directly from Brother. Visit us online for a complete selection of the Brother parts and supplies. In USA:...
-
Page 104: Check Replacement Cycle
Scanner Maintenance Check replacement cycle Your Brother machine is equipped with a scan counter, which automatically counts how many pages the machine scans. To check the scan count, follow these steps: ® For Windows Launch DS Capture. Click (Setup), and then click the Information tab. - Page 105 Scanner Maintenance Press and hold the buttons (1) on the inside of the ADF Cover and then pull the Reverse Roller Cover (2) down. Pinch the Reverse Roller and pull it out of the machine. Remove the old Reverse Roller from the shaft and insert the new Reverse Roller all the way onto the shaft.
- Page 106 Scanner Maintenance Pinch the new Reverse Roller and reinstall it in the machine. Securely close the Reverse Roller Cover until the hooks snap into the ADF Cover. Slide the document guides as far apart as possible and pull the Roller Cover (1) down. Pinch the Pick-up Roller and pull it out of the machine.
- Page 107 Scanner Maintenance Pinch the Separation Roller and pull it out of the machine. Pinch a new Separation Roller and reinstall it in the machine. Lift the blue hook that you pulled down in the step Pinch a new Pick-up Roller and reinstall it in the machine. Close the Roller Cover (1).
-
Page 108: Reset The Usage Counters
Scanner Maintenance Close the ADF Cover and the Top Cover. Reset the counter (see Reset the usage counters on page 103). Reset the usage counters After you have replaced scanner parts, reset the usage counter. ® For Windows Launch DS Capture. Click (Setup), and then click the Information tab. -
Page 109: Packing And Shipping The Machine
Scanner Maintenance Packing and shipping the machine When you transport the machine, use the packing materials that came with your machine. If you do not pack the machine properly, any damage that may occur in transit may not be covered by your warranty. The machine should be adequately insured with the carrier. - Page 110 NOTE If you are returning your machine to Brother as part of the Exchange Service, pack only the machine. Keep all separate parts (power cord and USB cable) and printed materials to use with your “Exchange” machine. Close the carton and tape it shut.
-
Page 111: Troubleshooting
If you think there is a problem with your scanner, check the chart below and follow the suggestions. You can correct most problems yourself. If you need additional help, visit the Brother Solutions Center at http://support.brother.com, click FAQs & Troubleshooting, and then navigate to your Model Name. - Page 112 Make sure your document is suitable the machine. for the machine (see Document Information on page 5). A hardware error has occurred. Contact Brother Customer Service. DRAM R/W test error For more information, see For AFE R/W test error customer service on page 123.
- Page 113 Multifeed is detected. Documents are multifed. Remove the remaining document from the ADF, set it carefully in the ADF, then start scanning again. Unknown error. Contact Brother customer service or your local Brother dealer. See For customer service on page 123.
-
Page 114: Document Jam
Troubleshooting Document jam Pages can jam in the ADF if they are not inserted or fed correctly, or if they are too long. Follow the steps below to clear a document jam. Remove any paper from the ADF that is not jammed. Open the ADF Cover by pulling the Cover Release Lever (1) toward you. - Page 115 Troubleshooting IMPORTANT • To avoid damage to the jammed document, DO NOT pull the document out before opening the ADF Cover. • Remove any paper from the ADF before closing the ADF Cover. • To avoid future document jams, do the following: •...
-
Page 116: Multi-Feed
Troubleshooting Multi-feed A multi-feed error means that multiple pages were fed at the same time. To clear the multi-feed: Remove any paper from the ADF. Open the ADF Cover by pulling the Cover Release Lever (1) toward you. Pull the multifed pages out of the machine. Close the ADF Cover. - Page 117 Troubleshooting IMPORTANT • Remove any paper from the ADF before closing the ADF Cover. • To avoid future multi-feeds, do the following: • Disable the multi-feed detection when scanning business cards. • Select the Carrier Sheet Mode check box under the Paper tab when scanning using the Carrier Sheet.
-
Page 118: Troubleshooting
Cause Suggestions TWAIN or WIA errors The TWAIN or WIA driver was not Make sure the Brother TWAIN or WIA driver is appear when starting chosen as the primary source in your chosen as the primary source in your scanning ®... - Page 119 USB cable from your scanner. Contact Brother customer service or your local Brother dealer. See For customer service on page 123. The scan quality is Paper dust has accumulated inside Clean your scanner (see Scanner Maintenance on poor.
- Page 120 Troubleshooting Difficulty Cause Suggestions Colors in the scanned The settings are not appropriate for the Adjust the scan settings. image are dark. type of document being scanned. ® For Windows : see Image tab on page 28. For Macintosh: see Image tab on page 66. A page that is not a The document is too light, or Blank Set Blank Page Removal to Off.
-
Page 121: Software Difficulties
Cannot find If the error still appears after verifying that the the scanner or USB cable is connected correctly, reinstall the Operation system scanner driver from Brother’s installation DVD. error. ® I cannot install the You may not have been given Log into Windows with administrator rights. -
Page 122: Specifications
Appendix A Specifications General PDS-5000 PDS-6000 Memory Capacity Standard 512 MB Power Source 100 - 240 V AC 50/60 Hz 24 V DC 2 A LCD (Liquid Crystal Display) 16 characters × 2 lines Power Consumption Scanning Approx. 59.0 W Ready Approx. - Page 123 Appendix A PDS-5000 PDS-6000 Dimensions 187 mm 316 mm 183 mm 316 mm 187 mm 711 mm 251 mm Weight Approx. 4.7 kg 5 to 35 °C Temperature Operating Humidity Operating 20 to 80 % Storage 10 to 90 %...
-
Page 124: Scanner
XP in this User’s Guide includes Windows XP Home Edition and Windows XP Professional. For the latest driver updates for the Mac OS X version you are using, visit us at http://support.brother.com Actual speed may be slower, depending on your computer specifications and scan settings. -
Page 125: Interfaces
Appendix A Interfaces 1, 2 Super Speed USB 3.0 Use a USB 3.0 cable (Type B) that is no more than 5.9 feet (1.8 meters) long. Your scanner has a Hi-Speed USB 3.0/USB 2.0/USB 1.1/USB 1.0 interface. The scanner can also be connected to a computer that has a USB 2.0/USB 1.1/USB 1.0 interface. -
Page 126: Computer Requirements
4 GB System ® OS X 10.10.x Intel Processor 2 GB 4 GB For the latest driver updates, visit http://support.brother.com, navigate to your product’s page, and click Downloads. All trademarks, brand and product names are property of their respective companies. -
Page 127: Contact Brother
Frequently Asked Questions (FAQs) The Brother Solutions Center is our one-stop resource for all your Brother machine needs. You can download the latest software documents and utilities, read FAQs and troubleshooting tips, and learn how to get the most from your Brother product. -
Page 128: For Customer Service
For customer service In USA: http://www.brother-usa.com/service/ 1-877-BROTHER (1-877-276-8437) 1-901-379-1215 (fax) For the location of a Brother authorized service center, call 1-877-BROTHER (1-877-276-8437). In Canada: www.brother.ca/support (Self-Service, Videos, Email, Chat, Facebook and Twitter Help) If you have comments or suggestions, please write us at:... -
Page 129: Technical Support (For
Appendix B Technical support (for PageManager) For USA Company name: NewSoft America Inc. Postal Address: 47102 Mission Falls Court, Suite 202 Fremont CA 94539 Telephone: 510-770-8900 Fax: 510-770-8980 E-mail Address: contactus@newsoftinc.com URL: http://www.newsoftinc.com For Canada E-mail Address: contactus@newsoftinc.com Other countries E-mail Address: tech@newsoft.eu.com NOTE...