Table of Contents
Advertisement
Available languages
Available languages
Do not subject the device to severe impact or drop it from heights.
Do not use the device in extreme hot or cold, dusty or damp conditions. Do not
expose it to direct sunlight.
Avoid using the device near strong magnetic fields.
Normal functioning of the product may be disturbed by ESD. If so, simply reset
and restart the device following the instruction manual. During file transmission,
please handle with care and operate in a static-free environment.
Keep the device away from water and other liquids. In the event that water or
other liquids enter the device, power off the product immediately and clean the
device.
Do not use chemicals to clean the device in order to avoid corrosion. Clean it
with a dry cloth.
Do not install this equipment in a confined space such as a book case or similar
unit. The ventilation should not be impeded by covering the ventilation openings
with items such as newspaper, table-cloths, curtains etc.
No naked flame sources, such as lighted candles, should be placed on the
apparatus.
Attention should be drawn to environmental aspects of battery disposal.
Use the apparatus in moderate climates.
We are not responsible for damage or lost data caused by malfunction, misuse,
modification of the device or battery replacement.
Do not attempt to disassemble, repair or modify the product. This will invalidate
the warranty.
If the device will not be used for an extended period of time, please charge the
battery at least once per month to maintain battery life.
Charge the battery if:
a) The battery level icon displays
b) The device powers off automatically when restarted.
c) There is no response when pressing keys with keys unlocked and battery full.
Do not interrupt the connection when the device is being formatted or
transferring files. Otherwise, data may be corrupted or lost.
When the device is used as a portable HD, please use only per the instructions.
Otherwise, permanent data loss could occur.
Please use and install data using the attachments/accessories provided and only
according to the manufacturer's instruction.
Please refer to the information on the bottom of the device for electrical and
safety information before installing data or operating the device.
To reduce the risk of fire or electric shock, do not expose this device to rain or
moisture. The device should not be exposed to dripping or splashing. Never
place objects filled with liquids, such as vases, on the device.
There is danger of explosion if the battery is replaced incorrectly. Replace only
with the same or equivalent type.
Safety Precautions
1
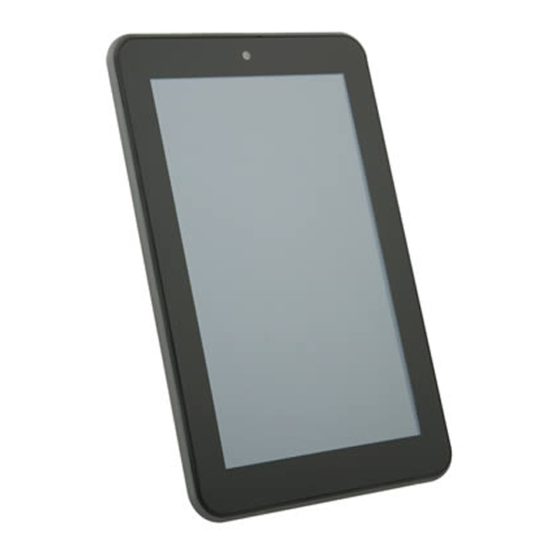
MODEL: NX007HD-8G
(An empty battery)
Advertisement
Chapters
Table of Contents

Related Manuals for Nextbook NX007HD-8G


Summary of Contents for Nextbook NX007HD-8G
- Page 1 MODEL: NX007HD-8G Safety Precautions Do not subject the device to severe impact or drop it from heights. Do not use the device in extreme hot or cold, dusty or damp conditions. Do not expose it to direct sunlight.
- Page 2 The battery (battery or batteries or battery pack) should not be exposed to excessive heat such as sunlight, fire or the like. Please follow responsible procedures for battery disposal. If the power adaptor disconnected from the device, the device will remain ...
-
Page 3: Listening Cautions
Listening Cautions This product respects the current regulations for limiting the output volume of consumer audio devices to a safe level. By listening to your device with headphones or earbuds at high volumes, you run the risk of permanent damage to your ears. -
Page 4: Table Of Contents
Table of Content Safety Precautions ....................1 Listening Cautions ....................3 Feature Summary ....................5 Accessories ......................5 Buttons & Ports ......................5 Charging Battery ...................... 6 Transferring Files from Computer ................6 Turning On the Unit ....................6 Home Screen ......................7 Unlocking the Screen .................... -
Page 5: Feature Summary
Feature Summary Wi-Fi Connectivity With the latest Wi-Fi technology, this device can connect you to the Internet wherever you are. 7.0” Touch Screen Touch or slide your finger on the screen, the screen responds instantly. Third-party Application Support With the built-in Android OS, you can install a large number of third-party applications in this device. -
Page 6: Charging Battery
Charging Battery The device has a built-in rechargeable battery. No extra battery installation is required. Just charge the device when it indicates low battery. To charge the battery, connect the device to any standard wall outlet via the DC-IN port using the power adaptor. It takes about hours to fully charge the battery. -
Page 7: Home Screen
Home Screen Go to Google Go to Search page application page WiFi Tap the circled is on area to display Time Return settings Go to Home Recently used Battery level screen applications The extended Home Screen Slide your finger horizontally on the screen to go to the left or right panel of the extended Home Screen. -
Page 8: Unlocking The Screen
Changing the wallpaper Hold your tap on the Home screen until a menu appear. Tap on “Wallpaper” and then choose a picture as the desktop wallpaper. Preset Applications The device has many useful applications pre-installed. You can tap the Application to display them. -
Page 9: Accessing Internet
Hold finger: In some browsers (File, Music, Video, Photo, Web etc.), you may hold your finger on an item to display options. Pinch finger: You can zoom the page by pinching your finger. Accessing Internet This device features built-in Wi-Fi technology so that you can access the internet over Wi-Fi network. -
Page 10: Reading E-Books
Launching the Web browser To launch the Web browser, you tap the Browser icon in the Applications screen. To display menus, tap To enter a new address, tap the address bar and then type in address. Note: Not all wireless networks offer access to the Internet. Some Wi-Fi networks only link several computers together, without any Internet connection. - Page 11 3. Slide your finger left and right on the book shelf to browse e-books and then tap an e-book to start reading immediately. 4. When you are reading a page, you can tap to display a menu and then choose “ ”...
-
Page 12: Playing Music
Tap to display e-book setting menu. Tap “ ” to display the table of content. Tap “ ” and then “New bookmark” to insert a bookmark on the current page. To delete a bookmark, hold your finger on the bookmark list until a menu pops up, and then select “delete bookmark”... -
Page 13: Music Library
Music Library You should enter the music library once you start the music player. The Music Library shows your music files sorted by categories (Artist, Album, etc.) if your music files contain these song information tags. If some of your music files do not contain information tags, they will be classified as (Unknown) in the Music Library. -
Page 14: Playing Video
Library– return to music library menu. Party Shuffle – select Party Shuffle mode Add to playlist – add a song to the playlist. Delete – delete a song. Sound Effects – Set the sound effects for the music playback. Playlist The playlist is a list of songs that you have added manually. -
Page 15: Viewing Photos
Delete Bookmark Delete bookmark and play from beginning. Play from beginning Delete Bookmark Delete the video bookmark. Single – plays the current video and then stops after playing. Play Mode Repeat One – Repeat the current video. Repeat All – Repeat all videos. Help Get instructions on playing video. -
Page 16: Using The Camcorder/Camera
Display Menu When you are viewing the picture, you can tap on the screen or the Menu icon show a menu. Using the Camcorder/Camera Tap the Camera in the application page to launch the Camera. Viewfinder Zoom Start/Stop Settings VCR mode Photography mode To start making video clips, tap on the Start/Stop button to start video... - Page 17 Home Screen, tap the Applications shortcut to display all applications and then tap the Explorer icon or ASTRO to enter the file explorer mode. Using the FileBrowser Navigate through Files and Folders You can drag your finger up and down to scroll ...
- Page 18 Select Multiple Items You can select more than one file or folder together. Tap “ ” to enter the file selection mode. In the file list, tap multiple files to select them. Using the ASTRO Navigate through Files and Folders ...
-
Page 19: Sending/Receiving E-Mails
select multiple items by tapping. To deselect the item(s), tap the Cancel icon (3) Select “Copy” or “Move” from the pop-up menu. (4) Navigate to the location where you wish to copy or move the file/folder to. (5) Select the Edit icon from the toolbar and then choose “Paste.”... -
Page 20: Manage Accounts
the service provider, network administrator or the Internet. (6) Choose the server type for outgoing emails, and input required server information. (7) Click “Next” to continue. Your tablet will check the server settings. When it prompts you that “Your account is set up, and email is on its way”, your account is set up successfully. -
Page 21: Hdmi Output
Email Menu Items In the email list, tap on the Menu icon to display the menu. Refresh Refresh the emails. Compose Compose a new email. Folders Go back to email box. Accounts View all email accounts. Account Settings Check your account settings. HDMI Output The device features a HDMI interface with which you can connect the device to digital televisions. -
Page 22: Close Recent Applications
Install Applications You can install applications manually following these steps: (1) Download the installation file directly from the built-in application library (e.g. SlideMe) or Internet. Make sure the file is in format of .apk which is supported by your Internet Tablet system. (2) Copy the installation file to your Internet Tablet by USB connection. -
Page 23: Troubleshooting
many tasks are running. In order to save system memory and enhance system performance, you can end some tasks that you don’t use at the moment. (1) Tap “Task Killer” application. (2) Tap the task that you want to end. (3) Tap “KILL selected apps”... -
Page 24: Fcc Statement
File Format AVI, 3GP, MP4, RM, RMVB, FLV, MKV, MOV, MPG, VOB, DAT 1920*1088pixels/30FPS (Max) AVI(MPEG4,XVID,DIVX3/4/ 5/6, MS MPEG4 V3) Audio Codec:MP2/MP3/AC3/AAC/PCM MPEG4,XVID,DIVX3/4/5/6: 3GP/MP4(H.264,H.263,MP 1920*1080pixels/30FPS (Max.) EG4,XVID,DIVX3/4/5/6, MS H.264: 1920*1080pixels/30FPS (Max) MPEG4 V3) Audio Codec: MP2/MP3/AC3/AAC/PCM 1920*1080pixels/30FPS (Max) RM/RMVB(Real video 8/9) Audio Codec: Cook/AAC 1920*1080pixels/30FPS (Max) FLV(Sorenson Spark) - Page 25 Increase the separation between the equipment and receiver. Connect the equipment into an outlet on a circuit different from that to which the receiver is connected. Consult the dealer or an experienced radio/TV technician for help. Caution: Any changes or modifications to this device not explicitly approved by manufacturer could void your authority to operate this equipment.
- Page 26 Other names of systems and products mentioned in these instructions are usually the registered trademarks or trademarks of the manufacturers who developed the system or product concerned. ™ ® marks are not used to identify registered trademarks and trademarks in these instructions.
- Page 27 Mesures de sécurité Ce produit est conforme aux normes actuelles limitant a un niveau sécuritaire le volume d’émission audio d’appareils destines a la consommation. En vous servant d’écouteurs ou d’oreillettes pour écouter votre appareil, vous courez le risque d’endommager votre ouïe. Même si vous devenez habitue d’écouter a volume élevé...
- Page 28 b) L’appareil se met automatiquement hors tension lorsqu’il est redémarré. c) Si le fait d’appuyer sur les touches alors qu’elles sont déverrouillées ne donne aucun résultat et que la batterie est complètement chargée. Lorsque l'appareil est en cours de formatage ou que le transfert de fichiers est ...
- Page 29 humaine provenant de l’élimination non contrôlée des déchets, recyclez l’appareil de manière responsable afin de promouvoir la réutilisation rationnelle des ressources matérielles. Pour éliminer votre appareil usagé, veuillez utiliser les systèmes de retour et de cueillette disponibles dans votre région ou contacter le détaillant chez qui vous avez acheté le produit. Il peut prendre ce produit pour le recycler de façon sûre et respectueuse de l’environnement.
- Page 30 Tables des matières Sommaire des caractéristiques ........................ 5 Boutons et ports ............................5 Chargement de la batterie ......................... 6 Transfert de fichiers ........................... 6 Mise sous tension / hors tension ......................6 Écran d’accueil ............................7 Déverrouillage de l’écran ........................... 9 Conseils pour l'écran tactile ........................
-
Page 31: Sommaire Des Caractéristiques
Divertissement Vous pouvez apprécier de la musique, des films, des photos et des e-livres avec le Mobile NextBook. Lecteur de documents Office Avec le lecteur OfficeSuite intégré, vous pouvez lire des documents en format Word, Excel, PPT etc. -
Page 32: Chargement De La Batterie
Chargement de la batterie Cet appareil est équipé d’une batterie rechargeable intégrée. Aucune installation additionnelle n’est requise pour la batterie. Chargez simplement l’appareil lorsque la batterie est faible. Pour charger la batterie, connectez l’appareil à une prise de courant murale standard via le port «... -
Page 33: Écran D'accueil
Un assistant de démarrage devrait se lancer lorsque l'appareil se met en marche. Veuillez suivre l'assistant pour configurer la région où vous êtes – États-Unis ou Canada. La prochaine fois que vous lancez l'Assistant de démarrage manuellement, vous pouvez appuyer sur «Réglages» «À propos de la tablette» «Assistant de démarrage», puis redémarrez l'appareil. - Page 34 Écran d'accueil étendu Faites glisser votre doigt horizontalement sur l'écran pour aller ay panneau de gauche ou de droite de l'écran d'accueil étendu. Ajouter un élément Pour ajouter un élément à l'écran d'accueil (raccourcis, widgets, dossiers etc.), appuyez Maintenez pour afficher les applications puis maintenez l'élément enfonce et placez-le sur enfoncé...
-
Page 35: Déverrouillage De L'écran
Déverrouillage de l’écran L'écran sera verrouillé si l'appareil est inactif pendant quelques secondes. Vous pouvez déverrouiller l'écran en faisant glisser l'icône de verrouillage vers la droite avant de continuer à utiliser l'appareil. Conseils pour l'écran tactile Cliquer : Cliquer brièvement sur un élément permet d'ouvrir un fichier, une lien, une application ou une page. -
Page 36: Accéder À Internet
Accéder à Internet Votre NextBook est équipé de la technologie sans fil (Wi-Fi) intégrée afin que vous puissiez accéder à Internet sur un réseau sans fil (Wi-Fi). Vous devez d’abord configurer un réseau sans fil (Wi-Fi). Afin de permettre la procédure de configuration du réseau sans fil (Wi-Fi), vous devez vous trouver dans... -
Page 37: Lecture D'e-Books
Pour afficher les menus, appuyez sur Pour entrer une nouvelle adresse, appuyez sur la barre d'adresse puis tapez l'adresse. Remarque : Ce ne sont pas tous les réseaux sans fil qui offrent accès à Internet. Certains réseaux sans fil (Wi-Fi) ne font que connecter plusieurs ordinateurs ensemble sans aucune connexion Internet. - Page 38 3. Faites glisser votre doigt de gauche à droite sur l’étagère pour parcourir les e-books et puis tapez sur un e-book pour immédiatement commencer la lecture. 4. Lorsque vous lisez une page, vous pouvez taper sur pour afficher un menu et puis choisissez “...
- Page 39 Tapez sur pour afficher le menu de paramétrage d’e-book. Tapez sur “ ” pour afficher la table des matières. Tapez sur “ ” et puis sur “New bookmark” (Nouveau marque-page) pour insérer un marque-page sur la page courante. Pour supprimer un marque-page, laissez votre doigt sur la liste de marque-page jusqu’à...
-
Page 40: Faire Jouer De La Musique
Faire jouer de la musique Sur l’écran d’accueil, tapez sur l’icône Musique pour passer en mode lecteur de musique. Facultativement, vous pouvez taper sur le raccourci Applications pour afficher toutes les applications, puis tapez sur l’icône Musique pour passer en mode musique. -
Page 41: Faire Jouer Des Vidéos
Écran de rappel a. Aperçu des pistes dans la liste a b c b. Lecture aléatoire/continue c. Répétition /Non-répétition des pistes d. Afficher les paroles e. Nom de l’Artiste Couverture de l’album h i j g. Nom de l’album h. Retour/Piste précédente Lecture/Pause Prochaine piste/Avance rapide Menu de lecture... -
Page 42: Voir Des Photos
Lecture à l’écran a. Barre de progression b. Quitter c. Vidéo Précédente d. Retour rapide e. Lecture/Pause Avance rapide g. Vidéo suivante h. Paramétrages de Vidéo Remarque : Certains fichiers vidéo peuvent ne pas jouer correctement avec cet appareil. Référez-vous aux spécifications techniques à la fin du manuel et assurez-vous que la résolution vidéo, l’encodage ou le type de fichier est supporté(e). -
Page 43: Utilisation Du Caméscope / De L'appareil Photo
Pour afficher l'image précédente / suivante, faites glisser votre doigt horizontalement sur l'écran. Pour zoomer ou dézoomer l'image, touchez la photo avec votre doigt. Affichage du menu Lorsque vous affichez l'image, vous pouvez appuyer sur l'écran ou sur l'icône Menu pour afficher un menu. -
Page 44: Explorateur De Fichiers
Pour commencer à faire des clips vidéo, appuyez sur le bouton Marche / Arrêt pour lancer l'enregistrement vidéo. Appuyez de nouveau sur le bouton Marche / Arrêt pour arrêter l'enregistrement vidéo ou la photographie. Le clip vidéo / la photo peut être prévisualisé dans la fenêtre de ... - Page 45 Copier/Déplacer Fichiers et Dossiers Tapez sur “ ” pour entrer dans le mode de sélection de fichier. Dans la liste de fichiers, tapez sur le fichier pour le sélectionner. Tapez sur “ ” et puis choisissez “copy” (copier) ou “cut” (couper) à partir du menu.
- Page 46 Utilisation de la barre d’outils Vous pouvez utiliser la barre d’outils pour naviguer dans la mémoire interne de votre appareil ou dans la carte mémoire et effacer ou copier des fichiers. Demarrer Aller a l’ecran de demarrage. Haut Reculer d’un niveau dans le répertoire. Multi Sélectionnez plus d’un fichier.
-
Page 47: Envoi/Réception De Courriels
Choisissez le type de serveur pour les courriels sortants et saisissez les informations requises au sujet du serveur. Cliquez sur « Next » pour poursuivre. Votre NextBook vérifiera les configurations du serveur. Lorsqu’il vous invite en disant « Your account is set up, and email is on its way »... - Page 48 Supprimer un compte de courrier électronique (1) Lorsque vous vous trouvez dans la boîte aux lettres électronique, tapez sur l’icône Menu pour afficher la commande de menu. (2) Tapez sur « Accounts » (comptes) pour afficher tous les comptes de courrier électronique.
-
Page 49: Sortie Hdmi
Sortie HDMI L’appareil comporte une interface HDMI avec laquelle vous pouvez connecter l’appareil à des télévisions numériques. La connexion HDMI peut fournir une qualité audio et vidéo de haute définition. Pour utiliser la fonction HDMI sur les télévisions numériques, (1) Allumez la télévision numérique, et commutez son mode source sur HDMI. (2) Connectez l’appareil à... -
Page 50: Fermer Applications Récentes
« supprimer de la liste ». Gérer des tâches Votre NextBook peut effectuer plusieurs tâches à la fois. Par exemple, vous pouvez visualiser des photos tout en écoutant de la musique. Le mode multitâche est utile mais inefficace lorsqu'il y a trop de tâches effectuées en même temps. Afin de... -
Page 51: Dépannage
pouvez mettre fin à certaines tâches que vous n’utilisez pas pour l’instant. Tapez sur l’application « Task Killer ». Tapez sur la tâche à laquelle vous voulez mettre fin. Tapez sur « KILL selected apps » pour mettre fin à la tâche. Dépannage Réinitialiser cet appareil Dans le cas où... -
Page 52: Déclaration De La Fcc
FLAC(Compress Level 0~8): 8~48KHZ APE (Version 3.95,3.97,3.98,3.99,normal and fast) : 8~48KHZ AAC(ADIF, ATDS Header AAC-LC and AAC-HE): 8~48KHZ Format de fichier AVI, 3GP, MP4, RM, RMVB, FLV, MOV Video MPEG4 ASP, XVID, DIVX5, Format de codage H.264,VC-1, WMV3:Max 1920*1080pixels/30FPS DIVX3/4/H2.63: Max. 720x480p @ 30fps Video Codec: MPEG4 ASP, XVID, DIVX3/4/5, H.263, H.264,VC-1,... - Page 53 présentement connecté. Consultez le détaillant ou un(e) technicien(ne) de radio/télévision expérimenté(e) pour obtenir de l’aide. Conformité à la FCC : Afin d’assurer le maintien de la conformité, veuillez suivre les instructions d’installation ci-jointes. Utilisez uniquement les câbles d’interface de protection fournis pour connecter à l’ordinateur.