Table of Contents
Advertisement
Advertisement
Table of Contents

Related Manuals for thomann the box PA202A


Summary of Contents for thomann the box PA202A
- Page 1 PA202A full-range speaker user manual...
- Page 2 Musikhaus Thomann e.K. Treppendorf 30 96138 Burgebrach Germany Telephone: +49 (0) 9546 9223-0 email: info@thomann.de Internet: www.thomann.de 30.11.2011...
-
Page 3: Table Of Contents
Table of contents Table of contents General notes............................... 4 Safety instructions............................. 7 Operating elements..........................12 Installation..............................16 4.1 Pin assignment..........................18 4.2 Tips on speaker positioning......................19 Technical specifications........................20 Cleaning and care............................ 22 Protecting the environment......................23 PA202A... -
Page 4: General Notes
General notes General notes This user manual contains important information on the safe operation of the device. Read and follow all safety notes and all instructions. Save this manual for future reference. Make sure that it is available to all persons using this device. If you sell the device to another user, be sure that they also receive this manual. - Page 5 General notes Signal word Meaning DANGER! This combination of symbol and signal word indicates an immediate dangerous situation that will result in death or serious injury if it is not avoided. WARNING! This combination of symbol and signal word indicates a possible dangerous situation that can result in death or serious injury if it is not avoided.
- Page 6 General notes Warning signs Type of danger Warning – high-voltage. Warning – suspended load. Warning – danger zone. full-range speaker...
-
Page 7: Safety Instructions
Safety instructions Safety instructions Intended use This device is intended to be used in a sound reinforcement system. Use the device only as described in this user manual. Any other use or use under other operating conditions is consid‐ ered to be improper and may result in personal injury or property damage. No liability will be assumed for damages resulting from improper use. - Page 8 Safety instructions DANGER! Electric shock caused by high voltages inside Within the device there are areas where high voltages may be present. Never remove any covers. There are no user-serviceable parts inside. DANGER! Electric shock caused by short-circuit Always use proper ready-made insulated mains cabling (power cord) with a pro‐ tective contact plug.
- Page 9 Safety instructions CAUTION! Possible hearing damage The device can produce volume levels that may cause temporary or permanent hearing impairment. Over an extended period of time, even levels that seem to be uncritical can cause hearing damage. Decrease the volume level immediately if you experience ringing in your ears or hearing impairment.
- Page 10 Safety instructions NOTICE! Operating conditions This device has been designed for indoor use only. To prevent damage, never expose the device to any liquid or moisture. Avoid direct sunlight, heavy dirt, and strong vibrations. NOTICE! Power supply Before connecting the device, ensure that the input voltage (AC outlet) matches the voltage rating of the device and that the AC outlet is protected by a residual current circuit breaker.
- Page 11 Safety instructions NOTICE! Use of stands When mounting the device onto a stand, ensure that the stand is in a safe and stable position and that the weight of the device does not exceed the maximum permissible load capacity of the stand. PA202A...
-
Page 12: Operating Elements
Operating elements Operating elements 1 CLIP This LED lights up if distortion occurs due to excessive input level. 2 LOW CUT @ 120 Hz Press this button to attenuate the frequencies below 120 Hz. This will reduce the transmission of impact noise and increase the lifetime of the woofer. 3 MIC Indicator for an incoming microphone signal. - Page 13 Operating elements 5 LINE/MIC This switch lets you toggle the input sensitivity for microphone or line level signals. For safety reasons this switch needs to be pressed deeply with a pen-like object, until it clicks into position. Press this switch down when connecting audio signals with microphone level to the INPUT socket.
- Page 14 Operating elements 9 VOLUME control Increase the volume by rotating this knob clockwise and decrease the volume by rotating it counter-clockwise. Attention: first please adjust the volume to minimum before switching the unit on or making connections. Then adjust the appropriate volume.
- Page 15 Operating elements 13 Mains power supply connector Make sure that the voltage selector (6) is in the position that matches with the actual supply voltage available for operation, BEFORE you connect the mains power here. 14 ON/OFF Power ON/OFF switch. PA202A...
-
Page 16: Installation
Installation Installation Unpack and check carefully there is no transportation damage before using the unit. Establish all connections as long as the unit is switched off. Use the shortest possible high- quality cables for all connections. WARNING! Risk of injury caused by falling objects Make sure that the installation complies with the standards and rules that apply in your country. - Page 17 Installation CAUTION! Risk of injury due to heavy weight Due to the heavy weight of the device, at least two persons are required for trans‐ port and installation. NOTICE! Possible property damage by magnetic fields Loudspeakers produce a static magnetic field. Therefore, maintain an appropriate distance to devices that can be adversely affected or damaged by an external magnetic field.
-
Page 18: Pin Assignment
Installation 4.1 Pin assignment You can use XLR connectors with either balanced or unbalanced wiring. XLR connection for signal in and XLR mounting sockets are provided for signal inputs. XLR mounting plugs are provided for outputs signal outputs. Drawings and descriptions explain the pin assignment. Balanced wiring: Ground, shielding Positive signal (+) -
Page 19: Tips On Speaker Positioning
Installation Unbalanced wiring: Ground, shielding Signal Bridged with Pin 1 4.2 Tips on speaker positioning We recommend you to set up the speakers in a way, that the sound signals can reach the audi‐ ence unobstructedly. Often tripod mounting is a good way to maximise dispersion and range. Always use high grade cable to connect your equipment. -
Page 20: Technical Specifications
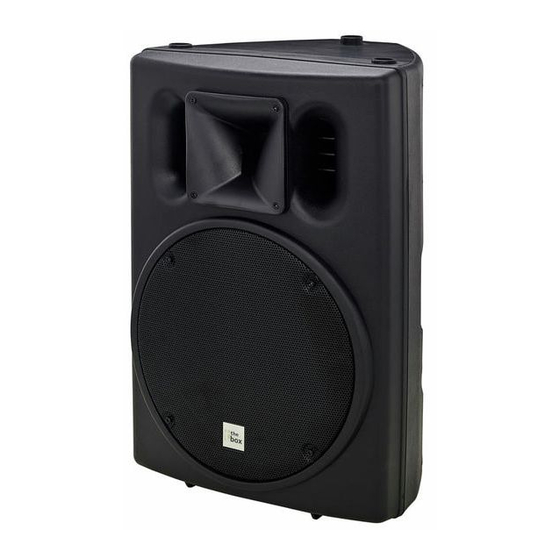
Technical specifications Technical specifications Mains voltage AC 115 V~, 50/60 Hz, AC 230 V~ 50/60 Hz System 2-way full range active speaker with built-in crossover Cabinet material Polypropylene, trapezoid Cabinet colour Black Driver quantity 1 × 12" (woofer), 1 × 1,4" tweeter Tweeter dispersion (H x V) 55°... - Page 21 Technical specifications Load impedance Tweeter - 8 Ω, woofer - 8 Ω Input impedance Balanced: 20 kΩ, unbalanced: 10 kΩ Connectors XLR input / output Dimensions (W x D x H) 417 × 382 × 620 mm Packing dimensions (W x D x H) 465 ×...
-
Page 22: Cleaning And Care
Cleaning and care Cleaning and care Cleaning plastic housing Do not use aggressive cleaners. Wipe the casing only with a slightly damp cloth. full-range speaker... -
Page 23: Protecting The Environment
Protecting the environment Protecting the environment Disposal of the packaging mate‐ rial For the transport and protective packaging, environmentally friendly materials have been chosen that can be supplied to normal recycling. Ensure that plastic bags, packaging, etc. are properly disposed of. Do not just dispose these materials with your normal household waste, but make sure that they are fed to a recovery. - Page 24 Notes full-range speaker...
- Page 25 Notes PA202A...
- Page 26 Notes full-range speaker...
- Page 28 Musikhaus Thomann e.K. · Treppendorf 30 · 96138 Burgebrach · Germany · www.thomann.de...