Table of Contents
Advertisement
Advertisement
Table of Contents

Related Manuals for Telefunken L32H125A3


Summary of Contents for Telefunken L32H125A3
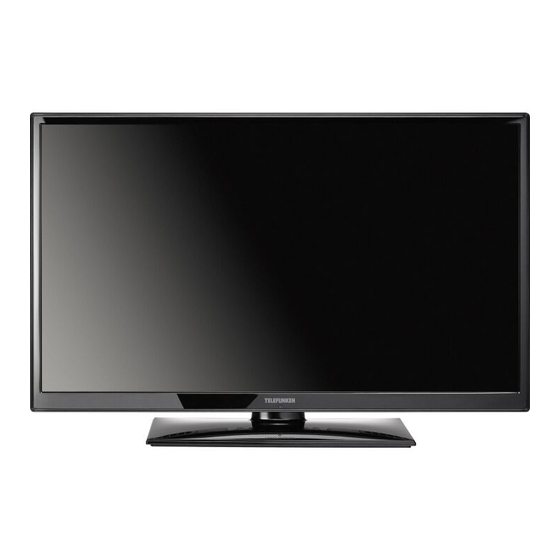
- Page 1 LCD TV Bedienungsanleitung InsTruCTIon ManuaL MoDE D‘EMPLoI L32H125A3...
-
Page 2: Table Of Contents
Contents Safety Precautions Safety Precautions ..........31 Please read these instructions fully Preparation ............31 before installing or operating. Intended Use ............ 31 Preparation Power source ............ 31 Place the device on a solid even surface. For Positioning the TV ..........31 ventilation, leave a free space of at least 10 cm Power cord and plug ......... -
Page 3: Power Cord And Plug
Power cord and plug Wall Mounting (optional) • The power cord plug should be easily accessible. • To prevent injury, this TV must be securely attached In case of storms and lightning, when going on to the wall in accordance with the installation holiday, or when the TV is not used for a long period instructions (if the option is available). -
Page 4: In The Box/Features
Environmental Information TV - Features This television is designed to consume less energy • Remote controlled colour LED TV. to save environment. You not only help to save the • F u l l y i n t e g r a t e d d i g i t a l / c a b l e / s a t e l l i t e T V environment but also you can save money by reducing (D V B -T /C / S - S 2 ) . -
Page 5: Viewing The Tv
To change volume: Increase the volume by pushing Viewing the TV the button up. Decrease the volume by pushing the button down. To change channel: Press the middle of the button, the channel information banner will appear on screen. Scroll through the stored channels by pushing the button up or down. -
Page 6: Viewing Remote Control
Viewing remote control 1. Standby 2. Numeric buttons 3. TV-AV / Channel List / DVB-T/C 4. Volume up/down SOURCE 5. Mute 6. Navigation buttons 7. Menu on/off 8. OK / Channel List / Hold (in TXT mode) 9. Return/Back/Index page (in TXT mode) 10. -
Page 7: Viewing The Connections
Viewing the Connections Connector Type Cables Device Scart Connection (back) Connection (back) PC/YPbPr Audio Connection PC Audio Cable Side Audio/Video (Not supplied) (side) Connection Cable (Supplied) SIDE AV HDMI Connection (side&back) SPDIFF Connection (back) Side AV Connection AV Connection (side) Cable (supplied) SIDE AV HEADPHONE... -
Page 8: Using A Conditional Access Module
Standby Notifications Using a Conditional Access Module If the TV does not receive any input signal (e.g. From IMPORTANT: Insert or remove the CI module only an aerial or HDMI source) for 5 minutes, the TV will when the TV is SWITCHED OFF. go into standby. -
Page 9: Installing The Batteries To The Remote
Note: When the TV is switched to standby mode, Installing the Batteries to the Remote standby LED can blink to indicate that features such 1. Lift the cover on the back of the remote upward as Standby Search, Over Air Download or Timer is gently. -
Page 10: Aerial Installation
Cable Installation You can activate Store mode (optional) option by using “ ” or “ ” button. If Store Mode (optional) If you select CABLE option and press OK button on is selected, Store mode option will be available in the remote control to continue, the following message other settings menu and your TV’s features will be will be displayed on the screen:... -
Page 11: Satellite Installation
Satellite Installation The TV sorts all stored stations in the Channel List. You can edit this channel list, set favourites or set If you select Normal, satellite configuration screen active stations to be listed by using the Channel List will be displayed. There are three types of antenna options. -
Page 12: Media Browser Menu
Media Browser Menu Changing Image Size: Picture Formats You can play photo, music, and movie files stored Programmes can be watched in different picture on a USB disk by connecting it to your TV and using formats, depending on the transmission received. the Media Browser screen. -
Page 13: Menu Features And Functions
Menu Features and Functions Picture Menu Contents For your viewing requirements, you can set the related mode option. Picture mode Mode can be set to one of these options: Cinema,Game,Sports, Dynamic and Natural. Contrast Sets the lightness and darkness values of the screen. Brightness Sets the brightness value for the screen. - Page 14 Menu Features and Functions Sound Menu Contents Volume Adjusts volume level. In equalizer menu, the preset can be changed to Music, Movie, Speech, Flat, Classic and User. Press the MENU button to return to the previous Equalizer: menu. Equalizer menu settings can be changed manually only when the Equalizer Mode is in User.
- Page 15 Menu Features and Functions Settings Menu Contents Conditional Access Controls conditional access modules when available. Language Configures language settings. Configures parental settings. Default PIN code can change depending on the selected country. If you are asked Parental to enter a PIN code for viewing a menu option, use one of the following codes: 4725, 0000 or 1234.
- Page 16 Menu Features and Functions Other Settings: Displays other setting options of the TV set: Store Mode If you are displaying the TV in a store, you can activate this mode. While Store (optional) Mode is enabled, some items in the TV menu may not be available to be set. DLNA renderer feature allows you to share files stored on your smartphone.
-
Page 17: Electronic Programme Guide (Epg)
Electronic Programme Guide (EPG) Some, but not all channels send information about the current and next programmes. Press the “ ” button to view the EPG menu. Up/Down/Left/Right: Navigate EPG. • To access and play shared files, you must Select Media Browser. - Page 18 Step 3: Play Shared Files via Media Browser Select Media Browser by using Left or Right button from the main menu and press OK button. Media browser will be then displayed. DLNA support is available only with Media Browser folder mode. To enable folder mode, go to Settings tab in the main media browser screen and press OK.
-
Page 19: Internet Portal
Select a link or application using the Left and Right or Up or Down buttons and press OK to activate. • Use Up/Down and Left/Right buttons to navigate Select Videos from this screen to list all the available between the items on Portal screen. video files from the selected network. - Page 20 HbbTv applications use keys on the remote control to interact with the user. When an HbbTv applications is launched, the control of some keys are owned by the application. For example, numeric channel selection may not work on a teletect application where the numbers indicate teletext pages.
-
Page 21: Teletext
When you select one of these satcodx files, all Teletext services and related satellites and transponders in “ ” Teletext / Mix: Activates video text mode when the selected file will be stored in TV. If there are any pressed once (if available in your broadcast). Press installed terrestrial, cable and/or analog services, they again to view analogue teletext page. -
Page 22: Troubleshooting & Tips
No picture • If your TV fails to restart in 10 minutes, unplug power for 10 minutes and re-plug again. TV should open with 1. No Picture means that your TV is not receiving a new software safely. If you still can not get TV working, transmission. -
Page 23: Pc Typical Display Modes
Information for Users on Disposal of Old 1152x870 75Hz Equipment and Batteries 1280x768 60Hz [European Union only] 1360x768 60Hz These symbols indicate that equipment with these symbols should not be disposed of as general 1280x768 75Hz household waste. If you want to dispose of the product 1280x768 85Hz or battery, please consider the collection systems or... -
Page 24: Specifications
Specifications Licence Notifications TV BROADCASTING Manufactured under license from Dolby Laboratories. PAL/SECAM B/G D/K K’ I/I’ L/L’ TRADEMARK ACKNOWLEDGMENT DIGITAL RECEPTION and the double-D symbol are DVB-T MPEG2 trademarks of Dolby Laboratories. DVB-T MPEG4 HD “DLNA , the DLNA Logo and DLNA CERTIFIED ®... -
Page 25: Supported File Formats For Usb Media Browser
Supported File Formats for USB Media Browser Media Extension Format Notes Video Audio Movie dat, mpg, Mpeg1,2 MPEG1/2 Layer 1/2/3, AAC/ 1080P@ 30fps 50Mbit/ mpeg HEAAC, AC3/EAC3, LPCM/ ADPCM dat, mpg, MPEG2 ,H.264, VC1, AVS, MPEG1/2 Layer 1/2/3, AAC/HEAAC, H.264:1080Px2@25fps mpeg AC3/EAC3, LPCM/ADPCM 1080P@ 50fps MVC:... -
Page 26: Supported Dvi Resolutions
Supported DVI Resolutions When connecting devices to your TV’s connectors by using DVI converter cables (not supplied), you can refer to the following resolution information. 72Hz 75Hz 56Hz 60Hz 66Hz 70Hz 640x400 þ 640x480 þ þ þ þ 800x600 þ þ... -
Page 27: Appendix: Nero Mediahome Installation
• Please do not change displayed serial. Appendix: Nero MediaHome Installation This software is compatible with Windows XP and Windows 7. To install Nero MediaHome, please proceed as follows: Note: To use DLNA function, this software should be installed to your PC. 1. - Page 28 automatically. A progress bar informs you of the progress of the installation process. Use Typical installation and click the Next button. 10. Installation finishes. • The Prerequisites screen is displayed. The Help us to Enhance Nero Software screen is displayed. In order to offer a better service, Nero The Nero MediaHome installation wizard checks the is collecting anonymous data to determine which availability of required third-party software on your PC.
- Page 29 13. A shortcut called Nero MediaHome 4 is now placed on your desktop Congratulations! You successfully installed Nero MediaHome 4 on your PC. 14. Run Nero MediaHome by pressing shortcut icon. • Click ADD icon from LOCAL FOLDERS to add the folder you want to share with the network.
- Page 30 TeLefunken ® Markenlizenz: TeLefunken ® licensed by: TeLefunken Licenses GmbH TeLefunken Licenses GmbH Vertrieb: Vestel Germany GmbH, Imported by: Vestel Germany GmbH, D-85748 Garching bei München D-85748 Garching/Munich 1 Die Marke TeLefunken ist eine eingetragene Marke der TeLefunken Licenses GmbH.