Miele FN 11827 S Operating And Installation Instructions
Frost free freezer
Hide thumbs
Also See for FN 11827 S:
- Operating and installation manual (48 pages) ,
- Operating and installation instructions (48 pages) ,
- Operating and installation instructions (48 pages)
Table of Contents
Advertisement
Advertisement
Table of Contents

Related Manuals for Miele FN 11827 S


Summary of Contents for Miele FN 11827 S
- Page 1 Operating and installation instructions Frost free freezer FN 11827 S FN 12827 S FN 12827 S edt/cs en - AU To avoid the risk of accidents or damage to the appliance, it is essential to read these instructions before it is installed and used for the first time.
-
Page 2: Table Of Contents
Contents Guide to the appliance ..........4 Caring for the environment . - Page 3 Contents Problem solving guide ..........27 Noises .
-
Page 4: Guide To The Appliance
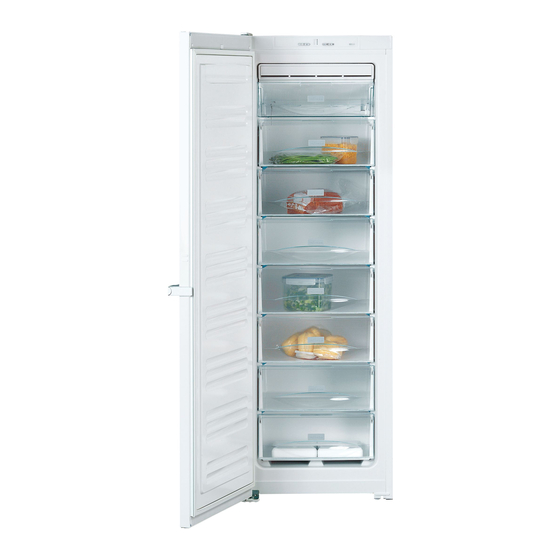
Guide to the appliance a On/Off button d SuperFreeze button and indicator light b Temperature selector button e Alarm off button and c Temperature display indicator light a Frost free system b Shallow freezer drawer c Freezer drawers... -
Page 5: Caring For The Environment
Caring for the environment Disposal of the packing Disposing of your old material appliance The transport and protective packing Electrical and electronic appliances has been selected from materials which often contain materials which, if are environmentally friendly for disposal handled or disposed of incorrectly, and can normally be recycled. -
Page 6: Warning And Safety Instructions
Warning and Safety instructions Correct application This appliance complies with all This appliance is intended for relevant local and national safety domestic use only, to store deep frozen requirements. Improper use can, food, freeze fresh food, and to make however, present a risk of both ice. -
Page 7: Technical Safety
In the event of any damage: - avoid open flames and anything which creates a spark, - disconnect from the mains, - air the room in which the appliance is located for several minutes and - contact Miele for advice. - Page 8 Faulty components must only be replaced by genuine Miele original national and local safety regulations. Repairs and other work by unqualified spare parts. The manufacturer can only persons could be dangerous. The...
- Page 9 Warning and Safety instructions Correct use Do not operate any electrical equipment (e.g. an electric ice-cream Never handle frozen food with wet maker) inside the appliance. Danger of hands. Your hands may freeze to the sparking and explosion. frozen food. Danger of frost burn. Do not store cans or bottles Do not take ice cubes out with your containing carbonated drinks or liquids...
-
Page 10: Disposal Of Your Old Appliance
Warning and Safety instructions The appliance is designed for use The following applies to stainless within certain climate ranges (ambient steel appliances: temperatures), and should not be used Do not place sticky notes, adhesive outside this range. The climate range tape, masking tape or any other for your appliance is stated on the data adhesive agent on the treated surface... -
Page 11: How To Save Energy
How to save energy Normal energy consumption Increased energy consumption Installation In a ventilated room. In an enclosed, unventilated room. Protected from direct sunlight. In direct sunlight. Not situated near a heat source Situated near a heat source (radiator, oven). (radiator, oven). -
Page 12: Switching On And Off
Switching on and off Before using for the first time Cool pack Place the cool pack in the top drawer Protective foil or, to save space, in the shallow freezer On stainless steel appliances, the drawer. The cool pack will be at its stainless steel door and possibly the most effective after it has been in the sides are covered in a protective foil. -
Page 13: The Correct Temperature
The correct temperature Setting the temperature It is very important to set the correct temperature for storing food in the appliance. Micro-organisms will cause food which is not stored at the correct temperature to deteriorate rapidly. Temperature influences the growth rate ^ Press the temperature button of these micro-organisms. -
Page 14: Temperature Display
The correct temperature Temperature display The temperature display on the control panel always shows the required temperature. The temperature can be adjusted from: -15 °C to -32 °C The temperature display will flash if – the temperature in the appliance is not within the possible temperature range, –... -
Page 15: Alarm
Alarm Activating the alarm system Your appliance has been fitted with a warning system which ensures that the The alarm system is always active. It temperature in the freezer cannot rise does not have to be switched on unnoticed. An alarm will sound, and the manually. -
Page 16: Superfreeze
SuperFreeze Switch the SuperFreeze function on Switching off SuperFreeze before putting fresh food into the The SuperFreeze function will switch off freezer. automatically after approx. 65 hours. This helps food to freeze quickly and The indicator light will go out and the retain its nutrients, vitamins, flavours appliance will run at normal power and appearance. -
Page 17: Freezing And Storing Food
Freezing and storing food Maximum freezing capacity Using the isolator plate To ensure that fresh food placed in the (depending on model) freezer freezes through to the core as In order to save energy, the appliance quickly as possible, the maximum has an isolator plate which enables freezing capacity must not be freezer drawers that aren't being used... -
Page 18: Storing Frozen Food
Freezing and storing food Storing frozen food Do not store food in the "switched When buying frozen food to store in off" drawers as large fluctuations your freezer, check may occur in these drawers, thus causing food to spoil. – that the packaging is not damaged, –... -
Page 19: Home Freezing
Freezing and storing food Home freezing lightly before freezing, but care should be taken as the taste of some Only freeze fresh food which is in a spices alters when frozen. good condition. – Do not place hot food or drinks in the Tips on home freezing freezer. -
Page 20: Before Placing Food In The Freezer
Freezing and storing food Before placing food in the freezer When removing freezer drawers, ^ When freezing more than 2 kg of please note: fresh food, switch on the The lowest freezer drawer must SuperFreeze function for some time always remain in the appliance. before placing the food in the freezer Place the food on the glass plate so (see "SuperFreeze"). -
Page 21: Defrosting
Freezing and storing food Defrosting Making ice cubes Frozen food can be defrosted in different ways: – in a microwave oven, – in an oven using the "Fan" or "Defrost" setting, – at room temperature, ^ Fill the ice cube tray with water to ¾ full and place it in a freezer drawer. -
Page 22: Freezer Tray
Freezing and storing food Freezer tray The freezer tray is useful for freezing small items such as berries, herbs and vegetables. They can be frozen individually and therefore maintain their shape when defrosted. ^ Space the food out loosely on the tray. -
Page 23: Automatic Defrost
Automatic defrost This freezer is equipped with a frost free system. The freezer defrosts automatically. The moisture generated by defrosting collects in the condensor and is automatically dissipated by the condensor from time to time. This automatic defrosting system enables the freezer to remain permanently ice-free. -
Page 24: Cleaning And Care
Cleaning and care Before cleaning Do not let water get into the ^ Switch off the appliance. electronic unit or the ventilation ^ Disconnect the appliance from the gaps. mains. Switch off at the wall and Do not use a steam cleaning withdraw the plug from the socket, or apparatus to clean the appliance. -
Page 25: Cleaning The Door And Side Panels
The external surfaces of this – Stainless steel cleaners: appliance are all susceptible to The coating will be damaged. scratching. – Miele Original Care product for Contact with unsuitable cleaning stainless steel: agents can also alter or discolour Visible smearing will form on the the outer surfaces. -
Page 26: Rear Of Appliance - Metal Grille
Cleaning and care Rear of appliance - metal grille The metal grille at the back of the appliance (heat exchanger) should be dusted at least once a year. A build-up of dust will increase the energy consumption of the appliance. When cleaning the grille, make sure that the pipework and other components do not get broken or... -
Page 27: Problem Solving Guide
^ Check that the door has been closed voltage or another appliance is faulty. properly. Contact a qualified electrician or Miele..the compressor runs continuously. To save energy, the compressor runs at . . . the door will not open because it... - Page 28 ^ the compressor is faulty. Call Miele..food has frozen together. Depending on the temperature in the Use a blunt instrument, e.g. a spoon...
-
Page 29: Noises
Noises Normal noises What causes them Humming noise made by the motor (compressor). This noise can Brrrrr ... get louder for brief periods when the motor is switching on. Blubb, blubb..A gurgling noise can be heard when coolant is circulating through the pipes. -
Page 30: After Sales
You will find the address and telephone number of Miele on the back cover of the manual. When contacting your Chartered Agent or Miele, please quote the model and serial number of your appliance. This information is given on the data plate inside your appliance. -
Page 31: Electrical Connection
Electrical connection Electrical connection WARNING THIS APPLIANCE MUST BE All electrical work should be carried out EARTHED by a suitably qualified and competent person in strict accordance with current For India only: Due to extreme local and national safety regulations. fluctuations in the electrical network, The appliance is supplied with a mains we recommend operating the... -
Page 32: Installation
Should you dry, well-ventilated room. It should not require further assistance, please be installed where it is exposed to contact Miele. direct sunlight or directly adjacent to a heat-producing appliance such as an Climate range oven or a radiator. The room... -
Page 33: Ventilation
Installation Ventilation Supporting the appliance door Air at the back of the appliance gets (depending on model) warm. To ensure sufficient ventilation, the ventilation gaps must not be covered over. The air inlet and outlet must not be covered or blocked in any way. -
Page 34: Appliance Dimensions
Installation Appliance dimensions FN 11827 S 1850 mm 600 mm 630 mm FN 12827 S FN 12827 S edt/cs... -
Page 35: Installing In A Side-By-Side Combination
Sliding the two appliances into side-by-side with certain other Miele position appliances. Your Miele Chartered Agent will be able to advise you on which models are suitable to being installed side-by-side. Installation ^ Slide the left side and right side alternately. -
Page 36: Joining The Two Appliances Together
Installing in a side-by-side combination ^ Before starting, peel off any Joining the two appliances protective foil from the appliance together casing. The following fastening components are Assembly steps on the appliance supplied: fronts ^ Screw in the feet a for supporting the appliance doors with the spanner r supplied. - Page 37 Installing in a side-by-side combination ^ Remove the covers b at the top of ^ Remove the two covers e at the the appliances. base of the appliances. ^ Remove the screw f if it is in place. Attaching the connecting plate will ensure the heights of the two This screw is no longer needed.
- Page 38 Installing in a side-by-side combination Attaching the connecting bracket will Assembly steps on the rear of the ensure the heights of the two appliances appliances are aligned. Start with the appliance on the right-hand side. If one appliance protudes at the front more than the other, start with this appliance: ^ Fit the connecting brace i at the top of the inside walls.
- Page 39 Installing in a side-by-side combination Assembly steps on the appliance fronts ^ Press the long stainless steel trim l into the gap at the front between the appliances. Ensure that the bottom of ^ Screw the inside feet c all the way the trim sits against the connecting in.
- Page 40 Installing in a side-by-side combination ^ Connect both appliances to the electricity supply as described under "Electrical connection". ^ Appliances with ice cube maker: Plumb the appliance in as described under "Mains water connection". Important! There is a risk of damage when moving the appliance combination.
-
Page 41: Changing The Door Hinging
Changing the door hinging To change the door hinging, you will need the following tools: – a cross-slotted screwdriver, – a flat-bladed screwdriver, – a selection of Torx screwdrivers, – a spanner. Two people are needed to change the door hinging. Removing the door handle: ^ Pull door handle a towards you. - Page 42 Changing the door hinging ^ Remove cover g, then rotate it by Changing over the door: 180° and fit it on the opposite side. ^ Close the appliance door. ^ Then fit cover e together with retaining plate f on the opposite side.
- Page 43 Changing the door hinging ^ Pull hinge pin a with disc b and foot c upwards to remove them. ^ Remove cap d. ^ Undo screws e and take hinge plate f off. ^ Remove cap h from the bearing ^ Slightly loosen bearing screw h from bush in the door and refit on the hinge plate f.
- Page 44 Changing the door hinging ^ Fit hinge plate c onto the opposite ^ Screw hinge plate f into position on side and secure it with screws d. the opposite side using the two outer long slots only. Do not use the ^ Fit covers a and b to their opposite middle screw because you will not sides.
- Page 45 Changing the door hinging Refitting the handle: It is important to check that the side section of the handle d does not Please make sure you follow the instructions below carefully when come into contact with the door seal you refit the handle. The door seal when opening the door as this would will be damaged if the handle is damage the door seal permanently.
-
Page 46: Aligning The Appliance Door
Aligning the appliance door The appliance door can be retrospectively aligned to the housing using the outer long slots in the lower hinge plate. In the following illustration the door is not shown in the closed position to make it easier to see what happens next. -
Page 47: Building In The Appliance
Building in the appliance The air inlet and outlet must not be covered or blocked in any way. They should be dusted on a regular basis. When built into a kitchen run (max. depth 580 mm), the appliance can be installed directly next to a kitchen furniture housing unit. - Page 48 Alteration rights reserved / 0512 M.-Nr. 09 171 760 / 00 FN 11827 S, FN 12827 S, FN 12827 S edt/cs...