Table of Contents
Advertisement
Advertisement
Table of Contents

Related Manuals for Life Fitness Essential FT4


Summary of Contents for Life Fitness Essential FT4
- Page 1 FT4 Treadmill U S E R M A N U A L...
- Page 2 LIFE FITNESS ASIA PACIFIC LTD Room 2610, Miramar Tower 132 Nathan Road Tsimshatsui, Kowloon HONG KONG Telephone: (+852) 2891.6677 FAX: (+852) 2575.6001 LIFE FITNESS ATLANTIC BV LIFE FITNESS BENELUX Bijdorpplein 25-31 2992 LB Barendrecht THE NETHERLANDS Telephone: (+31) 180.646.666 FAX: (+31) 180.646.699 Telephone: (+32) 87.300.942...
- Page 3 Before using this product, it is essential to read this ENTIRE operation manual and ALL installation instructions. This will help in setting up the equipment quickly and in instructing others on how to use it correctly and safely. Class HB (Home): Domestic use. Not designed for therapeutic purposes. CAUTION: Any changes or modifications to this equipment could void the product warranty.
-
Page 4: Table Of Contents
Treadmill Specifications...19 © 2002 Life Fitness, a division of Brunswick Corporation. All rights reserved. Life Fitness is a registered trademark of Brunswick Corporation. Any use of these trademarks, without the express written consent of Life Fitness or the corresponding companies is... -
Page 5: Unpacking And Assembly
Follow the assembly instructions on the opposite page before proceeding. 6. From the rear of the TREADMILL, tilt the BASE upward until it locks upright. 7. Tear the front end of the BOTTOM SHIPPING TRAY at the corners and fold the flap downward. - Page 6 DISPLAY CONSOLE (K) onto the LEFT and RIGHT UPRIGHTS (A) & (F). 7. Tighten all SCREWS securely. 8. Position the TREADMILL into the desired location for use. 9. Plug the TREADMILL into a proper electrical outlet as instructed in SECTION 1.2 of this manual.
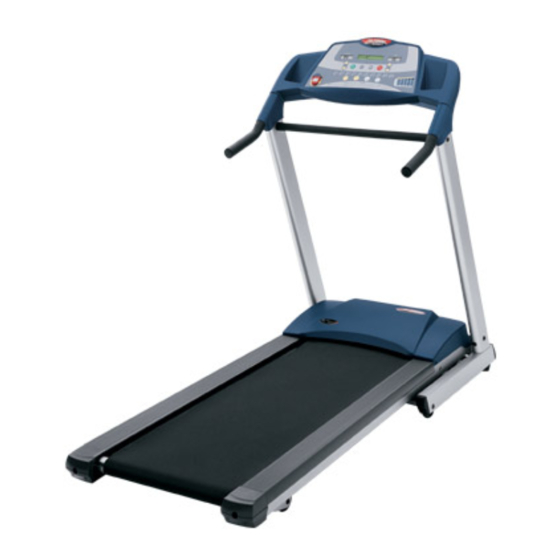
- Page 7 This Operation Manual describes the functions of the following products: See Section 5, titled Specifications page in this manual Statement of Purpose: The treadmill is an exercise machine that enables users to walk or run, in place, on a moving surface.
-
Page 8: Operation
Customer Support Services for assistance. See Section 4 for details. • Never insert objects into any opening in the treadmill. If an object should drop inside, carefully retrieve it. If the item is beyond reach, contact Customer Support Services for assistance. See Section 4 for details. -
Page 9: Setup
When positioning the treadmill for use, allow for a clearance area of six feet by four feet behind the treadmill to make it easy to get on and off the treadmill and to adjust the tension of the belt. See the section titled Specifications for the treadmill’s dimensions. - Page 10 FF THE With the treadmill belt idle, step on the side rails to straddle the belt. Set up a workout using the steps described in Section 3.2, titled Using the Workouts. When the belt is in motion, hold the handrails and carefully step onto the belt.
-
Page 11: The Display Console
ISPLAY ONSOLE The computerized display console on the treadmill allows the user to tailor a workout to personal fitness abilities and goals and to monitor progress. With this easy-to-use console the user can track fitness improvement from one work- out to the next. -
Page 12: Display Console Descriptions
MERGENCY The treadmill features an emergency system that cuts the main power of the unit to stop the treadmill if the user falls. The system consists of a key (A) that is inserted into a key-holder located in the lower-left side of the console. A cord and clip attached to this magnetized key is then clipped to the user. -
Page 13: Accessory Trays And Reading Rack
CCESSORY RAYS AND EADING An accessory tray (A) is built into each side of the console. Additionally, a reading rack (B) is built in to the base of the console. -
Page 14: The Workouts
This section provides details on the steps them- selves. EGIN ANY ORKOUT ETUP Switch on the treadmill. Then, make sure that the emergency stop key is properly inserted into the key-holder, and clip the key cord to clothing. ELECTING UICK TART QUICK START is the fastest way to begin exercising, and it bypasses the steps involved in selecting a specific workout. - Page 15 For all three workouts, the ELEVATION DATA window displays a default maximum elevation of eight percent. Use the ELEVATION keys to adjust this value. The range is 0 percent to 10 percent. The treadmill computer automatically selects the elevation for the lower elevation intervals based on the high elevation chosen.
-
Page 16: Workout Descriptions
ORKOUT ESCRIPTIONS PEED NTERVAL This program alternates intervals of high and low speeds. As the profile diagram indicates, the speed gradually increases in the early stage. The main section of the workout consists of high- and low-speed intervals. The contrast between speeds is sharper than in the AEROBIC workout. - Page 17 ROSS OUNTRY This program alternates intervals of high and low elevations. The workout builds up to a first peak, followed by a val- ley, and then another peak. LIMB This program alternates intervals of high and low elevations. The high intervals build to a peak and then gradually decline.
-
Page 18: Service And Technical Data
WARNING: Do not use any solvents on the deck or running belt, as these can reduce lubrication. Also, fold up the treadmill and vacuum the floor beneath and around it periodically to prolong the life of the unit. HEN AND... - Page 19 2. Locate and write down the serial number of the unit, which is located at the front of the frame. 3. Contact Life Fitness Customer Support Services via the Web at: www.lifefitness.com, or call the nearest Life Fitness Customer Support Services group:...
-
Page 20: Treadmill Specifications
READMILL PECIFICATIONS Designed use: Maximum user weight: Motor: Power requirements: Rollers: Striding belt: Cushioning system: Deck type: Front handrail: Side handrails: Stop systems: CONSOLE: Displays: Summaries: WORKOUTS: Elevation range: Workout duration range: Calorie range: Distance range: Speed range Accessory Tray: Color: ASSEMBLED DIMENSIONS (UNFOLDED): Length...