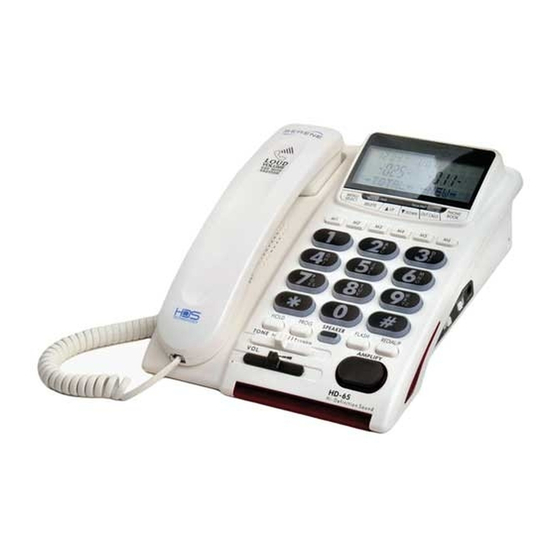
Serene HDPhone HD 65 Operating Manual
High defenition amplified telephone
Hide thumbs
Also See for HDPhone HD 65:
- Technical specifications (1 page) ,
- Quick user manual (2 pages) ,
- Operating manual (48 pages)
Table of Contents
Advertisement
Advertisement
Table of Contents

Related Manuals for Serene HDPhone HD 65


Summary of Contents for Serene HDPhone HD 65
-
Page 2: Table Of Contents
CONTENT 1. Product features ……………………………………………………….1 2. Important safety instructions…............2 3. Battery and AC Power Adapter…………………………………………3 4. Package content………………………………………………………….3 5. Installation …………………………………………………………….…..4 6. Detailed features and controls ……………………..………….….……5 7. Answering a call..…………………………………………………………7 8. Making a call ………………………………………………………….…..7 9. Transferring a Call from Handset to Speakerphone………….……….7 10. -
Page 3: Product Features
PRODUCT FEATURES 1. High Definition Sound Technology ensures crystal clear conversation 2. Up to 55 dB Of handset amplification 3. “AMPLIFY” key that remembers handset volume setting 4. Four (4) digital tone control settings 5. High performance speakerphone 6. Talking Caller ID 7. -
Page 4: Important Safety Instructions
Important Safety Instructions Instructions pertaining to a risk of fire, electric shock or injury to persons. Privacy of communications may not be ensured when using a cordless phone. WARNING – When using electric appliances, basic precautions should always be followed, including the following: 1. -
Page 5: Battery And Ac Power Adapter
Battery and AC Power Adapter Base: Accepts four (4) user provided AA size regular batteries for AC power outage backup purpose. Installation of base batteries is optional. Please care for the environment by disposing any used batteries through your local community recycle center. Do not dispose any used battery in trash bin. WARNING: For safety consideration, always disconnect phone cord to wall jack before changing batteries Disposal of Used Batteries and Safety Information... -
Page 6: Installation
Installation 1. Connect AC adapter and phone cord to the base as shown. 2. Install optional batteries in base (for your safety, always disconnect phone cord to wall before changing / installing batteries). -
Page 7: Detailed Features And Controls
Detailed Features and Controls... - Page 8 1. Handset 2. Speaker 3. “MENU / SELECT” button 4. “DELETE” button 5. “UP” button 6. “DOWN” button 7. “OUT CALLS” button (outgoing call list) 8. “PHONE-BOOK” button 9. “HOLD” indicator 10. “VOICE MAIL” indicator 11. LCD display 12. One-touch memory buttons (6) 13.
-
Page 9: Answering A Call
Answering a call 1. Lift handset to answer (or press key to use speakerphone) when phone rings. 2. Hang up handset (or press key again) to end the call. Making a Call 1. Enter phone number and confirm on display (Use DELETE key to cancel entry). -
Page 10: Auto "Amplify" Switch
Auto “Amplify” Switch This switch is located on the side of the phone, and it determines the initial condition of the AMPLIFY function. If this switch is set to ON, the will be active (illuminated) each time you lift the handset off its cradle. When this key is illuminated, an extra level of amplification is added to the receiver volume and tone control also becomes active. -
Page 11: Dial From Phone Book
7. Press PHONE BOOK key again to save the contact. Screen displays “SEARCH ADD” again for the next entry. 8. Repeat steps 1 to 7 to add another contact. 9. Lift handset momentary to exit phone-book Edit 1. While off-line, press PHONE BOOK key. Screen displays “SEARCH ADD”... -
Page 12: Review Outgoing Call List
5. Hang up the handset ends the call. Review / Dial Outgoing Call List 1. While off-line, press OUT CALLS key jumps to the most recent call dialed. 2. Use UP or DOWN key to review the latest twenty-five calls made. (The number of calls made is now shown on the upper right corner of the screen). -
Page 13: Call Waiting
13. The blinking cursor moves to the middle line for number editing. 14. Use DELETE key to delete digits and then re-enter number using keypad. 15. Press PHONE BOOK key again to save. 16. Lifting up the handset momentary returns to off-line mode. Call Waiting If you are on a call and there is a new call coming in, you will hear a short beep tone in your receiver signifies a new call is waiting. -
Page 14: Set Talking Keypad
4. Press UP key to select the number (0 to 4) of CID announcement on an incoming call. 5. Press MENU / SELECT key to confirm. 6. Lift handset momentary to exit menu setting mode. Set Talking Keypad 1. While off-line, press MENU / SELECT key for about a second to enter menu setting mode. -
Page 15: Set Time / Date
Set Time / Date 1. While off-line, press MENU / SELECT key for about a second to enter menu setting mode. Screen displays “MENU”. 2. Press UP key six times and screen displays “SET TIME / DATE”. 3. Press MENU / SELECT key to select. The hour and AM / PM positions are blinking. -
Page 16: Technical Information
Technical Information Amplified dB level (Amplify off): 0 to 18 dB Amplified dB level (Amplify on): 37 to 55 dB (measured at 2.8 Khz with Tone=4) Tone control settings: 4 settings (T1 = lowest tone, T4 = highest tone) Talking CID / Keypad voice: English, French, Spanish Flash time: 100, 300, 600, or 1000 msec LCD contrast levels: 5 Specifications are subjected to change without any notice. -
Page 17: Warranty Service Information
(freight prepaid) with proof of purchase (sales receipt or packing slip, no exceptions) to Serene Innovations. Serene Innovations will either repair or replace the unit (with a refurbished unit or unit of equal condition) and return it to you (using UPS / USPS ground shipping) at no cost to you if the unit is returned within 30 days of purchase. - Page 18 If the trouble does not persist and appears to be with this unit, disconnect the unit from the telephone line and discontinue use of the unit until it is repaired. For repair or warranty information, please contact Serene Innovations, Inc. at 562- 407 5400.
-
Page 19: Fcc Registration Information
you disconnect this equipment from the telephone network until the problem has been corrected or until you're sure that the equipment is not malfunctioning. There are no user serviceable parts in this equipment. This equipment may not be used on coin service provided by the telephone company. - Page 20 Modification: Any modification not expressly approved by the manufacturer of this device could void the user’s authority to operate the device. NOTICE: The Industry Canada label identifies certified equipment. This certification means that the equipment meets telecommunications network protective, operational and safety requirements as prescribed in the appropriate Terminal Equipment Technical Requirements document(s).