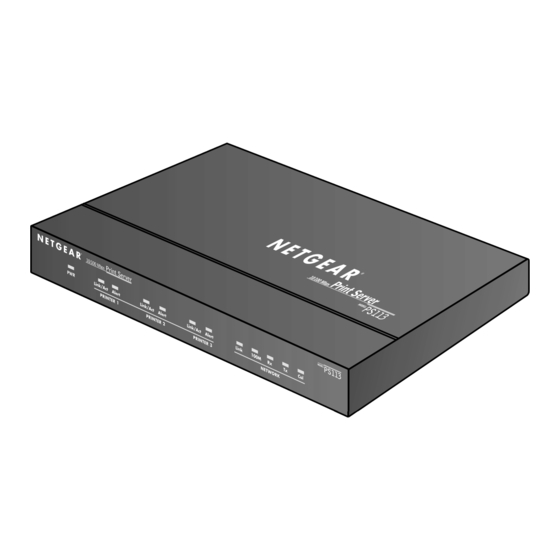
NETGEAR PS113 Installation Manual
10/100 mbps print servers
Hide thumbs
Also See for PS113:
- Specifications (2 pages) ,
- Installation and reference manual (171 pages) ,
- Reference manual (142 pages)
Table of Contents
Advertisement
Quick Links
Advertisement
Table of Contents

Summary of Contents for NETGEAR PS113
- Page 1 PS110 and PS113 10/100 Mbps Print Ser vers Installation Guide...
-
Page 2: Technical Support
E-mail: support@NETGEAR.com www.NETGEAR.com ©2002 by NETGEAR, Inc. All rights reserved. NETGEAR and AutoUplink are trademarks or registered trademarks of NETGEAR, Inc. in the United States and/or other countries. Other brand and product names are trademarks or registered trademarks of their respective holders. -
Page 3: Installation Procedure Overview
4 for each computer that will share the printer with the print server. It takes less than 5 minutes to configure and test each computer. On the PS110/PS113 Resource CD, you will find a Reference Manual containing more detailed information about installation, troubleshooting, and configuration. - Page 4 The package includes: • PS110 or PS113 Print Server • AC power adapter • PS110/PS113 Resource CD, including a full Reference Guide and print server software • PS110/PS113 Installation Guide (this document) • Warranty and registration card • Support information card...
-
Page 5: Connect The Print Server
The PS110 or PS113 Print Server connects to the parallel port on your printers. You may connect two printers to the PS110 or as many as three printers to the PS113. After connecting the print server to your printer, you then connect it to a network device (like a hub, router, or switch). - Page 6 3. If the printer is currently connected to a computer, turn the printer off and remove the printer’s parallel cable from the parallel port on the back of the computer and insert it into an available port on the print server. If the printer in not connected to a computer, insert the 25-pin D-sub male connector of the parallel printer cable into an available port on the print server and connect the other end into the parallel port on the printer.
- Page 7 Install Printer Server Software and Setup the Print Server The PS110 or PS113 comes with several software components that allow you to set up the print server and use administrative tools. You should install all the software onto one Windows computer to act as the print server administrator.
-
Page 8: Advanced Settings
If you don’t know what to use, you may click Suggest New to get a useable IP address. If you are using a NETGEAR router with default Values settings, the following settings should work: IP address: 192.168.0.150 (The first three numbers should match the numbers for the network device. -
Page 9: Print Server
Configure a Computer To Access the Print Server Before using the PS110/PS113 on your network, each computer that needs to access the print server must have: • A connection to the network. • If a Windows computer, the printer added using the NETGEAR Add Printer Wizard. - Page 10 To configure computers running Windows NT, 2000, and XP: 1. Click , point to and click Start Programs> NETGEAR Print Server NETGEAR Add Printer Wizard Read, follow the instructions, and click in the Setup message window. 3. In the list, select the print server port with the printer you want to add to this computer and click .
- Page 11 To configure computers running Windows 95, 98, and Me: 1. Click , point to and click Start Programs> NETGEAR Print Server NETGEAR Add Printer Wizard. 2. Read, follow the instructions, and click in the message window. Setup 3. Select the port with the printer you connect and click Add in the Printer Select screen.
- Page 12 To configure computers running Macintosh OS 8.6 or 9.x: The PS110/PS113 print servers only work with Macintosh computers for PostScript printers. 1. Open the menu and click Apple Chooser Select the LaserWriter driver on the left. The print server ports appear on the right.
- Page 13 To configure computers running Macintosh OS X: The PS110/PS113 print servers only work with Macintosh computers for PostScript printers. 1. Open the Print Center. 2. In the Printer List window, click Printer 3. Select the print server port with the printer you want to use.
-
Page 14: Troubleshooting
• Turn the printer off and unplug the print server’s power adapter. Turn the printer on and then plug in the print server’s power adapter. • Contact NETGEAR if turning the printer server off and on doesn’t solve the problem. - Page 15 1. Open a browser and go to the IP address for the print server. (For example, type http://192.168.0.150 and click Go.) Note: If you do not know the IP address and the computer is a Windows computer, you can use the NETGEAR Print Server Administration program. Click . Point Start and click .
-
Page 16: Glossary Of Terms
Glossary of Terms A twisted pair cable that meets specified requirements for 10 Mbps Category 3 (CAT3): networking up to 328 ft. (100m). A shielded twisted pair cable that meets requirements for 10 and 100 Mbps Category 5 (CAT5): networking up to 328 ft. (100m). A communications network within a limited area, such as one building. -
Page 17: Environmental Specifications
Length: 7.4 in. (18.9 cm) Dimensions Width: 4.8 in. (4.0 cm) Height: 1.2 in. (3.0 cm) Weight: 1.61 lbs. (0.73 kg) PS113 Length: 9.3 in. (23.5 cm) Dimensions Width: 1.0 in. (2.6 cm) Height: 4.0 in. (10.1 cm) Weight: 1.3 lb. (0.50 kg) -
Page 18: Statement Of Conditions
EN 55 022 Statement This is to certify that the Model PS110/PS113 Print Server is shielded against the generation of radio interference in accordance with the application of Council Directive 89/336/EEC, Article 4a. Conformity is declared by the application of EN 55 022 Class B (CISPR 22).


