Symbol PPT 8800 Series Quick Reference
Hide thumbs
Also See for PPT 8800 Series:
- Quick reference manual (37 pages) ,
- Product reference manual (328 pages) ,
- Product reference manual (328 pages)
Table of Contents
Advertisement
Quick Links
Download this manual
See also:
Quick Reference Manual
Advertisement
Table of Contents

Related Manuals for Symbol PPT 8800 Series


Summary of Contents for Symbol PPT 8800 Series
- Page 2 Symbol reserves the right to make changes to any product to improve reliability, function, or design. Symbol does not assume any product liability arising out of, or in connection with, the application or use of any product, circuit, or application described herein.
-
Page 3: About This Guide
Transflective color LCD display. About This Guide This guide describes how to set up and use the terminal. The term PPT 8800 Series refers to the batch, Spectrum24 and Bluetooth versions of the terminal. Specific topics covered include: • Accessories on page 2 •... - Page 4 P P T 8 8 0 0 The PPT 8800 Series Product Reference Guide for Embedded ® Windows CE .NET (p/n 72E-58094-XX) details the applications available for the terminal. For the latest version of this guide, visit: http://www.symbol.com/manuals. Accessories The following optional accessories will be available from Symbol: •...
-
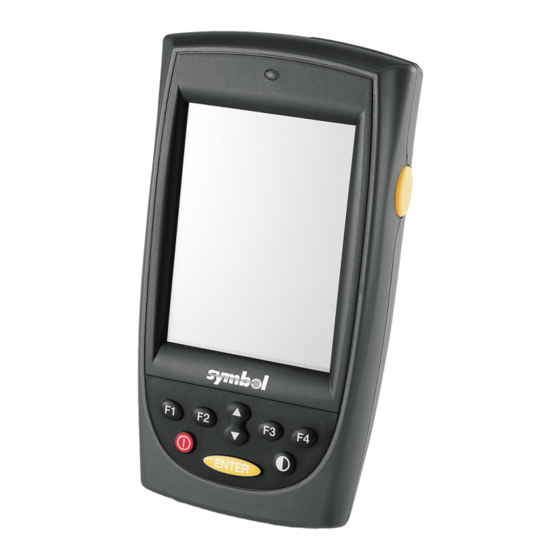
Page 5: Parts Of The Terminal
Q u i c k R e f e r e n c e Parts of the Terminal Scan LED LCD Display Right Scan Trigger Keypad Scan Window Infrared Port Handstrap Stylus Silo... - Page 6 P P T 8 8 0 0 Parts of the Terminal (continued) Neckstrap/ Handstrap Connector Speaker Tether Reset Button Serial Port Battery Battery Cover Compartment Microphone Handstrap Connectors Locking Screw...
-
Page 7: Getting Started
Q u i c k R e f e r e n c e Getting Started Before using the PPT 8800, perform the basic setup procedures: • Install and charge the main battery and backup battery • Start the terminal •... -
Page 8: Charging The Battery
P P T 8 8 0 0 4. Replace the battery cover by inserting the top first, then pressing the bottom in firmly. 5. Turn the locking screw clockwise to secure the cover to the terminal. Charging the Battery Note: To charge the battery for your mobile device, battery and charger temperatures must be between +32°... - Page 9 Q u i c k R e f e r e n c e Charging the Battery Using the Serial Charging Cable Charge the main battery using the Serial Charging Cable. The battery charges in approximately 2 1/2 hours. Serial Charging Cable Charging the Battery Using a Cradle Note:...
-
Page 10: Starting The Terminal
See Performing a Hard Reset on page As the terminal initializes its unique Flash File system, the Symbol splash screen displays for about a minute followed by the calibration screen. Note that these screens also appear every time you perform a hard reset. -
Page 11: Adjusting The Backlight
Q u i c k R e f e r e n c e Using the Power Button button turns the terminal on and off and controls the display’s backlight. Adjusting the Backlight Standard 6-Key Configuration Use the key combinations below to adjust the backlight. Keys Description Turn backlight on or off. -
Page 12: Using The Keypad
P P T 8 8 0 0 Using the Keypad The terminal has two keypad configurations: A Standard 6-key and a 15-key configuration. Scroll Keys Application Application Keys Keys Function key Power Button Enter key Standard 6-Key Configuration Scroll Keys Enter Key Power Button Function Key... - Page 13 Scanning The terminal has an integrated scanner which collects data by scanning bar codes. See the PPT 8800 Series Product Reference Guide for information on configuring your terminal for scanning. To scan bar codes: 1. Launch the terminal’s scanning application.
-
Page 14: Initiating A Network Connection
The green scan LED lights and a beep sounds to indicate a successful decode. Initiating a Network Connection Before using the terminal, set up the Spectrum24 network or Bluetooth connection. Refer to the PPT 8800 Series Product Reference Guide for setup instructions. -
Page 15: Resetting The Terminal
Therefore, never perform a hard reset unless a soft reset does not solve the problem. Note: You can restore any data previously synchronized with a computer during the next ActiveSync operation. See the PPT 8800 Series Product Reference Guide. - Page 16 3. Release the Function key. 4. Replace the battery cover. 5. Press 6. As the terminal initializes its unique Flash File system, the Symbol splash screen displays for about a minute. 7. See Calibrating the Screen on page 8 to perform an initial setup of the terminal.
-
Page 17: Host Communications
Q u i c k R e f e r e n c e Host Communications The terminal can communicate with a host computer either directly through its communications port using the cradle, or wirelessly via ® the Spectrum24 wireless LAN or Bluetooth Wireless PAN. For more information on setting up and performing wireless communications with your terminal, refer to the PDT 8800 Series Product Reference Guide. -
Page 18: Attaching The Neck Strap
P P T 8 8 0 0 To print from an IrDA-compliant printer: 1. Point the IrDA port on the back of the terminal at the IrDA port on the printer, at a maximum distance of 39 inches (1 meter). 2. -
Page 19: Maintenance
Q u i c k R e f e r e n c e Maintenance • Do not scratch the screen. Use the supplied stylus or plastic tipped pens intended for use with a touch-sensitive screen. Never use a pen or pencil or other sharp object on the screen. - Page 20 See your System Administrator. data was incom- figuration. plete. Communication Perform setup as described in the software was incor- PPT 8800 Series Product Reference rectly installed or Guide. configured. No sound is audi- Volume setting is Check the System Volume slider in ble.
- Page 21 Q u i c k R e f e r e n c e Problem Cause Solution Terminal does not Battery cover is at- You must remove the battery cover respond to a hard tached. before performing a hard reset. reset.
- Page 22 See your Sys- scan input. tem Administrator. Unreadable bar Ensure the symbol is not defaced. code. Distance between Ensure you are within proper scan- exit window and bar ning range. code is incorrect.
-
Page 23: Ergonomic Recommendations
In addition to the list above other countries may require a regulatory stamp to be affixed to the product. Please refer to www.symbol.com for the list of countries where mandatory stamps are required. For countries that require regulatory label, a sheet of stamps may be enclosed within the package. -
Page 24: Laser Devices
Operation of the device without a regulatory label or the correct country Stamp is illegal. Laser Devices Symbol devices using lasers comply with US 21CFR1040.10, and IEC825-1:1993, EN60825-1:1994+A11:1996. The laser classification is marked on one of the labels on the device. -
Page 25: Power Supply
LASERPRODUKT DER KLASSE 2 Power Supply Note: Use only a Symbol-approved power supply (50-14000-107) output rat- ed 9.0 Vdc and minimum 2.0 A. The power supply is certified to EN60950 with SELV outputs. Hinweis: Benutzen Sie nur eine Symbol Technologies genehmigt Stromversor- gung (50-14000-107) in den Ausgabe: 9.0 Vdc und minimum 2.0 A. -
Page 26: Fcc Rf Exposure Guidelines
P P T 8 8 0 0 FCC RF Exposure Guidelines This device was tested for typical body-worn operations with the holster providing a minimal spacing of 2.0 cm from the body to the back of the terminal/antenna. To maintain compliance with FCC RF exposure compliance requirements, use only belt- clips, holsters, or similar accessories that maintain a 2.0 cm separation distance between the user's body and the back of the terminal, including the antenna. - Page 27 • Italy requires a user license for outside usage. Statement of Compliance Symbol Technologies, Inc., hereby, declares that this device is in compliance with the essential requirements and other relevant provisions of Directives 1999/5/EC, 89/ 336/EEC and 73/23/EEC. Declaration of Conformities may be obtained from http:// www2.symbol.com/doc/.
-
Page 28: Battery Information
When you consistently experience significant loss of run time, replace your battery. Standard warranty period for all Symbol batteries is 30 days, regardless if the battery was purchased separately or included as part of the mobile computer or bar code scanner. - Page 29 Q u i c k R e f e r e n c e...
- Page 30 P P T 8 8 0 0...
-
Page 31: Warranty
Product result from normal wear and tear, misuse, negligence, improper storage, water or other liquids, battery leakage, use of parts or accessories not approved or supplied by Symbol, or failure to perform operator handling and scheduled maintenance instructions supplied by Seller; (iii) which... -
Page 32: Service Information
+1-954-255-2610 Outside US Europe/Mid-East Contact local distributor or call Distributor Operations +44 118 945 7360 For the latest version of this guide go to: http://www.symbol.com/manuals. 72-58093-04 Revision A - March 2005 Symbol Technologies, Inc. One Symbol Plaza, Holtsville, N.Y. 11742-1300...