LG LRY-517 Owner's Manual
Lg vcr & dvd recorder owner's manual
Hide thumbs
Also See for LRY-517:
- Specifications (2 pages) ,
- Specifications (2 pages) ,
- Owner's manual (65 pages)
Table of Contents
Advertisement
Quick Links
Advertisement
Table of Contents
Troubleshooting

Related Manuals for LG LRY-517


Summary of Contents for LG LRY-517
- Page 1 RC7793CML.AA1ULL_RV0011V_ENG VCR & DVD RECORDER OWNER’S MANUAL MODEL: LRY-517 Before connecting, operating or adjusting this product, please read this owner’s manual carefully and completely. Call us and we will guide you through your first recording, for free. 1-800-243-0000...
- Page 2 Consult the dealer or an experienced radio/TV tech- nician for help. FCC COMPLIANCE: The responsible party for this prod- uct’s compliance is: LG Electronics U.S.A., Inc.,1000 Sylvan Avenue, Englewood Cliffs, NJ. Phone: 1-800-243-0000. CAUTION concerning the Power Cord Most appliances recommend they be placed upon a dedicated circuit;...
-
Page 3: Important Safety Instructions
IMPORTANT SAFETY INSTRUCTIONS CAUTION: PLEASE READ AND OBSERVE ALL WARNINGS AND INSTRUCTIONS IN THIS OWNER’S MANUAL. AND THOSE MARKED ON THE PRODUCT. RETAIN THIS BOOKLET FOR FUTURE REFERENCE. This product has been designed and manufactured to assure personal safety. Improper use can result in electric shock or fire hazard. -
Page 4: Table Of Contents
INTRODUCTION Symbol Used in this Manual ....6 About the Symbol Display ... . .6 Notes on Discs ......6 Moisture Condensation . - Page 5 • Repeat A-B ..... .36 • Search ......36 Notes on MP3/WMA Recordings .
-
Page 6: Symbol Used In This Manual
Introduction To ensure proper use of this product, please read this owner’s manual carefully and retain for future refer- ence. Symbol Used in this Manual Indicates hazards likely to cause harm to the unit itself or other material damage. Note: Indicates special notes and operating fea- tures. -
Page 7: Recordable And Playable Discs
Recordable and Playable Discs DVD-RW (DVD - ReWritable) DVD-RW discs can be formatted for VR mode recording or Video mode recording. These Discs can be recorded on repeatedly. Recordings can be erased, then you can record again on the same Disc. [VR mode] Recordings can be extensively edited Playable only on VR mode compatible players (after finalization) -
Page 8: Playable Discs
Playable Discs DVD (8 cm / 12 cm disc) Discs such as movies that can be purchased or rented Video CD (VCD) (8 cm / 12 cm disc) VIDEO CDs or CD-Rs/CD-RWs in VIDEO CD/Super VIDEO CD format Audio CD (8 cm / 12 cm disc) Music CDs or CD-Rs/CD-RWs in music CD format that can be purchased CD-R/CD-RW (8 cm / 12 cm disc) CD-R/CD-RW discs that contain audio titles, MP3, WMA, JPEG or DivX files. -
Page 9: Restrictions On Video Recording
Restrictions on video recording • You cannot record copy-protected video using this recorder. Copy-protected video includes DVD- Video discs and some satellite broadcasts. If copy-protected material is encountered during a recording, recording will pause or stop automati- cally and an error message will be displayed on- screen. -
Page 10: Card Useable On This Unit
Card useable on this unit Card useable on this unit Compact Flash Card (CF) • Micro Drive (MD) • Secure Digital Card (SD) • Multi Media Card (MMC) • SmartMedia Card (SMC) • xD-Picture Card (xD) • Memory Stick (MS) •... -
Page 11: Disc-Related Terms
Disc-related terms DVD +R (Double Layer) Double layer recording technology offers two record- able layers on a single DVD disc, providing nearly double the capacity of 4.7GB single layer DVDs. The greatest, most valuable benefit of double layer recording technology is increased capacity. Storage space is nearly doubled with double layer DVD+R media, allowing consumers to burn up to 8.5GB of video on a single DVD+R disc. -
Page 12: Front Panel
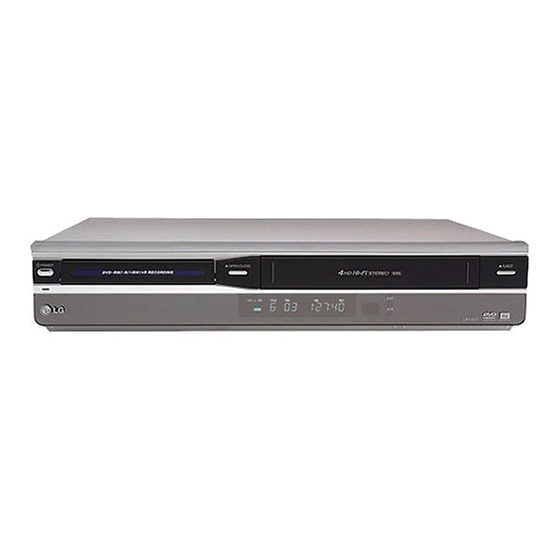
Front Panel POWER button and indicator Switches the Recorder ON and OFF. Lights green when the Recorder is turned on. Disc Tray (DVD deck) Insert a disc here. Z OPEN/CLOSE Opens or closes the disc tray. Cassette Compartment (VCR deck) Insert a video cassette here. -
Page 13: Function Display Window
Function Display Window PRG TTL SVCD M.CARD Indicates the type of disc loaded. SVCD Indicates when Memory Card is M.CARD activated. Indicates repeat mode. Indicates when the recorder is in timer recording or a timer recording is programmed. The recorder is recording. Programmed playback active. -
Page 14: Remote Control
Remote Control Repeats sequence between two points (A and B) ANGLE Selects a DVD camera angle, if available. AUDIO Selects an audio language (DVD) or an audio channel (CD). BACKWARD / FORWARD RANDOM Plays tracks in random order. (m/M) - DVD: Search backward or forward. REC MODE - VCR: Rewinds/Advances the tape Selects the recording mode:... -
Page 15: Rear Panel
Rear Panel ANT.IN Connect the antenna to this terminal. AC Power Cord Plug into the power source. AV 1 IN (VIDEO IN /AUDIO IN (Left/Right)) Connect the audio/video output of an external source (Audio system, TV/Monitor, VCR, Camcorder). AV OUT (VIDEO OUT/AUDIO OUT (Left/Right)) Connect to a TV with video and audio inputs. -
Page 16: Connecting An Antenna Or Cable Tv
Connecting an Antenna Connecting an Antenna or Cable TV or Cable TV a Antenna Disconnect the antenna from the rear of the TV and identify the antenna cable. If it is a round 75 ohm coaxial cable connect it directly to the jack marked ANT.IN on your Recorder. -
Page 17: Optional Tv Connections
RF coaxial connection Connect the RF.OUT jack on the Recorder to the antenna in jack on the TV using the supplied 75-ohm Coaxial Cable (R). How to set the Recorder’s RF output channel 1. When the Recorder is turned off, press and hold CH (V/v) on the front panel for more than five seconds. - Page 18 Connecting to an amplifier equipped with two chan- nel digital stereo (PCM) or to an Audio/Video receiv- er equipped with a multi-channel decoder (Dolby Digital™, MPEG 2, or DTS) 1. Connect one of the Recorder’s DIGITAL AUDIO OUT jacks (OPTICAL O, COAXIAL X) to the cor- responding in jack on your amplifier.
-
Page 19: Initial Settings
Initial Settings Initial Settings In this menu system, there are several ways to cus- tomize the settings provided. Most menus consist of three levels to set up the options, but some require greater depth for the variety of settings. General Operation 1. -
Page 20: To Add Or Erase Channels From Memory
To Add or Erase Channels from Memory This feature allows you to add to or erase channels from memory manually. 1. Select the [CH. Add/Del] option. 2. Press B to move to the third level. [Edit] icon is highlighted. 3. Press ENTER and the Channel Edit menu appears. -
Page 21: Progressive Scan
Progressive Scan Progressive Scan Video provides the highest quality pictures with less flickering. [ON] : Using the COMPONENT/PROGRESSIVE SCAN VIDEO OUT jacks for connection to a TV or monitor that is compatible with a progressive scan signal. [OFF] : Using the COMPONENT/PROGRESSIVE SCAN VIDEO OUT jacks, but are con- necting the Recorder to a standard (ana- log) television. -
Page 22: Audio Settings
Audio Settings Each DVD disc has a variety of audio output options. Set the Recorder’s Audio Output according to the type of audio system you use. Dolby Digital / DTS / MPEG [Bitstream]: Select [Bitstream] if you connect the DVD+VCR’s DIGITAL AUDIO OUT jack to an amplifier or other equipment with a Dolby Digital, DTS or MPEG decoder. -
Page 23: Lock (Parental Control) Settings
Lock (Parental Control) Settings Rating Some movies contain scenes that may not be suit- able for children to view. Many of these discs contain parental control information that applies to the com- plete disc or to certain scenes on the disc. Movies and scenes are rated from 1 to 8, depending on the area. -
Page 24: Recording Settings
Recording Settings Disc Record Mode You can set the picture quality for recording; XP (Excellent quality), SP (Standard quality), LP (Low quality), EP (Extend quality). 1. Select the [Disc Record Mode] option then press 2. Use v / V to select a desired Disc Record Mode (XP, SP, LP or EP). -
Page 25: Finalize
Finalize Finalizing ‘fixes’ the recordings in place so that the disc can be played on a regular DVD player or com- puter equipped with a suitable DVD-ROM drive. Finalizing a Video mode disc creates a menu screen for navigating the disc. This is accessed by pressing LIST/DISC MENU or TITLE. -
Page 26: Pbc
PBC stands for Playback Control and refers to special menus and navigation features that are available on some Video CDs. [ON]: Video CDs are played according to the PBC, if available. [OFF]: Video CDs are played the same way as Audio CDs. -
Page 27: General Explanation Of On-Screen Display
General Explanation of General Explanation of On-Screen Display On-Screen Display Some DVDs require specific operation or allow only limited operation during playback. When this occurs, is displayed, action prohibited or not available. Displaying Information While Watching TV While watching TV, press DISPLAY to display/ remove the information displayed on-screen. -
Page 28: Playback
Playback VCR T ape Playback VCR T ape Playback Press VCR button to select the device to be operated. Basic Instructions 1. Insert a pre-recorded video cassette. indicator lights and the Recorder pow- ers on automatically. 2. If the (TIMER) indicator in the display window is lit press POWER once. -
Page 29: Counter Memory Function
Counter Memory Function This feature is useful if there is a section of tape you want to view immediately after recording or if you want to return to the same point several times. 1. Begin recording or playing a tape. 2. -
Page 30: Slow Motion
Slow Motion Video 1. Press BACKWARD (m) or FORWARD (M) during pause mode. 2. Use the BACKWARD (m) or FORWARD (M) to select the required speed: DVD : 4 steps (forward and backward) Video CD: 3 steps (forward only). 3. To exit Slow Motion mode, press N (PLAY). Search Video 1. -
Page 31: Still Picture And Frame-By-Frame Playback
Still Picture and Frame-by-Frame Playback Video 1. Press PAUSE/STEP (X) during playback. Advance the picture frame-by-frame by pressing PAUSE/STEP (X) repeatedly. 2. To exit still motion mode, press N (PLAY). Tips: You can advance or back up the picture • frame-by-frame by pressing b / B repeatedly during PAUSE mode. -
Page 32: Changing The Audio Soundtrack
Changing the Audio Soundtrack Press AUDIO then press b / B repeatedly during playback to hear a different audio language or audio soundtrack if available. N o t e : Some discs feature both Dolby Digital and DTS soundtracks. There is no analog audio output when DTS is selected. -
Page 33: Playing A Divx Movie File
Playing a DivX Movie File Playing a DivX Movie File The Recorder can play Divx files on CD-R/RW or DVD±R/RW discs. Before playing DivX files, read “About DivX movie files” on page 34. 1. Use v / V to select a folder, and press ENTER twice. -
Page 34: About Divx Movie Files
About DivX movie files DivX disc compatibility with this recorder is limit- ed as follows: Available resolution size of the DivX file is under 720x576 (W x H) pixel. The file name of the DivX subtitle is limited to char- acters. -
Page 35: Playing An Audio Cd Or Mp3/Wma Files
Playing an Audio CD or Playing an Audio CD or MP3/WMA files MP3/WMA files The Recorder can play Audio CDs and MP3/WMA files on CD-ROM, CD-R/RW, DVD+R/RW, DVD-R/RW, DVD-RAM discs or Memory Card. Before playing MP3/WMA files, read [Notes on MP3/WMA Recordings] on page 36. -
Page 36: Changing The Audio Channel
Changing the Audio Channel Press AUDIO repeatedly to hear a different audio channel (stereo, left or right). Random 1. Press RANDOM during playback or in stop mode. Random Playback begins immediately and [RANDOM] appears on the menu screen. 2. To return to normal playback, press RANDOM repeatedly until [RANDOM] disappears from the menu screen. -
Page 37: Program Playback With Audio Cd And Mp3/Wma Files
Program Playback with Program Playback with CD and MP3/WMA files CD and MP3/WMA files The program function enables you to store your favourite tracks from any disc in the player memory. Program can contain 99 tracks (Audio CD) or 256 tracks (MP3/WMA). -
Page 38: Viewing A Jpeg Files
iewing a JPEG files iewing a JPEG files This unit can play JPEG files on CD-R/RW, DVD+R/RW, DVD-R/RW, DVD-RAM discs or Memory Card. Before playing JPEG recordings, read “About JPEG image files” on page 39. 1. Use v V b B to select a file or folder and press ENTER. -
Page 39: View Slide Shows
View Slide Shows 1. Select [Slide Show] option on the Photo menu. 2. Press ENTER. 3. Use b / B / v / V to set the options. [Object] option: • [Selected] Views slide show only selected files. • [All] Views slide show all files. [Speed] option: Sets the Slide Show speed to [Normal], [Slow], or [Fast]. -
Page 40: Recording
Recording About DVD recording About DVD recording Notes: • This Recorder cannot record CD-R or CD-RW discs. • Fingerprints and small scratches on a disc can affect playback and/or recording performance. Please take proper care of your discs. • The company does not hold any responsibility to compensate the contents which should have been recorded, and any losses or damages (e.g. -
Page 41: Basic Recording From A Tv
Basic Recording from a TV Basic Recording from a TV Follow the instructions below to record a TV program. Recording starts immediately and continues until the disc or tape is full or you stop the recording. 1. Switch on the Recorder, select the device (VCR or DVD) for Recording and load a recordable disc or tape. -
Page 42: To Record One Tv Program While Watching Another
To record one TV program while watching another 1. Press TV/VCR to select the TV mode during recording. The TV indicator appears. 2. Using the TV, select the channel to be viewed. Tip (VCR mode only) Always use PAUSE/STEP (X) for best results when making changes during recording . -
Page 43: Timer Recording Troubleshooting
Timer Recording Troubleshooting Even though the timer is set, the recorder will not record when: • There is no disc (or tape) loaded. • A non-recordable disc (or tape) is loaded. • Disc Protect is set to ON in the Disc menu (see page 26). -
Page 44: Dubbing From Dvd To Vcr
Dubbing from DVD to VCR Dubbing from DVD to VCR You can copy the contents of a DVD to a VHS tape using the DUBBING (or DUB) button. 1. Insert a blank VHS videotape into the VCR deck. 2. Insert the disc you wish to copy in the DVD deck and close the disc tray. -
Page 45: Recording From External Components
Recording from External Recording from External Components Components You can record from an external component, such as a camcorder or VCR, connected to any of the Recorder’s external inputs. 1. Make sure that the component you want to record from is connected properly to the Recorder. See page 18. -
Page 46: Recording From Dv Input
Recording from DV Input Recording from DV Input Before DV dubbing You can connect a DV-equipped camcorder to this recorder using a single DV cable for input and output of audio, video, data and control signals. This recorder is only compatible with DV-format (DVC-SD, DV25) camcorders. -
Page 47: Editing
Editing itle List and Chapter List itle List and Chapter List Menu Overview Menu Overview Using the Title List menu you can edit video content. The editing features available in the Title List menu depend on whether you are editing video on DVD, and whether you’re editing Original content, or a Playlist. -
Page 48: Vr Mode: Original And Playlist Editing
VR Mode: Original and VR Mode: Original and Playlist Editing Playlist Editing Titles, Chapters and Parts Titles in the disc’s original content contain one or more chapters. When you insert a disc’s title into the Playlist, all the chapters within that title also appear. In other words, chapters in the Playlist behave exact- ly as chapters on a DVD-Video disc do. -
Page 49: Making A New Playlist
Making a New Playlist Making a New Playlist Use this function to add an Original title or chapter to the Playlist. When you do this, the whole title is put into the Playlist (you can delete bits you don’t need later - see [Deleting an Original or Playlist title/chap- ter] on page 50). -
Page 50: Deleting An Original Or Playlist Title/Chapter
Deleting an Original or Deleting an Original or Playlist T itle/Chapter Playlist T itle/Chapter When you erase a title or chapter from the Playlist menu, you only remove it from the Playlist; the title/chapter remains in the Original menu. If you choose to delete a title or chapter from the Original (title/chapter) menu, the title or chapter is actually deleted from the disc and the remaining time available for recording increases. -
Page 51: Naming A Title
Naming a T itle Naming a T itle You can name Original and Playlist titles independ- ently. 1. Choose the title you want to name on the Title List menu, then press ENTER. The menu options appears on the left side of the menu. -
Page 52: Divide One Titles Into Two
Divide One T itle Into T Divide One T itle Into T Use this command to split a title up into two new titles. 1. On the Title List menu, select a title you want to divide then press ENTER. The menu options appears on the left side of the screen. -
Page 53: Moving A Playlist Chapter
Moving a Playlist Chapter Use this function to re-arrange the playing order of Playlist chapters on the Chapter List-Playlist menu. Note: This function is not available if there is only one chapter. 1. Select a chapter on the Chapter List-Playlist menu. -
Page 54: Overwriting Recording
Overwriting Recording Overwriting Recording To overwrite a new video recording on a previously recorded title, follow these steps. This feature is not available for DVD+Rs, that always record at the end of the Disc. 1. Select input source you want to record (TV chan- nel, AV1-2, DV). -
Page 55: Reference
Controlling other TVs with the remote You can control the sound level, input source, and power switch of non-LG TVs as well. If your TV is list- ed in the table below, set the appropriate manufactur- er code. 1. While holding down TV POWER button, press the number buttons to select the manufacturer code for your TV (Refer to table on the right column). -
Page 56: Language Code List
Language Code List Use this list to input your desired language for the following initial settings: Disc Audio, Disc Subtitle, Disc Menu. Language Code Language Abkhazian 6566 Fiji Afar 6565 Finnish Afrikaans 6570 French Albanian 8381 Frisian Ameharic 6577 Galician Arabic 6582 Georgian... -
Page 57: Troubleshooting
roubleshooting roubleshooting Check the following guide for the possible cause of a problem before contacting service. Symptom The power cord is disconnected. No power. No picture. The TV is not set to receive Recorder signal output. The video cable is not connected securely. - Page 58 Symptom The Recorder does not No disc is inserted. start playback. No tape is inserted. An unplayable disc is inserted. The disc is placed upside down. The disc is not placed within the guide. The disc is dirty. The Rating level is set. Video tape cannot be Is the cassette compartment empty? inserted.
-
Page 59: Reset The Recorder
Symptom Picture or sound of Antenna or cables are loose. broadcasting channel is Wrong Tuning Band is selected in the weak or missing. Recorder Setup menu. The disc was recorded in Video mode. Can’t play disc recorded on this Recorder on Some players will not play even a another DVD player. -
Page 60: Specifications
Specifications Specifications General Power requirements Power consumption Dimensions (approx.) Mass (approx.) Operating temperature Operating humidity Signal system Recording Recording format Recordable discs Recordable time Video recording format Sampling frequency Compression format Audio recording format Sampling frequency Compression format VCR Specifications Head system Timer Tape speed... -
Page 61: Specifications
DVD Specifications Laser system Semiconductor laser, wavelength 650 nm Frequency response DVD (PCM 48 kHz): 8 Hz to 22 kHz, CD: 8 Hz to 20 kHz Signal-to-noise ratio More than 95dB Harmonic distortion Less than 0.008% Dynamic range More than 90 dB Inputs ANTENNA IN Antenna or CATV input, 75 ohms... - Page 62 This LG Electronics product, will be repaired or replaced, at LG’s option, if it proves to be defective in material or workmanship, under normal use, during the warranty period (“Warranty Period”) listed below, effective from the date (“Date of Purchase”) of original consumer purchase of the product. This warranty is good only to the original pur- chaser of the product and effective only when used in the United States, excluding U.S.