LG LGDVT418 Owner's Manual
Dvd/cd receiver
Hide thumbs
Also See for LGDVT418:
- Service manual (58 pages) ,
- Owner's manual (40 pages) ,
- Specifications (2 pages)

Related Manuals for LG LGDVT418


Summary of Contents for LG LGDVT418
- Page 1 LH-T6749A JA1ULLK_ENG DVD/CD RECEIVER OWNER’S MANUAL MODEL: LGDVT418 Before connecting up, operating or repairing this product, please read this instruction booklet carefully and completely.
- Page 2 LH-T6749A JA1ULLK CAUTION RISK OF ELECTRIC SHOCK DO NOT OPEN WARNING: TO REDUCE THE RISK OF ELECTRIC SHOCK, DO NOT REMOVE COVER (OR BACK) NO USER-SERVICEABLE PARTS INSIDE REFER SERVICING TO QUALIFIED SERVICE PERSONNEL. This lightning flash with arrowhead symbol within an equilateral triangle is intended to alert the user to the presence of uninsulated dangerous voltage within the product’s enclosure that may be of...
-
Page 3: Introduction
IMPORTANT SAFETY INSTRUCTIONS CAUTION: PLEASE READ AND OBSERVE ALL WARNINGS AND INSTRUCTIONS IN THIS OWNER’S MANUAL AND THOSE MARKED ON THE UNIT. RETAIN THIS MANUAL FOR FUTURE REFERENCE. This set has been designed and manufactured to assure personal safety. Improper use can result in electric shock or fire hazard. -
Page 4: Table Of Contents
Contents Introduction ....3-10 IMPORTANT SAFETY INSTRUCTIONS ..3 Symbol used in this Manual ....5 About the Symbol Display Notes on Discs . -
Page 5: Symbol Used In This Manual
Introduction To ensure proper use of this product, please read this owner’s manual carefully and retain for future reference. This manual provides information on the operation and maintenance of your DVD/CD receiver. Should the unit require service, contact an authorized service location. -
Page 6: Types Of Playable Discs
Types of Playable Discs (8 cm / 12 cm disc) DVD audio discs (8 cm / 12 cm disc) Audio CD (8 cm / 12 cm disc) In addition, this unit plays DVD -R, DVD +R, DVD -RW, DVD +RW, and CD-R / CD-RW that contains audio titles, MP3, WMA, and/or JPEG files. -
Page 7: Disc-Related Terms
Disc-related terms DVD ±R / DVD ±RW DVD -R and DVD +R are two different standards for recordable DVD drives and discs. This format allows information to be recorded onto the DVD disc only once. DVD +RW and DVD -RW are two standards for re-writable media, meaning the DVD content can be erased and re-recorded. -
Page 8: Front Panel
Front Panel STANDBY/ON STANDBY indicator Lights red when the receiver is in Standby mode (off). DISC Tray FUNCTION/PLAY Press and hold down this button about 3 seconds, then press repeatedly to select other function. MONO/STEREO/ PAUSE/STEP MEMORY/STOP AV2 AUDIO Input (L/R)/VIDEO Input Display Window Indicates current SLEEP... -
Page 9: Remote Control
Remote Control POWER NUMBER PRO LOGIC II (p. 17) AUDIO (p. 25) SOUND (p. 17) SETUP (p. 19) ARROW For use in highlighting a selection on a GUI menu screen, TITLE and MENU screen. MENU (p. 25) Use the MENU button to display the menu screen included on DVD video discs. -
Page 10: Rear Panel
Rear Panel POWER CORD SPEAKER Connectors OPTICAL IN Connector S-VIDEO OUT Connector MONITOR VIDEO OUT Connector COMPONENT VIDEO OUT Connectors Connect to a TV with Y Pb Pr Do not touch the inner pins of the jacks on the rear panel. Electrostatic discharge may cause permanent damage to the unit. -
Page 11: Installation And Setup
Installation and Setup TV Connections Make one of the following connections, depending on the capabilities of your existing equipment. Tips: Depending on your TV and other equipment you wish to connect, there are various ways you could connect the DVD/CD Receiver. Use one of the connections described below. -
Page 12: Audio Connection To Optional Equipment
To AUDIO OUT (L/R)/ VIDEO OUT OPTICAL DVD Player (or Digital Device, etc) Note: If the audio format of the digital output does not match the capabilities of your DVD/CD Receiver, the receiver will produce a strong, distorted sound or no sound at all. -
Page 13: Antenna Connections
Antenna Connections Connect the supplied FM/AM antenna for listening to the radio. Connect the AM Loop antenna to the AM antenna connector. Connect he FM Wire antenna to the FM antenna connector. Notes: To prevent noise pickup, keep the AM Loop antenna away from the DVD/CD receiver and other components. Be sure to fully extend the FM wire antenna. -
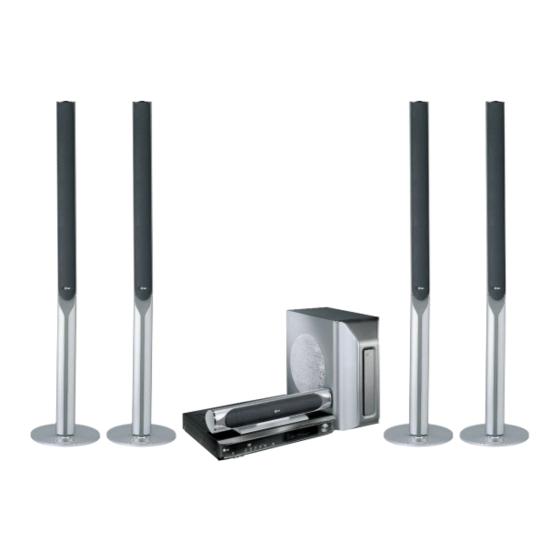
Page 14: Assembling And Connecting To The Speakers
Assembling and Connecting to the Speakers The front and rear speakers are detached from the speaker stands. Connect the speaker cords and assemble the front and rear speakers from speaker stands as illustrated. To attach the speaker to the stand How to connect the Speakers Connect the speaker cords to the appropriate terminals on the bottom of each front and rear... -
Page 15: Speaker System Connection
Speaker System Connection Connect the speakers using the supplied speaker cords. To obtain the best possible surround sound, adjust the speaker parameters (volume, distance, etc.). Notes: Be sure to match the speaker cable to the appropriate terminal on the components: + to + and – to –. If the cables are reversed, the sound will be distorted and will lack base. -
Page 16: Speaker Positioning
Speaker Positioning In the case of normal position use the 6 speakers (2 front speakers, 1 center speaker, 2 rear speakers and subwoofer). If you want to play the excellent bass sound, DTS digital surround or Dolby Digital surround, you should connect a subwoofer. -
Page 17: Mini Glossary For Audio Stream & Surround Mode
Mini Glossary for Audio Stream & Surround Mode Allows you to enjoy 5.1(or 6) discrete channels of high quality digital audio from DTS program sources such as discs, DVD and compact discs, etc.bearing the trademark. DTS Digital Surround delivers up to 6 channels of transparent audio(which means identical to the original masters) and results in exceptional clarity throughout a true 360 degree sound field. -
Page 18: On-Screen Display
On-Screen Display You can display the general playback status on the TV screen. Some items can be changed using the menu. To use the on-screen display: 1. Press DISPLAY during playback. 2. Press v / V to select an item. The selected item is highlighted. -
Page 19: Initial Settings
Initial Settings By using the Setup menu, you can make various adjustments to items such as picture and sound. You can also set a language for the subtitles and the Setup menu, among other things. For details on each Setup menu item, see pages 19 to 22. To display and exit the Menu: Press SETUP to display the menu. -
Page 20: Audio
Note: If your TV does not accept the Progressive • Scan format, the picture will appear scrambled if you try Progressive Scan on the DVD/CD receiver. 4. When the confirm menu appears on your screen Cancel is highlighted as default. Use the b / B buttons to highlight Enter. -
Page 21: Lock (Parental Control)
LOCK (Parental Control) LOCK Rating Unlock Password Country Code Move DVD-V Rating Some movies contain scenes that may not be suitable for children to view. Many of these discs contain parental control information that applies to the complete disc or to certain scenes on the disc. Movies and scenes are rated from 1 to 8, depending on the country. -
Page 22: Others
OTHERS The Auto Play and B.L.E. settings can be changed. OTHERS Auto Play B.L.E. Move DVD-V Auto Play You can set up the DVD/CD receiver so a DVD disc automatically starts playing whenever the DVD is inserted. If Auto Play mode is set to On, this DVD/CD receiver will search for title that has the longest playback time and then play back the title automatically. -
Page 23: Operation
Operation Playing a DVD PLAYBACK SETUP 1. Turn on the TV and select the video input source connected to the DVD/CD receiver. 2. Turn on the audio system (if applicable) and select the input source connected to the DVD/CD receiver. 3. -
Page 24: Still Picture And Frame-By-Frame
Still Picture and Frame-by-Frame Playback DVD-V DVD-A 1. Press PAUSE/STEP on the remote control during playback. Advance the picture frame-by-frame by pressing PAUSE/STEP repeatedly. 2. To exit still motion mode, press PLAY. Note: When using a DVD audio disc that includes pictures, this operation may be permitted in some picture segments. -
Page 25: Zoom
ZOOM DVD-V DVD-A Use zoom to enlarge the video image. 1. Press ZOOM during playback or still playback to activate the Zoom function. The square frame appears briefly in the right bottom of the picture. 2. Each press of the ZOOM button changes the TV screen in the sequence: 100% size →... -
Page 26: Dvd Audio Discs
DVD Audio Discs DVD Audio is a new disc format building on the success of DVD to provide high quality, uncompressed, multi-channel audio for a new experience in audio quality. A DVD Audio disc can be identified by the DVD audio logo on the disc jacket or on the disc itself. -
Page 27: Playing An Audio Cd Or Mp3/Wma Disc
Playing an Audio CD or MP3/WMA Disc The DVD/CD receiver can play MP3/WMA formatted recordings on CD-ROM, CD-R, or CD-RW discs. Audio CD Once you insert an audio CD a menu appears on the TV screen. Press v / V to select a track then press PLAY or ENTER and playback starts. -
Page 28: Audio Cd And Mp3 / Wma Disc Features
Audio CD and MP3 / WMA Disc Features PAUSE 1. Press PAUSE/STEP during playback. 2. To return to playback, press PLAY, ENTER or press PAUSE/STEP again. MOVING TO ANOTHER TRACK 1. Press SKIP (. or >) briefly during playback to go to the next track or to return to the beginning of the current track. -
Page 29: Programmed Playback
Programmed Playback The program function enables you to store your favorite tracks from any disc in the receiver memory. A program can contain 30 tracks. 1. Insert a disc. Audio CD or MP3/WMA Discs: AUDIO CD or MUSIC menu appears. 2. -
Page 30: Viewing A Jpeg Disc
Viewing a JPEG Disc Using this DVD/CD receiver you can view discs with JPEG files. 1. Insert a disc and close the tray. The PHOTO menu appears on the TV screen. PHOTO List Preview JPEG Folder 1 JPEG Folder 2 JPEG Folder 3 JPEG Folder 4 JPEG Folder 5... -
Page 31: Playing A Dvd Vr Format Disc
Playing a DVD VR format Disc This unit will play DVD-R/RW discs recorded using the DVD-Video format that have been finalized using a DVD-recorder. • This unit will play DVD-RW discs recorded using the Video Recording (VR) format. 1. Insert a disc and close the tray. The DVD-VR menu appears on the TV screen. -
Page 32: Additional Features
Additional Features VIDEO MODE SETTING The video mode setting only works when the Progressive Scan mode is set to “On” in the Setup menu. With certain discs, the playback picture may be • flickering or Dot Crawl is shown on straight lines. That means Vertical interpolation or De-interlace is not perfectly matched with the disc. -
Page 33: 5.1 Speaker Setup
5.1 Speaker Setup This chapter includes important reference information to help you set your DVD/CD receiver. Speaker Setup Make the following settings for the built-in 5.1 channel surround decoder. 1. Press SETUP. The setup menu appears. 2. Use v / V to select the AUDIO option then press B to move to the second level. -
Page 34: Presetting The Radio Stations
Presetting the Radio Stations You can preset 50 stations for FM and AM (MW). Before tuning, make sure that you have turned down the volume. 1. Press BAND on the remote control until FM or AM (MW) appears in the display window. 2. -
Page 35: Sleep Timer Setting
Sleep Timer Setting You can set the DVD/CD Receiver to turn off automatically at a specified time. 1. Press SLEEP to set the desired sleep time. The SLEEP indicator and sleep time appears in the display window. 2. Each time you press SLEEP the setting changes in the following order. -
Page 36: Reference
Language Codes Use this list to input your desired language for the following initial settings: Disc Audio, Disc Subtitle, Disc Menu. Language Code Language Abkhazian 6566 Fiji Afar 6565 Finnish Afrikaans 6570 French Albanian 8381 Frisian Ameharic 6577 Galician Arabic 6582 Georgian Armenian... -
Page 37: Troubleshooting
Troubleshooting Check the following guide for the possible cause of a problem before contacting service. Symptom No power. • The power cord is disconnected. The power is on, but • No disc is inserted. the DVD/CD Receiver does not work. •... - Page 38 Symptom • The antenna is positioned or connected Radio stations cannot poorly. be tuned in. • The signal strength of the stations is too weak (when tuning in with automatic tuning). • No stations have been preset or preset stations have been cleared (when tuning by scanning preset stations).
-
Page 39: Specifications
Specifications Power supply Power consumption Mass External dimensions (W x H x D) Operating conditions Operating humidity Laser Signal system Frequency response (audio) Signal-to-noise ratio (audio) Dynamic range (audio) Harmonic distortion (audio) Video input Video output S-video output COMPONENT VIDEO OUT Tuning Range Intermediate Frequency Signal-to Noise Ratio... - Page 40 DVD/CD Receiver -LGDVT418 This LG Electronics product, marketed by Zenith, will be repaired or replaced, at LG’s option, if it proves to be defective in material or workmanship, under normal use, during the warranty period (“Warranty Period”) listed below, effective from the date (“Date of Purchase”) of original consumer purchase of the product. This warranty is good only to the original purchaser of the product and effective only when used in the United States, excluding U.S.