Table of Contents
Advertisement
Quick Links
Advertisement
Table of Contents

Related Manuals for Philco PEI 12715


Summary of Contents for Philco PEI 12715
-
Page 1: Range Hood
RANGE HOOD USER'S MANUAL PEI 12715 PEM 14 PEM 8... - Page 2 Dear customer, Thank you for buying a PHILCO brand product. So that your appliance serves you well, please read all the instructions in this user's manual.
-
Page 3: Table Of Contents
CONTENTS PART 1: IMPORTANT SAFETY INSTRUCTIONS ....................2 PART 2: DESCRIPTION OF THE APPLIANCE ....................4 PART 3: INSTALLATION ............................ 5 Unpacking ........................................5 Dimensions of the appliance ................................5 Placement ........................................5 Assembly and installation ..................................6 Carbon fi lter.......................................8 Ventilation ........................................8 PART 4: INSTALLATION OF THE EXTERNAL MOTOR UNIT ................9 PEM 14 External motor unit .................................9 PEM 8 External motor unit ................................ -
Page 4: Part 1: Important Safety Instructions
PART 1: IMPORTANT SAFETY INSTRUCTIONS Recommendation: Carefully read these instructions before installing and operating this range hood. Write down the serial number found on the rating label of the range hood in the space below. It is essential that you store this user's manual in a safe place so that you can use it in the future. If you intend to sell the appliance, give it to another owner, or if you move, always make sure that the user's manual is attached to the appliance, so that the new owner can also learn about the operation of the appliance and the relevant warnings. - Page 5 If a chimney is connected to the exhaust of the range hood, use pipes with a diameter of 150 or 120 mm. The pipe connection should be as short as possible. Keep packaging materials out of children's reach. They could suff er injury or suff ocation. ...
-
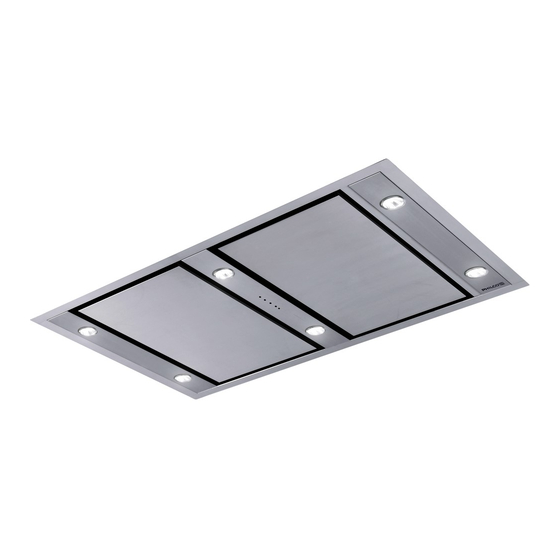
Page 6: Part 2: Description Of The Appliance
PART 2: DESCRIPTION OF THE APPLIANCE Power cord Function indicator lights Lighting Aluminium fi lter Protective cover Remote control a) Turn the appliance on / off b) Increase the exhaust power c) Decrease the exhaust power d) Turn the lights on / off EN - 4 Copyright ©... -
Page 7: Part 3: Installation
PART 3: INSTALLATION Unpacking After unpacking remove all packaging and advertising labels from the appliance. Check that the appliance has not been damaged and that the package includes all the items described in this user's manual. If the appliance was damaged during transport, contact authorised service centre. ... -
Page 8: Assembly And Installation
Assembly and installation of the appliance Before assembling and installing the appliance carefully read these instructions and adhere to them. NOTE: Dowels, screws and the hanging plate are supplied together with the range hood. IMPORTANT: Before installing or using the appliance, please fi rst read all instructions and check that the voltage and frequency values on the rating label correspond to the voltage and frequency in your electricity grid. -
Page 9: Installation Procedure
Installation procedure Open the protective covers and remove the aluminium fi lters. Pull out the cable leading from the external ventilation unit and lead it about 30 cm above the range hood. Cable leading from the external ventilation unit Place the range hood against the ceiling and secure it in place using screws. Attach one end of the aluminium pipe to the range hood fl ange and the other end to the air outlet. -
Page 10: Carbon Fi Lter
Right Wrong Carbon fi lter If you are using the range hood without an air exhaust, it is necessary to use a carbon fi lter. The carbon fi lter is not included. Contact your vendor or an authorised service centre to purchase this fi lter. ... -
Page 11: Part 4: Installation Of The External Motor Unit
PART 4: INSTALLATION OF THE EXTERNAL MOTOR UNIT PEM 14 External motor unit 1. Installation of hanging brackets To hang the external motor unit it is necessary to fi rst install 2 L-shaped hanging brackets, which are supplied together with the screws. Screw M5x40 screws into the M5 thread on the motor unit base. 2. - Page 12 4. Hanging the external motor unit Hang the motor unit using the hanging brackets on to the screws in holes A and B. Installation of aluminium tubes Connecting the range hood to the external motor unit Connect the fl exible aluminium tube to the air outlet in the top part of the range hood. Insert the other end into the air inlet of the external motor unit.
-
Page 13: Pem 8 External Motor Unit
Cable connection After completing the entire installation and connecting the tubes you can connect the cables of the external motor unit to the range hood. Connect the cables according to the pictures below. Cable of the Cable of the external range hood motor unit PEM 8 External motor unit... - Page 14 Install the non-return exhaust fl ap on to the top part of the motor unit using 3.5 x 9.5 screws. 4. Hanging the external motor unit Hang the motor unit using the hanging brackets on to the screws in holes A and B. Installation of aluminium tubes Connecting the range hood to the external motor unit Connect the fl exible aluminium tube to the air outlet in the top part of the range hood.
- Page 15 NOTE: To prevent the aluminium tube from coming loose when at the maximum exhaust power level, you can use supports to strengthen the tube structure. Cable connection After completing the entire installation and connecting the tubes you can connect the cables of the external motor unit to the range hood.
-
Page 16: Part 5: Operation
PART 5: OPERATION Remove the protective foil from the control panel. The range hood is controlled only by means of a remote control. button – This button serves to turn the range hood on / off . When it is pressed the range hood motor starts running at 1 (lowest power). -
Page 17: Part 6: Maintenance And Cleaning
PART 6: MAINTENANCE AND CLEANING WARNING! Before cleaning, regular or other maintenance, installation or removal, check that the appliance is turned off and disconnected from the power socket or that the respective circuit breaker is turned off . Changing a light bulb ... - Page 18 WARNING! For cleaning do not use petrol, benzene, thinners or any other solvents, coarse cleaning agents, steel wool or any sponges with steel wool. WARNING! You may put the aluminium fi lters in a dishwasher. The colour of the aluminium fi lters may change after several washes.
-
Page 19: Part 7: Before You Call The Service Centre
PART 7: BEFORE YOU CALL THE SERVICE CENTRE If the appliance is not working as it should check the following recommendations for resolving the most common problems. If the problem persists or it is not included in the table below, turn off the appliance and disconnect it from the power socket and contact an authorised service centre. -
Page 20: Part 8: Technical Specifications
PART 8: TECHNICAL SPECIFICATIONS Input voltage 220 V ~ 50 Hz Air outlet diameter 120 mm NOTE: All the here mentioned data is subject to change. EN - 18 Copyright © 2012, Fast ČR, a. s. 04/2012... - Page 21 INSTRUCTIONS AND INFORMATION REGARDING THE DISPOSAL OF USED PACKAGING MATERIALS Dispose of packaging material at a public waste disposal site. DISPOSAL OF USED ELECTRICAL AND ELECTRONIC APPLIANCES The meaning of the symbol on the product, its accessory or packaging indicates that this product shall not be treated as household waste.