
Summary of Contents for HP Officejet Enterprise Color MFP X585
- Page 1 Officejet Enterprise Color MFP X585/X585 Flow User Guide www.hp.com/support/ojcolorMFPX585...
- Page 3 HP Officejet Enterprise Color MFP X585 User Guide...
- Page 4 Computer, Inc. iPod is for legal or rightholder- change without notice. authorized copying only. Don't steal music. The only warranties for HP products and Microsoft®, Windows®, Windows® XP, and services are set forth in the express warranty Windows Vista® are U.S. registered trademarks statements accompanying such products and of Microsoft Corporation.
-
Page 5: Table Of Contents
Table of contents 1 Product introduction ............................. 1 Product comparison .............................. 2 Product views ................................ 5 Product front view ..........................5 Product back view ..........................7 Interface ports ............................. 8 Control-panel view ..........................9 Product hardware setup and software installation .................... 11 2 Paper trays .............................. - Page 6 Set up Scan to Email ............................50 Use the E-Mail Setup Wizard ......................50 Set up the Scan to Email feature via the HP Embedded Web Server ..........50 Set up personal and network contacts ..................... 51 Add contacts to the address book from the product control panel ......52 Configure Microsoft Outlook with Google Gmail ................
- Page 7 Manually configure IPv4 TCP/IP parameters from the control panel ..........85 Manually configure IPv6 TCP/IP parameters from the control panel ..........85 HP Embedded Web Server ........................... 87 How to access the HP Embedded Web Server (EWS) ................ 87 HP Embedded Web Server features ....................87 Information tab ....................... 88 General tab ........................
- Page 8 IP Security ............................100 Sign in to the product ........................100 Assign a system password ......................100 Encryption support: HP High Performance Secure Hard Disks ............101 Lock the formatter .......................... 101 Software and firmware updates ........................102 9 Solve general problems ..........................103 Restore factory-set defaults ..........................
- Page 9 Visually inspect the ink cartridge ....................130 Check paper and the printing environment ..................131 Step one: Use paper that meets HP specifications ............131 Step two: Check the environment ................131 Step three: Set the individual tray alignment .............. 132 Calibrate the product to align the colors ..................
- Page 10 You touched the Stop button to cancel a fax, but the fax was still sent ..... 154 No fax address book button displays ................154 Not able to locate the Fax settings in HP Web Jetadmin ..........154 The header is appended to the top of the page when the overlay option is enabled .........................
-
Page 11: Product Introduction
Product hardware setup and software installation For more information: In the US, go to www.hp.com/support/ojcolorMFPX585. Outside the US, go to www.hp.com/support. Select your country/region. Click Troubleshooting. Enter the product name, and then select Search. HP's all-inclusive help for your product includes the following information: ●... -
Page 12: Product Comparison
HP ePrint via email ● HP ePrint App ● HP ePrint Software ● HP ePrint Enterprise ● HP ePrint Home & Biz App ● Google Cloud Print ● AirPrint NOTE: Get more information on mobility solutions at the following links: www.hp.com/go/mobileprinting;... - Page 13 64-bit version, but the print driver supports it. NOTE: Microsoft retired mainstream support for Windows XP in April 2009. HP will continue to provide best-effort support for the discontinued XP operating system. Windows Vista, 32-bit and 64-bit NOTE:...
- Page 14 The HP Software Installer CD installs the HP PCL 6 driver for Windows operating systems along with other optional software. Mac installer software is not included on the CD. The CD provides steps to download the Mac installer software from www.hp.com. Go to www.hp.com/support, select the country/region, and then click Drivers &...
-
Page 15: Product Views
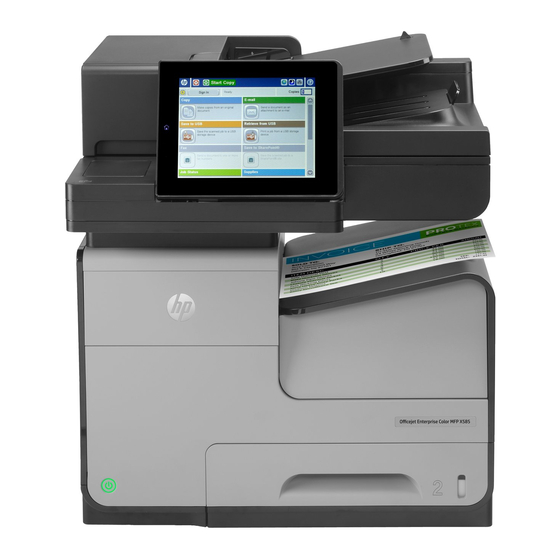
Product views ● Product front view ● Product back view ● Interface ports ● Control-panel view Product front view Document feeder/scanner assembly Document feeder input tray Document-feeder output bin Output bin extension Output bin Output ejector flap Tray 2 On/off button Ink cartridge door X585z models only: keyboard (pull the keyboard straight out to use it) ENWW... - Page 16 Hardware integration pocket (HIP — for connecting accessory and third-party devices) Control panel with color touchscreen display (tilts up for easier viewing) Chapter 1 Product introduction ENWW...
-
Page 17: Product Back View
Product back view Document feeder cover (access for clearing jams or cleaning rollers) Left door (access for clearing jams and the ink collection unit) Tray 1 (multipurpose tray) Fax port (fax models only) Cable lock slot Model and serial number label Interface ports Formatter (contains the interface ports) Power connection... -
Page 18: Interface Ports
Interface ports USB device port accepts a USB cable from a computer (alternative to network and wireless connections). Ethernet port Foreign interface harness (FIH) port USB host port accepts USB storage devices for Plug and Print Fax port (fax models only) Chapter 1 Product introduction ENWW... -
Page 19: Control-Panel View
After you sign out, the product restores all options to the default settings. HP logo or Home button On any screen other than the Home screen, the HP logo changes to a Home button. Touch the Home button to return to the Home screen. - Page 20 Features Depending on the product configuration, the features that appear in this area can include any of the following items: ● Quick Sets ● Copy ● E-mail ● ● Save to USB ● Save to Network Folder ● Save to Device Memory ●...
-
Page 21: Product Hardware Setup And Software Installation
HP's all-inclusive help for your product. Outside the US, follow these steps: Go to www.hp.com/support. Select your country/region. Click Troubleshooting. Enter the product name (HP Officejet Enterprise Color MFP X585), and then select Search. Find the following support: ● Install and configure ●... - Page 22 Chapter 1 Product introduction ENWW...
-
Page 23: Paper Trays
Load Tray 2 or optional Tray 3 For more information: In the US, go to www.hp.com/support/ojcolorMFPX585. Outside the US, go to www.hp.com/support. Select your country/region. Click Troubleshooting. Enter the product name, and then select Search. HP's all-inclusive help for your product includes the following information: ●... -
Page 24: Understand Paper Use
NOTE: Based on HP internal testing using a range of plain papers, HP highly recommends using papers with the ColorLok® logo for this product. For details, go to www.hp.com/go/printpermanence. Use the following guidelines to obtain satisfactory results when using special paper or print media. Set the paper type and size in the printer driver to obtain the best results. - Page 25 HP paper that has been approved for use in this product. Glossy or coated paper ● Use only glossy or coated paper that ●...
-
Page 26: Configure Trays For Paper Type And Size
Configure trays for paper type and size By default, the product pulls paper from Tray 2. If Tray 2 is empty, the product pulls paper from Tray 1, or Tray 3 if it is installed. Configuring a tray on this product changes the speed settings to obtain the best print quality for the type of paper that you are using. -
Page 27: Configure A Tray By Using The Control Panel
Configure a tray by using the control panel You can also configure the trays for type and size without a prompt from the product. From the Home screen on the product control panel, scroll to and touch the Trays button. Touch the line for the tray that you want to configure, and then touch the Modify button. -
Page 28: Load Tray 1 (Multi-Purpose Tray On Left Side Of The Product)
Load Tray 1 (multi-purpose tray on left side of the product) Open Tray 1. Pull out the tray extension. Extend the paper guides fully and then load the paper stack into Tray 1. Adjust the paper guides to the size of the paper. NOTE: Place the paper into Tray 1 with the side to be printed on face-down and the top of page... -
Page 29: Load Tray 2 Or Optional Tray 3
Load Tray 2 or optional Tray 3 Pull the tray out of the product. Slide open the paper length and width guides. Place the paper in the tray and make sure that it is flat at all four corners. Slide the side paper width guides so that they align with the paper- size marking in the bottom of the tray. - Page 30 Push down on the paper to make sure that the paper stack is below the paper limit tabs on the side of the tray. Slide the tray into the product. NOTE: To close the tray, push in the middle or with even pressure on both sides.
-
Page 31: Parts, Supplies, And Accessories
Replace the ink cartridges For more information: In the US, go to www.hp.com/support/ojcolorMFPX585. Outside the US, go to www.hp.com/support. Select your country/region. Click Troubleshooting. Enter the product name, and then select Search. HP's all-inclusive help for your product includes the following information: ●... -
Page 32: Order Parts, Accessories, And Supplies
To access, in a supported Web browser on your computer, enter the product IP address or host name in the address/URL field. The EWS contains a link to the HP SureSupply Web site, which provides options for purchasing Original HP supplies. -
Page 33: Replace The Ink Cartridges
Replace the ink cartridges The product uses four colors and has a different ink cartridge for each color: yellow (Y), cyan (C), magenta (M), and black (K). Open the ink cartridge door. Push the old ink cartridge inward to unlock it. Grasp the edge of the old ink cartridge and then pull the cartridge straight out to remove it. - Page 34 Remove the new ink cartridge from the packaging. Do not touch the gold-colored metal contacts of the ink cartridge. Fingerprints on the contacts can cause print-quality problems. Insert the new ink cartridge into the product. Push the cartridge until it “clicks” into place. Chapter 3 Parts, supplies, and accessories ENWW...
- Page 35 Close the ink cartridge door. Place the old cartridge in the box and refer to information about recycling used ink cartridges on the ink cartridge box. ENWW Replace the ink cartridges...
- Page 36 Chapter 3 Parts, supplies, and accessories ENWW...
-
Page 37: Print
Print from the USB port For more information: In the US, go to www.hp.com/support/ojcolorMFPX585. Outside the US, go to www.hp.com/support. Select your country/region. Click Troubleshooting. Enter the product name, and then select Search. HP's all-inclusive help for your product includes the following information: ●... -
Page 38: Print Tasks (Windows)
Print tasks (Windows) How to print (Windows) The following procedure describes the basic printing process for Windows. From the software program, select the Print option. Select the product from the list of printers. To change settings, click or tap the Properties or Preferences button to open the print driver. -
Page 39: Automatically Print On Both Sides (Windows)
Automatically print on both sides (Windows) Use this procedure for products that have an automatic duplexer installed. If the product does not have an automatic duplexer installed, or to print on paper types that the duplexer does not support, you can print on both sides manually. -
Page 40: Manually Print On Both Sides (Windows)
Manually print on both sides (Windows) Use this procedure for products that do not have an automatic duplexer installed or to print on paper that the duplexer does not support. From the software program, select the Print option. Select the product from the list of printers, and then click or tap the Properties or Preferences button to open the print driver. -
Page 41: Print Multiple Pages Per Sheet (Windows)
Print multiple pages per sheet (Windows) From the software program, select the Print option. Select the product from the list of printers, and then click or tap the Properties or Preferences button to open the print driver. NOTE: The name of the button varies for different software programs. Click or tap the Finishing tab. -
Page 42: Select The Paper Type (Windows)
Additional print tasks In the US, go to www.hp.com/support/ojcolorMFPX585. Outside the US, go to www.hp.com/support. Select your country/region. Click Troubleshooting. Enter the product name, and then select Search. Instructions are available for performing specific print tasks, such as the following: ●... -
Page 43: Print Tasks (Mac Os X)
Automatically print on both sides (Mac OS X) NOTE: This feature is available if you install the HP print driver. It might not be available if you are using AirPrint. Click the File menu, and then click the Print option. -
Page 44: Select The Paper Type (Mac Os X)
Additional print tasks In the US, go to www.hp.com/support/ojcolorMFPX585. Outside the US, go to www.hp.com/support. Select your country/region. Click Troubleshooting. Enter the product name, and then select Search. Instructions are available for performing specific print tasks, such as the following: ●... -
Page 45: Store Print Jobs On The Product To Print Later
Store print jobs on the product to print later ● Create a stored job (Windows) ● Create a stored job (Mac OS X) ● Print a stored job ● Delete a stored job Create a stored job (Windows) You can store jobs on the product so you can print them at any time. NOTE: Your print driver might look different than what is shown here, but the steps are the same. -
Page 46: Create A Stored Job (Mac Os X)
Select a Job Storage Mode option. ● Proof and Hold: Print and proof one copy of a job, and then print more copies. ● Personal Job: The job does not print until you request it at the product control panel. For this job-storage mode, you can select one of the Make Job Private/Secure options. -
Page 47: Print A Stored Job
● Proof and Hold: Print and proof one copy of a job, and then print more copies. ● Personal Job: The job does not print until you request it at the product control panel. If you assign a personal identification number (PIN) to the job, you must provide the required PIN at the control panel. -
Page 48: Mobile Printing
Mobile printing HP offers multiple Mobile and ePrint solutions to enable wireless printing to an HP printer from a laptop, tablet, smartphone, or other mobile device. To determine the best choice, go to www.hp.com/go/ LaserJetMobilePrinting (English only). ● HP Wireless Direct and NFC Printing ●... -
Page 49: Hp Eprint Via Email
HP ePrint software The HP ePrint software makes it easy to print from a Windows or Mac desktop or laptop computer to any HP ePrint-capable product. This software makes it easy to find HP ePrint-enabled products that are registered to your HP Connected account. -
Page 50: Airprint
Go to www.hp.com/go/eprintsoftware for drivers and information. NOTE: The HP ePrint software is a PDF workflow utility for Mac, and is not technically a print driver. NOTE: HP ePrint Software does not support USB printing. AirPrint Direct printing using Apple’s AirPrint is supported for iOS 4.2 or later. Use AirPrint to print directly to the... -
Page 51: Print From The Usb Port
Print from the USB port This product features easy-access USB printing, so you can quickly print files without sending them from a computer. The product accepts standard USB flash drives in the USB port on the front of the product. You can print the following types of files: ●... - Page 52 Chapter 4 Print ENWW...
-
Page 53: Copy
Optimize copy quality for text or pictures For more information: In the US, go to www.hp.com/support/ojcolorMFPX585. Outside the US, go to www.hp.com/support. Select your country/region. Click Troubleshooting. Enter the product name, and then select Search. HP's all-inclusive help for your product includes the following information: ●... -
Page 54: Make A Copy
Make a copy Place the document face-down on the scanner glass, or place it face-up in the document feeder and adjust the paper guides to fit the size of the document. From the Home screen on the product control panel, touch the Copy button. - Page 55 Enter the number of copies, and then touch the button. Touch the Start button. ENWW Make a copy...
-
Page 56: Copy On Both Sides (Duplex)
Copy on both sides (duplex) Copy on both sides automatically Load the original documents face-up in the document feeder with the top of the page leading. Adjust the paper guides to fit the size of the document. From the Home screen on the product control panel, touch the Copy button. -
Page 57: Optimize Copy Quality For Text Or Pictures
Optimize copy quality for text or pictures Optimize the copy job for the type of image being copied: text, graphics, or photos. From the Home screen on the product control panel, touch the Copy button. Touch the More Options button, and then touch the Optimize Text/Picture button. - Page 58 Chapter 5 Copy ENWW...
-
Page 59: Scan/Send
Use HP Flow CM solution (flow models only) For more information: In the US, go to www.hp.com/support/ojcolorMFPX585. Outside the US, go to www.hp.com/support. Select your country/region. Click Troubleshooting. Enter the product name, and then select Search. HP's all-inclusive help for your product includes the following information: ●... -
Page 60: Set Up Scan To Email
Use the E-Mail Setup Wizard Some HP products include driver installation from a software CD. At the end of this installation is an option to Setup Scan to Folder and Email. This option opens the setup wizards that are in the HP Embedded Web Server (EWS) for the product. -
Page 61: Set Up Personal And Network Contacts
Contacts: Lists all the contacts that are stored in the product memory. These contacts are visible to all people who use the product. To use this feature, first use the HP Embedded Web Server (EWS) to enable the personal contacts and network contacts address books. Ask the system administrator for assistance with the following steps:... -
Page 62: Add Contacts To The Address Book From The Product Control Panel
If you are not signed in to the product, contacts that you add to the address book will be visible to all people who use the product. NOTE: You can also use the HP Embedded Web Server (EWS) to create and manage the address book. From the Home screen on the product control panel, touch the E-mail button. - Page 63 Touch the Address Book button that is next to field to open the Address Book screen. Touch the Add button that is in the lower left corner of the screen. ENWW Set up Scan to Email...
-
Page 64: Configure Microsoft Outlook With Google Gmail
In the Name field, enter the name of the contact. From the menu list, select the E-mail Address option, and then enter the contact's email address. Touch the button to add the contact to the list. Configure Microsoft Outlook with Google Gmail If you have Google™... - Page 65 Use the following type of encrypted connection: TLS Click OK. On the Account Settings screen, click Next. On the Change Email Account screen, click Finish to complete the setup. ENWW Set up Scan to Email...
-
Page 66: Set Up Save To Network Folder
Use the Save to Network Folder Quick Set Wizard Some HP products include driver installation from a software CD. At the end of this installation is an option to Setup Scan to Folder and Email. This option opens the setup wizards that are in the HP Embedded Web Server (EWS) for the product. -
Page 67: Complete The Destination Folder Settings
Complete the destination folder settings Use the following information to complete the destination folder settings for a shared folder or FTP folder. These options are available to set up a network folder using a quick set in the HP Embedded Web Server. NOTE: Similar options are available to set up a folder destination from the control panel. -
Page 68: Add Network Folder Path - Save To An Ftp Server
Custom Subfolder: This option automatically creates a subfolder for a scan in the destination folder. Select a format for the subfolder name from the list. Restrict subfolder access to user: Select this option to restrict subfolder access to the user who creates the scan job. -
Page 69: Send Only To Folders With Read And Write Access
Send only to folders with read and write access Select this option for folders configured for read and write access. This option also supports folder access verification, job notifications, and inclusion of user in a subfolder name. Verify folder access prior to job start ●... -
Page 70: Set Up Save To Usb
Set up Save to USB Open the HP Embedded Web Server (EWS): From the Home screen on the product control panel, touch the Network button to display the IP address or host name. Open a Web browser, and in the address line, type the IP address or host name exactly as it displays on the product control panel. -
Page 71: Set Up Save To Sharepoint® (Flow Models Only)
Before you can complete this procedure, the destination folder to which you want to save scanned files must exist on the SharePoint® site, and you must have write access to the destination folder. Open the HP Embedded Web Server (EWS): From the Home screen on the product control panel, touch the Network button to display the IP address or host name. - Page 72 In the Authentication Settings field, select whether users must sign in with their credentials at the control panel to access this SharePoint® folder, or if the login credentials should always be the same as when you navigated to the folder. NOTE: If you select Use credentials of user to connect after Sign In at the control panel in the Authentication Settings drop-down list, the logged-in user must have permissions to write to the...
-
Page 73: Create A Quick Set
Use the Quick Sets feature to quickly access preset job options. The product administrator can use the HP Embedded Web Server to create Quick Sets, which are then available in the Quick Sets menu from the control-panel Home screen. Quick Sets are available for the following scan/send features: ●... - Page 74 Settings, Add SharePoint® Path, SharePoint® Destination Settings NOTE: The Save to SharePoint® feature is available for all HP LaserJet flow MFPs and the Scanjet 8500 fn1, and the Scanjet 7000nx with firmware datecode 20120119 or newer. Proceed through the destination-specific dialogs. Click Next to advance to the next dialog.
-
Page 75: Send A Scanned Document To One Or More Email Addresses
Send a scanned document to one or more email addresses ● Send email by entering email addresses manually ● Send email by using the address book Send email by entering email addresses manually Place the document face-down on the scanner glass, or place it face-up in the document feeder and adjust the paper guides to fit the size of the document. - Page 76 Enter the email address. To send to multiple addresses, separate the addresses with a semicolon, or touch the Enter button on the touchscreen keyboard after you type each address. Complete the CC:, Subject:, and File Name: fields by touching the field and using the touchscreen keyboard to enter information.
-
Page 77: Send Email By Using The Address Book
Touch the Start button to send. NOTE: The product might prompt you to add the email address to the address book. NOTE: You can preview the image at any time by touching the Preview button in the upper-right corner of the screen. For more information about this feature, touch the Help button on the preview screen. - Page 78 Touch the Address Book button that is next to field to open the Address Book screen. From the drop-down list, select the address book view that you want to use. Chapter 6 Scan/send ENWW...
- Page 79 Select a name from the list of contacts, and then touch the right arrow button to add the name to the recipients list. Repeat this step for each recipient, and then touch the button. Touch the Start button to send. NOTE: You can preview the image at any time by touching the...
-
Page 80: Send A Scanned Document To A Network Folder
Sharing. NOTE: You might be required to sign in to the product to use this feature. The system administrator can use the HP Embedded Web Server to configure pre-defined Quick Sets folders, or you can provide the path to another network folder. - Page 81 To use one of the preset job settings, select one of the items in the Quick Sets list. To set up a new job, touch the File Name text field to open a keyboard, and then type the name for the file. Touch the button.
- Page 82 Touch the Add button that is below the Folder Path field to open a keyboard, and then type the path to the network folder. Use this format for the path: \\path\path Touch the button. To configure settings for the document, touch More Options button.
-
Page 83: Use Hp Flow Cm Solution (Flow Models Only)
Use a networked scanner or HP LaserJet Flow MFP (and select upgradeable HP MFPs) to quickly and simply send paper documents directly to the HP Flow CM Professional solution. Retrieve and print PDF documents, set directories, and browse a file repository directly from the control panel of a Flow CM enabled product. - Page 84 Chapter 6 Scan/send ENWW...
-
Page 85: Fax
Send a fax For more information: In the US, go to www.hp.com/support/ojcolorMFPX585. Outside the US, go to www.hp.com/support. Select your country/region. Click Troubleshooting. Enter the product name, and then select Search. HP's all-inclusive help for your product includes the following information: ●... -
Page 86: Set Up Fax
Only one fax feature, either LAN fax, analog fax, or internet fax, can be enabled at a time. If you want to use analog fax when LAN fax is enabled, use the HP MFP Digital Sending Software Configuration Utility or the HP Embedded Web Server to disable LAN fax. -
Page 87: Change Fax Configurations
Change fax configurations NOTE: The settings configured using the Fax Setup Wizard on the control panel override any settings made in the HP Embedded Web Server. ● Fax dialing settings ● General fax send settings ● Fax receive settings Fax dialing settings From the Home screen on the product control panel, scroll to and touch Administration. -
Page 88: General Fax Send Settings
Menu item Description Redial On No Answer Redial On No Answer setting selects the number of times the fax accessory redials if the number dialed does not answer. The number of retries is either 0 to 1 (used in the U.S.) or 0 to 2, depending on the country/region setting. -
Page 89: Fax Receive Settings
Menu item Description Error Correction Mode Normally, the fax accessory monitors the signals on the telephone line while it is sending or receiving a fax. If the fax accessory detects an error during the transmission and the Error Correction Mode setting is on, the fax accessory can request that the error portion of the fax be sent again. - Page 90 Menu item Description Ring Interval Touch the box beneath the Ring Interval heading to open the keypad. Enter a value for the ring interval on the keypad, and then touch the button. The default setting for ring interval is 600 ms. Ring Frequency Touch the box beneath the Ring Frequency...
-
Page 91: Send A Fax
Send a fax Place the document face-down on the scanner glass, or place it face-up in the document feeder and adjust the paper guides to fit the size of the document. From the Home screen on the product control panel, touch the button. - Page 92 Enter a phone number, and then touch the button. Touch the Start button to send the fax. NOTE: You can preview the image at any time by touching the Preview button in the upper-right corner of the screen. For more information about this feature, touch the Help button on the preview screen.
-
Page 93: Manage The Product
Software and firmware updates For more information: In the US, go to www.hp.com/support/ojcolorMFPX585. Outside the US, go to www.hp.com/support. Select your country/region. Click Troubleshooting. Enter the product name, and then select Search. HP's all-inclusive help for your product includes the following information: ●... -
Page 94: Configure Ip Network Settings
Click the Networking tab to obtain network information. You can change settings as needed. Rename the product on a network If you want to rename the product on a network so that it can be uniquely identified, use the HP Embedded Web Server. -
Page 95: Manually Configure Ipv4 Tcp/Ip Parameters From The Control Panel
On the Device Information page, the default product name is in the Device Name field. You can change this name to uniquely identify this product. NOTE: Completing the other fields on this page is optional. Click the Apply button to save the changes. Manually configure IPv4 TCP/IP parameters from the control panel Use the control-panel Administration... - Page 96 To configure the address, touch the Address button and then touch the field to open a keypad. Use the keypad to enter the address, and then touch the button. Touch the Save button. Chapter 8 Manage the product ENWW...
-
Page 97: Hp Embedded Web Server
● How to access the HP Embedded Web Server (EWS) ● HP Embedded Web Server features Use the HP Embedded Web Server to manage printing functions from a computer instead of the product control panel. ● View product status information ●... -
Page 98: Information Tab
Shows the status of the supplies for the product. Event Log Page Shows a list of all product events and errors. Use the HP Instant Support link (in the Other Links area on all HP Embedded Web Server pages) to connect to a set of dynamic Web pages that help solve problems. -
Page 99: Print Tab Or Copy/Print Tab
Name the product and assign an asset number to it. Enter the name of the primary contact who will receive information about the product. Language Set the language in which to display the HP Embedded Web Server information. Date and Time Set the date and time or synchronize with a network time server. -
Page 100: Scan/Digital Send Tab (Mfp Models Only)
Table 8-3 HP Embedded Web Server Copy/Print tab (continued) Menu Description Copy Settings (MFP models only) Configure the default options for copy jobs. Manage Trays Configure settings for paper trays. Scan/Digital Send tab (MFP models only) Table 8-4 HP Embedded Web Server Scan/Digital Send tab... -
Page 101: Fax Tab (Mfp Models Only)
● Export email, fax, or user records from the product into a file on the computer to use as a data backup, or import the records onto another HP product. Fax Receive Setup Configure default print options for incoming faxes, and set up a fax printing schedule. -
Page 102: Security Tab
Verify that the security functions are running according to expected system parameters. HP Web Services tab Use the HP Web Services tab to configure and enable HP Web Services for this product. It is necessary to Enable HP Web Services to use the HP ePrint feature. - Page 103 Enable, set up, or disable network printing from Apple supported products. Select Language Change the language displayed by the HP Embedded Web Server. This page displays if the Web pages support multiple languages. Optionally, select supported languages through language-preference settings in the browser.
-
Page 104: Other Links List
Connect to the support site for the product to search for help on various topics. Shop for Supplies Connect to the HP SureSupply Web site for information on purchasing original HP supplies, such as toner cartridges and paper. HP Instant Support Connect to the HP Web site to find solutions to product problems. -
Page 105: Hp Utility For Mac Os X
HP Utility for Mac OS X Use the HP Utility for Mac OS X to check product status or to view or change product settings from your computer. You can use the HP Utility when the product is connected with a USB cable or is connected to a TCP/IP-based network. - Page 106 Configures the network settings, such as the IPv4 and IPv6 settings. Additional Settings Provides access to the HP Embedded Web Server. Scan Settings Scan to E-mail Opens the HP Embedded Web Server page for configuring settings for scanning to email. NOTE: USB connections are not supported. Scan to Network Folder Opens the HP Embedded Web Server page for configuring settings for scanning to a network folder.
-
Page 107: Hp Web Jetadmin
HP Web Jetadmin HP Web Jetadmin is an award-winning, industry-leading tool for efficiently managing a wide variety of networked HP products, including printers, multifunction products, and digital senders. This single solution allows you to remotely install, monitor, maintain, troubleshoot, and secure your printing and imaging environment —... -
Page 108: Economy Settings
Economy settings ● Optimize speed or energy usage ● Set Sleep mode ● Set the Sleep Schedule Optimize speed or energy usage The product has four incremental settings to optimize for speed or energy usage. From the Home screen on the product control panel, scroll to and touch the Administration button. - Page 109 ● Date Format ● Time Format Touch the Save button. Open the Date/Time menu and configure the following settings: ● Date/Time ● Time Zone If you are in an area that uses daylight savings time, select the Adjust for Daylight Savings box.
-
Page 110: Product Security Features
For products that are connected to the network and have an HP Jetdirect print server, you can configure IPsec by using the Networking tab in the HP Embedded Web Server. -
Page 111: Encryption Support: Hp High Performance Secure Hard Disks
This hard disk uses the latest Advanced Encryption Standard (AES) and has versatile time-saving features and robust functionality. Use the Security menu in the HP Embedded Web Server to configure the disk. Lock the formatter The formatter has a slot that you can use to attach a security cable. Locking the formatter prevents someone from removing valuable components from it. -
Page 112: Software And Firmware Updates
Software and firmware updates HP regularly updates features that are available in the product firmware. To take advantage of the most current features, update the product firmware. Download the most recent firmware update file from the Web: In the US, go to www.hp.com/support/ojcolorMFPX585. Click Drivers & Software. -
Page 113: Solve General Problems
Solve fax problems For more information: In the US, go to www.hp.com/support/ojcolorMFPX585. Outside the US, go to www.hp.com/support. Select your country/region. Click Troubleshooting. Enter the product name, and then select Search. HP's all-inclusive help for your product includes the following information: ●... -
Page 114: Restore Factory-Set Defaults
Restore factory-set defaults From the Home screen on the product control panel, scroll to and touch the Administration button. Open the following menus: ● General Settings ● Restore Factory Settings A verification message advises that completing the reset function might result in loss of data. Touch the Reset button to complete the process. -
Page 115: Control Panel Help System
Control panel help system The product has a built-in Help system that explains how to use each screen. To open the Help system, touch the Help button in the upper-right corner of the screen. For some screens, the Help opens to a global menu where you can search for specific topics. You can browse through the menu structure by touching the buttons in the menu. -
Page 116: A "Cartridge Is Low" Or "Cartridge Is Very Low" Message Displays On The Product Control Panel
The ink cartridge does not need to be replaced now unless the print quality is no longer acceptable. Once an HP ink cartridge has reached Very Low, HP’s Premium Protection Warranty on that ink cartridge has ended. Change the “Very Low” settings You can change the way the product reacts when supplies reach the Very Low state. -
Page 117: Order Supplies
To access, in a supported Web browser on your computer, enter the product IP address or host name in the address/URL field. The EWS contains a link to the HP SureSupply Web site, which provides options for purchasing Original HP supplies. -
Page 118: Product Does Not Pick Up Paper Or Misfeeds
Remove the stack of paper from the tray and flex it, rotate it 180 degrees, and flip it over. Do not fan the paper. Return the stack of paper to the tray. Use only paper that meets HP specifications for this product. Use paper that is not wrinkled, folded, or damaged. If necessary, use paper from a different package. - Page 119 ● The paper guides must be touching the sides of the paper stack to work correctly. Make sure that the paper stack is straight and the guides are against the paper stack. ● The document feeder input tray or output bin might contain more than the maximum number of pages. Make sure the paper stack fits below the guides in the input tray, and remove pages from the output bin.
-
Page 120: Clear Jams
Experiencing frequent or recurring paper jams? To reduce the number of paper jams, try these solutions. Use only paper that meets HP specifications for this product. Use paper that is not wrinkled, folded, or damaged. If necessary, use paper from a different package. -
Page 121: Clear Jams In The Output Bin
Clear jams in the output bin Look for jammed paper in the output bin area. Remove any visible media. NOTE: If the sheet tears, make sure that all fragments are removed before resuming printing. Open and then close the left door to clear the message. -
Page 122: Clear Jams In Tray 1 (Multipurpose Tray)
Clear jams in Tray 1 (multipurpose tray) If the jammed sheet is visible and easily accessible in Tray 1, pull it from Tray 1. NOTE: If the sheet tears, make sure that all of the fragments are removed before you resume printing. - Page 123 If the paper is still not visible or accessible, remove the ink collection unit by pulling it out with both hands. Set the unit aside, upright, on a piece of paper to prevent ink spills. CAUTION: When pulling out the ink collection unit, avoid making direct contact with the black cylinder to prevent ink smear on skin or clothes.
- Page 124 Reinstall the ink collection unit. Close the left door. 114 Chapter 9 Solve general problems ENWW...
-
Page 125: Clear Jams In The Left Door
Clear jams in the left door Open the left door. Gently remove any visible paper from the rollers and delivery area. NOTE: If the sheet tears, make sure that all fragments are removed before you resume printing. Do not use sharp objects to remove fragments. -
Page 126: Clear Jams In The Ink Collection Unit Area
Clear jams in the ink collection unit area Open the left door. If you can see the trailing edge of the sheet, remove the sheet from the product. If the paper is not visible or accessible, remove the ink collection unit by pulling it out with both hands. - Page 127 Lower the platen by pressing down on the green tab. This will cause the product to try to feed the sheet through the print zone. You might need to gently pull on the sheet if it does not feed. Remove the sheet. Lift the green tab to place the platen back into its operating position.
- Page 128 Reinstall the ink collection unit. Close the left door. 118 Chapter 9 Solve general problems ENWW...
-
Page 129: Clear Jams In Tray 2
Clear jams in Tray 2 Open Tray 2 by pulling it out and releasing the latch at the rear left of the tray. Remove the jammed sheet by pulling it to the right and then out of the product. Close Tray 2. NOTE: To close the tray, push in the middle or with even pressure on both sides. -
Page 130: Clear Jams In Optional Tray 3
Clear jams in optional Tray 3 Open Tray 3. Remove the jammed sheet by pulling it to the right and then out of the product. 120 Chapter 9 Solve general problems ENWW... - Page 131 If the jam cannot be cleared at the tray, try clearing the jam from the lower left door. Close Tray 3. NOTE: To close the tray, push in the middle or with even pressure on both sides. Avoid pushing on one side only. ENWW Clear jams 121...
-
Page 132: Clear Jams In The Document Feeder
Clear jams in the document feeder Lift the latch to release the document-feeder cover. Open the document-feeder cover. 122 Chapter 9 Solve general problems ENWW... - Page 133 Lift the jam-access door, and remove any jammed paper. If necessary, rotate the green wheel at the front of the document feeder to remove jammed paper. Press on the door next to the document-feeder rollers to make sure it is closed completely. ENWW Clear jams 123...
- Page 134 Flow models only: Lift the document feeder input tray. Flow models only: Squeeze inward on the two slots at each end of the e-Duplex assembly. Flow models only: Remove the e-Duplex assembly by pulling it out. 124 Chapter 9 Solve general problems ENWW...
- Page 135 Flow models only: Remove any jammed paper. Flow models only: Reinstall the e-Duplex assembly by sliding it in until it locks into place. Flow models only: Lower the document-feeder input tray. ENWW Clear jams 125...
- Page 136 Close the document-feeder cover. NOTE: To avoid jams, make sure the guides in the document feeder input tray are adjusted tightly against the document. Remove all staples and paper clips from original documents. NOTE: Original documents that are printed on heavy, glossy paper can jam more frequently than originals that are printed on plain paper.
-
Page 137: Improve Print Quality
Improve print quality If the product is having print-quality problems, try the following solutions in the order presented to resolve the issue. If the product is having scan, fax, or copy quality problems, try the following solutions and also see “Improve scan quality,”... -
Page 138: Check The Paper Type Setting (Mac Os X)
Check to see if you are using a genuine HP cartridge. A genuine HP ink cartridge has the words “HP” or “Hewlett-Packard” on it, or has the HP logo on it. For more information on identifying HP cartridges go to www.hp.com/support. Select your country/region. -
Page 139: Clean The Printhead
● Specks of ink are on the printed pages. ● Repeated marks occur on the printed pages. Use the following procedure to print a cleaning page. From the Home screen on the product control panel, scroll to and touch the Device Maintenance button. -
Page 140: Visually Inspect The Ink Cartridge
Open the scanner lid. Clean the scanner glass, the document feeder strips, and the white plastic backing with a soft cloth or sponge that has been moistened with nonabrasive glass cleaner. CAUTION: Do not use abrasives, acetone, benzene, ammonia, ethyl alcohol, or carbon tetrachloride on any part of the product;... -
Page 141: Check Paper And The Printing Environment
Print a few pages to see if the problem has resolved. Check paper and the printing environment Step one: Use paper that meets HP specifications Some print-quality problems arise from using paper that does not meet HP specifications. ● Always use a paper type and weight that this product supports. -
Page 142: Step Three: Set The Individual Tray Alignment
● Place the product on a sturdy, level surface. ● Remove anything that is blocking the vents on the product. The product requires good air flow on all sides, including the top. ● Protect the product from airborne debris, dust, steam, grease, or other elements that can leave residue inside the product. -
Page 143: Adjust Color Settings (Windows)
● Custom Profile: Select this option to use a custom input profile to accurately control color output (for example, to emulate a specific HP Color LaserJet product). Download custom profiles from www.hp.com. Click the OK button to close the Document Properties dialog box. In the Print dialog box, click the OK button to print the job. -
Page 144: Try A Different Print Driver
You might need to use a different print driver when printing from a software program and the printed pages have unexpected lines in graphics, missing text, missing graphics, incorrect formatting, or substituted fonts. Download any of the following drivers from the HP Web site. In the US, go to www.hp.com/support/ ojcolorMFPX585. -
Page 145: Improve Copy Image Quality
Improve copy image quality If the product is having copy quality problems, try the following solutions in the order presented to resolve the issue. ● Check the scanner glass for dirt and smudges ● Calibrate the scanner ● Check the paper settings ●... -
Page 146: Calibrate The Scanner
Open the scanner lid. Clean the scanner glass, the document feeder strips, and the white plastic backing with a soft cloth or sponge that has been moistened with nonabrasive glass cleaner. CAUTION: Do not use abrasives, acetone, benzene, ammonia, ethyl alcohol, or carbon tetrachloride on any part of the product;... -
Page 147: Check The Paper Settings
Touch the Next button to start the calibration process. Follow the on-screen prompts. Wait while the product calibrates, and then try copying again. Check the paper settings Follow these steps if copied pages have smears, fuzzy or dark print, curled paper, scattered dots of toner, loose toner, or areas where toner has dropped out. -
Page 148: Edge-To-Edge Copying
NOTE: These settings are temporary. After you have finished the job, the product returns to the default settings. Edge-to-edge copying Use this feature to avoid shadows that can appear along the edges of copies when the original document is printed close to the edges. From the Home screen on the product control panel, scroll to and touch the Administration button. - Page 149 Open the document-feeder cover. Remove any visible lint or dust from each of the feed rollers and the separation pad using compressed air or a clean lint-free cloth moistened with warm water. NOTE: Lift up the roller assembly so you can clean the second roller.
-
Page 150: Improve Scan Image Quality
Improve scan image quality ● Check the scanner glass for dirt and smudges ● Check the scan/send settings from the product control panel ● Clean the pickup rollers and separation pad in the document feeder Try these few simple steps first: ●... -
Page 151: Check The Scan/Send Settings From The Product Control Panel
Open the scanner lid. Clean the scanner glass, the document feeder strips, and the white plastic backing with a soft cloth or sponge that has been moistened with nonabrasive glass cleaner. CAUTION: Do not use abrasives, acetone, benzene, ammonia, ethyl alcohol, or carbon tetrachloride on any part of the product;... -
Page 152: Check The Color Settings
Select the category of scan and send settings that you want to configure. Open the Default Job Options menu. Touch the Resolution button. Select one of the predefined options. Touch the Save button. Touch the Start button. Check the color settings Follow these steps to adjust the color setting: From the Home screen on the product control panel, scroll to and touch the Administration... -
Page 153: Check The Output-Quality Settings
● Save to USB ● Scan to SharePoint® Touch the More Options button, and then touch the Optimize Text/Picture button. Select one of the predefined options, or touch the Manually adjust button, and then adjust the slider in Optimize For area. - Page 154 Open the document-feeder cover. Remove any visible lint or dust from each of the feed rollers and the separation pad using compressed air or a clean lint-free cloth moistened with warm water. NOTE: Lift up the roller assembly so you can clean the second roller.
-
Page 155: Improve Fax Image Quality
Improve fax image quality ● Check the scanner glass for dirt and smudges ● Check the send-fax resolution settings ● Check the image-adjustment settings ● Optimize fax quality for text or pictures ● Check the error-correction settings ● Send to a different fax machine ●... -
Page 156: Check The Send-Fax Resolution Settings
Open the scanner lid. Clean the scanner glass, the document feeder strips, and the white plastic backing with a soft cloth or sponge that has been moistened with nonabrasive glass cleaner. CAUTION: Do not use abrasives, acetone, benzene, ammonia, ethyl alcohol, or carbon tetrachloride on any part of the product;... -
Page 157: Check The Image-Adjustment Settings
Select one of the predefined options. Touch the Save button. Touch the Start button. Check the image-adjustment settings Adjust these additional settings to improve send-fax quality From the Home screen on the product control panel, scroll to and touch the Administration button. -
Page 158: Send To A Different Fax Machine
Send to a different fax machine Try sending the fax to a different fax machine. If the fax quality is better, the problem is related to the initial recipient's fax machine settings or supplies status. Clean the pickup rollers and separation pad in the document feeder Lift the document-feeder latch. -
Page 159: Check The Fit-To-Page Setting
Remove any visible lint or dust from each of the feed rollers and the separation pad using compressed air or a clean lint-free cloth moistened with warm water. NOTE: Lift up the roller assembly so you can clean the second roller. Close the document-feeder cover. -
Page 160: Solve Wired Network Problems
Open the printer properties and click the Ports tab. Verify that the current IP address for the product is selected. The product IP address is listed on the product configuration page. If you installed the product using the HP standard TCP/IP port, select the box labeled Always print to this printer, even if its IP address changes. -
Page 161: The Product Is Using Incorrect Link And Duplex Settings For The Network
Open a command-line prompt on your computer. For Windows, click Start, click Run, type cmd, and then press Enter. Type ping followed by the IP address for your product. For Mac OS X, open the Network Utility, and then supply the IP address in the correct field in the Ping pane. -
Page 162: Solve Fax Problems
Solve fax problems ● Checklist for solving fax problems ● General fax problems Checklist for solving fax problems Use the following checklist to help identify the cause of any fax-related problems you encounter: ● Are you using the fax cable supplied with the fax accessory? This fax accessory has been tested with the supplied fax cable to meet RJ11 and functional specifications. -
Page 163: Does Your Phone Line Have A Call-Waiting Feature
The fax accessory is installed and operational; however, the HP Digital Sending utility has either disabled the product fax feature or has enabled LAN fax. When LAN fax is enabled, the analog-fax feature is disabled. Only one fax feature, either LAN fax or analog fax, can be enabled at a time. -
Page 164: General Fax Problems
No fax address book button displays The fax address book feature has not been enabled. Use the HP MFP Digital Sending Software Configuration utility to enable the fax address book feature. Not able to locate the Fax settings in HP Web Jetadmin Fax settings in HP Web Jetadmin are located under the device's status page drop-down menu. -
Page 165: A One-Page Fax Prints As Two Pages
A one-page fax prints as two pages The fax header is being appended to the top of the fax, pushing text to a second page. To print a one page fax on one page, set the overlay header to overlay mode, or adjust the fit-to-page setting. - Page 166 156 Chapter 9 Solve general problems ENWW...
-
Page 167: Index
Windows 30 bin, output two-sided documents 46 duplexing jams, clearing 111 copy settings manually (Mac) 33 bins, output HP Embedded Web Server 89 manually (Windows) 30 locating 5 copying Bonjour multiple copies 44 identifying 87 easy-access USB printing 41 resolution 2... - Page 168 110 scan settings 90 document feeder 122 fax settings security settings 92 ink collection unit 116 HP Embedded Web Server 91 troubleshooting tools 91 output bin, clearing 111 feeding problems 154 paper path, clearing 115 file upload, Mac 95...
- Page 169 (Windows) 31 locating 8 Netscape Navigator, versions paper rollers jams 110 supported cleaning 138, 143, 148 HP embedded Web Server 87 selecting 131 network paper jams product name, changing 84 document feeder 122 Save to Network Folder 70 settings, changing 84...
- Page 170 85 USB storage accessories supplies printing from 41 low threshold settings 106 ordering 22 status, viewing with HP Utility for Web browser requirements Mac 95 HP Embedded Web Server 87 using when low 106 Web sites supplies status 128...
- Page 172 © 2014 Hewlett-Packard Development Company, L.P. www.hp.com *B5L04-90904* *B5L04-90904* B5L04-90904...