
Related Manuals for Topfield TF5000PVRt


Summary of Contents for Topfield TF5000PVRt
- Page 1 The User’s Manual Digital Terrestrial Receiver Personal Video Recorder TF5000PVR Please read this User's Manual carefully. The menu structure and specification can be changed without noti ce.
-
Page 2: Table Of Contents
TABLE OF CONTENTS TABLE OF CONTENTS INTRODUCTION......................6 CONTENTS ........................6 FEATURES ........................7 FRONT/ REAR PANELS ....................8 REMOTE CONTROL UNIT(RCU)................. 10 INSTALLATION (Connection) ..................13 Connection to TV, VCR and Hi-Fi ................13 Connection to the Antenna..................14 GETTING STARTED .................... - Page 3 TABLE OF CONTENTS EPG (Electronic Program Guide) ................39 Subtitle........................39 Teletext ........................39 Sound Track......................40 Multifeed ........................40 Time Shifting ......................40 Recording while Time Shifting................... 41 Recording, Checking and Editing the reserved delayed recording......42 Immediate Recording by RECORD button ............42 Immediate Recording by Menu Selection .............
- Page 4 WARNING Please read the following recommended safety precautions carefully for your safety. MAINS SUPPLY : 90-250V AC 50/60 Hz. OVERLOADING : Do not overload wall outlets, extension cords or adapters as these can result in fire or electrical shock. LIQUIDS : Keep liquids away from the PVR. The apparatus shall not be exposed to dripping or splashing and that no objects filled with liquids, such as vases, shall be placed on the apparatus.
- Page 5 WARNING EARTHING : The antenna cable must be earthed. LOCATION : Locate the PVR indoor place properly to prevent lightening, raining and direct sunlight. Do not allow the PVR to be exposed to hot, cold or humid conditions. RESPONSIBILITY : Do not use the PVR and its contents for illegal purpose. We are not responsible for any kind of illegal use.
-
Page 6: Introduction
INTRODUCTION INTRODUCTION Thank you for purchasing the Personal Video Recorder (PVR). This PVR is fully compliant with the international DVB standard and thus transmits digital images, sounds, information guides and teletext directly to your TV through the terrestrial broadcasting. Now you can comfortably see and receive digitally transmitted music, news, movie and sports terrestrial broadcasts in your office or at your home. -
Page 7: Features
FEATURES FEATURES - Fully Compliant with DVB. - 2 Common Interfaces for CONAX, CRYPTOWORKS, IRDETO, NAGRAVISION, SECA & VIACCESS - MPEG-2 Digital and fully DVB compliant - 2 Tuners - 2000 channels (TV or Radio) programmable - Channel switching time less than 1 second - Channel list editing - Favorite channel list editing - True-color On-screen Display (OSD) -
Page 8: Front/ Rear Panels
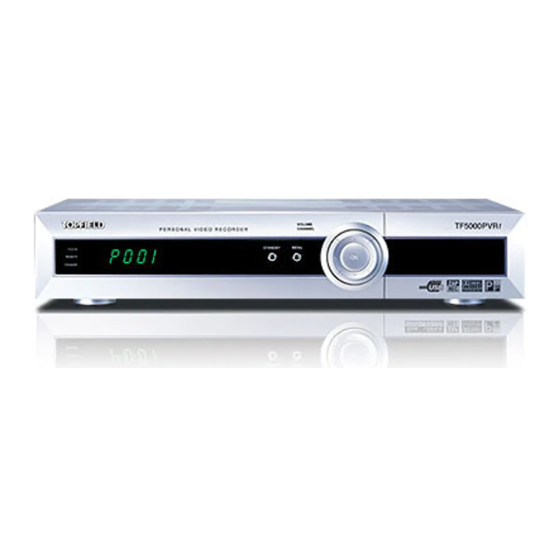
FRONT/ REAR PANELS FRONT/ REAR PANELS 1)FRONT PANEL -CHANNEL -POWER Change the channels The power button of PVR (ON / Stand by ) -VOLUME -LED Change audio volume level T V/STB -MENU REMOTE Display the Menu on screen. STAND BY -DISPLAY Display channel List on screen. - Page 9 FRONT/ REAR PANELS Antenna 1 IN Connect the terrestrial antenna cable RF Loopout 1 Use it to connect to another STB or Antenna 2 IN Antenna 2 IN Connect the terrestrial antenna cable or RF Loopout 1 RF Loopout 2 Use it to connect to another STB or RF IN of RF modulator VIDEO OUTPUT Video output.
-
Page 10: Remote Control Unit(Rcu)
REMOTE CONTROL UNIT(RCU) REMOTE CONTROL UNIT(RCU) . POWER Button ( Switch the PVR between Operation and Standby mode. . MUTE Button ( Enable / Disable the Audio. . UHF Button ( Display and alter the UHF setting in menu. . TV/STB Button ( Change the terrestrial TV and STB mode. - Page 11 REMOTE CONTROL UNIT(RCU) . SOUND Button ( Select Sound Track and LEFT / RIGHT / MONO / STEREO sound. Select the multifeed channel if multifeed is available. . V+/V- Buttons ( Adjust the volume (Increase / Decrease). Change the value of the selected item in Menu. .
- Page 12 REMOTE CONTROL UNIT(RCU) Button Stop time shifting, playback or recording. Button Start recording. Button Pause the playback and live picture. Button Move the position of Sub-picture at the PIP by counter clockwise. Button Move the position of Sub-picture at the PIP by clockwise. ) Button Exchange main-picture with sub-picture at the PIP.
-
Page 13: Installation (Connection)
INSTALLATION (Connection) INSTALLATION (Connection) First, connect both the aerial antenna and the TV to the PVR. There are some of the most common ways to connect the equipment in this manual. There are several ways of connecting the PVR to the existing Audio/TV system. We recommend one of the following setups. -
Page 14: Connection To The Antenna
INSTALLATION (Connection) 4) Connection to the TV using the RF cable. Connect an aerial antenna or RF Loopout2 to RF IN socket on the PVR. Connect one end of the RF cable to the RF OUT socket on the PVR. Connect the other end to the ANT IN socket on the TV. -
Page 15: Getting Started
GETTING STARTED GETTING STARTED Press the Power ( ) button to operate the PVR from the STANDBY mode. Now, the Info Box will appear for a given time and disappear. By pressing button, the Info Box will remain on the screen. The display time of the Info Box is adjustable in the System Setting menu of the Main menu. -
Page 16: Menu Operations
MENU OPERATIONS MENU OPERATIONS Now this chapter assumes that the PVR system has been installed correctly, meaning: • The aerial antenna for the PVR has been installed, connected to the PVR. • The PVR is connected to the TV. • The RCU has batteries and ready to control the PVR. If the PVR has not been installed or connected properly, please refer to the INSTALLATION menu on this manual. -
Page 17: System Setting
MENU OPERATIONS System Setting Time Setting The exact local current time can be adjusted by using the GMT, the Time Offset and the Mode sub menus. A. Mode By using buttons, you can select on of the Auto/Manual mode. The Auto mode updates the time settings automatically by the GMT received from the broadcast and the Time Offset you have inserted. -
Page 18: Timer Setting
MENU OPERATIONS B. Local Time The Local Time is adjustable only when the Mode is in the Manual mode. Adjust the current time, if necessary, by using the numeric buttons and buttons. C. GMT GMT is referred to the standard time of Greenwich. It cannot be changed. D. - Page 19 MENU OPERATIONS FASHION TV 08/03-Wed 11:39 30Min DWtv 07/02-Mon 13:00 60Min Service Number Mode Reseved Date and Time to Start Service Name Duration Record recording A. Record ON : This function is used for the delayed recording to the HDD of PVR. - Type : Select TV or Radio by pressing buttons.
-
Page 20: Parental Control
MENU OPERATIONS Parental Control Password to various menus can be configured. The PIN Code box will automatically appear when this menu is selected. The default PIN Code is 0000. A. Censorship The Censorship item blocks programs according to each specific setting. buttons to select the items below. -
Page 21: Language Setting
MENU OPERATIONS C. Access Control The Access Control menu controls access to following items: Time Setting, Language Setting, A/V Output Setting, Organizing Favorites, Installation and IRD Lock. Press buttons to Locked / Unlocked the access. Locked means controlling the access to the specific menus with the PIN Code system. The default PIN Code is 0000. -
Page 22: A/V Output Setting
MENU OPERATIONS A. Menu Language It is an item for changing the language of the Main menu. Select the language that the menus will be shown in. [English / French / Deutsch / Italian / Spanish / Arabic / Greek / Turkish / Danish / Swedish / Norwegian / Dutch / Russian / Polish / Persian] * The supported language can be changed without any notice. - Page 23 MENU OPERATIONS C. VCR SCART Type Select the VCR SCART type either Standard or External A/V. In case of External A/V, the source of TV SCART Output will be selected between VCR SCART input and internal AV by pressing button on the RCU. In case of Standard, it will be done automatically by the SCART functionality.
-
Page 24: Osd Transparency
MENU OPERATIONS OSD Transparency Adjust the OSD transparency of all the menus. The available levels are ranging from 0% to 50%. Info Box Display Time Adjust the time-out of the Info Box. Set the period of time that the Info Box is displayed on screen. -
Page 25: Organizing Channels
MENU OPERATIONS Organizing Channels This menu can be used to rename, reorder, lock, hide and delete TV Services. A. Browse Press button. Now, browsing through the Organizing Channels is possible. Press assigned buttons on the help message. B. Rename buttons to select Rename item and press button to move the cursor to the Channel List. - Page 26 MENU OPERATIONS E. Skip You can hide and skip the services. In order to unlock the skip function, press button on the skipped channel. The skipped channels will not be visible on the channel list. F. Delete Press button to delete channels. The delete function differs from the skip function as it deletes the channel completely.
-
Page 27: Organizing Favorites
MENU OPERATIONS Organizing Favorites This mode is helpful in adding and deleting services to and from the favorite group. Under the menu Organizing Favorites, there are three different modes: Fav List , Fav CHs and TV or Radio Ch List. On the Fav List mode, four standard lists are selected as the default menus: News, Sports, Movie and Music. -
Page 28: Recording
MENU OPERATIONS Recording To record the service you want, you have to set the following options. You can record the service immediately. To reserve a recording, you have to use Timer Setting function in System Setting at Main menu. You can go to the Timer Setting menu directly by selecting Timer Setting item in this menu, too. -
Page 29: Installation
MENU OPERATIONS D. Duration To change the duration of the recording time, press button. E. File Name To change the file name of the service to be recorded, press button at this item. You can change the file name by keyboard on screen. F. -
Page 30: Channel Search
MENU OPERATIONS Channel Search A. Search Mode There are 3 search modes, Auto, Manual and Advanced. The Auto mode enables you to search all the services you can receive. The Manual mode enables you to search the services in the channel you want. On the Advanced mode, you can search the service by setting the Audio PID, Video PID or the PCR PID. -
Page 31: Services Copy
MENU OPERATIONS 4) SAVE To ensure the above Video, Audio and PCR PID change, press button at this item. D. Tuner Select Select a tuner for channel searching from the selected channel. E. Antenna Supply 5V When using an active antenna, it should be set to On to supply power to the Amplifier of the Antenna. -
Page 32: Factory Setting
MENU OPERATIONS Factory Setting All the stored data can be reset just like it was manufactured. Format Hard Disk To format the HDD in PVR, Press button at this Item. Formatting Hard Disk will delete all the data and the files recorded in HDD permanently. If a new HDD is installed, it should be formatted because the file structure of PVR is different from others. -
Page 33: Information
MENU OPERATIONS Notes: Please proceed this menu with connecting the PVR of same model and same specification. Transfer Firmware Information You can check the IRD(PVR) version and refer the calendar. IRD Status Check the PVR’s system information here. It shows the System ID, Loader Version, Device Version, Application Version and Last Update. -
Page 34: Calendar
MENU OPERATIONS Calendar Press button to select the year. Press button to select the month. Common Interface The menu differs according to each inserted CAM. If the module has not been installed yet, the phrase Not Installed will be indicated. -
Page 35: Game
MENU OPERATIONS Game ExBlock Bomb Hexa... -
Page 36: Pac Man
MENU OPERATIONS Pac Man... -
Page 37: Function Guide
FUNCTION GUIDE FUNCTION GUIDE Channel List Press button to see the Channel List. The Channel List displays as follows. • Service provider. (It can be displayed by pressing button.) • Channel List by T1 (Tuner 1) or T2 (Tuner 2). •... -
Page 38: Information Box
FUNCTION GUIDE Information Box Press button on the RCU to see the program information. The Information box displays as follows: . Channel Number . Channel Name . Detailed Program Information . Signal Level and Quality . Tuner Information . Information of subtitle and / or teletext . -
Page 39: Epg (Electronic Program Guide)
FUNCTION GUIDE Title Bitrate Progress Bar Artist Time Information Album Duration EPG (Electronic Program Guide) To display the information about currently being broadcasted as well as those that will be broadcasted next, press button on the remote control unit. If EPG is available on programs, you will detailed description programs, start/end time and programs... -
Page 40: Sound Track
FUNCTION GUIDE In the software emulation mode, you can watch the teletext even though your TV does not support teletext. You can watch the teletext using the RCU of PVR. Press Teletext ( ) button to watch the teletext with software emulation mode. Press button once more or EXIT ( ) button to escape from teletext. -
Page 41: Recording While Time Shifting
FUNCTION GUIDE 1. To use Time Shifting function, the Time Shifting option should be enabled. To find the Time Shifting option menu, follow the steps below. Main Menu System Setting Time Shifting Enable 2. Press button to display Time Shifting progress bar. You have to press button once more to display Time Shifting progress bar during Trick mode. -
Page 42: Recording, Checking And Editing The Reserved Delayed Recording
FUNCTION GUIDE Recording, Checking and Editing the reserved delayed recording To record services, refer to the following steps. There are four kinds of recording references. Caution : If the recording time is less than about 1 minute, the recorded file will not be saved. -
Page 43: Immediate Recording By Menu Selection
FUNCTION GUIDE Immediate Recording by Menu Selection * Precaution (Dual Recording) Before starting recording on the Menu, you have to select one of the record NO. There are Record NO.1 and 2 to distinguish between the two records for dual recording. -
Page 44: Delayed Recording
FUNCTION GUIDE Delayed Recording Timer Setting KiKa 19/08-Sun 00:46 30Min Entry Information Record Type Service B. KiKa Tuner select Tuner 2 Mode One Time 1/01/2001-Mon Date Start Time 09:51 Duration 30 min File NAME Next/Prev entry. Edit entry. Insert new entry. Delete the selected entry. -
Page 45: Recording By Epg
FUNCTION GUIDE Recording by EPG A. Record Press button to display EPG. Select a service that you want to record, and press button. Instead of rec button, two times pressing of OK button is valid for delayed recording. The Recording mark ( ) will be displayed by pressing OK button two times. -
Page 46: Playback A Recorded Service
FUNCTION GUIDE Playback a Recorded Service 1. Press list button to display the recorded service list. 2. You can use several useful editing functions at Recorded Services menu as followings. A. New Folder : Press (Green) button to make new folder. B. -
Page 47: Stop
FUNCTION GUIDE * Successive Playback of Services Press F1 (Red) button to number the services among the recorded services list and press or ply button to playback the multi-services in sequence automatically. This function is very convenient for you to descramble the pay TV service with proper CAM module and smart card. -
Page 48: Slow Motion Playback
FUNCTION GUIDE Slow Motion Playback 1. To playback in slow motion (without sound), press the button. 2. Slow motion speed can be adjusted by pressing the button repeatedly. 3. There are 3 steps (1/2, 1/4, 1/8) in slow motion playback. 4. -
Page 49: Bookmark
FUNCTION GUIDE Bookmark You can jump to a position directly by bookmark function in playback and time-shifted playback. To search positions very quickly and easily, use bookmarks. It is impossible to use the bookmark in the following conditions. - Timeshifting is disabled and you are watching live picture. - You are recording 2 services, and you are watching the other sevice. -
Page 50: Recording The Descrambled Live Service
FUNCTION GUIDE Recording The Descrambled Live Service 1. Select the live picture you want to record. Descramble the service with a proper CAM and smart card. The live service should be decoded well with the proper CAM and smart card. 2. -
Page 51: Repeated Playback Mode
FUNCTION GUIDE Repeated Playback mode The repeated Playback mode works only in playback mode. It does not work in time shifting mode. There are two repeated Playback modes. 1. Repeating the whole selected service. a. Start playback a recorded service. b. -
Page 52: Cut Out/ Save Selected Region
FUNCTION GUIDE 1. Select and playback a service to copy. 2. Press button to display Playback progress bar. 3. To go to the desired position, press button or button. 4. Start playback the recorded video you want to copy. The fast/slow motion copying is possible by fast/slow motion playback. -
Page 53: Time Shifting While Recording
FUNCTION GUIDE Time Shifting while Recording During single recording, Time Shifting is possible. But, if you are recording 2 services at the same time, Time Shifting is possible only in the recorded channel. Zapping while Recording For the tuner being recorded with, all the channels in the same Channel can be selected. For the other tuner, all the scanned channels can be selected. -
Page 54: Dual Recording
FUNCTION GUIDE Dual Recording 1. Press button to start Recording. 2. You can use the Time-shifting function while recording another service. It is possible to record two services at the same time, too. 3. To record the 2nd service, press button at the service you want to record. -
Page 55: Recorded Services List
FUNCTION GUIDE Recorded Services List The file list is displayed by pressing button. The file list of Recorded Services can be selected by buttons from other list. 1. You can see the file number, file name, date of recording, information of scramble, locking, Service name, event information, file size, HDD information, etc. -
Page 56: Mp3 File List
1. You can download the MP3 files via USB from PC using Altair.exe.( You can get it from www.topfield.co.kr) The list of MP3 files will be displayed here. 2. Folder A new folder can be made by pressing (Green) button. -
Page 57: Program File List
The file list of Program files can be selected by buttons from other list. 1. You can download the TAP(Topfield Application Program) via USB from PC using Altair.exe.( You can get it from www.topfiled.co.kr). The list of the TAP will be displayed. -
Page 58: Progress Icon
FUNCTION GUIDE Progress Icon There will be Icons during Playback, Time Shifting, Recording and Copying. They will be displayed for a seconds. To display it again, press button. Icon (color) Description Recording. - Small Circle in the large circle means the current service you are watching is being recorded. -
Page 59: Software Upgrade And Pc Interface
Whenever a problem is found or functions are added or modified, the software in the PVR has to be upgraded to enjoy better function. The latest news, software, utility, driver, product and manual will be found at Topfield website http://www.topfield.co.kr. -
Page 60: Menu Map
MENU MAP MENU MAP Mode Local Time Time Setting Time Offset Timer Setting Censorship Change PIN Code Time Setting Language Setting Parental Control A/V Output Setting Access Control Organizing Channels Organizi ng Favorites Installation IRD Lock System Setting Main Menu Language Language Setting Subtitle Language Audio Language... - Page 61 MENU MAP Organizing Favorites Record No. Service Mode Duration Record ing File Name Start Stop Timer Setting Main Search M ode Channel Service Search Tuner Select Antenna Supply 5V Installation Service Search Service Copy Factory Setting Format Hard Disk Transfer Program to… Transfer Firmware Transfer Data to…...
-
Page 62: Specifications
SPECIFICATIONS SPECIFICATIONS Tuner & Service Decoder Item Specification 2 Tuners Input/Loop through Connector 75W, IEC 169-2, Female/Male Frequency Range 50 ~ 870MHz Signal Level Input -78 ~ -20dBm Modulation OFDM Carrier Mode 2k and 8k hierarchical/non-hierarchical Constellation QPSK, 16 and 64 QAM Guard Interval 1/4, 1/8, 1/16 and 1/32 MPEG Transport Stream A/V Decoding... - Page 63 SPECIFICATIONS A/V & Data In/Out Item Specification Video CVBS/S-VIDEO/RGB output TV-SCART Audio L/R output Video CVBS output, Audio L/R output VCR-SCART Video CVBS/S-VIDEO/RGB input bypass Audio L/R input bypass S-VIDEO Video S-VIDEO output Video CVBS output RCA A/V Audio L/R output S/PDIF Digital audio or Dolby AC-3 bitstream output 9 pin D-sub type...
- Page 64 110T-F4213-205-0 rev.2...