Table of Contents
Advertisement
Quick Links
Download this manual
See also:
User Manual
Advertisement
Table of Contents

Related Manuals for Kogan KALED19DVDA


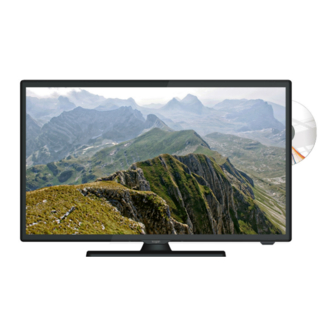
Summary of Contents for Kogan KALED19DVDA
-
Page 2: Table Of Contents
Table Of Contents Preparations Guide Safety Information.........................2 Important Safety Precautions....................3 Installed And Connected TV TV Bracket assemble......................4 TV Buttons And Terminal Interface..................5 External device connection diagram..............6 Install And Connect TV......................7 TV Stand installation Instructions...............7 TV Menu Input Source...........................8 Picture Menu..........................8 Sound Menu.......................... -
Page 4: Important Safety Precautions
Important Safety Precautions 1. Read these instructions. 2. Keep these instructions. 3. Heed all warnings. 4. Follow all instructions. 5. Do not use this apparatus near water. 6. Clean only with dry cloth. 7. Do not block any ventilation openings. Install in accordance with the manufacturer’s instructions. -
Page 5: Tv Bracket Assemble
TV Bracket assemble Fix the TV on the wall 1.First, put the TV on the table smoothly and put some soft cloth on the table to avoid scratching the screen. 2.Use the screw driver to take off the screws which are fixed on the bottom stand (the direction of the arrow, refer to the pic 1). -
Page 6: Tv Buttons And Terminal Interface
TV Buttons And Terminal Interface TV Buttons Note: The following is only functional schematic. The actual position and arrangement of different models may be different. :Turn ON/OFF Power. SOURCE:External Signal Input Selection. MENU:Display Main MENU And Confirm MENU Item Selection. CH+/-:Select Channel. -
Page 7: External Device Connection Diagram
External device connection diagram Set-top boxes HDMI HDMI HDMI input connection INPUT INPUT INPUT VIDEO VIDEO AV input connection AV input connection USB connection TV connection... -
Page 8: Install And Connect Tv
Install And Connect TV Set your TV Put your TV in a steady location which can bear the weight of the TV. To avoid danger, please don’t expose the TV near water or heating sources (such as lights, candles, heaters), and do not block the ventilation at the back of TV. -
Page 9: Tv Menu
TV Menu 1. Press ▼ / ▲ button to select the option that you want to adjust in the Input Source PICTURE menu. 2. Press Enter/ button to adjust. 3. After finishing your adjustment, Press MENU button to save and return back to the previous menu. -
Page 10: Sound Menu
TV Menu Channel Menu SOUND MENU Press MENU button to display the main menu. Press MENU button to display the main menu. ENTER / ▼ Press button select in the main menu,then p ress SOUND ress Press button to select CHANNEL in the main menu,then p to enter. - Page 11 TV Menu Channel Edit Press ▼ / ▲ button to select Channel Edit, then press Enter / button to enter sub-menu. Analog Manual Scan Press ▼ / ▲ button to select , then press Analog Manual Scan Enter / button to enter sub-menu. The three coloured keys are the shortcut keys for programming the channels.
-
Page 12: Lock System Menu
Default password is 0000. Press ▼ / ▲ button to select OSD Language, then press button to select. you set, please contact the Kogan customer support team. Audio Languages ress ▼ / ▲ button to select Enable then press button Press ▼... -
Page 13: Usb Operation
TV Menu First Time Setup Press ▼ / ▲ button to select First time Setup, then press Enter button to enter. Press ▼ / ▲ button to select OAD, then press Enter button to enter sub-menu. Reset Press ▼ / ▲ button to select Reset, then press Enter button to enter sub-menu. -
Page 17: Specifications
Machine Technical Specifications ATV:99 DTV:1200 IN TV,AV,Y Pb Pr,PC,HDMI,DVD,USB OUT EARPHONE, COAXIAL 5W+5W DC 12V AC adapter, Remote controller, warranty card Quick Setup Guide, 2xAAA Batteries... -
Page 18: Remote Controller
Remote Controller DTV/ATV: Switch between Analog and Digital TV previous DTV/ATV DTV/ATV P.MODE S.MODE SLEEP SLEEP MENU MENU SOURCE Open the main menu. ENTER ENTER Press to view and select available input sources ENTER: EXIT DISPLAY RECLIST D.setup FREEZE TIMESHIFT GUIDE ASPECT FAV/LIST... - Page 19 Remote Controller 1.When watching channel , allows you to switch between TV and Radio modes. TV/RADIO 2.Previous chapter in PVR or Media Player mode GUIDE:1. Launches the EPG (Electronic Program Guide) 2. Fast reverse in PVR or Media Player mode. list of PVR recordings REC LIST: DTV/ATV...
- Page 20 Remote Controller Button functionality when watching DVD (Note that some features are disc-dependent): 34. :DVD EJECT。 35. :Play /pause DVD program. 36. :DVD previous chapter. 37. :DVD next chapter. 38. :DVD fast reverse. 39. :DVD fast forward. DTV/ATV DTV/ATV 40. :Stop DVD program.