Napoleon 325 Instructions Manual
Gourmet
Hide thumbs
Also See for 325:
- Manual (150 pages) ,
- Instruction manual (96 pages) ,
- Owner's manual (72 pages)
Table of Contents
Advertisement
Quick Links
This gas grill must be used only outdoors in a well-ventilated space and must not be used inside a
building, garage, screened-in porch, gazebo or any other enclosed area.
DANGER
IF YOU SMELL GAS:
• Shut off gas to the appliance.
• Extinguish any open flame.
• Open lid.
• If odor continues, keep away from the
appliance and immediately call your gas
supplier or fire department.
Notice to Installer: Leave these instructions with the grill owner for future reference.
0359-12
Fax: (705)725-2564 email: wecare@napoleonproducts.com web site: www.napoleongrills.com
Napoleon Appliance Corp.,
214 Bayview Dr., Barrie, Ontario, Canada L4N 4Y8 Phone: 1-866-820-8686
APPLY SERIAL NUMBER LABEL FROM CARTON
Serial No.
XXXXXX000000
MODEL NO.
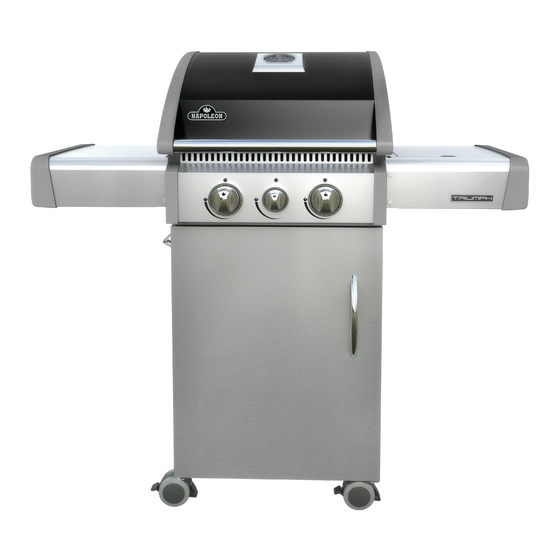
325, 325SB
WARNING
Do not try to light this appliance without
reading the "LIGHTING" instructions section of
this manual.
Do not store or use gasoline or other flam-
mable liquids or vapors in the vicinity of this
or any other appliance. An L.P. cylinder not
connected for use must not be stored in the
vicinity of this or any other appliance. If the
information in these instructions is not fol-
lowed exactly, a fire or explosion may result,
causing property damage, personal injury or
death.
EN
Z415-0009CE JUL 05/14
Advertisement
Table of Contents

Related Manuals for Napoleon 325


Summary of Contents for Napoleon 325
- Page 1 APPLY SERIAL NUMBER LABEL FROM CARTON Serial No. XXXXXX000000 MODEL NO. 325, 325SB WARNING DANGER Do not try to light this appliance without reading the “LIGHTING” instructions section of IF YOU SMELL GAS: this manual.
- Page 2 NAPOLEON will not be responsible for the installation, labor or any other costs or expenses related to the re-installation of a warranted part, and such expenses are not covered by this warranty.
-
Page 3: Safe Operating Practices
Never use natural gas in a unit designed for liquid propane gas. • Never use lighter fluid in a gas grill. • Use charcoal briquettes only with a Napoleon charcoal tray designed for this unit. • Burner controls must be off when turning supply cylinder on. •... -
Page 4: Gas Cylinder
Correct Disposal Of This Product This marking indicates that this product should not be disposed with other household wastes throughout the EU. To prevent possible harm to the environment or human health from uncontrolled waste disposal, recycle it responsibly to promote the sustainable reuse of material resources. To return your used device, please use the return and collection systems or contact the retailer where the product was purchased. -
Page 5: Technical Data
Bubbles will indicate a gas leak. Either tighten the loose joint or have the part replaced with one recommend- ed by the Napoleon Customer Care department and have the grill inspected by a certified gas installer. If the leak cannot be stopped, immediately shut off the gas supply, disconnect it, and have the grill inspected by a certified gas installer or dealer. -
Page 6: Lighting Instructions
Lighting Instructions Left Burner Side Burner Right Burner Off Position WARNING! Open lid. WARNING! Ensure all burner controls are in the off position. Turn on the gas supply valve. Main Burner Rear Burner Lighting Side Burner Lighting Lighting (If equipped) (If equipped) 1. -
Page 7: Operating The Grill
Should a flare-up occur, move food away from the flames and reduce the heat. Leave the lid open. See Your All Season Grill cookbook by Napoleon for more detailed instructions. Direct Cooking: Place food to be cooked on the grill directly over the heat. This method is generally used for searing or for foods that do not require prolonged cooking times such as hamburgers, steaks, chicken pieces, or vegetables. -
Page 8: Maintenance / Cleaning Instructions
To clean the panel, use only warm soapy water or Continental brand stainless steel cleaner available from your Napoleon dealer. Never apply abrasive cleaners on any stainless surfaces, espe- cially the printed portion of the control panel or the printing will gradually rub off. - Page 9 WARNING! Hose: Check for abrasions, melting, cuts, and cracks in the hose. If any of these conditions exist, do not use the gas grill. Have the part replaced by your Napoleon Gas Grill dealer or qualified gas installer. Tube Burner: The burners are made from heavy wall 304 stainless steel, but extreme heat and a corrosive envi- ronment can cause surface corrosion to occur.
-
Page 10: Troubleshooting
Troubleshooting Problem Possible Causes Solution Low heat / Low flame when For propane - improper lighting Ensure lighting procedure is followed carefully. valve turned to high. procedure. All gas grill valves must be in the off position when the tank valve is turned on. Turn tank on slowly to allow pressure to equalize. -
Page 11: Ordering Replacement Parts
KEEP YOUR RECEIPT AS PROOF OF PURCHASE TO VALIDATE YOUR WARRANTY. Ordering Replacement Parts Warranty Information MODEL: DATE OF PURCHASE: SERIAL NUMBER: (Record information here for easy reference) Before contacting the Customer Care Department, check the NAC Website for more extensive cleaning, main- tenance, troubleshooting and parts replacement instructions at www.napoleongrills.com. -
Page 12: Getting Started
CAUTION! During unpacking and assembly we recommended you wear work gloves and safety glasses for your protection. Although we make every effort to make the assembly process as problem free and safe as possible, it is characteristic of fabricated steel parts that the edges and corners might be sharp and could cause cuts if handled incorrectly. - Page 13 FAX TO: 705 727 4282 ACCESSORIES & PARTS ORDER FORM PLEASE PRINT CLEARLY CONTACT NAME:______________________________________________________________________ SHIP TO :_____________________________________________________________________________ _________________________________________________________________________________________ _________________________________________________________________________________________ _________________________________________________________________________________________ TEL :_________________________________ FAX :______________________________ EMAIL: __________________________________________________________________ VISA OR MASTERCARD # :_______________________________________ EXPIRY DATE: _____________ SIGNATURE:_____________________________________________________________________________ QUANTITY PART NUMBER DESCRIPTION TAXES MAY APPLY SHIPPING EXTRA IF CONFIRMATION IS REQUIRED PLEASE INCLUDE A FAX NUMBER OR EMAIL ADDRESS...
-
Page 14: Caster Installation
5/8”(16mm) 1. Caster Installation Attach (4) casters to the bottom shelf. Tighten securely. 6 x Z570-0027 (1/4-20 x 3/8”) 3/8”(10mm) 2. Left and Right Cart Panel Installation Install end cart panels ensuring slots in panel are to the top. Rest the panel on the bottom shelf and line up the holes. - Page 15 9 x N570-0042 (#10-24 x 3/8”) 3. Rear Cart Panel Installation Fit the rear cart panel between the two end panels. Ensure the large holes in the rear panel are to the bottom of cart as illustrated. Fasten using (9) #10-24 x 3/8” screws, three on each side. 4 x N570-0042 (10-24 x 3/8”) 4.
-
Page 16: Heat Shield Installation
4 x N570-0042 (10-24 x 3/8”) 5. Heat Shield Installation Attach heat shield using (4) 10-24 x 3/8” screws. Attach one end under lip of back panel and other end to underside of front cabinet support. www.napoleongrills.com... -
Page 17: Grill Head Installation
4 x Z570-0027 (1/4-20 X 3/8”) 2 x Z570-0022 (M4X8mm) 3/8”(10mm) 6. Grill Head Installation To avoid assembly difficulties, prior to mounting the grill head, remove zip tie holding regulator/connector up under control panel. This was installed at the factory to protect the regulator hose during shipping and is no longer required. (Take care when removing the tie not to damage the hose). -
Page 18: Cabinet Door Installation
2x Z570-0027 (1/4-20 X 3/8”) 2 x N105-0015 N105-0011 (door bushing) 3/8”(10mm) 7. Cabinet Door Installation Bushing Push down and engage top pin. www.napoleongrills.com... -
Page 19: Side Shelf Installation
8. Side Shelf Installation Insert the shelf pin into the left shelf bracket. Bend shelf open slightly to insert second pin into bracket. WARNING! Do not over bend. www.napoleongrills.com... - Page 20 8. Side Shelf Installation Push down and engage top pins to lock shelf in place. Lift To disengage shelf, pull up. www.napoleongrills.com...
-
Page 21: Side Burner Installation
1 x N160-0016 (clip) 9. Side Burner Installation Fit orifice into burner tube and secure with hose retainer clip supplied. Attach wire from main unit to side burner electrode. 325SB MODEL Ensure bushing snaps into base as shown. Fit the orifice into the burner tube and secure with the hose... - Page 22 10. Sear Plate Installation Set sear plates into base, positioning one over each tube burner. 11. Grids and Warming Rack Installation Position the grids and warming rack into base as shown. www.napoleongrills.com...
-
Page 23: Drip Pan Installation
12. Drip Pan Installation Slide drip pan into rear of base as shown. Ensure drip pan rests on rails at the bottom of base. 13. Grease Tray and Holder Installation Place aluminum grease tray into the grease tray holder and then clip the wire grease tray holder into the bottom of the drip pan. - Page 24 2 x N570-0042 (#10-24 x 3/8”) 14.Bottle Opener Installation Fasten bottle opener to the side panel using (2) #10-24×3/8” screws. www.napoleongrills.com...
- Page 25 15.Proper Hose Connection All cylinders 7kg or larger must be placed outside the enclosure (under the right side shelf) on level ground. The hose assembly must be routed through the knock out hole in the right side panel. www.napoleongrills.com...
- Page 26 Bubbles will indicate a gas leak. Either tighten the loose joint or have the part replaced with one recom- mended by the Napoleon Customer Care department and have the grill inspected by a certified gas installer. If the leak cannot be stopped, immediately shut off the gas supply, disconnect it, and have the grill inspected by a certified gas installer or dealer.
-
Page 27: Parts List
325 Parts List Item Part # Item Part # Z135-0001 Z570-0022 Z135-0002 N080-0284 Z335-0001K N080-0285 Z010-0001 Z570-0021 Z080-0001-GY1SG Z570-0027 Z580-0001 N570-0101 N510-0013 N450-0039 N685-0006 Z476-0001-GY1SG N385-0129 Z476-0002-GY1SG W450-0005 Z010-0010-GY1SG N570-0038 Z130-0002 N735-0003 Z655-0001-GY1SG N570-0091 Z010-0026 N570-0078 N105-0011 Z010-0023 N430-0002 Z035-0005... -
Page 28: Parts Diagram
PARTS DIAGRAM www.napoleongrills.com... - Page 29 325SB Parts List Item Part # 325SB Item Part # 325SB Z135-0001 Z570-0022 Z135-0002 N080-0284 Z335-0001K N080-0285 Z010-0001 Z570-0021 Z080-0001-GY1SG Z570-0027 Z580-0001 N570-0101 N510-0013 N450-0039 N685-0006 Z476-0001-GY1SG N385-0129 Z476-0002-GY1SG W450-0005 Z010-0010-GY1SG N570-0038 Z130-0002 N735-0003 Z655-0001-GY1SG N570-0091 Z010-0026 N570-0078 N105-0011 Z010-0023 N430-0002 Z035-0005 Z080-0012...
- Page 30 PARTS DIAGRAM www.napoleongrills.com...