Advertisement
Quick Links
WT-211
WT
-211
WT
WT
-211
-211
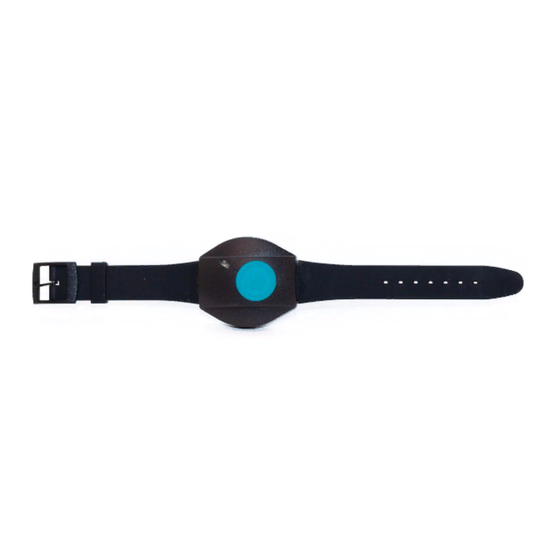
Waterproof Wrist Transmitter
1 1 1 1 . INTRODUCTION
. INTRODUCTION
. INTRODUCTION
. INTRODUCTION
The WT-211 is a miniature water-proof wrist-worn transmitter,
designed to send coded transmissions to wireless receivers of
the WR-200 and WR-300 series. Transmission is activated by
depressing the pushbutton at the center of the unit.
All WT-211 units are supplied with a wrist band, to be worn like a
regular watch. Operating power is obtained from a coin-type,
3-volt lithium battery that can last up to 10 years.
A LED lights during transmission, indicating that the battery
voltage exceeds 2.7 V. If the LED lights dimly or does not light at
all during transmission, the battery must be replaced immediately.
2 2 2 2 . SPECIFICATIONS
. SPECIFICATIONS
. SPECIFICATIONS
. SPECIFICATIONS
Frequency (MHz): 315, 404, 418, 433.92 or other frequencies
according to local requirements.
Modulation: ASK (ON-OFF keying)
System
Code:
8-bit
digital
combinations, pulse width modulation.
Channel Code: 4-bit digital word
Transmit Duration: Continuous, for as long as the pushbutton is
being pressed.
Power Supply: 3-volt Lithium cell (Sanyo type CR-2025 or
equivalent).
Nominal Battery Capacity: 150 mAh
Current Consumption: 2 mA (during transmission only).
Battery Life: 3 to 5 years with about 3 transmissions per day; up
to 10 years with one transmission per day or none at all.
Battery Check:
Good battery - LED lights steadily upon transmission.
Low battery - LED lights dimly or not at all upon transmission.
3 3 3 3 . PREPARATION FOR USE
. PREPARATION FOR USE
. PREPARATION FOR USE
. PREPARATION FOR USE
3.1 Opening the Case
A. Put the transmitter face down.
B. Loosen and remove the 4
screws
where
shown
Figure 2. Take care not to
lose the screws.
C. Turn the transmitter over.
Hold the base between the
fingers of one hand, and pull
the cover off.
D. Make sure that the rubber
ring that serves as a seal is
in place around the rim of
the base. If it comes loose,
save it for later use together
with the screws.
Note: The strap pivots are
seated in open grooves at
the two edges of the base.
If you put the base on the table "on its back", the pivots and
the two sections of the strap will remain in place.
Upon removal of the cover, the top side of the transmitter module
can be viewed (Fig. 3).
3.2 System Code Selection
A miniature 8-position DIP switch with levers marked "1" to "8" is
used to select the SYSTEM code - a "password" between the
WT-211 and the target receiver.
DE2231
word,
256
possible
in
Figure 3. Transmitter Module
- Top Side
Figure 1. WT-211, General
View
Low Battery Threshold: 2.7 VDC
Operating Temperature: 0° to 50°C (32° to 122°F).
Dimensions: Ø 35 mm (1.4 in.).
code
Weight: 25 g (0.9 oz).
Color: Watch - black, button - turquoise.
Standards: Meets FCC part 15, MPT1340 and RTTE requirements
This device complies with Part 15 of the FCC Rules and
RSS-210 of Industry and Science Canada. Operation is subject
to the following two conditions: (1) This device may not cause
harmful interference, and (2) this device must accept any
interference received, including interference that may cause
undesired operation.
This device complies with the essential requirements and
provisions of Directive 1999/5/EC of the European Parliament and
of the Council of 9 March 1999 on radio and telecommunications
terminal equipment.
Each lever on this switch may be set to ON or OFF, to obtain one
of the 256 possible code combinations. The digital code selected
must match the code setting of the target receiver.
Use a ball point pen or a similar pointed object to shift the switch
levers to the positions producing the desired system code (Fig. 4).
Figure 4. System Code
Selector
Important: The factory test code shown in Figure 4 (2, 4, 5, 6, 7
ON / 1, 3, 8 OFF) must not be used. Also avoid codes such as:
all keys ON, all keys OFF or alternating ON/OFF settings.
3.3 Channel Code Selection
A 4-position DIP switch with levers marked "1" to "4" is used to
select the CHANNEL code transmitted by the WT-211. Each
transmitter can be set to activate any one of the outputs or
"channels" of a 4-output receiver. This way, different zones of an
alarm control panel may be activated via a multi-channel receiver.
The channel code is selected by shifting the lever marked with
the desired channel number to ON (Fig. 5).
Use a ball point pen to set the channel selector as required by the
host system.
Installation Instructions
Figure 2. Opening the Case
ON
POSITION
1 2 3 4
Figure 5. Channel Code
Selector
OFF
POSITION
1
Advertisement

Related Manuals for Visonic WT-211


Summary of Contents for Visonic WT-211
-
Page 1: Installation Instructions
WR-200 and WR-300 series. Transmission is activated by depressing the pushbutton at the center of the unit. All WT-211 units are supplied with a wrist band, to be worn like a regular watch. Operating power is obtained from a coin-type, 3-volt lithium battery that can last up to 10 years. -
Page 2: Closing The Case
VISONIC LTD. (ISRAEL): P.O.B 22020 TEL-AVIV 61220 ISRAEL. PHONE: (972-3) 645-6789, FAX: (972-3) 645-6788 VISONIC INC. (U.S.A.): 10 NORTHWOOD DRIVE, BLOOMFIELD CT. 06002-1911. PHONE: (860) 243-0833, (800) 223-0020 FAX: (860) 242-8094 VISONIC LTD. (UK): FRASER ROAD, PRIORY BUSINESS PARK, BEDFORD MK44 3WH. PHONE: (0870) 730-0800 FAX: (0870) 730-0801 INTERNET: WWW.VISONIC.COM...