Chapters
Table of Contents

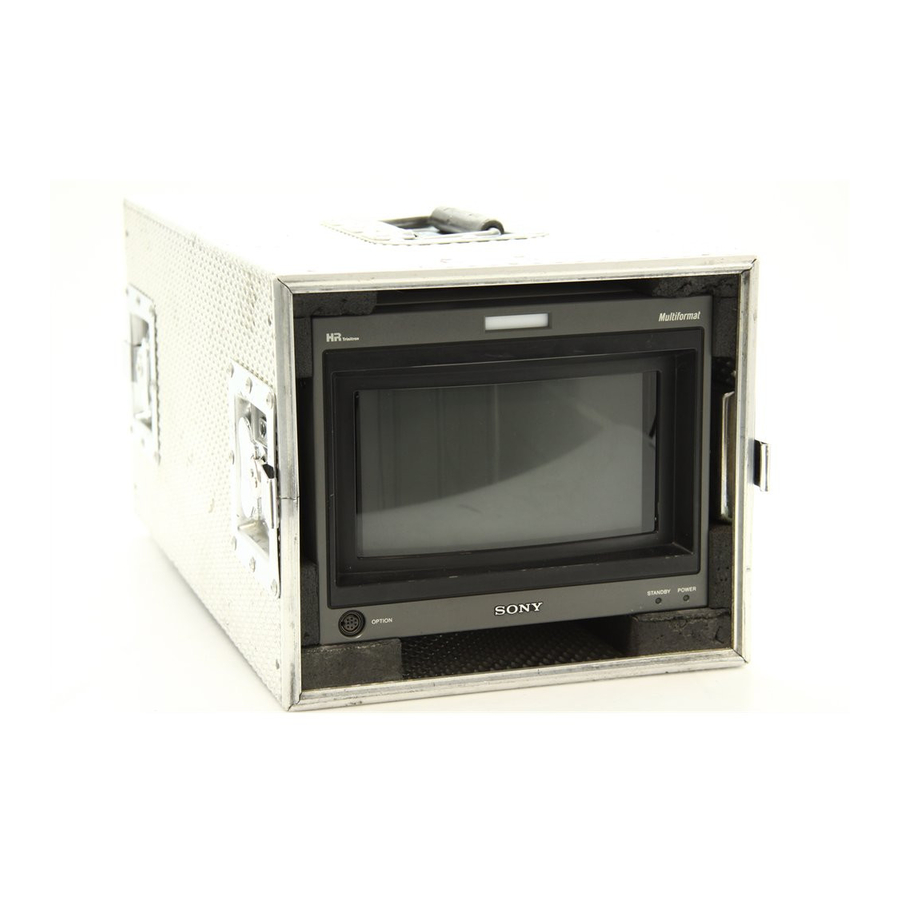
Related Manuals for Sony BVM-D9H1j


Summary of Contents for Sony BVM-D9H1j
- Page 1 TRINITRON COLOR VIDEO MONITOR ® BVM-D9H1J/D9H1U/D9H1E/D9H1A BVM-D9H5J/D9H5U/D9H5E/D9H5A BVM-D14H1J/D14H1U/D14H1E/D14H1A BVM-D14H5J/D14H5U/D14H5E/D14H5A OPERATION MANUAL [Japanese/English] 1st Edition (Revised 4) Serial No. 2000001 and Higher...
- Page 3 3(J) ......................4(J) ......................6(J) ................. 7(J) ....................8(J) ........................11(J) .................... 28(J) ..................29(J) ..................34(J) ..................CONTROL PRESET ADJ 35(J) ..........COLOR TEMP ADJ 37(J) ........INPUT CONFIG 39(J) ....... REMOTE 41(J) ......
- Page 4 SYSTEM CONFIG 43(J) ............STATUS 46(J) ......... ALIGNMENT 47(J) ... ADDRESS 48(J) ........50(J) ........................58(J) .................... 60(J) ....................
- Page 5 • • • • •...
- Page 6 • • • • •...
- Page 8 • • • • • •...
- Page 9 • • • • • • • BVM-D9H1J/D9H5J)
- Page 10 ®1) (BVM-D9H1J/ BVM-D14H1J) ®...
- Page 11 • • BKM-10R • • • BKM-11R • • • BKM-14L MB-520 MB-519 MB-509 BKM-30E14 BKM-31E14 VF-508...
- Page 12 SDI 4 2 2 BKM-120D NTSC/PAL BKM-127W BKM-129X HD SDI BKM-142HD • •...
- Page 13 BVM-D9H1J/D9H5J BVM-D9H5J STANDBY POWER OPTION VOLUME DEGAUSS !¡ MANUAL POWER !™ SHIFT !£ !¢ !∞ BVM-D9H1J STANDBY OPTION POWER...
- Page 14 DEGAUSS( POWER( STANDBY( • • OPTION( POWER( VOLUME...
- Page 15 !¡ MANUAL( !£ !™ !¢ MENU PHASE CHROMA BRIGHT CONTRAST MENU UP/DOWN DOWN PHASE CHROMA BRIGHT CONTRAST !∞ !™ SHIFT( !£...
- Page 16 LED) • • • • MONO( MONO APT COMB ADDRESS •RGB 16:9 SYNC B ONLY MARKER • NTSC PAL ADDRESS( ADDRESS ADDRESS COLOR TEMP ADJ MANUAL MANUAL CONTROL PRESET ADJ MANUAL COLOR TEMP ADJ MANUAL ALIGNMENT COMB( BKM-127W NTSC/PAL NTSC APT( (RGB...
- Page 17 LED) 16:9 16:9 16:9 55(J) SYNC( BKM-129X SYNC (EXT SYNC) OFF (INT SYNC) •INT SYNC •BKM-129X SYNC EXT SYNC B ONLY( R( ) G( ) B( ) R/G/B MONO APT COMB ADDRESS MARKER 16:9 SYNC B ONLY MARKER F3/F4...
- Page 18 BVM-D9H1J/D9H5J BVM-D9H5J PARALLEL REMOTE DC 12V IN EJECT SERIAL REMOTE AUDIO IN/OUT BVM-D9H1J PARALLEL REMOTE DC 12V IN EJECT SERIAL REMOTE SERIAL REMOTE/CTRL UNIT...
- Page 19 PARALLEL REMOTE DC 12V IN : D-sub 9 EJECT : D-sub 9 D-sub 9...
- Page 20 SERIAL REMOTE ( (D-sub 9 ) SERIAL REMOTE/CTRL UNIT (BVM-D9H1J • • BKM-129X ANALOG (BNC ) (BNC ) SERIAL SERIAL REMOTE REMOTE CTRL UNIT CTRL UNIT (BNC ) SERIAL SERIAL REMOTE REMOTE SYNC (BNC ) SYNC 129X BVM-D9H1J: BVM-D9H1J: SERIAL REMOTE...
- Page 21 • •...
- Page 22 BVM-D14H1J/D14H5J BVM-D14H5J POWER SHIFT DEGAUSS !¡ MANUAL !™ OPTION POWER STANDBY OVER LOAD BVM-D14H1J !™ OPTION POWER STANDBY OVER LOAD...
- Page 23 INPUT ENTER MANUAL( CONTRAST CONTRAST MANUAL POWER( BRIGHT BRIGHT ( CHROMA CHROMA ( DEGAUSS( PHASE PHASE (...
- Page 24 !º SHIFT( !¡ MENU MENU UP/DOWN ENTER DOWN ENTER !¡ POWER( !™ OPTION( STANDBY( • • OVER LOAD(...
- Page 25 LED) • • • • 16 : 9 MONO( SYNC BLUE ONLY • RGB • NTSC PAL MONO APT( COMB COMB( BKM- 127W NTSC/PAL NTSC CONTROL PRESET ADJ MANUAL COLOR TEMP ADJ MANUAL ALIGNMENT ADDRESS MARKER COLOR TEMP ADJ MANUAL MANUAL ADDRESS( ADDRESS...
- Page 26 LED) 16:9 16:9 16:9 55(J) SYNC( SYNC (EXT SYNC) OFF (INT SYNC) •INT SYNC 16 : 9 •BKM-129X INT SYNC SYNC EXT SYNC BLUE BLUE ONLY( ONLY MONO R/G/B R( ) G( ) B( ) COMB F3/F4 MARKER MARKER ADDRESS...
- Page 27 BVM-D14H1J/D14H5J BVM-D14H5J PARALLEL REMOTE SERIAL REMOTE MAIN POWER AC IN BVM-D14H1J PARALLEL REMOTE SERIAL REMOTE MAIN POWER AC IN CONTROL UNIT...
- Page 28 PARALLEL REMOTE : D-sub 9 D-sub 9 SERIAL REMOTE ( (D-sub 9 : D-sub 9 SERIAL SERIAL REMOTE REMOTE D-sub 9 • •...
- Page 29 BKM-129X AC IN(AC ANALOG (BNC ) (BNC ) (BNC ) SYNC (BNC ) SYNC 129X CONTROL UNIT( (D-sub 9 ) (BVM-D14H1J MAIN POWER(...
- Page 30 BVM-D14H1J/D14H5J BVM-D9H1J/D9H5J 16 9 16 9...
- Page 31 BVM-D14H5J BVM-D9H5J PHASE INPUT MENU PHASE MENU DOWN PHASE PHASE DOWN MENU MENU UP/DOWN DOWN ENTER ENTER...
-
Page 32: Table Of Contents
M E N U ” A C O N T R O L P R E S E T A D J . . . ” B C O L O R T E M P A D J . . . ”... - Page 33 ERROR M E N U C O N T R O L P R E S E T A D J . . . C O L O R T E M P A D J . . . I N P U T C O N F I G.
- Page 34 C H A N N E L N A M E P R O G ↓ I N P U T C O N F I G ( 1 / 2 ) E D I T C A M F O R M A T . . . Y P B P R V T R S L O T...
- Page 35 ADDRESS C H A N N E L N A M E P R O G E D I T C A M V T R N E W N A M E C H A N N E L N A M E P R O G E D I T...
- Page 36 CONTROL PRESET ADJ COLOR TEMP ADJ INPUT CONFIG REMOTE SYSTEM CONFIG STATUS ALIGNMENT...
-
Page 37: Control Preset Adj
CONTROL PRESET ADJ • AUTO • MANUAL MANUAL CONTROL PRESET ADJ MANUAL A1 CHROMA PHASE CONTRAST BRIGHT AUTO A2 FULL FIELD WHITE 100% 8COLOR BAR 100% 8COLOR BAR 75% SMPTE COLOR BAR EIA COLOR BAR [A1] MANUAL • CHROMA • ÷ PHASE ÷... - Page 38 CONTROL PRESET ADJ [A2] AUTO ÷ 8COLOR BAR 100% 8COLOR BAR 75% SMPTE COLOR BAR EIA COLOR BAR...
-
Page 39: Color Temp Adj
COLOR TEMP ADJ • MANUAL • PROBE • COPY COLOR TEMP ADJ ADJUST MANUAL B1 PROBE B2 START PROBE LOW LIGHT (20 IRE) HIGH LIGHT (100 IRE) LOAD REF VALUE B21 COPY B3 COL1 COL2... - Page 40 COLOR TEMP ADJ [F2] [F2] • • ÷ ÷ [B] COLOR TEMP ADJ [B2] PROBE MANUAL... ÷[B1] START PROBE... ÷[B2] PROBE COPY... ÷[B3] [B1] MANUAL LOW LIGHT (20IRE) ADJUST... HIGH LIGHT(100IRE) LOAD REF VALUE ÷[B21] RED CONTRAST KNOB [B21] LOAD REF VALUE GREEN BRIGHT KNOB BLUE CHROMA KNOB LUMINANCE PHASE KNOB...
-
Page 41: Input Config
INPUT CONFIG INPUT CONFIG INPUT CONFIG (1/2) CH x YPBPR FORMAT C1 NTSC, PAL D1-SDI SLOT NO HD-SDI INPUT NO EXT SYNC SLOT AUDIO INPUT COLOR TEMP APERTURE VALUE CHANNEL NAME C 2 PROG EDIT NEW NAME INPUT CONFIG (2/2) CH x 1125/60I SYSTEM H PHASE... - Page 42 INPUT CONFIG VCR MODE • • ÷ [C1] FORMAT ÷ YPBPR [C] (1/2) INPUT CONFIG (1/2) NTSC PAL CH x D1-SDI HD-SDI FORMAT... ÷[C1] [C2] CHANNEL NAME SLOT NO INPUT NO EXT SYNC SLOT PROG AUDIO INPUT (BVM-D9H5J EDIT COLOR TEMP... APERTURE VALUE NEW NAME CHANNEL NAME...
-
Page 43: Remote
REMOTE • SERIAL REMOTE • PARALLEL REMOTE ON/OFF • PARALLEL REMOTE CONFIG REMOTE SERIAL REMOTE D1 MONITOR ADDRESS GROUP ADDRESS PARALLEL REMOTE PARALLEL REMOTE CONFIG D2 1 PIN D21 CH D211 (1/2) 2 PIN 3 PIN R OFF D211 (2/2) 4 PIN 5 PIN 6 PIN... - Page 44 REMOTE • [D211] (1/2) 1 8 PIN (1/2) • ÷ ÷ ----- [D] REMOTE UNDER SCAN 16:9 SERIAL REMOTE H DELAY V DELAY EXT SYNC ÷[D1] APERTURE PARALLEL REMOTE MONO BLUE ONLY PARALLEL REMOTE CONFIG ÷[D2] [D211] (2/2) 1 8 PIN (2/2) [D1] SERIAL REMOTE R OFF...
-
Page 45: System Config
SYSTEM CONFIG • FORMAT DISPLAY • STANDBY MODE POSITION • CH NO POSITION • CH NAME • DEFAULT CH POSITION • CAPTION • DEGAUSS DELAY • MAINTENANCE • CONT/BRT HOLD • COL TEMP SHORT-CUT [F2] • ACC SW (BKM- 127W •... - Page 46 SYSTEM CONFIG SYSTEM CONFIG SYSTEM CONFIG (1/2) STANDBY MODE DEFAULT CH LAST DEGAUSS DELAY CH x CONT/BRT HOLD COL TEMP SHORT-CUT ACC SW CONFIG COPY E1 MONITOR ADDRESS E11 SYSTEM CONFIG (2/2) FORMAT DISPLAY E2 POSITION CH NO E3 POSITION CH NAME E4 POSITION CAPTION E5...
- Page 47 [E3] (2/2) CH NO POSITION ACC SW CH NO CONFIG COPY ... [AUTO] ÷[E11] [E11] MONITOR ADDRESS POSITION BOTTOM LEFT [E] (2/2) SYSTEM CONFIG (2/2) BOTTOM CENTER [BOTTOM RIGHT] FORMAT DISPLAY TOP LEFT ÷[E2] TOP CENTER POSITION ÷[E2] TOP RIGHT CH NO...
-
Page 48: Status
STATUS • STATUS (1/2) • STATUS (2/2) STATUS STATUS (1/2) F1 STATUS (2/2) F2 SLOT 1 F3 MODEL NAME SERIAL NO [F2] STATUS (2/2) MODEL NAME • SERIAL NO OPERATION TIME SOFTWARE VERSION • ÷ ÷ [F] STATUS ÷[F1] SLOT 1 ÷[F3] [F1] STATUS (1/2) SLOT 2... -
Page 49: Alignment
ALIGNMENT ALIGNMENT V SIZE V CENTER H SIZE H PHASE H PIN H KEY V CENTER • H SIZE [G] ALIGNMENT H PHASE V SIZE H PIN H KEY... - Page 50 ADDRESS A D D R E S S - - - S I N G L E G R O U P A L L A L L P O W E R A L L P O W E R O F F ADDRESS D I S P L A Y...
- Page 51 ADDRESS...
- Page 52 BVM-D9H1J/D9H5J BVM-D14H1J/D14H5J...
- Page 53 BVM-D9H5J : mm BVM-D9H1J : mm ∅22 ∅20 379.5 352.5 18.7 18.7 352.5 364.5 18°...
- Page 54 BVM-D14H1J BVM-D14H5J : mm : mm...
- Page 57 (Hz)
- Page 58 GRASEBY SLS 9400 N.C. H SYNC V SYNC N.C. N.C. MINOLTA CA-100 N.C. H SYNC V SYNC N.C. N.C. 8~25 N.C.
- Page 59 PHILIPS PM 5639 (PHILIPS PM 5639/64 H SYNC N.C. V SYNC N.C. N.C. THOMA N.C. H SYNC V SYNC N.C. N.C. N.C. N.C. 8~15 N.C.
- Page 60 ACC SW 45(J) SYSTEM CONFIG ADDRESS 48(J) ADDRESS ADJUST 38(J) COLOR TEMP ADJ ALIGNMENT 47(J) ALIGNMENT APERTURE VALUE 40(J) INPUT CONFIG AUDIO INPUT 40(J) INPUT CONFIG [A2] AUTO 36(J) CONTROL PRESET ADJ BRIGHT 35(J) CONTROL PRESET ADJ 40(J) INPUT CONFIG [E5] CAPTION 45(J)
- Page 61 LAST 44(J) SYSTEM CONFIG [B21] LOAD REF VALUE 38(J) COLOR TEMP ADJ LOW LIGHT 38(J) COLOR TEMP ADJ MAINTENANCE 45(J) SYSTEM CONFIG MANUAL 35(J) [A1] CONTROL PRESET ADJ [B1] 38(J) COLOR TEMP ADJ MARKER PHASE 40(J) INPUT CONFIG MARKER WIDTH 40(J) INPUT CONFIG MODEL NAME...
- Page 62 M E N U M A N U A L C O N T R O L P R E S E T A D J . . . C O L O R T E M P A D J . . . I N P U T C O N F I G.
- Page 63 M E N U C O N T R O L P R E S E T A D J . . . C O L O R T E M P A D J . . . I N P U T C O N F I G.
- Page 64 CAUTION: WARNING Danger of explosion if battery is incorrectly replaced. Replace only with the same or equivalent type recommended To prevent fire or shock hazard, do not by the manufacturer. Discard used batteries according to the expose the unit to rain or moisture. manufacturer’s instructions.
- Page 65 For customers in the USA For the customers in Europe (BVM-D9H1U/D9H5U, BVM-D14H1U/D14H5U) (BVM-D9H1E/D9H1A/D9H5E/D9H5A, BVM-D14H1E/ D14H1A/D14H5E/D14H5A) This equipment has been tested and found to comply with the limits for a Class A digital device, pursuant to Part 15 of This product with the CE marking complies with both the the FCC Rules.
- Page 66 ATTENTION - When the product is installed in a rack: Achtung - bei Installation des Geräts in einem Gestell: a) Elevated operating ambient temperature a) Erhöhte Umgebungstemperatur bei Betrieb If installed in a closed or multi-unit rack assembly, the Wird das Gerät in einem geschlossenen Gestell oder operating ambient temperature of the rack environment einem Gestell mit mehreren anderen Geräten installiert, may be greater than room ambient.
- Page 67 Table of Contents Precautions ..................3(E) Chapter 1 Overview .................... 4(E) Overview Features ..................4(E) Options ..................5(E) Location and Function of Parts ............7(E) BVM-D9H1U/D9H1E/D9H1A/D9H5U/D9H5E/D9H5A Front Panel ...................7(E) BVM-D9H1U/D9H1E/D9H1A/D9H5U/D9H5E/D9H5A Rear Panel .................12(E) BVM-D14H1U/D14H1E/D14H1A/D14H5U/D14H5E/D14H5A Front Panel ...............16(E) BVM-D14H1U/D14H1E/D14H1A/D14H5U/D14H5E/D14H5A Rear Panel ................ 21(E) Installation of the 4:3 Mask ............
- Page 68 Table of contens E Setting the Power-Up Conditions and Data about the Screen Chapter 2 Display — SYSTEM CONFIG Menu ........39(E) Menu Overview .................39(E) Structure of the SYSTEM CONFIG Menu ......40(E) Setting Lists of the SYSTEM CONFIG Menu......40(E) F Displaying Information About the Monitor —...
-
Page 69: Precautions
• The socket-outlet shall be installed near the If you have any questions about this unit, contact your equipment and shall be easily accessible. authorized Sony dealer. • Use the supplied AC adaptor for the BVM-D9H1U/ D9H1E/D9H1A/D9H5U/D9H5E/D9H5A models On magnetism only. -
Page 70: Overview
........................................® 1) Trinitron is a registered trademark of Sony Corporation. 2) 9-inch and 14-inch refer to the CRT size of the monitor. For effective picture size, see “Specifications” on page 47(E). 3) For details on the signal format, see “Available Signal Format” on page... -
Page 71: Options
Rack mount kit for mounting the BVM-D14H1U/ 16:9 or 4:3 display by the replacement of a mask. D14H1E/D14H1A in an EIA standard 19-inch rack. • Operable by using a Sony lithium ion battery (BP- L60/L90A) or DC 12 V external power source. (BVM-D9H1U/D9H1E/D9H1A/D9H5U/D9H5E/... - Page 72 Overview BKM-120D SDI 4:2:2 Input Adaptor Includes a decoder for serial digital component signals. D1 SDI input/output connectors for two serial digital channels and active loop-through output connectors. BKM-127W NTSC/PAL Input Adaptor Includes decoders for analog composite NTSC and PAL signals. Input/output connectors for two analog channels and one YC channel.
-
Page 73: Location And Function Of Parts
Location and Function of Parts BVM-D9H1U/D9H1E/D9H1A/D9H5U/D9H5E/D9H5A Front Panel For the BVM-D14H1U/D14H1E/D14H1A/D14H5U/D14H5E/D14H5A, see pages 16(E) to 20(E). BVM-D9H1U/D9H1E/D9H1A 8 Carrying handle 1 Tally lamp 2 STANDBY lamp 9 OPTION connector 3 POWER lamp 0 VOLUME control 4 DEGAUSS button qa MANUAL adjustment knobs 5 POWER switch qs SHIFT button qd Function buttons... - Page 74 Location and Function of Parts This manual explains the location and function of parts Note and controls of the BVM-D9H5U/D9H5E/D9H5A. When the STANDBY lamp 2 is blinking, the monitor The explanation also applies to the optional BKM- cannot be put into operation mode (internal data 10R/11R Monitor Control Unit.
- Page 75 !¡ MANUAL adjustment knobs !£ Function buttons Each press of one of these knobs turns the knob’s Change the operation conditions for the monitor. green LED on or off. When the corresponding knob is Each time the button is pressed, the LED turns on and on (lit), it is possible to manually adjust the contrast, turns off, and the operation conditions are changed.
- Page 76 Location and Function of Parts Function buttons in SHIFT OFF mode (LEDs of function buttons in green) (Underscan) button: When this button is pushed in (ON), the picture is underscanned by 3%, and four ends of the raster is displayed on the screen. (H delay) button: When this button is pushed in (ON), the picture moves horizontally, and a horizontal sync signal appears approximately one quarter in the left edge of the...
- Page 77 Function buttons in SHIFT ON mode (LEDs of function buttons in amber) 16:9 button: When this button is pushed in (ON), the aspect ratio changes to 16:9, and when set to OFF, the aspect ratio changes to 4:3. The aspect ratio is fixed to 16:9 when the signal other than 4:3 signal format is input.
-
Page 78: Bvm-D9H1U/D9H1E/D9H1A/D9H5U/D9H5E/D9H5A Rear Panel
Location and Function of Parts BVM-D9H1U/D9H1E/D9H1A/D9H5U/D9H5E/D9H5A Rear Panel For the BVM-D14H1U/D14H1E/D14H1A/D14H5U/D14H5E/D14H5A, see pages 21(E) to 23(E). BVM-D9H5U/D9H5E/D9H5A 6 Input option slots 1 PARALLEL REMOTE 1/2 connectors 2 DC 12V IN jack 3 EJECT button 7 Analog input/output connectors 4 AC adaptor/battery attachment place 5 SERIAL REMOTE connectors... - Page 79 1 PARALLEL REMOTE1/2 connectors 2 DC 12V IN jack (XLR-type, 4-pin) (1: female, D-sub 9-pin, 2: modular connector) Connects the DC 12V external power source to use the Form a parallel switch and controls the monitor monitor. externally. The pin assignment and factory setting 3 EJECT button function assigned to each pin are given below.
- Page 80 Location and Function of Parts 7 Analog input/output connectors (BKM-129X) For connecting the BKM-10R Monitor Control Unit Connect the monitor and control unit using a cable ANALOG with D-sub 9-pin plugs such as an RCC-5G (not Y/G connectors (BNC) supplied) as follows: /B connectors (BNC) SERIAL REMOTE...
- Page 81 Attaching the AC adaptor or battery Connecting the AC power cord Attaching Attach the AC adaptor to the monitor, and then connect the supplied AC power cord. AC plug holder (supplied) AC power cord (supplied) Removing the AC adaptor or battery Attach the AC plug holder to the AC power cord, and connect it to the AC IN connector so that the cord does not come loose.
-
Page 82: Bvm-D14H1U/D14H1E/D14H1A/D14H5U/D14H5E/D14H5A Front Panel
Location and Function of Parts BVM-D14H1U/D14H1E/D14H1A/D14H5U/D14H5E/D14H5A Front Panel BVM-D14H5U/D14H5E/D14H5A 1 Tally lamp 2 POWER switch 0 SHIFT button 3 DEGAUSS button 4 Numeric keypad qa Function buttons 5 MANUAL adjustment buttons and knobs 6 Menu operation buttons qs OPTION connector 7 POWER lamp 8 STANDBY lamp 9 OVER LOAD lamp... -
Page 83: Tally Lamp
This manual explains the location and function of parts and controls of the BVM-D14H5U/D14H5E/D14H5A. INPUT The explanation also applies to the optional BKM- Numeric buttons 10R/11R Monitor Control Unit. 1 Tally lamp Ent button: Confirms the With factory settings, the tally lamp lights as follows values and characters entered (ENTER button of the menu when the pins of the PARALLEL REMOTE [1]... - Page 84 “[E] Setting the Power-Up Conditions and Data about the Screen Display — SYSTEM CONFIG Menu” on page 39(E). 9 OVER LOAD lamp Lights when some malfunction has occured. When the OVER LOAD lamp is lit, consult your nearest Sony service facilities.
- Page 85 Function buttons in SHIFT OFF mode (LEDs of function buttons in green) (Underscan) button: When this button is pushed in (ON), the picture is underscanned by 3%, and four ends of the raster is displayed on the screen. (H delay) button: When this button is pushed in (ON), the picture moves horizontally, and a horizontal sync signal appears approximately one quarter in the left edge of the screen.
- Page 86 Location and Function of Parts Function buttons in SHIFT ON mode (LEDs of function buttons in amber) 16:9 button: When this button is pushed in (ON), the aspect ratio changes to 16:9, and when set to OFF, the aspect ratio changes to 4:3. The aspect ratio is fixed to 16:9 when the signal other than 4:3 signal format is input.
-
Page 87: Bvm-D14H1U/D14H1E/D14H1A/D14H5U/D14H5E/D14H5A Rear Panel
BVM-D14H1U/D14H1E/D14H1A/D14H5U/D14H5E/D14H5A Rear Panel BVM-D14H5U/D14H5E/D14H5A 3 Input option slots 1 PARALLEL REMOTE 1/2 connectors 4 Analog input/output connectors 2 SERIAL REMOTE connectors 5 MAIN POWER switch 6 AC IN connector BVM-D14H1U/D14H1E/D14H1A 3 Input option slots 1 PARALLEL REMOTE 1/2 connectors 4 Analog input/output connectors 2 SERIAL REMOTE connectors... - Page 88 Location and Function of Parts 1 PARALLEL REMOTE1/2 connectors To switch each function between on and off or (1: female, D-sub 9-pin, 2: modular connector) between enable and disable, change pin connections in Form a parallel switch and controls the monitor the following way.
- Page 89 4 Analog input/output connectors (BKM-129X) 6 AC IN connector (3-pin) Connects the monitor to an AC power source, via the supplied AC power cord. ANALOG Y/G connectors (BNC) AC plug holder (supplied) /B connectors (BNC) AC power cord (supplied) /R connectors (BNC) Attach the AC plug holder to the AC power cord, and connect it to the AC IN connector so that the cord does not come loose.
-
Page 90: Installation Of The 4:3 Mask
Installation of the 4:3 Mask When the aspect ratio is switched from 16:9 to 4:3, BVM-D14H1U/D14H1E/D14H1A/ replace the 16:9 mask with the supplied 4:3 mask. D14H5U/D14H5E/D14H5A BVM-D9H1U/D9H1E/D9H1A/ Installing the 4:3 mask D9H5U/D9H5E/D9H5A Remove the 16:9 mask. Installing the 4:3 mask Remove four screws from both sides of the monitor and then remove the16:9 mask. -
Page 91: Menu
Basic Menu Operations Menu Operation Buttons The menus are operated using the menu operation buttons on the front panel of the monitor or BKM- 10R/11R Monitor Control Unit. Buttons on the BVM-D9H5U/D9H5E/D9H5A Buttons on the BVM-D14H5U/D14H5E/D14H5A INPUT Numeric keypad PHASE MENU button Numeric keypad Del button knob... -
Page 92: Displaying The Menus
Basic Menu Operations Displaying the Menus Menu Operation Press the MENU button. Follow the steps described below to display the menu The menu list is displayed on the screen. and perform the adjustment or setup you wish. M E N U Press the MENU button. - Page 93 Repeat steps 2 and 3 until the desired menu is Choosing one of two or more selections displayed. For more information about setting and Selecting in setting mode adjustments, see below. [ ↓ ] indicates that the menu Using the UP/DOWN buttons or PHASE knob, continues onto move the cursor to the desired item and press the next page.
-
Page 94: Entering Characters
Basic Menu Operations Press the ENTER or Ent button. Entering a numerical value “?” is displayed in yellow. The “?” indicates the position where character input is possible. Using the UP/DOWN buttons or PHASE knob, C H A N N E L N A M E move the cursor to the desired item and press the ENTER or Ent button. -
Page 95: Address Menu
ADDRESS Menu In addition to the menus displayed on the menu list, the ADDRESS menu is provided. This ADDRESS menu is used to select the monitor or the monitor group, so that when several monitors are connected together via serial remote ports, the control panel can select which monitor to control. -
Page 96: Menu Structure
Menu Structure Menus consist of one to three levels. Detailed information on the levels of menus is described at the top of explanation of each menu. Main Menu Functions CONTROL PRESET ADJ menu Sets the preset values for the input signal’s chroma, contrast, phase, and brightness. -
Page 97: Structure Of The Control Preset Adj Menu
Preset Adjustment of the Picture Level Control Knobs — CONTROL PRESET ADJ Menu Overview The preliminary adjustments of chroma, phase, Preset values can be set in the following two ways: contrast and brightness are carried out with the • Adjustment with the MANUAL adjustment knobs CONTROL PRESET ADJ menu to set the preset (MANUAL menu) values to the knobs for the above-mentioned... -
Page 98: A Preset Adjustment Of The Picture Level Control Knobs - Control Preset Adj Menu
A Preset Adjustment of the Picture Level Control Knobs — CONTROL PRESET ADJ Menu [A] CONTROL PRESET ADJ menu Select the setting method. MANUAL... : Set with the MANUAL adjustment knobs. ÷[A1] AUTO... : Set by automatic adjustment. ÷[A2] [A1] MANUAL menu Adjust values by turning the CHROMA, PHASE, CONTRAST, and/or BRIGHT knobs. -
Page 99: Overview
• The CRT size of the BVM-D9H1U/D9H1E/D9H1A/ following three ways: D9H5U/D9H5E/D9H5A is small. So, when a probe other than the Sony BKM-14L is used, use the probe • Knob adjustment (MANUAL menu) closely to the CRT screen. You can adjust the color temperature with the bias •... -
Page 100: Setting Lists In The Color Temp Adj Menu
B Adjusting the Color Temperature — COLOR TEMP ADJ Menu Setting Lists in the COLOR TEMP ADJ Menu This section explains the setting lists displayed in the Note menu. You cannot reset the setting after you press the ENTER or Ent button. How to read the setting lists •... -
Page 101: C Setting The Input Configuration
Setting the Input Configuration — INPUT CONFIG Menu Overview You can set up to nine input channels. To assign D1 serial digital signals Data pertaining to the input signals are set with the Serial digital signals can be assigned to the slot where INPUT CONFIG menu. -
Page 102: Setting Lists In The Input Config Menu
C Setting the Input Configuration — INPUT CONFIG Menu Setting Lists in the INPUT CONFIG Menu This section explains the setting lists displayed in the H PHASE: Set the horizontal picture position (–32 to menu. +31). MARKER PHASE: Set the 4:3 marker position. How to read the setting lists MARKER WIDTH: Set the 4:3 marker width. -
Page 103: D Assigning The Remote Control Functions - Remote Menu
Assigning the Remote Control Functions — REMOTE Menu Overview PARALLEL REMOTE 1 and 2 are connected The remote control functions are set with the REMOTE menu. With this monitor, both serial remote parallel inside the unit, therefore, there is no priority control (SERIAL REMOTE) and parallel remote order between them. -
Page 104: Setting Lists Of The Remote Menu
D Assigning the Remote Control Functions — REMOTE Menu Setting Lists of the REMOTE Menu This section explains the setting lists displayed in the Note menu. PINs 1 to 4, and PIN 6 of the PARALLEL REMOTE 1 and 2 are connected inside the unit, therefore How to read the setting lists different functions cannot be assigned to those pins. -
Page 105: Menu
Setting the Power-Up Conditions and Data about the Screen Display — SYSTEM CONFIG Menu Overview The SYSTEM CONFIG menu is displayed on the two monitor. pages. The SYSTEM CONFIG (1/2) menu is used for the The SYSTEM CONFIG (2/2) menu is used for the following settings: following settings: •... -
Page 106: Structure Of The System Config Menu
E Setting the Power-Up Conditions and Data about the Screen Display — SYSTEM CONFIG Menu Structure of the SYSTEM CONFIG Menu Level 1 Level 2 SYSTEM CONFIG (1/2) STANDBY MODE DEFAULT CH LAST DEGAUSS DELAY CH x CONT/BRT HOLD COL TEMP SHORT-CUT ACC SW CONFIG COPY E1 MONITOR ADDRESS E11... - Page 107 CONT/BRT HOLD: Select the contrast and [AUTO]: Disappears after displayed for a while. brightness settings to the center or adjusted value ON: Displayed. after adjusting the white balance or auto OFF: Not displayed. adjustment of CONTROL PRESET ADJ (OFF or POSITION menu ON).
-
Page 108: F Displaying Information About The Monitor - Status Menu
Displaying Information About the Monitor — STATUS Menu Overview The STATUS menu is used to view general data about • Data about the current channel (STATUS menu the monitor and information about signals assigned to (1/2)) the slots in the rear panel. •... -
Page 109: G Adjusting The Position, Size And Geometry Of The Picture - Alignment Menu
Adjusting the Position, Size and Geometry of the Picture — ALIGNMENT Menu Overview The ALIGNMENT menu is used for adjusting the position, size and geometry of the picture. Structure of the ALIGNMENT Menu Level 1 V SIZE V CENTER H SIZE H PHASE H PIN H KEY... - Page 110 G Adjusting the Position, Size and Geometry of the Picture — ALIGNMENT Menu [G] ALIGNMENT menu Adjust the position, size or geometry of the picture with the UP and DOWN buttons or PHASE knob. V SIZE: Adjust the height of the picture. V CENTER: Adjust the vertical picture position.
-
Page 111: Selecting The Monitor To Control - Address Menu
Selecting the Monitor to Control — ADDRESS Menu Overview A D D R E S S - - - S I N G L E When multiple monitors are connected by a serial G R O U P remote connection, the ADDRESS menu is used to A L L choose whether one particular monitor or monitor A L L... -
Page 112: Cancelling The Remote Control Mode
Selecting the Monitor to Control — ADDRESS Menu Cancelling the Remote Control Short-cut Function in the Mode ADDRESS Menu To cancel the remote control mode, press the When selecting the monitor, short-cut function will ADDRESS button. enable to select the target monitor without using the items in the ADDRESS menu. -
Page 113: Specifications
Specifications Nominal chromaticity coordinates: General EBU phosphor System 15.625 kHz – 45 kHz (For details, see “Available Signal 0.640 0.330 Format” on page 53(E).) 0.290 0.600 0.150 0.060 BVM-D9H1U/D9H1E/D9H1A/D9H5U/D9H5E/ D9H5A HR Trinitron, 4:3 aspect ratio Dimensions (w/h/d) Aperture grille pitch: 0.25 mm BVM-D9H1U/D9H1E/D9H1A: 90 degree deflection, 21.6 mm approx. - Page 114 Specifications Dimensional drawing BVM-D9H5U/D9H5E/D9H5A Unit: mm (inches) BVM-D9H1U/D9H1E/D9H1A Front Unit: mm (inches) Front ∅20 ∅22 ( 163 (6 163 (6 217 (8 217 (8 Side 453 (17 379.5 (15) Side 15 ( 12 ( 352.5 (14) 438 (17 30 (1 18.7 18.7 60 (2...
- Page 115 BVM-D14H5U/D14H5E/D14H5A BVM-D14H1U/D14H1E/D14H1A Unit: mm (inches) Unit: mm (inches) Front Front 260 (10 340 (13 346 (13 482 (19) Side Side 43 (1 12 ( 500 (19 500 (19 12 ( 90 (3 370 (14 19 ( 19 ( 370 (14 90 (3 562 (22 519 (20...
- Page 116 Specifications Mass BVM-D9H1U/D9H1E/D9H1A: Power requirements approx. 8.1 kg (17 lb 14 oz) BVM-D9H1U/D9H1E/D9H1A/ when the AC adaptor is installed: D9H5U/D9H5E/D9H5A: approx. 8.9 kg (19 lb 10 oz) AC 100 to 240 V, 50/60 Hz, DC BVM-D9H5U/D9H5E/D9H5A: approx. 9.3 kg (20 lb 8 oz) BVM-D14H1U/D14H1E/D14H1A/ when the AC adaptor is installed: D14H5U/D14H5E/D14H5A:...
- Page 117 Convergence error Video signal Within a central area bounded by a circle with a diameter equal to the Frequency response picture height. 575/50I, 480/60I component inputs Less than 0.4 mm with a central BVM-D9H1U/D9H1E/D9H1A/ area bounded by a circle and less D9H5U/D9H5E/D9H5A/ than 0.7 mm at any other point.
- Page 118 Specifications Accessories supplied AC power cord (1) AC adaptor (1) (BVM-D9H1U/D9H1E/D9H1A/ D9H5U/D9H5E/D9H5A only) AC plug holder (1) Tally plate (1) 4:3 mask (1) Operation manual (1) Acquired safety regulations UL1950, CSA950 FCC Class A, IC Class A DHHS, DNHW TÜV (EN60950), PTB CE-Marking, C-tick Mark Design and specifications are subject to change without notice.
-
Page 119: Available Signal Format
Available Signal Format Active Total lines ** Frame System lines per rate (Hz) Standard per frame Aspect Scanning format frame 575/50I (*PAL) 2:1 interlace 16:9/4:3 ITU 601 480/60I (*NTSC) 2:1 interlace 16:9/4:3 ITU 601 575/50P Progressive 16:9/4:3 – 480/60P Progressive 16:9/4:3 SMPTE 293M 1080/48I... -
Page 120: Connection Cable Specifications For Color Temperature Probes
Connection Cable Specifications for Color Temperature Probes Special cables are required to connect color The following diagrams show specifications and pin temperature probes other than the Sony BKM-14L to assignments for the required cables. the monitor. Connection cable for GRASEBY SLS 9400 probe... - Page 121 Connection cable for PHILIPS PM 5639 probe (corresponds to PHILIPS PM 5639/64 cable) Modular connector Mini DIN 8-pin connector (male) Signal Pin Number Signal Pin Number N.C. N.C. N.C. Connection cable for THOMA TF6 probe D-sub 15-pin connector (female) Mini DIN 8-pin connector (male) Signal Pin Number Signal...
-
Page 122: Menu Index
Menu Index The menu index shows the menu items provided with this monitor in alphabetical order. For you reference, each menu item is followed by the page of this manual on which the item is explained, its menu number, and the Main Menu that the item belongs to. - Page 123 Menu Item Page Menu number Main menu MAINTENANCE 40(E) [E5] SYSTEM CONFIG menu [A1] MANUAL 32(E) CONTROL PRESET ADJ menu [B1] 34(E) COLOR TEMP ADJ menu MARKER PHASE 36(E) – INPUT CONFIG menu MARKER WIDTH 36(E) – INPUT CONFIG menu MODEL NAME 42(E) –...
-
Page 124: Menu Configuration
Menu Configuration MAIN MENU M E N U M A N U A L Set the preset value with the C O N T R O L P R E S E T A D J . . . adjustment knobs. C O L O R T E M P A D J . - Page 125 MAIN MENU M E N U C O N T R O L P R E S E T A D J . . . C O L O R T E M P A D J . . . I N P U T C O N F I G.
- Page 127 The material contained in this manual consists of information that is the property of Sony Corporation and is intended solely for use by the purchasers of the equipment described in this manual. Sony Corporation expressly prohibits the duplication of any...
- Page 128 BVM-D9H1J/D9H1U/D9H1E/ D9H1A/D9H5J/D9H5U/ D9H5E/D9H5A/D14H1J/ Sony Corporation D14H1U/D14H1E/D14HA/ B & P Company Printed in Japan D14H5J/D14H5U/D14H5E/ 2004.8.13 D14H5A (J/UC/AEP/AUS) 1999 3-867-938-05(1)