Table of Contents
Advertisement
Quick Links
Table of Contents
Welcome ·······················································································3
Safety Instructions and Recommendations ···································3
Your Alarm Clock Frame and Its Accessories ································6
Battery Inserting Steps ··································································7
Specifications ················································································8
Getting to Know Your Alarm Clock Frame ··································· 9
Turning on/off the Alarm Clock Frame ········································· 10
Alarm Menu················································································· 10
Viewing Photo ············································································· 11
Watching Video & Listen to Radio ··············································· 11
Listen to Music ············································································ 12
Setup Menu················································································· 13
Compatible memory card ···························································· 14
2
Advertisement
Table of Contents

Related Manuals for AgfaPhoto AC8130D


Summary of Contents for AgfaPhoto AC8130D
-
Page 1: Table Of Contents
Table of Contents Welcome ·······················································································3 Safety Instructions and Recommendations ···································3 Your Alarm Clock Frame and Its Accessories ································6 Battery Inserting Steps ··································································7 Specifications ················································································8 Getting to Know Your Alarm Clock Frame ··································· 9 Turning on/off the Alarm Clock Frame ········································· 10 Alarm Menu·················································································... -
Page 2: Welcome
Alarm Clock. You will also find some more information on the web site: www.agfaphoto.com Safety Instructions and Recommendations Do not install your a l a r m c l o c k in a humid room (bathroom, laundry, kitchen, etc.), or within 1.50 m of a... - Page 3 AGFAPHOTO is used under license of Agfa-Gevaert NV & Co.KG Alarm Clock Frame is produced for SAGEM COMMUNICATIONS and distributed or sold by SAGEM COMMUNICATIONS - Customer relations department : 4, rue du Petit Albi - 95800 Cergy Saint-Christophe – FRANCE...
- Page 4 - At sales points in the event of the purchase of similar equipment. - At the collection points made available to you locally (drop-off centre, selective collection, etc.). In this way you can participate in the re-use and upgrading of Electrical and Electronic Equipment Waste, which can have an effect on the environment and human health.
-
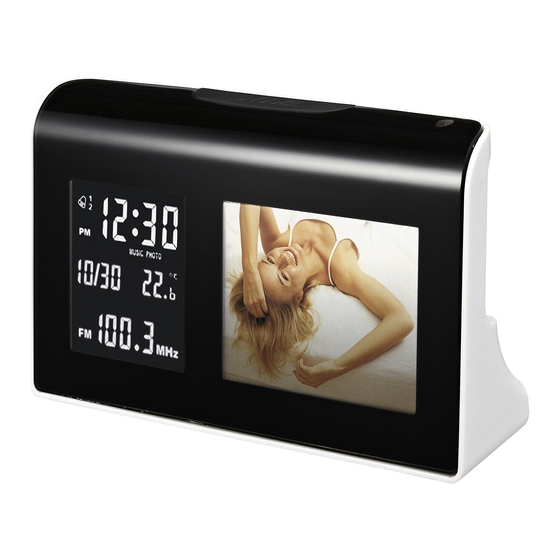
Page 5: Your Alarm Clock Frame And Its Accessories
Your Alarm Clock Frame and Its Accessories Manual USB Cable Alkaline Battery Power Supply Travel bag AC8130D... -
Page 6: Battery Inserting Steps
Battery Inserting Steps Notice: Process as shown below in order to insert Battery. If your product contains batteries, they must be disposed of at a appropriate collection point. CAUTION RISK OF EXPLOSION IF BATTERY IS REPLACED BY AN INCORRECT TYPE. 1. -
Page 7: Specifications
Specifications Display: 3" TFT LCD On-screen Display Language: English, French, German, Spanish, Italian, Dutch, Poland, Czech, Hungarian, Turkish, Russian, Swedish, Greek, Portuguese, Romania, Slovak File formats supported: JPEG, Motion JPEG Expansion Slot: SD/MMC Card slot Speaker: Built-in Speaker Audio Format: MP3, Motion JPEG Internal Memory: 80MB... -
Page 8: Getting To Know Your Alarm Clock Frame
Getting to Know Your Alarm Clock Frame Snooze Light Sensor SD/MMC Slot TN LCD TFT LCD Speaker Temperature Unit Switch POWER Thermometer Sensor DC IN Antenna ENTER USB Port DOWN LEFT RIGHT Alarm Photo Video Radio Music Tools... -
Page 9: Turning On/Off The Alarm Clock Frame
Turning on/off the Alarm Clock Frame 1. Connect the supplied power adapter to the set’s DC 5V socket and to the power socket. 2. To read files from a memory card, insert a memory card into the Alarm Photo Frame Memory Card Port first. 3. -
Page 10: Viewing Photo
* When alarm is activated, press the “Snooze” button during the alarm call and it will repeat at 3-minute interval. * During alarm call, if no button is pressed, alarm call will repeat at 2-minute intervals for twice. * To Switch off the alarm completely, press and hold down the “Snooze”... -
Page 11: Listen To Music
use Video Converter program from internal memo ry to convert the file through PC by USB cable connection. Listen to Radio 1. Auto search: it would auto save up to 10 stations. 2. To adjust the volume, press the “SNOO ZE”... -
Page 12: Setup Menu
Setup Menu Eco Mode Low/ Medium/ High Light Sensor Off/ On Rock/ Pop/ Jazz/ Classic/ Standard/ Equalizer Personalized Music Play Mode Random/ Sequential/ Repeat/ Single Repeat Slide Show 5sec./ 10sec./ 30sec./ 1min./ 5min./ 10min./ Interval 30min. Transition Effect 24 effects available English/ French/ Germa n/ Spanish/ Italian/ Dutch/ Polish/ Czech/ Hungarian/... -
Page 13: Compatible Memory Card
ECO Mode To save energy and power, select high/ medium/ low to show different backlight level. e Manageme o delete or copy the file, select the file and then press Thermometer To toggle between Fahrenheit and centigrade, press Compatible memory card : The Alarm Clock Frame with a SD/MMC card acts li ke a ard-reader by connecting to a computer via USB.