Table of Contents
Advertisement
Available languages
Available languages
Quick Links
Advertisement
Chapters
Table of Contents

Related Manuals for Sony CDX-GT25


Summary of Contents for Sony CDX-GT25
- Page 1 4-153-957-31(1) FM/MW/SW Compact Disc Player Operating Instructions Manual de instrucciones To cancel the demonstration (DEMO) display, see page 4. Para cancelar la pantalla de demostración (DEMO), consulte la página 4. CDX-GT25 ©2009 Sony Corporation...
- Page 2 Note on the lithium battery Be sure to install this unit in the dashboard of Do not expose the battery to excessive heat such as the car for safety. For installation and direct sunlight, fire or the like. connections, see the supplied installation/ connections manual.
-
Page 3: Table Of Contents
Table of Contents Getting Started Playable discs on this unit ....4 Display items ......8 Canceling the DEMO mode . -
Page 4: Getting Started
Getting Started Preparing the card remote commander Playable discs on this unit Remove the insulation film. This unit can play CD-DA (also containing CD TEXT) and CD-R/CD-RW (MP3/WMA files (page 12)). Type of discs Label on the disc CD-DA For how to replace the battery, see page 13. Setting the clock The clock uses a 12-hour digital indication. -
Page 5: Detaching The Front Panel
Detaching the front panel Attaching the front panel Engage part A of the front panel with part B of You can detach the front panel of this unit to the unit, as illustrated, and push the left side into prevent theft. position until it clicks. -
Page 6: Location Of Controls And Basic Operations
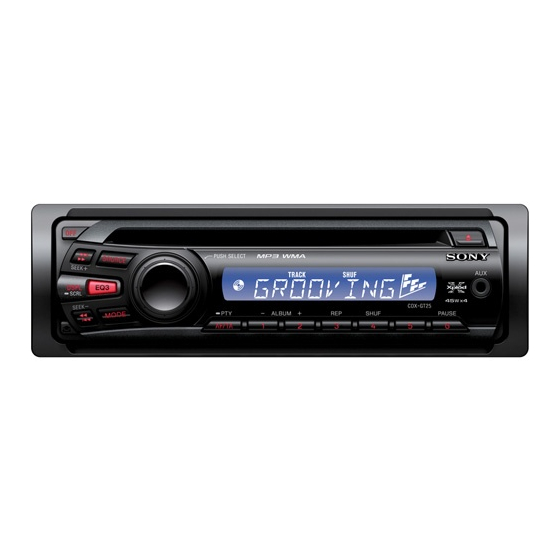
Location of controls and basic operations Main unit PUSH SELECT LOUD DISC ALBM TRACK SHUF DSPL SCRL SET UP ALBUM SHUF PAUSE Card remote commander This section contains instructions on the location of controls and basic operations. RM-X151 For details, see the respective pages. The corresponding buttons on the card remote commander control the same functions as those on the unit. - Page 7 F Disc slot The following buttons on the card remote commander have also different buttons/functions Insert the disc (label side up), playback from the unit. Remove the insulation film before starts. use (page 4). G Display window qj < (.)/, (>) buttons H AUX input jack page 11 To control radio/CD, the same as (SEEK) –/ To connect a portable audio device.
-
Page 8: Radio
Radio Storing and receiving stations Display items Caution When tuning in stations while driving, use Best Tuning Memory (BTM) to prevent an accident. Storing automatically — BTM Track name* , Disc/artist name* Artist name* , Album number* Press (SOURCE) repeatedly until Album name* , Track number/ “TUNER”... -
Page 9: Other Functions
Other functions Customizing the equalizer curve — EQ3 Changing the sound settings “CUSTOM” of EQ3 allows you to make your own equalizer settings. Select a source, then press (EQ3) Adjusting the sound repeatedly to select “CUSTOM.” characteristics — BAL/FAD/SUB Press the select button repeatedly You can adjust the balance, fader, and subwoofer until “LOW,”... -
Page 10: Adjusting Setup Items - Set
LPF* (Low Pass Filter) Adjusting setup items — SET Selects the subwoofer cut-off frequency: “OFF,” “55Hz,” “85Hz,” “120Hz.” Press and hold the select button. LOUD (Loudness) The setup display appears. Reinforces bass and treble for clear sound at low Press the select button repeatedly volume levels: “ON,”... -
Page 11: Using Optional Equipment
Using optional equipment Additional Information Precautions Auxiliary audio equipment By connecting an optional portable audio device • Cool off the unit beforehand if your car has been to the AUX input jack (stereo mini jack) on the parked in direct sunlight. unit and then simply selecting the source, you •... -
Page 12: Playback Order Of Mp3/Wma Files
– copyright-protected ISO9660 Level 1/Level 2, Joliet/Romeo or multi-session. If you have any questions or problems concerning your unit that are not covered in this manual, consult your nearest Sony dealer. Playback order of MP3/WMA files Folder MP3/WMA (album) MP3/WMA file... -
Page 13: Maintenance
When the battery becomes weak, the range of the malfunction. In such a case, Fuse (10 A) card remote commander becomes shorter. consult your nearest Sony Replace the battery with a new CR2025 lithium dealer. battery. Use of any other battery may present a risk of fire or explosion. -
Page 14: Removing The Unit
Removing the unit Specifications Remove the protection collar. Tuner section 1 Detach the front panel (page 5). Tuning range: 2 Pinch both edges of the protection collar, 87.5 – 108.0 MHz (at 50 kHz step) then pull it out. 87.5 – 107.9 MHz (at 200 kHz step) FM tuning interval: 50 kHz/200 kHz switchable Antenna (aerial) terminal: External antenna (aerial) connector... -
Page 15: Troubleshooting
Power requirements: 12 V DC car battery Troubleshooting (negative ground (earth)) Dimensions: Approx. 178 × 50 × 179 mm × 2 × 7 in) (w/h/d) The following checklist will help you remedy Mounting dimensions: Approx. 182 × 53 × 162 mm problems you may encounter with your unit. - Page 16 Radio reception CD playback The stations cannot be received. The disc cannot be loaded. The sound is hampered by noises. • Another disc is already loaded. • The connection is not correct. • The disc has been forcibly inserted upside down or in t Connect a power antenna (aerial) control lead the wrong way.
-
Page 17: Error Displays/Messages
The character cannot be displayed with the unit. If these solutions do not help improve the situation, consult your nearest Sony dealer. If you take the unit to be repaired because of CD playback trouble, bring the disc that was used at the... - Page 18 Nota sobre la pila de litio Asegúrese de instalar esta unidad en el tablero No exponga la pila a fuentes de calor excesivo como del automóvil por razones de seguridad. Para luz solar directa, fuego o similar. realizar la instalación y las conexiones, consulte el manual de instalación y de conexiones suministrado.
- Page 19 Tabla de contenido Procedimientos iniciales Discos que se pueden reproducir en esta Elementos de la pantalla....9 unidad ....... . 4 Reproducción repetida y aleatoria .
-
Page 20: Procedimientos Iniciales
Procedimientos iniciales Preparación del control remoto de tarjeta Discos que se pueden reproducir en esta unidad Retire la lámina de aislamiento. Esta unidad permite reproducir discos CD-DA (incluidos CD TEXT) y CD-R/CD-RW (archivos MP3/WMA (página 12)). Tipos de discos Etiqueta del disco Sugerencia CD-DA Si desea obtener información adicional sobre cómo... -
Page 21: Extracción Del Panel Frontal
Extracción del panel frontal Colocación del panel frontal Fije la parte A del panel frontal en la parte B de Es posible extraer el panel frontal de la unidad la unidad, tal como muestra la ilustración, y para evitar que la roben. presione el lado izquierdo hasta que encaje. -
Page 22: Ubicación De Los Controles Y Operaciones Básicas
Ubicación de los controles y operaciones básicas Unidad principal PUSH SELECT LOUD DISC ALBM TRACK SHUF DSPL SCRL SET UP ALBUM SHUF PAUSE Control remoto de tarjeta Este apartado contiene instrucciones acerca de la ubicación de los controles y las operaciones RM-X151 básicas. - Page 23 F Ranura del disco Los botones siguientes del control remoto de tarjeta también presentan botones y funciones Inserte el disco (con la etiqueta mirando distintos de los de la unidad. Retire la película de hacia arriba) y se iniciará la reproducción. aislamiento antes de usar la unidad (página 4).
-
Page 24: Radio
Radio Sintonización automática Seleccione la banda y, a continuación, Almacenamiento y recepción presione (SEEK) +/– para buscar la de emisoras emisora. La búsqueda se detiene cuando la unidad recibe una emisora. Repita este Precaución procedimiento hasta recibir la emisora Para sintonizar emisoras mientras maneja, utilice deseada. -
Page 25: Elementos De La Pantalla
Otras funciones Cambio de los ajustes de Elementos de la pantalla sonido Ajuste de las características del sonido — BAL/FAD/SUB Puede ajustar el balance, el equilibrio y el Nombre de la pista* , Nombre del disco/artista* volumen del altavoz potenciador de graves. Nombre del artista* , Número de álbum* Presione el botón de selección varias... -
Page 26: Personalización De La Curva De Ecualizador - Eq3
Personalización de la curva de Definición de los elementos de ecualizador — EQ3 configuración — SET “CUSTOM” de EQ3 le permite realizar sus propios ajustes en el ecualizador. Mantenga presionado el botón de selección. Seleccione una fuente y presione Aparecerá la pantalla de ajustes. (EQ3) varias veces para seleccionar “CUSTOM”. -
Page 27: Uso De Equipo Opcional
M.DSPL (Desplazamiento de indicaciones) Uso de equipo opcional – “ON”: para desplazar los elementos. – “OFF”: para desactivar el desplazamiento de indicaciones. Equipo de audio auxiliar A.SCRL (Desplazamiento automático) Si conecta un dispositivo de audio portátil Permite desplazarse por los elementos de la opcional a la toma de entrada AUX (minitoma pantalla automáticamente: “ON”, “OFF”. -
Page 28: Información Complementaria
Notas sobre los discos CD-R/CD-RW Información complementaria • Cantidad máxima de: (solamente CD-R/CD-RW) – carpetas (álbumes): 150 (incluida la carpeta raíz) Precauciones – archivos (pistas) y carpetas: 300 (si los nombres de archivo o carpeta contienen muchos caracteres, este número puede ser inferior a 300) •... -
Page 29: Acerca De Los Archivos Mp3
Si el Sony más cercano. fusible vuelve a fundirse después de sustituirlo, es posible que exista alguna falla Fusible (10 A) de funcionamiento interno. En tal caso, consulte con el distribuidor Sony más cercano. continúa en la página siguiente t... -
Page 30: Extracción De La Unidad
Limpieza de los conectores Extracción de la unidad Es posible que la unidad no funcione correctamente si los conectores entre ésta y el panel frontal están Extraiga el marco de protección. sucios. Para evitar esta situación, extraiga el panel frontal (página 5) y limpie los conectores con un 1 Extraiga el panel frontal (página 5). -
Page 31: Especificaciones
Generales Especificaciones Salidas: Terminal de salidas de audio (intercambiable entre Sección del sintonizador altavoz potenciador de graves y posterior) Terminal de control del relé de la antena motorizada Rango de sintonización: Terminal de control del amplificador de potencia 87,5 – 108,0 MHz (a intervalos de 50 kHz) Entradas: 87,5 –... -
Page 32: Solución De Problemas
No es posible utilizar la unidad mediante el Solución de problemas control remoto de tarjeta. Si se activa la función de desactivar pantalla (no hay La siguiente lista de comprobación le ayudará a iluminación), no será posible utilizar el control remoto solucionar los problemas que puedan producirse con de tarjeta (página 10). -
Page 33: Mensajes/Indicaciones De Error
” No se puede mostrar el carácter con la unidad. Si estas soluciones no ayudan a mejorar la situación, póngase en contacto con el distribuidor Sony más cercano. Si entrega la unidad para su reparación a causa de problemas en la reproducción de CD, lleve el disco... - Page 36 Sony Corporation Printed in Thailand...