
Related Manuals for DeLonghi CR 265 ST


Summary of Contents for DeLonghi CR 265 ST
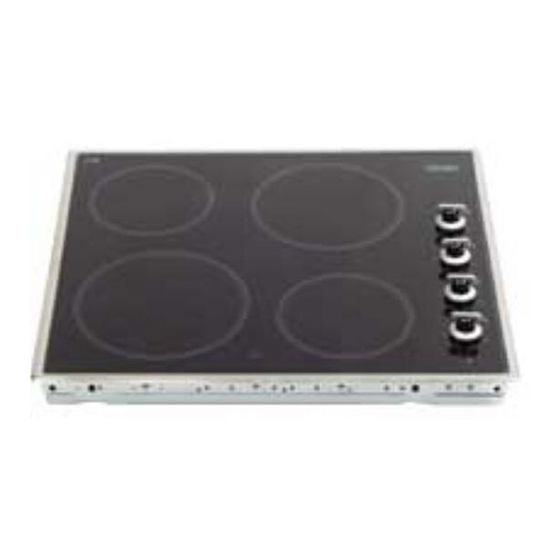
- Page 1 Users Operating Instructions Before operating this hob, please read these instructions carefully CR 265 ST ceramic hob...
-
Page 2: Tips For The User
Dear Customer Thank you for choosing one of our appliances which has been carefully designed and built by our specialist staff and thoroughly tested to satisfy your cooking requirement. We suggest that you read this Instruction Booklet so that you will understand fully how to operate the appliances. - Page 3 IMPORTANT WARNINGS AND TIPS When unpacking the appliance make sure that it is not damaged. If you have any doubts, do not use the appliance but consult your supplier or an engineer. The packing materials (plastic bags, expanded polystyrene, nails, bands etc.) must not be left within easy reach of children, because they are a possible source of dan- ger.
-
Page 4: Technical Data
Technical Data 3 circuits cooking zone Ø 145 - 1200 W 3 circuits cooking zone Ø 180 - 1700 W 3 circuits cooking zone Ø 195 - 1900 W “ON” indicator light Cooking zone and residual heat indicator Voltage 230 V~ 50 Hz Maximum absorbed power 6,0 kW DIMENSIONS... - Page 5 Fitting your hob Minimum distance of hob to back wall 50 mm. Minimum distance of hob from any vertical surface either side of the hob 50 mm. Minimum height of a cabinet directly above hob if not fitting a hood 900 mm. Minimum of 650 mm from the hob to a cooker hood.
-
Page 6: How To Install The Hob
HOW TO INSTALL YOUR HOB 1. The hob requires a space in the kitchen work surface as shown in the diagram (Fig. 2) below: Figure 2 2. Apply the adhesive seal around the edge of the hob ensuring that the ends do not over lap or leave a space. - Page 7 3. Place the hob in the work top cut out and secure it in position by using the brackets as indicated in Fig. 4 - (3 cm work top) or Fig. 5 - (4 cm work top). Figure 4 Figure 5 NOTE: A partition should be fitted a minimum of 4 cm below the base of the hob if the cupboard is to be used for storage.
- Page 8 Electric Supply Requirements WARNING! double pole switch must be provided no further than 2 metres from the appli- This appliance must be earthed. ance to the electrical supply. Your hob must be installed by a quali- All supply current and earth conductors fied electrician in line with all electrical must be able to withstand an ambient and installation requirements published...
- Page 9 How Your Hob Operates Figure 8 The ceramic surface of the hob allows a fast transmission of heat in the vertical direction, from the heating elements underneath the ceramic glass to the pans sat on it. The heat does not spread in the horizontal direction, so that the glass stays “cool” only a few centimeters from the cooking plate.
- Page 10 The temperature control knobs located on the right hand side of the hob. These knobs are wired as follows (Fig. 9): Rear right cooking zone Rear left cooking zone Front left cooking zone Front right cooking zone The hob is provided with a signal lamp (5) which lights up when the hob is switched The hob also features 4 warning lamps (6) which are wired to the corresponding cook- ing zone.
-
Page 11: Cooking Zone
Use of Ceramic Hob Before you switch the hob on make COOKING ZONE sure that it is clean. Each cooking zone is controlled sepa- To switch a cooking zone on you must rately by a 7 position switch and reach- turn the relevant control knob anticlock- es working temperature very quickly. -
Page 12: Cooking Hints
COOKING HINTS: To reduce the cooking time, you can turn the control knob to the max when you switch the zone on. After a short time you will set the control knob to the required position. You should use pots and pans with flat bases. The diameter of the pan should match that of the cooking zone (or be slightly bigger) to make the most of the energy. -
Page 13: Safety Hints
Safety Hints Figure 13 1. Never put aluminium foil or plastic materials on the ceramic surface when the hob is hot. DISTORTED PANBASE 2. Make sure that the hob is clean before you use it. WRONG 3. Remember that the zone will remain hot for approximately half an hour after the zone has been switched off. - Page 14 Cookware It is very important that the pans used on the hobs are made of a suitable material and have the correct base as follows: The base should be flat and smooth. Any rough part on the pan base could scratch the hob surface. Choose pans which are the same size as the cooking zone and with bases that are as non reflective as possible.
-
Page 15: Cleaning Your Hob
Cleaning Your Hob Before you begin cleaning make sure that the hob is switched off. Remove spillages and other types of incrustations. Dust or food particles can be removed with a damp cloth. If you use a detergent, please make sure that it is not abrasive or scouring. Abrasive or scouring powders can damage the glass surface of the hob. - Page 16 Descriptions and illustrations in this booklet are given as simply indicative. The manufacturer reserves the right, considering the characteristics of the models described here, at any time and without notice, to make eventual necessary modifications for their construction or for commercial needs. codice 1101982 ß5...