
Related Manuals for Pioneer X-SMC55DAB-S


Summary of Contents for Pioneer X-SMC55DAB-S
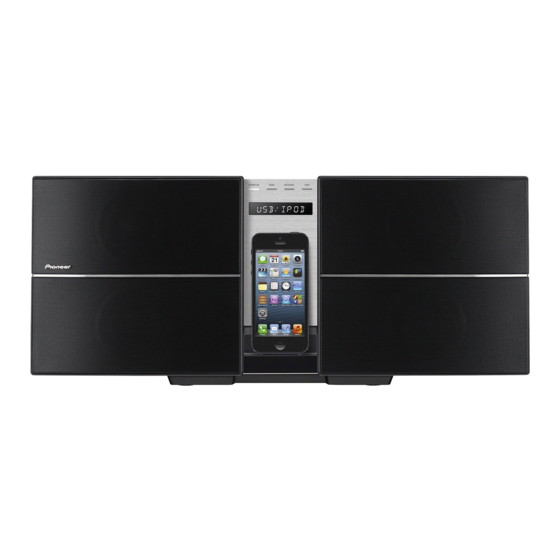
- Page 1 X-SMC55DAB Slim Micro System Discover the benefits of registering your product online at http://www.pioneer.co.uk (or http://www.pioneer.eu). Operating Instructions...
- Page 2 CAUTION This product is for general household purposes. Any TO PREVENT THE RISK OF ELECTRIC SHOCK, DO NOT failure due to use for other than household purposes REMOVE COVER (OR BACK). NO USER-SERVICEABLE (such as long-term use for business purposes in a PARTS INSIDE.
- Page 3 If the connection is incomplete, supported by this unit). heat may be generated which could lead to fire. • Pioneer is not responsible for any malfunction of the Furthermore, contact with the connected prongs compatible Pioneer product due to communication of the adapter may result in electrocution.
-
Page 4: Table Of Contents
Thank you for buying this Pioneer product. Please read through these operating instructions so that you will know how to operate your model properly. After you have finished reading the instructions, put them in a safe place for future reference. - Page 5 12 Using the tuner Listening to the radio broadcasts ....35 Tuning ........35 Saving station presets .
-
Page 6: Before You Start
Before you start Chapter 1: Before you start CAUTION What’s in the box • When inserting the batteries, make sure not to damage the springs on the battery’s terminals. This can cause Please confirm that the following accessories are in the box batteries to leak or over heat. -
Page 7: Part Names And Functions
Part names and functions Chapter 2: Part names and functions STANDBY/ON Remote control Switches the unit between standby and on (page 14). Input function buttons Use to select the input source to this unit (pages 18, 19, 22, STANDBY/ON CLOCK 24, 30, 32, 35 and 38). -
Page 8: Using The Remote Control
Part names and functions Using the remote control 10 Tuner control buttons ST/MONO The remote has a range of about 7 m at an angle of about 30º from the remote sensor. Use to switch the sound mode between stereo and monaural (page 35). -
Page 9: Front Panel
Part names and functions Front panel 2 3 4 5 POWER ON TIMER NETWORK TUNE PUSH OPEN Remote sensor TUNE Receives the signals from the remote control. Will light up when it is receiving a station. POWER ON indicator Main display When the power is on, this indicator lights. -
Page 10: Top Panel/Side Panel
Part names and functions Top panel/Side panel DISC EJECT LABEL SIDE – INPUT NW SETUP STANDBY/ON WIRELESS DIRECT VOLUME Movable range of the wireless LAN antenna 90° 2.1 A 180° PHONES AUDIO IN LAN(10/100) ANTENNA CAUTION... -
Page 11: Connections
Connections Chapter 3: Connections To customers in Norway and Sweden CAUTION • Be sure to turn off the power and unplug the power cord CAUTION from the power outlet whenever making or changing • “Apparater som er koplet til beskyttelsesjord via connections. -
Page 12: Connecting Using Lan Cable
Connections Connecting using LAN cable Connecting using wireless LAN Internet Internet Modem Modem Router LAN cable (commercially available) Router Computer 1 Computer 2 Computer This unit 2.1 A Plugging in PHONES After you’ve finished making all connections, plug the unit AUDIO IN into an AC outlet. -
Page 13: Hang From The Wall To Use
Connections • The cord length from the unit to the AC adaptor is 1.5 m long. Make sure that you use the AC adaptor so that it is Wall hanging screws not suspended in air. (commercially available) 2 mm to 3 mm In contact with the ground 1.5 m 7 mm to 8 mm... -
Page 14: Getting Started
Getting started Chapter 4: Getting started To turn the power on General control Press the STANDBY/ON to turn the power on. Input function About startup time: When the INPUT on main unit is pressed, the current function About 30 seconds are required between after the power turns will change to different mode. -
Page 15: Muting
Getting started Muting Setting the wake-up timer The volume is muted temporarily when pressing the MUTE on the remote control. Press again to restore the volume. Used to change the existing timer setting, or to set a new timer. Press STANDBY/ON to turn the power on. Sound controls Press TIMER. -
Page 16: Calling The Wake-Up Timer
Getting started Calling the wake-up timer Using Headphones An existing timer setting can be reused. Connect the headphones plug to the PHONES terminal. Follow steps 1 to 3 in “Setting the wake-up When the headphones are connected, there is no sound timer”. -
Page 17: Ipod/Iphone/Ipad Playback
(especially around the connector section). Note • Pioneer does not guarantee that this unit plays iPod/ iPhone/iPad models other than the ones specified. • Some functions may be restricted depending on the model or software version. -
Page 18: When Closing The Ipod/Iphone Dock
iPod/iPhone/iPad playback When closing the iPod/iPhone dock Playing iPod/iPhone/iPad • When closing the dock, slide the lock release switch once to the left. This will release the lock on the dock, so return the dock to the original position. Connect your iPod/iPhone/iPad. •... -
Page 19: Disc Playback
Disc playback Chapter 6: Disc playback This system can play back a standard CD, CD-R/RW in the CD CAUTION format and CD-R/RW with MP3 or WMA files, but cannot • Do not insert two or more discs into the slot at once. record on them. -
Page 20: Advanced Cd Or Mp3/Wma Disc Playback
Disc playback • When random play is set up during repeat play, the Advanced CD or MP3/WMA disc repeat play will be canceled. playback Random play The tracks on the disc can be played in random order automatically. STANDBY/ON CLOCK DISPLAY FOLDER TUNE+... -
Page 21: About Folder Playback Order
Disc playback Specify the folder to play • If you press the STANDBY/ON to enter the standby mode or change the function from CD to another, the To specify the folder to play, perform the following steps. programmed selections will be cleared. •... -
Page 22: Usb Playback
• When a USB storage device is not playing and no operations have been performed for more than 20 • Pioneer does not guarantee that any file recorded on a minutes, the unit will automatically power off. USB storage device will play or that power will be •... -
Page 23: Specify The Folder To Play
USB playback Note Playing in the desired order • In random play, the unit will select and play tracks automatically. (You cannot select the order of the (Programmed Play) tracks.) The unit can play folders stored on a USB storage device in •... -
Page 24: Connect To Network
Connect to network Chapter 8: Connect to network Network setting If a broadband router (with built-in DHCP server function) is connected to this unit, you can simply turn on the DHCP server function without having to set up the network manually. Before you set up the network, consult with your ISP or the network manager for the required settings. -
Page 25: A: Using A Web Browser On A Computer Supporting
Connect to network When the NETWORK indicator lights red, start your computer's Web browser, and access A: Using a web browser on a the URL noted below to make settings for this computer supporting wired LAN to unit. make connecting settings for the The Web Control menu will appear. -
Page 26: B: Wired Connection To A Router With Dhcp Server
Connect to network 10 Press STANDBY/ON. If using a wireless LAN connection, input the When the power is completely on, the NETWORK indicator router’s SSID, then select the “Security” item set will light white, indicating that settings are completed. on the router. -
Page 27: C: Connections For Wireless Lan Using Wps-Pbc
Select Pioneer Setup (this unit) in the available wireless network connection of your computer. SSID is displayed as Pioneer Setup:xxxxxx. “xxxxxx” is the lower three bytes of the MAC address. Note • Consult the appropriate operating instructions for information regarding operation of the computer, iPhone, tablet computer or other device used. -
Page 28: E: Connection Settings Using An Ios Device
Connect to network From the menu on the left, select “Network Note Configuration”. • You can set the network as in the above by connecting this unit’s IP address via the Safari browser even if Web If using a wireless LAN connection, input the control isn’t selected. -
Page 29: F: Wireless Direct
Connect to network F: Wireless Direct Network type setting Network Type setting can be changed on the Network Configuration screen. Important • Wireless Direct should be used only as a temporary Select Network type, Auto/Wired. connection under conditions where a normal router cannot be used. -
Page 30: Internet Radio
Chapter 9: Internet Radio Playing back your favorite songs Installation of the Pioneer Control Application (ControlApp) is required in order to use all of the Internet Radio functions. 20 broadcast stations are already preset in Favorites. The Consult the following website:... -
Page 31: Installing Controlapp
Installing ControlApp The Pioneer application ControlApp must be installed on your mobile device. For more information about your operating environment, access the appropriate Website as noted below. -
Page 32: Music Server
Chapter 10: Music server About playable DLNA network devices Installation of the Pioneer Control Application (ControlApp) is required in order to use all of the Music server functions. This unit allows you to play music on media servers Consult the following website: connected on an identical Local Area Network (LAN) as the unit. -
Page 33: Airplay
Pioneer website. AirPlay may not be compatible with iPod touch, iPhone, iPad or iTunes Select this unit’s name (“Friendly Name”) software versions other than those indicated on the from the available device list. -
Page 34: Operating Airplay From An Ipod/Iphone/Ipad
AirPlay Operating AirPlay from an iPod/iPhone/ iPad Tap Music icon and start playing music. Playback starts. Tap AirPlay icon ( Select X-SMC55. X-SMC55... -
Page 35: Using The Tuner
Using the tuner Chapter 12: Using the tuner Improving poor FM reception: Listening to the radio broadcasts Press ST/MONO repeatedly to select MONO. The following steps show you how to tune in to FM radio This will change the tuner from stereo to mono and usually broadcasts using the automatic (search) and manual (step) improve the reception. -
Page 36: To Recall A Memorized Station
Using the tuner To recall a memorized station Auto Scan Press PRESET +/– to select the desired DISPLAY FOLDER TUNE+ station. To scan the preset stations ENTER MEMORY The stations saved in the memory can be scanned MENU /PROGRAM automatically. (Preset memory scan) PRESET VOLUME TUNE–... -
Page 37: Manual Tune
Using the tuner Manual tune Within 10 seconds, press the PRESET +/– to select the preset channel number. You can manually store stations which Auto Scan cannot Store the stations in memory, in order, starting with preset find. If reception is poor, you can adjust the sensitivity. channel 1. -
Page 38: Other Connections
Other connections Chapter 13: Other connections CAUTION • Before making or changing the connections, switch off the power and disconnect the power cord from the AC outlet. Connecting auxiliary components Connect the side panel AUDIO IN mini-plug jack to your auxiliary playback component. -
Page 39: Additional Information
If the trouble cannot be rectified even after exercising the checks listed below, ask your nearest Pioneer authorized service center or your dealer to carry out repair work. • If the unit does not operate normally due to external effects such as static electricity disconnect the power plug from the outlet and insert again to return to normal operating conditions. - Page 40 Additional information When a USB storage device is connected Problem Check Remedy USB storage device is not Is the USB storage device properly Connect the device securely (all the way in). recognized. connected? Is the USB storage device connected This unit does not support USB hubs. Connect the USB storage via a USB hub? device directly.
- Page 41 Additional information Network Problem Check Remedy Cannot access to the The LAN cable is not firmly Firmly connect the LAN cable (page 12). network. connected. The router is not switched on. Switch on the router. Is the network type correctly set up? If set to Auto, the network connection is switched to wired or wireless depending on whether the unit is connected to a LAN cable when the power is turned ON.
- Page 42 Additional information Problem Check Remedy Cannot access Windows In case of Windows Media Player 11: Instead of logging onto the domain, log onto the local machine. Media Player 11 or Windows You are currently logged onto the Media Player 12. domain through your PC with Windows XP or Windows Vista installed.
- Page 43 Additional information Wireless LAN Problem Check Remedy Network cannot be accessed Is the LAN cable connected to the Be sure the LAN cable is not connected to the unit, and then the via wireless LAN. unit? unit OFF and ON again. Is the Network type set to Wired? In the Network configuration screen in the Web browser, set Network type to Auto.
-
Page 44: Firmware Update
You should now be able to access the Web Control menu. You can update this unit’s firmware via Web Control menu. Download the latest firmware at Pioneer website. Display the Web Control menu. Choose the access method appropriate for your device. - Page 45 Additional information Browse the latest firmware on your computer (a) and then press “Upload” (b). The confirmation screen is displayed. If you continue the firmware update, press Yes. Once the firmware update process starts, you can’t stop it. Wait until the file is uploaded (about one minute may be required depending on your LAN connection environment).
-
Page 46: Dimensions (Rear)
Additional information Dimensions (Rear) Unit:mm Center line... -
Page 47: Playable Discs And Formats
Additional information Playable discs and formats • Commercially available audio CDs Audio CD • CD-R/ -RW/ -ROM discs containing music recorded in the CD-DA format WMA files recorded on CD-R/ -RW/ -ROM discs or USB storage devices MP3 files recorded on CD-R/ -RW/ -ROM discs or USB storage devices •... -
Page 48: Do Not Place Objects On This Unit
• This unit’s lens should not become dirty in normal use, but if for some reason it should malfunction due to dust or dirt, consult your nearest Pioneer authorized service center. Although lens cleaners for players are commercially available, we advise against using them... -
Page 49: About Network Playback
DLNA Interoperability Guidelines. This network connection may be blocked. unit complies with DLNA Interoperability Guidelines v1.5. Pioneer is not responsible for any malfunction of the player When a computer running DLNA server software or other and/or the Music Server features due to communication... -
Page 50: Aacplus
Additional information aacPlus • If an attempt is made to play files with unsupported formats, the sound may be intermittent or be accompanied by noise. In such cases, confirm that the file format is compatible with this unit. • Internet Radio playback may be affected by the Internet communications environment, and in this case playback may not be possible even with the file formats listed here. -
Page 51: About Wi-Fi
Channel 2 ch Apple Lossless Audio Codec *1 Uncompressed FLAC files are not supported. Pioneer does Copyright © 2011 Apple Inc. All rights reserved. not guarantee playback. Licensed under the Apache License, Version 2.0. You may obtain a copy of the License at http://www.apache.org/licenses/LICENSE-2.0. -
Page 52: Auto Power Off Setting
Additional information Specifications Auto power off setting Long press the ■ on the unit for 3 seconds to switch auto • Amplifier section power off setting ON/OFF. RMS Power Output: ..... . . 20 W + 20 W The operation can be conducted using only the ■... - Page 53 Additional information...
- Page 54 212-0031, Japan http://www.pioneer.eu English: Dansk: Hereby, Pioneer, declares that this Undertegnede Pioneer erklærer X-SMC55DAB-S is in compliance with herved, at følgende udstyr the essential requirements and other X-SMC55DAB-S overholder de relevant provisions of Directive væsentlige krav og øvrige relevante krav 1999/5/EC.
- Page 55 Latviešu valoda: Norsk: Ar šo Pioneer deklarē, ka Pioneer erklærer herved at utstyret X-SMC55DAB-S atbilst Direktīvas X-SMC55DAB-S er i samsvar med de 1999/5/EK būtiskajām prasībām un grunnleggende krav og øvrige citiem ar to saistītajiem noteikumiem. relevante krav i direktiv 1999/5/EF.
- Page 56 253 Alexandra Road, #04-01, Singapore 159936 TEL: 65-6472-7555 PIONEER ELECTRONICS AUSTRALIA PTY. LTD. 5 Arco Lane, Heatherton, Victoria, 3202, Australia, TEL: (03) 9586-6300 PIONEER ELECTRONICS DE MEXICO S.A. DE C.V. Blvd.Manuel Avila Camacho 138 10 piso Col.Lomas de Chapultepec, Mexico, D.F. 11000 TEL: 55-9178-4270 K002_B3_En Printed in China <YOM200155-0005>...