Advertisement
Advertisement
Table of Contents

Summary of Contents for Victoria E-2073
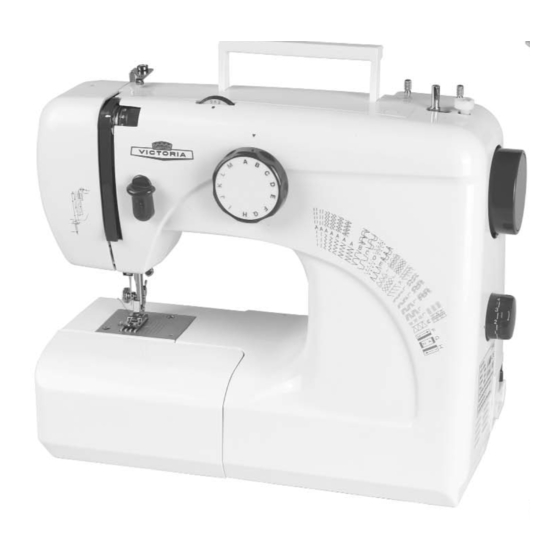
- Page 2 Automatic Free-Arm Sewing Machine 270 E Operating instructions Kompernaß Handelsgesellschaft mbH · Burgstraße 21 · D-44867 Bochum www.kompernass.com E-2073/05-2004...
-
Page 3: Table Of Contents
- for use as a movable machine, - for sewing normal household fabrics - for private use only. The sewing machine is not intended ... - to be installed at a fixed location, - for processing other materials (for example leather, canvas,... -
Page 4: Safety Instructions
This will prevent possibly life-threat- ening electric shocks. • Only use the sewing machine in dry rooms. • If damage is visible on the sewing machine, or the foot switch, or the power cord: Have the damage repaired by Customer Service, before using the sewing machine again. -
Page 5: Setting Up
5. Setting up • Place the sewing machine on a steady worktop. Connect the foot switch machine Insert the power plug in a power socket. If the worktop is not completely even, you can compensate for slight uneven- ness as follows: Pull out the box compartment to the side, as shown. -
Page 6: Threading
After the first few turns of thread are taut on the bobbin, press the bobbin against the winder stopper. • Now switch on the sewing machine and step on the foot switch. When the bobbin is full, cut the thread. - Page 7 Threading the lower thread First raise the needle fully, by turning the handwheel. Pull out the box compartment to the side, as shown. Open the gripper flap located behind. Fold out the lever arm from the bobbin case. Take out the bobbin case as shown.
- Page 8 Wind about 10 cm of thread away from the bobbin and feed this into the bobbin case. Pull the loose end of the thread through the gap in the side of the bobbin case under the tension spring until the thread passes out of the slit in the bobbin case.
- Page 9 Place the bobbin case on the pin Turn the bobbin case until the feed dog engages in the recess. • Place the excess thread so that it does not catch anywhere • Close the gripper flap. The box compartment can now be simply pushed back in, for example if you need it as an 'extension flap' for sewing larger areas of material.
- Page 10 Threading the upper thread To pass in the upper thread, it is not necessary to open the front of the sewing machine. The illustration is for guidance only. Pull out one of the two roll pins and put on a spool of thread.
- Page 11 In this way, you can pull the lower thread clear. • Pull out the two threads by about 10 cm. and lie them out as shown. The sewing machine is now ready to use.
-
Page 12: Attaching Accessories
Threading with 2 needles If you have inserted the twin needle, as described in Chapter 8: • Pull out both roll pins and put on two spools of thread. You can put a felt pad under the spool of thread, to protect the machine casing. - Page 13 Changing the sew foot First raise the needle fully, by turning the handwheel. Loosen the foot screw and take off the sew foot together with the foot holder. Press the lever on the foot holder. The sew foot can now be separated from the holder.
-
Page 14: Settings
9. Settings The tension in the upper and lower thread has been set correctly if no twining of the thread is visible on the top or on the underside of the material after sewing. If the tension on only one of the threads is set incorrectly, the resulting seam will be untidy. - Page 15 Setting the presser foot pressure Here you can set the pressure with which the material is pressed onto the stitch plate. • Using the little screwdriver supplied, loosen the screw at the top of the front cover. Open the front cover. Now use the lever to set the presser foot pressure, for example "0"...
-
Page 16: Sewing
10. Sewing If you have placed the thread and everything is set correctly, as described in the previous chapters: To place the material Raise the needle fully, by turning the handwheel. Raise the sew foot using the foot pedal. • Place the material under the sew foot and lower the sew foot again. - Page 17 Guiding the material Guide normal materials only as shown in the illustration. Avoid pulling it, as this can cause the nee- dle to bend or break. • Very fine materials are drawn in slightly when sewing. To prevent this, simply lay a thin sheet of paper under the material and sew with the paper in place.
- Page 18 Selecting a stitch pattern To select a particular pattern, take the following steps: Select Stitch program on the pro- gramme selector. Set the stitch length. Select the stitch width. Attach the corresponding sew foot, as described in Chapter 8. Make the required settings as shown in the table on the right.
- Page 19 Sewing (stitch pattern selector) & sewing table accoutrements Stitch pattern Straight stitch Zigzag Blind Box stitch Three-step zigzag stitch Blind stitch Buttonhole Single overlock stitch Honeycomb stitch Slant over edge stitch Stretch zigzag stitch Stretch straight stitch Double overlock stitch Free-hand embroidery Stitch length...
- Page 20 Blind hem Fold the material as shown. Make the fold as wide as you want the fin- ished seam to be: the bottom fold should be about 5 mm away. Use the blind hem foot. While sewing, check the seam width and needle setting, to ensure that the seam remains uniform.
- Page 21 Material-Thread-Needle-Table Please refer to the details for the various materials. Material Thread Light Nylon Cotton Tricot Man-made fibre 60 Silk Silk Wool Man-made Silk fibre 50 Silk Medium Poplin Cotton 60-80 Fine jersey Man-made fibre 60 Gabardine Silk Heavy Denim Cotton Jersey Man-made...
- Page 22 Seam guide Use the seam guide for sewing longer seams or hems, which should have a uniform distance from the edge of the cloth. • Screw the seam guide into one of the threaded holes on the right of the stitch plate.
- Page 23 Pattern selector Procedure (stitch pattern) m) Sewing buttonholes Attach the button hole foot, as described in Chapter 8. • Refer to the table for: - the required stitch length - the required stitch pattern - the required procedure for sewing. You can now cut into the center of the button hole, as shown.
- Page 24 • If necessary, slightly adjust the stitch width of the zigzag pattern. • If the sewing machine can sew both buttonholes in manual mode, you can now carefully sew 5-7 stitches with the machine by carefully pressing the foot switch.
- Page 25 Sewing a zipper Using the zipper foot, you can sew closely along the edges of the zipper, without damaging either the zipper or the needle. The zipper foot is also useful for sewing edges or parallel seams. Attach the zipper foot, as described in Chapter 8.
- Page 26 Sewing with the twin needle Insert the new needle, with the flat end towards the rear. • Pass the thread in, as for normal sewing. The two threads are passed together through the thread guides – as far as the twin needle. •...
-
Page 27: Care
Warning!: Before carrying out any maintenance work on the sewing machine, first pull the plug out of the power socket. This will prevent the risk of accidents due to the machine being started unintention- ally. - Page 28 Storing Keep the sewing machine ... - in a dry place, to protect the metal components from rust, - inside the wrapping supplied, to pre-...
-
Page 29: Is There A Problem
Customer Service. Warning!: Before carrying out any maintenance work on the sewing machine, first pull the plug out of the power socket. This will prevent the risk of accidents due to the machine being started unintention- ally. -
Page 30: Warranty And Service
14. Disposal Keep the sewing machine's transport packaging. This can be useful for stor- ing the sewing machine – but it will be especially useful if you need to return the sewing machine for repair. Most instances of damage occur when the machines are being transported.