
Related Manuals for Pentair EVERPURE PRO


Summary of Contents for Pentair EVERPURE PRO
- Page 1 EVERPURE ® REVERSE OSMOSIS WATER FILTRATION SYSTEM INSTALLATION AND OPERATING INSTRUCTIONS ©2014 Pentair Residential Filtration, LLC...
-
Page 2: Table Of Contents
TABLE OF CONTENTS If your water pressure and temperature are at the NOTE: low end of the listed range (40 psi [2.8 bar] and 40°F Operating Specifications ............2 [4.4°C]), and the TDS level is near the maximum (1500 ppm), the system will not function properly. System Dimensions .............2 Under these extreme conditions, pre-warming the Production Capabilities............2... -
Page 3: Tools Required
TOOLS REQUIRED • Your water must be within required limits for satisfactory operation. If not, your membrane life may be shortened and your warranty will be voided (see Tools Required Operating Specifications, page 1). • Hand or electric drill • Install on cold water line only. •... -
Page 4: How Reverse Osmosis Works
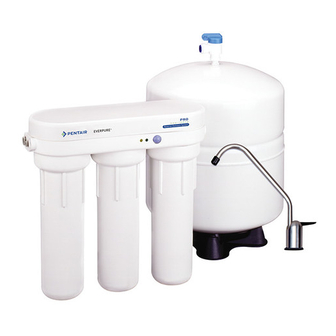
HOW REVERSE OSMOSIS WORKS The Everpure PRO uses a semi-permeable membrane to reduce dissolved salts, improving the taste and odor of your water. The RO membrane is made of multiple layers of micron-thin film wound around a hollow center core. Water molecules can pass through the membrane, while dissolved salts are rejected. -
Page 5: Installation
INSTALLATION Drinking Water Faucet Blue Supply Adapter Drain Clamp Membrane Post-polishing Housing Manifold Filter Housing Tank White Cover Valve Manifold Cold Water Green Prefilter Optional Tank Installation Housing Membrane Prefilter Storage Post-polishing Tank Filter Figure 1 Installing the Water Supply Adapter Read all installation and operating instructions NOTE: before installing and using your RO system. - Page 6 Selecting the Faucet Location Mounting the Faucet The drinking water faucet should be positioned with function, 1. Loosen brass stem-nut on faucet, remove metal “C” convenience and appearance in mind. An adequate flat area is disc (Figure 4). required to allow faucet base to rest securely. The faucet fits through a 1-1/4 inch hole.
- Page 7 5. Lubricate the o-rings on the bottom of the faucet spout 3. Remove the drain clamp from the drainpipe and enlarge with supplied silicone lubricant. Use lubricant the hole with a 3/8-inch drill bit (Figure 12). Use a file to sparingly (Figure 8).
- Page 8 Connecting the Faucet to the Drain Installation of Mounting Screws This is a gravity drain line. Any loops, kinks or sharp NOTE: When tank is full, it weighs approximately 40 CAUTION bends must be eliminated before proceeding. Failure pounds. Provide ample support under the tank. to create a straight line to the drain may result in If system is being installed under the kitchen sink, locate it reject water leaking through the air gap in the faucet...
- Page 9 Connecting the Faucet to the System Connecting the Storage Tank to the System 1. Locate the red tubing (reject water line) from the drinking When tank is full, it weighs approximately 40 lbs. CAUTION water faucet. Place a mark on the red tubing 5/8 inch from Provide ample support under the tank.
-
Page 10: Battery Installation
Connecting the Supply Adapter and Inlet of Filter See Figure 22. 1. Locate the pre-installed white plastic tubing on the left- hand side of the RO system. Place a mark 5/8 inch from the end of the tubing. Locking Device 2. -
Page 11: System Startup
SYSTEM STARTUP 7. Close faucet and allow tank to fill. Initially, the water may appear cloudy. This is a result NOTE: The reverse osmosis membrane is treated with a food NOTE: of air trapped in the post-polishing filter. It is not grade sanitizing agent that may cause an undesirable harmful and will disappear in a matter of minutes. -
Page 12: Testing Your Reverse Osmosis System
TESTING YOUR REVERSE OSMOSIS SYSTEM MAINTENANCE Use only the replacement elements and parts referred to in Dissolved Solids (TDS) Test this manual. Failing to do so will void your warranty. Under NSF/ANSI Standard 58, it is highly NOTE: Use a different sink or set aside water to wash and NOTE: recommended that you (the consumer) have your rinse housings. - Page 13 7. Insert the new cartridge into the housing. Make sure the Removing the Filter Cartridges and Membrane cartridge slips over the standpipe in the bottom of the 1. Turn off cold water supply. Place a tray under the system to housing.
-
Page 14: Troubleshooting
14. Wait 25 minutes, then open the drinking water faucet and 21. After the membrane is seated, lightly lubricate the two let the water flow to drain. small o-rings at the end of the membrane. Also, lightly lubricate both brine ring o-rings (Figure 29). Do not attempt to remove the filter housings until the NOTE: water flow stops. - Page 15 Leaks at quick-connect fittings Limited Flow at Drinking Water Faucet 1. Close tank valve, close water supply and open drinking 1. Turn off water supply to system. water faucet. 2. Lift drinking water faucet handle to lock it in the 2.
-
Page 16: Performance Data
PERFORMANCE DATA EPA Est. No. 090375-MEX-001 The tested efficiency rating for these systems is 10.46%. Important Notice: Read this performance data and compare the Efficiency rating means the percentage of the influent water capabilities of this system with your actual water treatment to the system that is available to the user as reverse osmosis needs. -
Page 17: California Proposition 65 Warning
Arsenic Fact Sheet Arsenic (abbreviated As) is found naturally in some well water. Arsenic in water has no color, taste or odor. It must be measured by a lab test. Public water utilities must have their water tested for arsenic. You can get the results from your water utility. -
Page 18: Replacement Parts
REPLACEMENT PARTS 144653 Auto Shut-Off Assembly EV929510 PRO Replacement Cartridge Kit SH144764 3/8-inch Elbow EV929500 PRO Membrane Replacement Kit SH143370 1/4-inch Elbow SH144925 Nitrate/Nitrite Test Kit (PRO) SH144616 Drain Clamp Assembly SH244820 Drinking Water Faucet SH143431 1/2-inch x 1/2-inch x 1/4-inch Supply Adapter SH144747 Manifold Cover SH144847... - Page 19 IOWA RESIDENTS ONLY: Store or seller’s name Address City State _____________________ Zip__________ Seller’s signature Customer’s signature Date EVERPURE • 19 PRO-Reverse Osmosis Water Filtration System Installation and Operating Instructions ®...
- Page 20 All Pentair trademarks and logos are owned by Pentair, Inc. or its affiliates. All other registered and unregistered trademarks and logos are the property of their respective owners. Because we are continuously improving our products and services, Pentair reserves the right to change specifications without prior notice.