Table of Contents
Advertisement
Quick Links
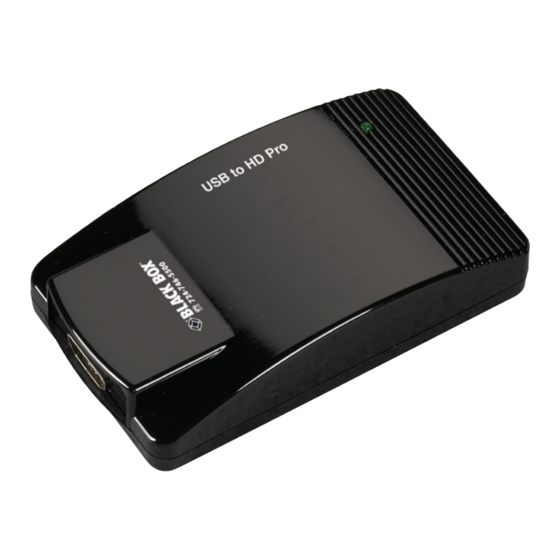
USB to HD Pro
Use this HDMI and HDCP-compliant USB converter
for streaming media files stored on your PC to an HD
screen with HDMI input.
Customer
Order toll-free in the U.S.: Call 877-877-BBOX (outside U.S.
Support
call 724-746-5500) FREE technical support 24 hours a day, 7 days
Information
a week: Call 724-746-5500 or fax 724-746-0746 Mailing address:
Black Box Corporation, 1000 Park Drive, Lawrence, PA 15055-1018
Web site: www.blackbox.com • E-mail: info@blackbox.com
BLACK BOX
AC346A
®
Advertisement
Table of Contents

Related Manuals for Black Box AC346A USB to HD Pro


Summary of Contents for Black Box AC346A USB to HD Pro
- Page 1 Order toll-free in the U.S.: Call 877-877-BBOX (outside U.S. Support call 724-746-5500) FREE technical support 24 hours a day, 7 days Information a week: Call 724-746-5500 or fax 724-746-0746 Mailing address: Black Box Corporation, 1000 Park Drive, Lawrence, PA 15055-1018 Web site: www.blackbox.com • E-mail: info@blackbox.com...
- Page 2 FCC and IC RFI Statements/NOM Statement FEDERAL COMMUNICATIONS COMMISSION AND INDUSTRY CANADA RADIO FREQUENCY INTERFERENCE STATEMENTS This equipment generates, uses, and can radiate radio-frequency energy, and if not installed and used properly, that is, in strict accordance with the manufacturer’s instructions, may cause inter ference to radio communication.
- Page 3 NOM Statement 4. Todas las instrucciones de operación y uso deben ser seguidas. 5. El aparato eléctrico no deberá ser usado cerca del agua—por ejemplo, cerca de la tina de baño, lavabo, sótano mojado o cerca de una alberca, etc. 6.
- Page 4 NOM Statement 16. El cable de corriente deberá ser desconectado del cuando el equipo no sea usado por un largo periodo de tiempo. 17. Cuidado debe ser tomado de tal manera que objectos liquidos no sean derramados sobre la cubierta u orificios de ventilación. 18.
- Page 5 Trademarks Used in this Manual Trademarks Used in this Manual Black Box and the Double Diamond logo are registered trademarks of BB Technologies, Inc. HDMI is a registered trademark of HDMI Licensing, LLC. Pentium is a registered trademark of Intel Corporation.
-
Page 6: Table Of Contents
6. Uninstall ......................24 6.1 Uninstall the US to HD Pro Driver ............24 6.2 Uninstall the USB Audio Driver .............24 Appendix: Troubleshooting .................26 A.1 Problems/Solutions ................26 A.2 Contacting Black Box ................26 A.3 Shipping and Packaging ................27 724-746-5500 | blackbox.com Page 6... -
Page 7: Specifications
Chapter 1: Specifications 1. Specifications System Requirements — Operating System: Microsoft Windows ® Windows Vista (32-bit); ® Processor: Pentium 4 2.4 GHz or above; ® 512-MB RAM or above; available USB 2.0 port; 30 Mb of available disk space Connectors — USB Input: (1) Type A USB 2.0; HDMI Output: (1) HDMI Size —... -
Page 8: Overview
Chapter 2: Overview 2. Overview 2.1 Introduction The USB to HD Pro conveniently enables customers to play media files stored in a PC on a big screen by converting USB input into HDMI. Simply connect the USB interface of the PC to the converter using the included USB cable, and connect the unit to your home theater system with an HDMI cable to enjoy high-quality ®... -
Page 9: What's Included
Chapter 2: Overview 2.3 What’s Included Your package should contain the following items. If anything is missing or damaged, contact Black Box Technical Support at 724-746-5500 or info@blackbox.com. • USB to HD Pro • USB Cable • Driver CD (contains driver and this user manual) 2.4 System Requirements... - Page 10 Chapter 2: Overview USB input (connect to the USB port of your PC) HDMI Output (connect to the HDMI input of the display device) Figure 2-1. Top and side views. 724-746-5500 | blackbox.com Page 10...
-
Page 11: Installation
Chapter 3: Installation 3. Installation 3.1 Install the USB to HD Pro Driver Step 1: Insert the provided driver CD into your CD-ROM driver. Execute the Setup.exe file from the USB to HD Pro Driver folder. Step 2: A dialog box should pop up to prompt you to choose the desired installing language. -
Page 12: Install The Hardware
Chapter 3: Installation 3.3 Install the Hardware Step 1: Use the HDMI cable to connect your display device that supports HDMI input. HDMI cable USB to HD Pro Display device Figure 3-2. Connecting the USB to HD Pro to the display device. Step 2: Connect the USB to HD Pro to a USB 2.0 port of your computer using the provided USB cable. -
Page 13: Using The Usb To Hd Pro
Chapter 4: Using the USB to HD Pro 4. Using the USB to HD Pro 4.1 Using the USB to HD Pro DisplayLink Manager After the driver is installed, a utility (USB to HD Pro DisplayLink Manager) icon will automatically appear in the system tray. The utility allows you to quickly change the settings and resolution for the USB to HD Pro. - Page 14 Chapter 4: Using the USB to HD Pro Color Quality: Select the screen color quality (available only in extended mode). Figure 4-3. Selecting color quality. Screen Rotation: Rotate the screen on the additional monitor by 90, 180, or 270 degrees. Figure 4-4.
- Page 15 Chapter 4: Using the USB to HD Pro Extend to: Reposition the extended screen to the top, bottom, left, or right of the primary display. Figure 4-5. Repositioning the extended screen. Extend: Set the USB to HD Pro to Extended mode. You can access the website on the VGA monitor and play videos on the HDMI display device.
- Page 16 Chapter 4: Using the USB to HD Pro Mirror: Set the USB to HD Pro to Mirror mode. You can see the same desktop image on the additional monitor. Figure 4-7. Setting the unit to mirror mode. NOTE: If there is no picture on the additional monitor, adjust the resolution of the main screen.
-
Page 17: Using Usb To Hd Pro After Driver Is Already Installed
Chapter 4: Using the USB to HD Pro Advanced: Directly access the display properties. You can also adjust the resolution, color quality, position, and refresh rate via the display properties. Figure 4-9. Accessing the display properties. 4.2 Using the USB to HD Pro After Driver Is Already Installed You don’t need to install the driver again if you have already installed the driver as described in Section 4.1. -
Page 18: Firmware Update
Chapter 4: Using the USB to HD Pro 4.3 Firmware Update Manually Update: Click the Updates—>Check Now…, and the unit will check and download the latest firmware immediately. NOTE: Confirm that your computer is already connected to the network. Figure 4-11. Manually updating the firmware. Automatic Update: Click the Updates—>Configure. - Page 19 Chapter 4: Using the USB to HD Pro Figure 4-13. Select “Check and prompt me to download and install the updates.” 724-746-5500 | blackbox.com Page 19...
-
Page 20: Usb Pnp Sound Program
Chapter 5: USB PnP Sound Program 5. USB PnP Sound Program The USB PnP sound program is C-Media’s 3D audio control panel that you can use to control all audio configurations. After finishing the installation of the Audio Driver and rebooting the system, you can open “Control Panel”... -
Page 21: Main Setting
Chapter 5: USB PnP Sound Program 5.1 Main Setting Select the output device (earphones or speakers). Figure 5-3. Main setting screen. 724-746-5500 | blackbox.com Page 21... -
Page 22: Mixer
Chapter 5: USB PnP Sound Program 5.2 Mixer Adjust the volume of each source. Figure 5-4. Mixer screen. 5.3 Effect There are many environment effect presets and 10-band EQ that you can choose from. • Select an “Environment” button for emulation that is implemented by producing the sound reflection and reverberation. -
Page 23: Information
Chapter 5: USB PnP Sound Program Figure 5-5. Effect screen. 5.4 Information This page will display audio driver and system information. Figure 5-6. Information screen. 724-746-5500 | blackbox.com Page 23... -
Page 24: Uninstall
Chapter 6: Uninstall 6. Uninstall 6.1 Uninstall the USB to HD Pro Driver Follow the steps below to uninstall the driver of the USB to HD Pro. Step 1: Open the Control Panel: Start—>Control Panel—>Add or Remove Programs. Step 2: Select the “DisplayLink Graphics” and click “Remove,” then follow the instructions of the uninstall wizard. - Page 25 Chapter 6: Uninstall Figure 6-2. Change or remove programs from your computer. NOTE: Restart your PC after you uninstall the drivers. 724-746-5500 | blackbox.com Page 25...
-
Page 26: Appendix: Troubleshooting
A.2 Contacting Black Box If you determine that your USB to HD Pro is malfunctioning, do not attempt to alter or repair the unit. It contains no user-serviceable parts. Contact Black Box Technical Support at 724-746-5500 or info@blackbox.com. Before you do, make a record of the history of the problem. We will be able to... -
Page 27: Shipping And Packaging
• Package it carefully. We recommend that you use the original container. • If you are returning the unit, make sure you include everything you received with it. Before you ship for return or repair, contact Black Box to get a Return Authorization (RA) number. - Page 28 724-746-5500 or blackbox.com. About Black Box Black Box provides an extensive range of networking and infrastructure products. You’ll find everything from cabinets and racks and power and surge protection products to media converters and Ethernet switches all supported by free, live 24/7 Tech Support available in 30 seconds or less.