Table of Contents
Advertisement
Advertisement
Table of Contents

Summary of Contents for Mitel 7100
- Page 1 INSTALLATION GUIDE...
- Page 2 Mitel Networks Corporation (MITEL®). The information is subject to change without notice and should not be construed in any way as a commitment by MITEL or any of its affiliates or subsidiaries. MITEL and its affiliates and subsidiaries assume no responsibility for any error or omissions in this document.
-
Page 3: Table Of Contents
About the 7100 Management Access Point ....... . . 2... - Page 4 7100 MAP - iv -...
-
Page 5: About This Guide
Who this guide is for This guide is for certified technicians. Where you can find more information Refer to the 7100 Management Access Point Product Guide for further details about the information provided in this installation guide and for complete technical information. -
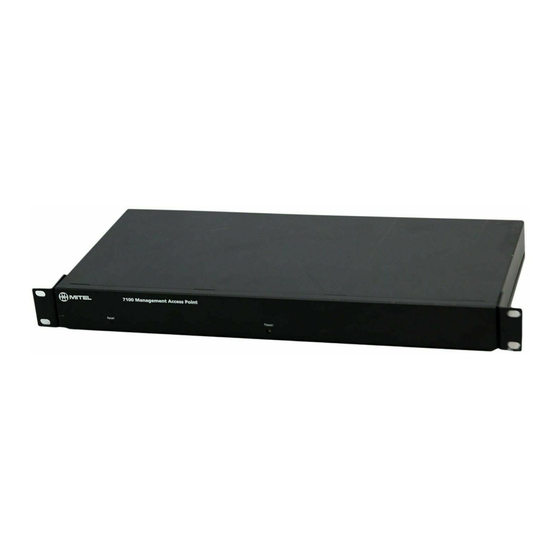
Page 6: About The 7100 Management Access Point
• SX-200 From a remote client station, you can dial in through a modem connection to the 7100 MAP and then log in to a Mitel Networks system that is installed on the customer’s site. After logging in with your system username and password, you can launch a programming session or maintenance session on the Mitel Networks system. -
Page 7: 7100 Map Variants
Admin: The admin user (local or dial-in) can access the 7100 MAP user interface to configure the 7100 MAP itself. The admin can be an on-site user or an engineer who accesses the 7100 MAP from a remote client station to conduct an admin session. -
Page 8: Installing The 7100 Map
7100 MAP This installation guide takes you through the following procedures to complete the initial installation and configuration of a 7100 MAP and to connect to remote Mitel Networks systems. Note that these procedures must be completed in order: 1. Installing the 7100 MAP 2. -
Page 9: Installing The 7100 Map
2. Locate the 7100 MAP within 1.3 meters (4 feet) of a power source. 3. Place the 7100 MAP on a desk, or install it in a 19-inch rack, using the supplied mounting brackets. The mounting brackets fasten to the sides of the rack. - Page 10 7100 MAP 5. Proceed to "Accessing the 7100 MAP admin interface" (p. 7).. ™ Connect the dedicated incoming line to the “Modem 1” port. š Plug the RJ-45 connector on the CAT 5 patch cable into the “Ethernet 1” port.
-
Page 11: Accessing The 7100 Map Admin Interface
Telnet (local/remote) or HyperTerminal (local only). Note: You can use Telnet with the 7100 MAP E/M, E/M/S, and E/M/S/U; however, HyperTerminal requires a serial connection and can, therefore, only be used with the E/M/S variants. -
Page 12: Accessing The 7100 Map Locally
Accessing the 7100 MAP locally Indefinite access for local admin The on-site admin user has indefinite access to the 7100 MAP on the LAN via a Telnet connection to the actual IP address of the 7100 MAP. Accessing a local administration session (Ethernet connection) The Ethernet cards on the remote PC and the 7100 MAP must have the same subnet address;... -
Page 13: Accessing The 7100 Map Remotely
• Telephone number of the 7100 MAP modem Note: Windows 95 and 98 are not supported for use with the 7100 MAP. If you are using either of these operating systems, consult Windows help to set up a dial-up networking connection and for any help with the user interface. - Page 14 4. Ensure that the Dial-up to private network radio button is selected, and click Next. 5. Enter the telephone number of the 7100 MAP in the Phone number field. If you wish to enter the area code separately, select the Use dialing rules check box, and enter the Country/Region code information, and click Next.
-
Page 15: Privileged Access For Remote Engineer
At this point, you have an authenticated dial-up network connection, but you are not logged in to the 7100 MAP. Although you have the IP address for the 7100 MAP, you will not be able to access it, or even ping it, until privileged access has been enabled. -
Page 16: Enabling And Disabling Privileged Access From The Dial-In Network Access Menu
7100 MAP • CLEAR button: If the CLEAR button (inset) on the rear panel of the 7100 MAP is pressed, you can log in to the Admin interface from a remote location for the next 30 minutes. After 30 minutes, the Admin interface is no longer accessible; however, after gaining access to the 7100 MAP, you can increase your access time from the Privileged Access Control menu. -
Page 17: Configuring The 7100 Map
(option 7 (E/M) or 8 (E/M/S) in the main configuration menus), you will lose your connection to the 7100 MAP. You will also lose any time remaining in your session, unless you have indefinite access (in which case, you can simply reconnect to the 7100 MAP). -
Page 18: Privileged Access Required For Engineer
7100 MAP for the customer network. The easiest way to grant remote access for the initial configuration of the 7100 MAP is to press the CLEAR button. You can also grant access through the Dial-in Network Access menu, but this requires that the local admin match the IP address of their PC to that of the 7100 MAP in order to access the menu interface. -
Page 19: Changing The Passwords
If the PPP (Engineer) password is forgotten, Mitel Networks security measures require that the 7100 MAP be shipped back to Mitel so that our technicians can restore the unit to its default configuration settings. Note that if the... -
Page 20: Configuring The Ethernet Devices
(p. 17). To change the ‘engineer’ password 1. For the E/M variant, at the 7100 MAP EM Configuration Menu, type 3 (Dial-in Network Access), and press ENTER. For the E/M/S variants, at the 7100 MAP EMS Configuration Menu, press 4 (Dial-in Network Access), and press ENTER. -
Page 21: Configuring The Serial Devices
Installation Guide 1. For the E/M variant, at the 7100 MAP EM Configuration Menu, type 2 (Managed LAN Devices), and press ENTER. For the E/M/S variants, at the 7100 MAP EMS Configuration Menu, type 3 (Managed LAN Devices), and press ENTER. -
Page 22: Committing Your Changes
4. At the Serial Port Settings menu, type 2 (Serial Port 2), and press ENTER to get to the Serial Port 2 Settings form. 5. Enter the settings listed in step 3. 6. At the Serial Port Settings menu, enter x to return to the 7100 MAP EMS Configuration Menu. Committing your changes You must commit any changes you make to the 7100 MAP settings before they will take effect. -
Page 23: Privileged Access Not Required For Engineer
Accessing the 3300 or 3100 ICP VxWorks shell If a 7100 MAP E/M/S is connected to the serial port of a 3300 or 3100 Controller, you can access the VxWorks shell to issue VxWorks commands or custom commands and access the file system. -
Page 24: Dial-Up Access To Ops Manager Via The 7100 Map
7100 MAP 3. Telnet to the PPP address of the 7100 MAP plus the number of the serial port (either 4001 or 4002) that connects to the managed device. For example, type telnet xxx.xxx.xxx.x 4001 (where x is the PPP address of the 7100 MAP). - Page 25 3. Type either telnet xxx.xxx.xxx.x 4001 or telnet xxx.xxx.xxx.x 4002 (where x is the PPP IP address, and 4001 or 4002 is the serial port on the 7100 MAP E/M/S that is connected to the serial device you wish to access).
- Page 26 7100 MAP - 22 -...