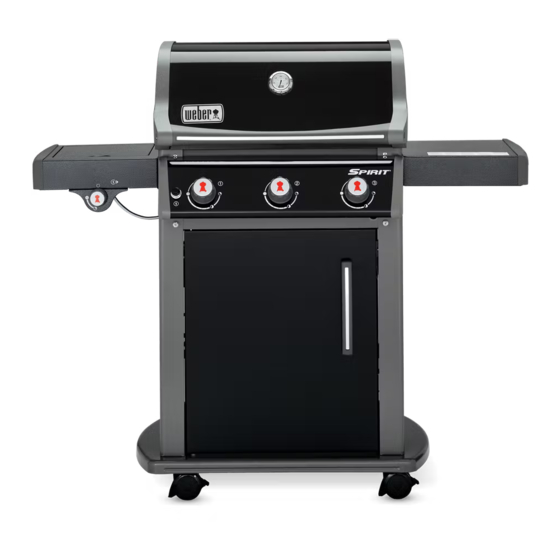
Weber Spirit E210 ORIGINAL Owner's Manual
Lpg gas grill
Hide thumbs
Also See for Spirit E210 ORIGINAL:
- Owner's manual (144 pages) ,
- User manual (41 pages) ,
- Assembly instructions manual (8 pages)
Table of Contents
Advertisement
LPG GAS GRILL OWNER'S GUIDE
E210 ORIGINAL · E310 ORIGINAL · E320 ORIGINAL
YOU MUST READ THIS OWNER'S GUIDE BEFORE
OPERATING YOUR GAS GRILL.
If you smell gas:
1) Shut off gas to the appliance.
2) Extinguish any open flames.
3) Open lid.
4) If odour continues, keep away from the appliance and
immediately call your gas supplier or your fire service.
Leaking gas may cause a fire or explosion which can cause
serious bodily injury, death, or damage to property.
1) Do not store or use petrol or other flammable liquids or
vapours in the vicinity of this or any other appliance.
2) A gas supply cylinder not connected for use shall not be
stored in the vicinity of this or any other appliance.
845CN-0003
0845
m DANGER
m WARNING
Thank you for purchasing a Weber
You've made a wise investment.
Now take a few minutes and protect it by
registering your product online at
www.weber.com.
m WARNING: Carefully follow
all leak-check procedures
in this Owner's Guide prior
to grill operation. Do this
even if the grill was dealer-
assembled.
m WARNING: Do not ignite
this appliance without
first reading the BURNER
IGNITION sections of this
Owner's Guide.
OUTDOOR USE ONLY.
NOTICE TO INSTALLER:
These instructions must be left
with the owner, who should
keep them for future use.
EN - INTERNATIONAL ENGLISH
grill.
®
®
57217
06/19/12
Advertisement
Table of Contents

Related Manuals for Weber Spirit E210 ORIGINAL


Summary of Contents for Weber Spirit E210 ORIGINAL
- Page 1 LPG GAS GRILL OWNER’S GUIDE E210 ORIGINAL · E310 ORIGINAL · E320 ORIGINAL Thank you for purchasing a Weber grill. ® You’ve made a wise investment. Now take a few minutes and protect it by registering your product online at www.weber.com.
-
Page 2: Warnings
See instructions in this Owner’s Guide for correct procedures. m Do not operate your Weber gas grill if ® there are any leaking gas connections. m Do not use a flame to check for gas leaks. -
Page 3: Table Of Contents
LPG CYLINDER INSTALLATION OUTSIDE CABINET ......14 claim, Weber will elect to replace such parts without charge. If you are required to return defective parts, transportation charges must OUTSIDE CABINET REQUIREMENTS . -
Page 4: Spirit ® E210 Original Lpg Exploded View
SPIRIT E210 ORIGINAL LPG EXPLODED VIEW ® Spirit_E210_Original_LPG_EU_030412 WWW.WEBER.COM ®... - Page 5 Flavorizer ® Fold-Down Side Table Fold-Down Assembly Rear Cross Brace Rear Frame Support Manifold Manifold Hose Bulkhead Hose & Regulator Right Frame Panel Slide-Out Grease Tray Cylinder Bracket Bottom Panel Wheel Cover Hub Cap Wheel Axle Locking Caster WWW.WEBER.COM ®...
-
Page 6: Spirit ® E310 Original Lpg Exploded View
SPIRIT E310 ORIGINAL LPG EXPLODED VIEW ® Spirit_E310_Original_LPG_EU_030412 WWW.WEBER.COM ®... - Page 7 Front Cross Brace Door Door Handle Shroud Hardware Cooking Grate Flavorizer ® Side Table Rear Cross Brace Rear Frame Support Manifold Manifold Hose Bulkhead Hose & Regulator Right Frame Panel Slide-Out Grease Tray Bottom Panel Cylinder Bracket Caster Locking Caster WWW.WEBER.COM ®...
-
Page 8: Spirit ® E320 Original Lpg Exploded View
SPIRIT E320 ORIGINAL LPG EXPLODED VIEW ® Spirit_E320_Original_LPG_EU_030412 WWW.WEBER.COM ®... - Page 9 Shroud Hardware Cooking Grate Flavorizer ® Side Table Rear Cross Brace Rear Frame Support Side Burner Gas Line Assembly Manifold Manifold Hose Bulkhead Hose & Regulator Right Frame Panel Slide-Out Grease Tray Bottom Panel Cylinder Bracket Caster Locking Caster WWW.WEBER.COM ®...
-
Page 10: Important Information About Lpg Gas & Gas Connections
There are various guidelines and safety factors that you REGULATOR CONNECTIONS & need to keep in mind when using liquid propane gas REQUIREMENTS (LPG). Carefully follow these instructions before using Liquid propane gas (LPG) is the your Weber ® gas grill. • In the United Kingdom, this appliance must be fitted flammable, petroleum-based with a regulator complying with BS 3016, having a •... - Page 11 NOTICE: We Romania, Slovak Republics, Slovenia, Spain, Sweden, Turkey recommend that you replace the Belgium, France, Greece, Ireland, Italy, Luxembourg, Portugal, - 28-30 / 37 mbar gas hose assembly on your Weber ® Switzerland, United Kingdom gas grill every five years. Some Poland...
-
Page 12: Lpg Cylinder Installation Inside Cabinet
Several possible cylinder models approved for installation inside the cabinet are illustrated, with dimensions included. Maximum LPG cylinder capacity INSIDE cabinet is 6 kg. The length of hose must not exceed 1.5 metres. WWW.WEBER.COM ®... -
Page 13: Inside Cabinet Installation
(3) on the bottom panel. The base of the cylinder must fit between the cylinder brackets (4). C) Turn the cylinder so the valve opening faces the front of the grill. D) Connect the regulator to the LPG cylinder. Refer to “CONNECTING THE REGULATOR.” WWW.WEBER.COM ®... -
Page 14: Lpg Cylinder Installation Outside Cabinet
C) Turn the LPG cylinder so the opening of the valve is facing forward. D) Connect the regulator to the LPG cylinder. Refer to “CONNECTING THE REGULATOR.” Maximum LPG cylinder capacity OUTSIDE cabinet is 13 kg. The length of hose must not exceed 1.5 metres. WWW.WEBER.COM ®... -
Page 15: Connecting The Regulator
CONNECTING THE REGULATOR WHAT IS A REGULATOR? Your Weber gas grill is ® equipped with a pressure regulator, which is a device to control and maintain uniform gas pressure as gas is released from the LPG cylinder. CONNECTING THE REGULATOR TO THE CYLINDER A) Connect regulator to LPG cylinder. -
Page 16: Preparing To Use Your Grill
This appliance is intended for outdoor use only and should never be used in garages and roofed or enclosed porches or verandas. m Your Weber gas grill must never ® be used under an unprotected combustible roof or overhang. -
Page 17: Checking For Gas Leaks
As a safety precaution, however, you should check all fittings for leaks before using your Weber® gas grill. Shipping and handling may loosen or damage a gas fitting. CHECKING FOR GAS LEAKS You will need: A spray bottle or brush or rag and a soap- and-water solution. - Page 18 DO NOT OPERATE THE GRILL. Contact the Customer Service Representative in your area using the contact information on our web site. Log onto www.weber.com ® Regulator-to-cylinder connection (6). g) Regulator hose-to-regulator connection (7). h) Valves-to-manifold connections (8).
-
Page 19: Disconnecting The Regulator
(7) (9). Slide the collar of the regulator up (8) (10) to disconnect from the cylinder. B) Exchange empty cylinder for a full cylinder. REFILLING THE LPG CYLINDER We recommend that you refill the LP cylinder before it is completely empty. To refill, take LP cylinder to a “Gas Propane” dealer. RECONNECT THE LPG CYLINDER Refer to “CONNECTING THE REGULATOR.” WWW.WEBER.COM ®... -
Page 20: Grilling Tips & Helpful Hints
After flames subside, relight unwanted flare-ups. the grill. NEVER USE WATER • In general, large pieces TO EXTINGUISH FLAMES ON of meat will require more A GAS GRILL. cooking time per pound than • Using a timer will help to alert small pieces of meat. you when “well done” is about to become “overdone.” WWW.WEBER.COM ®... -
Page 21: Safety Checks Before Using Your Grill
Remove excess grease with a plastic scraper (2). Wash the catch pan with warm, soapy water and rinse with water. To keep the catch pan cleaner longer, you can line the catch pan with a Weber ® disposable drip pan or with aluminium foil. -
Page 22: Main Burner Ignition & Usage
( ) position. Turn gas supply off at the source. Some batteries have a plastic protective wrap around them. This plastic must be removed before you attempt to ignite your grill with the electronic Crossover ignition system. ® Do not confuse this plastic with the battery label. WWW.WEBER.COM ®... - Page 23 G) After burner 1 is lit, you can turn on burner 2 (and burner 3). TO EXTINGUISH BURNER Push each burner control knob in and turn it clockwise to the off ( ) position. Turn gas supply off at the source. WWW.WEBER.COM ®...
-
Page 24: Side Burner Ignition & Usage (320 Models)
(refer to “Lighting with a Match”). TO EXTINGUISH SIDE BURNER Push side burner control knob in and turn it clockwise to the off ( ) position. Be sure the side burner is off and cool before closing the side burner lid. WWW.WEBER.COM ®... - Page 25 TO EXTINGUISH SIDE BURNER Push side burner control knob in and turn it clockwise to the off ( ) position. Be sure the side burner is off and cool before closing the side burner lid. WWW.WEBER.COM ®...
-
Page 26: Troubleshooting
THIS IS NOT A DEFECT. Clean thoroughly. Refer to “ROUTINE MAINTENANCE.” If problems cannot be corrected by using these methods, please contact the Customer Service Representative in your area using the contact information on our web site. Log onto www.weber.com ® SIDE BURNER TROUBLESHOOTING (320 MODEL) -
Page 27: Annual Maintenance
NOTE: If a spider/insect screen becomes damaged or cannot be cleaned, please contact the Customer Service Representative in your area using the contact information on our web site. Log onto www.weber.com®. BURNER TUBE PORTS Over time, from repeated use of the grill, the burner tube ports will become dirty. -
Page 28: Burner Tube Cleaning Or Replacement
(8). Pull manifold forward and away from burner tubes (9). Manifold will remain attached to corrugated gas line(s). Be careful not to let manifold scratch frame or door or kink the attached corrugated gas line(s). WWW.WEBER.COM ®... - Page 29 D) Slide burner tube 2 out from under the guide screw and washer. Remove the Crossover tube by moving it ® toward back of cookbox (3). Lift burner tube 2 up and out of cookbox. WWW.WEBER.COM ®...
- Page 30 (openings) running along the length of the tubes are fully open. When cleaning burner tube 1, avoid damaging the igniter electrode by carefully brushing around it (4). m CAUTION: Do not enlarge the burner ports when cleaning. WWW.WEBER.COM ®...
- Page 31 E) While holding burner tube 1, insert left side of Crossover tube into Crossover burner hole. Slide ® ® burner tube 1 under the guide screw and washer (7). WWW.WEBER.COM ®...
-
Page 32: Storage
STORAGE For grills that have been stored for a while, it is important to follow these guidelines: • The gas must be turned off at the LPG cylinder when the Weber ® gas grill is not in use. • If storing the Weber gas grill indoors, first DISCONNECT the gas supply and store the LPG cylinder ®... -
Page 33: Routine Maintenance
Wash outside surfaces with a soft and rinse with water. To keep the catch pan cleaner cloth and a soap-and-water solution, rinse with water, and longer, you can line the catch pan with a Weber ® wipe dry. -
Page 34: Maintaining The Electronic Crossover
If the electronic Crossover ignition system still fails ® to ignite, contact the Customer Service Representative in your area using the contact information on our web site. Log onto www.weber.com ® IGNITER MODULE WIRE CHART 210/310 BURNER 1 SIDE BURNER... -
Page 35: Cleaning Side Burner Tube (320 Model)
Refer to the “IGNITER MODULE WIRE GUIDE.” • Check that the wires are not kinked. • Make sure the electronic igniter button is working by listening for clicking and looking for sparks at burner. • The sparks should be a white/blue colour, not yellow. SIDE BURNER EXPLODED VIEW Side Burner Grate Side Burner Head Side Burner Tray Side Burner Table Side Burner Control Knob WWW.WEBER.COM ®... -
Page 36: Www.weber.com
This product has been safety-tested and is only certified for use in a specific country. Refer to country designation located on outside of box. These parts may be gas-carrying or gas-burning components. Please contact Weber-Stephen Products LLC Customer Service Department for genuine Weber-Stephen Products LLC replacement part(s) information.