Table of Contents
Advertisement
INSTALLATION COMMISSIONING AND SERVICING INSTRUCTIONS
WALL HUNG RSF GAS FIRED CONDENSING COMBINATION BOILER
GREENSTAR CDi CLASSIC
FOR SEALED CENTRAL HEATING SYSTEMS AND MAINS FED DOMESTIC HOT WATER
The appliances are for use with:
Natural Gas or L.P.G. (Cat. II type C13, C33)
Natural Gas: 29CDi GC number 47-406-34
34CDi GC number 47-406-36
38CDi GC number 47-406-38
42CDi GC number 47-406-10
L.P.G.: 29CDi GC number 47-406-35
34CDi GC number 47-406-37
38CDi GC number 47-406-39
42CDi GC number 47-406-11
UK/IE
Advertisement
Table of Contents

Related Manuals for Worcester 29CDi GC 47-406-34


Summary of Contents for Worcester 29CDi GC 47-406-34
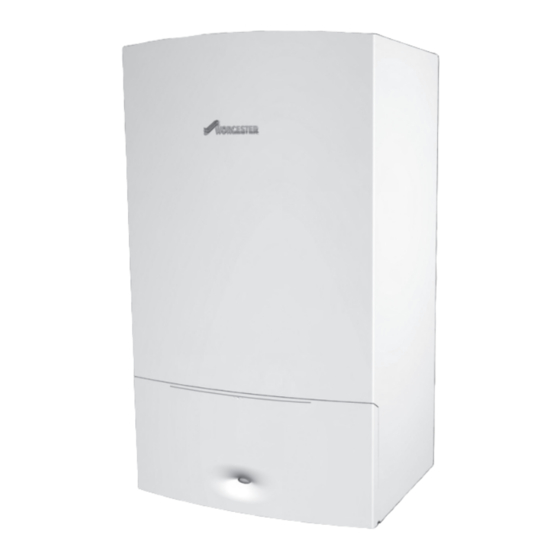
- Page 1 INSTALLATION COMMISSIONING AND SERVICING INSTRUCTIONS WALL HUNG RSF GAS FIRED CONDENSING COMBINATION BOILER GREENSTAR CDi CLASSIC FOR SEALED CENTRAL HEATING SYSTEMS AND MAINS FED DOMESTIC HOT WATER The appliances are for use with: Natural Gas or L.P.G. (Cat. II type C13, C33) Natural Gas: 29CDi GC number 47-406-34 34CDi GC number 47-406-36 38CDi GC number 47-406-38...
-
Page 2: Table Of Contents
CONTENTS CONTENTS KEY TO SYMBOLS ........3 SERVICING AND SPARES . -
Page 3: Key To Symbols
The following keywords are defined and can be used in this document: If you are in any doubt, contact the Worcester Technical helpline • NOTE indicates a situation that could result in damage to property or (0844 892 3366). - Page 4 KEY TO SYMBOLS manufacturer's instructions by competent persons and that it meets the BUILDING REGULATIONS PART L 1B 2010 - BOILER REPLACEMENT requirements of the appropriate Building Regulations. For boiler replacement on an existing system, it is not necessary to zone the system, compliance with the zone requirements can be achieved by The Benchmark Checklist can be used to demonstrate compliance with a single room thermostat or programmable room thermostat.
-
Page 5: Appliance Information
APPLIANCE INFORMATION APPLIANCE INFORMATION GENERAL INFORMATION STANDARD PACKAGE: Wall hung gas fired condensing combi boiler for central heating and domestic hot water Wall mounting plate Hanging bracket Pre-plumbing manifold Hardware pack Charging Link Assembly Literature pack Bottom panel Trap / Siphon Outlet Connection (22 mm Plastic Pipe) 6720647631-02.1Wo max. -
Page 6: Layout & Components
APPLIANCE INFORMATION LAYOUT & COMPONENTS Fig. 3 Boiler components 6 720 803 599 (2012/06) - Page 7 APPLIANCE INFORMATION The diagram opposite shows the controls in the servicing position and excludes the outer case FLAME VIEWING WINDOW IGNITION ELECTRODES AND FLAME SENSE ELECTRODE HEAT EXCHANGER reset OVERHEAT THERMOSTAT ACCESS POINT FOR CLEANING HEAT EXCHANGER PLATE TO PLATE DHW HEAT EXCHANGER MODULATING PUMP PRESSURE RELIEF VALVE DRAIN POINT...
-
Page 8: Technical Data
APPLIANCE INFORMATION TECHNICAL DATA NATURAL GAS L.P.G DESCRIPTION UNITS Domestic hot water Min. heat input 11.5 11.5 14.5 14.5 Max. rated heat output 30.9 35.0 40.0 42.0 30.9 35.0 40.0 42.0 Max. rated heat input 30.9 35.0 40.0 42.0 30.9 35.0 40.0 42.0... -
Page 9: Pre-Installation
PRE-INSTALLATION PRE-INSTALLATION MAINS SUPPLY 3.2.1 ELECTRICAL SUPPLY CLEANING PRIMARY SYSTEMS • Supply: 230V - 50 Hz, 140 Watts NOTICE: • Cable: PVC insulated 0.75 mm2 (24 x 0.2 mm) temperature rated to B All the following Pre-Installation sections must be read 90°C. -
Page 10: Water Systems And Pipe Work
PRE-INSTALLATION USE IN HARD WATER AREAS: SYSTEM FILL Normally there is no need for water treatment to prevent scale formation Heating Mains as the maximum temperature of the HW heat exchanger is limited by the supply return Hose union electronic control. In areas where temporary water hardness exceeds 200 ppm, consideration may need to be given to the fitting of a scale Test point... -
Page 11: Condensate Pipe Work
PRE-INSTALLATION CONDENSATE PIPE WORK NOTICE: B Where a new or replacement boiler is being installed, access to an internal “gravity discharge” point should be one of the factors considered in determining boiler location. B The condensate pipe must be nominally 22mm Ø... -
Page 12: External Connections
PRE-INSTALLATION 3.4.2 EXTERNAL CONNECTIONS NOTICE: Freezing conditions B Pipe work length should be kept to a minimum and the route as vertical as possible. B Weather proof insulation must be used. NOTICE: Condensate waste B Care should be taken when siting a soak-away to avoid obstructing existing services. -
Page 13: Pressure Relief Pipe Work
PRE-INSTALLATION NOTICE: Unheated internal areas. B Internal pipe runs in unheated areas such as lofts, basements and garages should be treated as external runs. 500mm min. 25mm min. 400mm min. 6720646608-123.1Wo Fig. 16 Pressure relief pipe work Fig. 14 Soak away Outside wall Drain pipe External drain... - Page 14 PRE-INSTALLATION SERVICING CLEARANCES BATHROOMS: A boiler fitted with a non-mechanical timer or with no timer can be installed in zone 2 or outside the shaded area . 960mm A boiler with a mechanical timer or RF mechanical timer with room thermostat must only be installed outside the shaded area.
-
Page 15: Plumbing Manifold
PRE-INSTALLATION PLUMBING MANIFOLD CONNECTIONS: Heating System: 22mm compression fittings DHW: 15mm compression fittings Gas: 22mm compression fittings Use the fittings supplied in the Hardware pack. 1. CH Flow 22 mm 2. DHW Out 15 mm 3. Mains Gas Supply 22 mm 4. -
Page 16: Flue Options
PRE-INSTALLATION FLUE OPTIONS The Greenstar CDi has the option of three horizontal RSF (60/100 Horizontal extended flue with 2x90° bends telescopic, 60/100 longer telescopic and 80/125 telescopic) flue Flue option 4 100mmØ 125mmØ system and two vertical RSF (60/100 or 80/125) regular flue systems: 29CDi 4,000mm 12,000mm... - Page 17 PRE-INSTALLATION 350 mm - 570 mm 130 mm Min 500 mm 300 mm Flat roof 6720643895-12.1Wo 6 720 803 599 (2012/06)
-
Page 18: Flue Terminal Positions
PRE-INSTALLATION FLUE TERMINAL POSITIONS All measurements in millimetres 52mm 104mm 1,500 1,500 300 300 300 300 1,200 Boundary Line Fig. 19 Flue terminal positions NOTICE: B All measurements are the minimum clearances required. B Terminals must be positioned so to avoid combustion products entering the building. B Support the flue at approximately one metre intervals and at a change of direction, use suitable brackets and fittings (flue brackets 100mm x 6 part number:7 716 191 173, flue bracket 125mm part number: 7 716 191 174). -
Page 19: Plume Management Terminal Positions
PRE-INSTALLATION 3.10 PLUME MANAGEMENT TERMINAL POSITIONS All measurements in millimetres Flue terminal guard 7 716 191 176 ±45° Plume re-direction: 180° Flue Exhaust Outlet 1,500 Air Intake ±80° 1,200 Boundary Line Fig. 20 Plume terminal positions NOTICE: B All measurements are the minimum clearances required. B Refer to previous page for all concentric flue terminal positions unless the flue position is specified on the figure above “Plume terminal positions”. -
Page 20: Installation
INSTALLATION INSTALLATION WARNING: All the previous Pre-Installation sections must be read and requirements met before starting boiler or flue installation. UNPACKING WALL FRAME AND ANCILLARY ITEMS LIFTING AND CARRYING PRECAUTIONS: WARNING: B Lift only a manageable weight, or ask for help. B When lifting the boiler, bend the knees, and keep the back straight and feet apart. -
Page 21: Wall Mounting Plate Flue Opening
INSTALLATION WALL MOUNTING PLATE FLUE OPENING CAUTION: Ensure there are no pipes, electric cables, damp proof courses or other hazards before drilling. min. 225 mm 85 mm SAFETY: All relevant safety precautions must be undertaken. Protective clothing, foot wear, gloves and safety goggles must be worn as appropriate. FIXING THE POSITION OF THE WALL MOUNTING PLATE: 160 mm •... -
Page 22: Charging Link (Filling Loop)
INSTALLATION CHARGING LINK (FILLING LOOP) B Do not attempt to turn the brass hexagon connectors. B Ensure that the white plastic control tap on the Charging Link is turned B Fully close the isolating valves on both the cold water inlet and CH fully into its closed position, see diagram 3. -
Page 23: Unpacking The Appliance
INSTALLATION UNPACKING THE APPLIANCE 1. With the wall frame and ancillary items removed (see page 22), lay the carton (A) on its back. 2. Open the carton bottom flaps and fold under boiler. Do not remove the packaging base. 3. Stand carton (A) with boiler upright on the packaging base (B). 4. -
Page 24: Fitting The Appliance/Boiler Connections
INSTALLATION FITTING THE APPLIANCE/BOILER CONNECTIONS Do not lift by the CAUTION: Isolate the mains gas supply before starting top case panel. any work and observe all relevant safety precautions. GAS AND WATER CONNECTIONS: B System pipes may be run vertically upwards behind the boiler or below it. -
Page 25: Flue Installation
INSTALLATION FLUE INSTALLATION HORIZONTAL FLUE (60/100mm diameter) For vertical flues and 80/125mm horizontal flues, please refer to separate Flue Kit instructions. Apply silicone lubricant to the sealing surfaces of the 635mm flue components to ease assembly of flue components. Min. 500mm cut length WALL 85 mm... -
Page 26: Installing The Standard Flue
INSTALLATION 4.6.4 INSTALLING THE STANDARD FLUE RE-DIRECTING THE FLUE DISCHARGE 1. Set the flue length to the distance required, secure with screw and 1. Using a suitable tool, release the clips (1 & 2) the terminal end and seal joint with the aluminium tape supplied. rotate through 180°. -
Page 27: Condensate Connection
INSTALLATION CONDENSATE CONNECTION Never terminate or discharge into any open source, including; sink, bath, shower, bidet, toilet etc. Any external condensate pipe work of excessive runs should be protected with weather resistant insulation to help prevent freezing. B Ensure that the condensate drain is 22mm diameter plastic pipe. It must fall at least 52mm per metre towards the outlet B A 22mm adaptor pipe is contained in the fitting pack. -
Page 28: Electrical
INSTALLATION ELECTRICAL CAUTION: ISOLATE THE MAINS ELECTRICITY SUPPLY BEFORE STARTING ANY WORK AND OBSERVE ALL RELEVANT SAFETY PRECAUTIONS Danger of short circuit: When connecting the cables ensure that no cable pieces fall inside the control panel. Mains supply to the boiler must be through a fused double pole isolator situated next to the appliance. -
Page 29: Position Of Wired Components
Blue FROST STAT ST17 Yellow Green (OPTIONAL) Black EMS BUS contacts Yellow (for FX controls) Grey Blue Black WORCESTER 24V CONTROLS OPTION, PLUG IN POINT (under blanking cover on fascia) Grey White Black 230V~ Orange Orange Orange Orange White Black... -
Page 30: Commissioning
COMMISSIONING COMMISSIONING 3. Check that the pressure relief connector, located on the right hand side at the bottom of the wall frame, is in the up position. PRE-COMMISSIONING CHECKS CAUTION: ISOLATE THE MAINS SUPPLIES BEFORE STARTING ANY WORK AND OBSERVE ALL RELEVANT SAFETY PRECAUTIONS 1. -
Page 31: Starting The Appliance
COMMISSIONING 9. Refill the system up to 1 bar. Turn the white control tap (C) to its closed position and then remove the charging key by turning back to its “unlock” position and withdrawing. 10. Place the charging key (D) in its storage position (E) on the bottom cover of the boiler. -
Page 32: Water Treatment
COMMISSIONING WATER TREATMENT ON/OFF button NOTICE: Cover or position for optional plug-in control B ARTIFICIALLY SOFTENED WATER MUST NOT BE Display USED TO FILL THE CENTRAL HEATING SYSTEM. System pressure gauge Reset button ENSURE THAT THE SYSTEM HAS BEEN CLEANED AS ON PAGE 9 OF THESE INSTRUCTIONS. -
Page 33: Checking The Gas Rate
COMMISSIONING B If left in the Performance test mode the control will return to normal 5.5.2 CHECKING THE GAS RATE operation after 15 minutes. B The gas rate should be measured at the gas meter after 10 minutes B Close the gas isolation valve and remove the manometer. operation at maximum. -
Page 34: Finishing Commissioning
COMMISSIONING FINISHING COMMISSIONING The boiler has been factory set, so there should be no need to adjust combustion settings. REPLACE OUTER CASING: 1. Replace outer casing making sure that the securing points are properly located. B Press the clip (A) downwards to secure casing on top. B Retighten bottom two screws (B). -
Page 35: Servicing And Spares
SERVICING AND SPARES SERVICING AND SPARES CAUTION: TURN OFF THE GAS SUPPLY AND ISOLATE THE MAINS SUPPLIES BEFORE STARTING ANY WORK AND OBSERVE ALL RELEVANT SAFETY PRECAUTIONS. NOTICE: After replacement of any components always check for gas tightness where relevant and carry out functional checks as described in the commissioning section. -
Page 36: Fan Pressure Test
SERVICING AND SPARES 6.1.2 FAN PRESSURE TEST FAN PRESSURE TEST This test is to determine if the heat cell requires cleaning/ Clean the Heat Ex. Heat Ex. ok attention NG Boilers 42 CDi: - 4.8 38 CDi: - 4.4 SET THE BOILER TO MAXIMUM 34 CDi: - 5.3 B When running in the Performance test mode, the... -
Page 37: To Clean The Heat Exchanger
SERVICING AND SPARES 3. Clean the heat exchanger from top to bottom using the brush. NOTICE: Air/Gas ratio B After servicing the CO/CO must be checked using the procedure in the section “Setting the air/gas ratio” on page 38. B The setting of the air/gas ratio must be carried out by a competent person. -
Page 38: To Check The Diaphragm In Burner Cover
SERVICING AND SPARES SETTING THE AIR/GAS RATIO 3. Remove the burner (H) and clean components. Do not use a wire brush. NOTICE: Air/Gas ratio B The setting of the gas ratio must be carried out by a competent person. Setting the air/gas ratio must not be attempted unless the person carrying out the operation is equipped with a combustion analyser conforming to BS 7927 and is competent in its use. -
Page 39: Replacement Of Parts
SERVICING AND SPARES B Fit new plastic sealing cover onto the max adjuster. B Replace the brass screw over the min adjuster on the valve. B Re-assemble and refit boiler case. adjust adjust Inlet pressure 6720647361-48.1Wo test point Fig. 51 Setting the Air/Gas ratio REPLACEMENT OF PARTS CAUTION: TURN OFF THE GAS SUPPLY AND ISOLATE THE MAINS SUPPLIES BEFORE STARTING ANY WORK... - Page 40 SERVICING AND SPARES 3. PRIMARY SENSOR 6. EXPANSION VESSEL B Press retaining clip on plastic moulding and pull upwards until clear of B Drain the appliance. pocket in heat exchanger. 6.1 Remove locking screw (D). B Separate sensor from connector, coat new sensor with heat 6.2 Undo the union connection (E) at the bottom of the expansion conductive paste and replace.
- Page 41 SERVICING AND SPARES 7. GAS VALVE B Isolate gas supply at boiler gas cock. B Pull out air inlet tube (A). B Undo top gas connection (B) to gas valve. B Undo bottom gas connection (C) to gas valve. B Undo two securing screws (D)on the underside of casing. B Pull valve up and forward out of boiler.
- Page 42 SERVICING AND SPARES 12. FAN ASSEMBLY B Re-assemble with the new gasket and secure with the screws (F) removed earlier. NOTICE: Air/Gas ratio B After re-assembly the combustion must be checked using the procedure in the section “Setting the air/gas ratio.”...
- Page 43 SERVICING AND SPARES 3. Remove air/gas manifold (I) 1. Remove plastic nut (A) from the base of the inner casing 6720647361-67.1Wo Fig. 66 Heat exchanger removal 1 2. Remove return pipe at the bottom of heat exchanger. Fig. 63 Air/gas manifold 4.
- Page 44 SERVICING AND SPARES 17. DIVERTER VALVE MOTOR There is no need to drain the appliance. B Disconnect the electrical connector from the diverter valve motor. 1. Pull the motor assembly (A) towards you. The assembly will slide free from the valve. B To refit, follow the above in reverse.
- Page 45 SERVICING AND SPARES 21. PUMP HEAD B Using the cartridge tag, withdraw the flow restrictor housing. B Ensure the appliance has been fully drained. B If the regulator housing has become stuck, a pair of long nosed pliers may be used to grip the housing. 1.
- Page 46 SERVICING AND SPARES 6720647361-43.1Wo Fig. 76 Drain tap removal 26. HYDRAULIC BLOCK B Ensure the appliance has been fully drained. B Disconnect the electrical connections to the NTC, Turbine and pump. B Undo the nuts securing the copper water pipes to the manifold (there is no need to remove the gas pipe).
- Page 47 SERVICING AND SPARES 27. CH PRESSURE RELIEF VALVE 2. Withdraw the pressure relief valve (A). To refit, follow the above in reverse. B Remove the Hydraulic block from the boiler (See Removing the Hydraulic Block). B Ensure any seals that have been disturbed are renewed. 1.
-
Page 48: Short Parts List
SERVICING AND SPARES SHORT PARTS LIST Burner Burner skin seal 8 716 116 067 0 8 718 006 658 0 8 711 004 168 0 GC No. H26 536 GC No. E27 200 0GC No. E27 201 Gas valve Temperature limit Set of electrodes 8 718 221 347 0 sensor... -
Page 49: Fault Finding & Diagnosis
This fault finding information is for guidance only. On completion of the Service/Fault-Finding task which has required the Worcester, Bosch Group cannot be held responsible for breaking and remaking of electrical connections, check: (a) EARTH costs incurred by persons not deemed to be competent. -
Page 50: Central Heating Function
FAULT FINDING & DIAGNOSIS CENTRAL HEATING FUNCTION 6720647361-59.2Wo 6 720 803 599 (2012/06) -
Page 51: Preheat And Dhw Function
FAULT FINDING & DIAGNOSIS PREHEAT AND DHW FUNCTION 6720647361-60.2Wo 6 720 803 599 (2012/06) -
Page 52: Protection Function
FAULT FINDING & DIAGNOSIS PROTECTION FUNCTION Run autofroststat Boiler temperature function below 8 Pump runs for Pump antiseize 5 seconds every 24 hours DHW demand active Holiday mode Frost protection active set to ON All other demands not active 6720647361-61.1Wo 6 720 803 599 (2012/06) - Page 53 FAULT FINDING & DIAGNOSIS 6 720 803 599 (2012/06)
- Page 54 Failure to install and commission according to the manufacturer’s instructions and complete this Benchmark Commissioning Checklist will invalidate the warranty. This does not affect the customer’s statutory rights. If yes, and if required by the manufacturer, has a water scale reducer been fitted? CONDENSING BOILERS ONLY The condensate drain has been installed in accordance with the manufacturer’s instructions and/or BS5546/BS6798 If the condensate pipe terminates externally has the pipe diameter been increased and weatherproof insulation fitted?
-
Page 55: Service Record
Service Record It is recommended that your heating system is serviced regularly and that the appropriate Service Interval Record is completed. Service Provider Before completing the appropriate Service Record below, please ensure you have carried out the service as described in the manufacturer’s instructions. - Page 56 LITERATURE: 0844 892 9800 TRAINING: 01905 752526 SALES: 01905 752640 Worcester, Bosch Group Cotswold Way, Warndon, Worcester WR4 9SW. Tel. 0844 892 9900 Worcester, Bosch Group is a brand name of Bosch Thermotechnology Ltd. worcester-bosch.co.uk 6 720 803 599 (2012/06)