
Related Manuals for Uniden Guardian App Cam 25


Summary of Contents for Uniden Guardian App Cam 25
- Page 1 Guardian App Cam 25 IP Camera For more exciting new products please visit our website: Australia: www.uniden.com.au...
-
Page 2: Important Safety Instructions
Disconnect the power adaptor during long periods between usage. • Use only the accessories and power adaptors supplied by Uniden. • WIRELESS DEVICES OPERATING RANGE Ensure the signal reception is acceptable between the camera(s) and the WiFi router. -
Page 3: Table Of Contents
CONTENTS IMPORTANT SAFETY INSTRUCTIONS ....................2 CONTENTS ........................(this page)3 OVERVIEW ............................4 FEATURES ............................5 What’s in the box? ..........................6 GETTING TO KNOW YOUR CAMERA ..................... 7 INSTALLING THE CAMERA ......................8 NETWORK SETUP .......................... 10 Overview ............................10 Prerequisites .......................... -
Page 4: Overview
No PC interface is needed to view video on your smartphone or wireless devices. The wireless Guardian App Cam 25 offers superior quality video with true colour. It is suitable for day or night time use. -
Page 5: Features
• Supports up to 32GB microSD (not included) • High quality H.264 video • Audio reception • Guardian App Cam 25 Indoor/Outdoor Camera IP66 weather-rated • IR cut filter switch • Compact design • Night vision range – up to 12 metrest •... -
Page 6: What's In The Box
WHAT’S IN THE BOX? Antenna Guardian App Cam 25 Camera Camera Stand Screws and Anchors Quick Start Guide 5V/1.5V Power Adaptor Micro USB to Ethernet Cable Need Help? Get answers at our website: www.uniden.com.au for Australian model If any item is missing or damaged, contact your place of purchase immediately. -
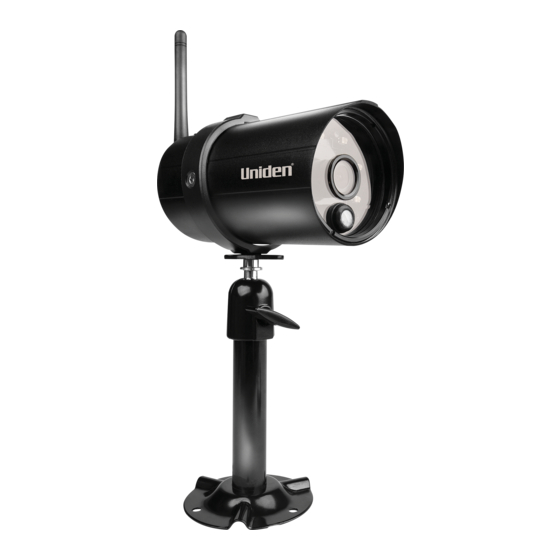
Page 7: Getting To Know Your Camera
GETTING TO KNOW YOUR CAMERA Antenna Infrared LEDs Power Indicator PIR sensor Signal indicator Camera Stand SMA Connector microSD Power cable/ card slot Reset button microUSB to RJ45... -
Page 8: Installing The Camera
You can mount the Guardian App Cam 25 with the stand on the bottom (on a flat surface such as a table-top), on the side (on a wall), or on the top (on the ceiling or under an eave or overhang). - Page 9 4. Set the mounting post to the correct angle, then tighten the wingnut until the post is locked into place. 5. After the Guardian App Cam 25 camera is installed, reconnect power.
-
Page 10: Network Setup
NETWORK SETUP OVERVIEW There are two methods of connecting the Guardian App Cam 25 camera to your mobile device. One method is wireless and the other method has the camera connected directly to the router using the provided microUSB to Ethernet cable. -
Page 11: Connect Camera And Mobile Device
CONNECT CAMERA AND MOBILE DEVICE 1. If you are connecting wirelessly, from your device’s settings, go to WiFi. Select the Guardian App Cam 25 to connect your device to it. The camera listing will be HD-XXXXXX where XXXXXX are the last 6 digits on the camera label. -
Page 12: Set Time Zone
Your camera will reboot and reconnect to the router. If using the wired set up process, unplug the Ethernet cable from the router and camera during the reboot process. Wait 2 - 3 minutes until the camera’s LEDs both return to the steady on state to continue. 4. -
Page 13: Setting Up Email Alert
SETTING UP EMAIL ALERT Set up the email alert so you can be notified when the motion sensor triggers automatic recording. 1. In LIVE view, tap the Back icon ( In LIVE view, tap the Back icon ( ), the System icon ( ), and then the System Setting icon ( 2. - Page 14 Setting up a gmail account is recommended. Check SSL and use the data in the following table: For Gmail SMTP Server smtp.gmail.com Enter this. SMTP Port Enter this. User Name XXXX@gmail.com Enter your gmail address in full, including ‘@gmail.com’. Password XXXXXXXXXXX Enter the password for this gmail account.
-
Page 15: Using The App
Guardian App Cam 25 operations and to take snapshots and remotely view LIVE or recorded video on your smart phone or tablet device. You can view up to 12 independant Guardian App Cam 25 cameras on the Uniden AppCam app. -
Page 16: Snapshot Vs Live Video Screen
SNAPSHOT VS LIVE VIDEO SCREEN The Snapshot and LIVE Video screens control operations. The Snapshot screen lets you add more cameras, configure advanced settings, access and manage recorded files, update the camera connection status, and check app version. The LIVE Video screen lets you take snapshots and record live video. You can also control the sound. - Page 17 System Settings icon allows you to configure the advanced settings, remove the camera connection, and play back the recorded video clips. Tap the following three icons display in the center of the snapshot image: Accesses System Information - Advanced Screen. This screen lets you configure the camera and set notification alerts.
- Page 18 Information to set up and enable PIN lock or to check the app information. Android The PIN lock is a unique security code you must enter when you start the • app. APP information displayed includes APP and API version information. •...
-
Page 19: Enable Event Notify
Enable Event notify The system generates event notifications when something triggers the motion sensors on your cameras. Tap the box to turn this feature on. Advanced Tap the Advanced tab to configure various settings in your device, such as the time zone, device password, and video setting. These settings are displayed in a list of fields, each field contained in its own block. - Page 20 Normal: The image on the device appears as seen by the naked eye. Flip: Use this option to flip the images (i.e., if you want to view the images turned upside down). Mirror: Use this option to view the images as it would appear if seen in a mirror (reversed side).
- Page 21 Delete Camera Connection Tap the Delete icon ( ) to remove a camera from your system. Tap to delete it. A confirmation screen to keep the camera connection or displays. Event List Details Android 1. Tap the Event List icon ( ) to select a date range of recorded files to display.
- Page 22 1. Tap the Event List icon ( ) and then tap the Search icon to set a date range of recorded files to display. 2. Tap the start date and end dates to set the date range. A list of files displays.
-
Page 23: Live Video Screen Overview
LIVE VIDEO SCREEN OVERVIEW The Live Video screen lets you take snapshots, record video, and turn the sound from the live video on and off. Tap this icon to take a snapshot of the current image. Snapshots are saved in your mobile device. Turn the audio on and off when you’re viewing live video. -
Page 24: Turn Off The App
TURN OFF THE APP 1. Tap your device’s button. The button displays. MENU ExIT 2. Tap . The app closes and returns to the device’s main screen. ExIT For the iPhone, press the button. HOME... -
Page 25: Common Operations
COMMON OPERATIONS To Do This ... Do This: Start Recording From the Live Video screen, tap . The camera will record for 1 minute. View Live Video Tap the image on the Snapshot screen. View Recorded Files 1. From the Snapshot screen, tap 2. -
Page 26: Maintaining Your System
MAINTAINING YOUR SYSTEM TAKING CARE OF YOUR CAMERA When dust and grime builds up on the camera lens and glass, it affects night vision capability. The infrared light reflects off of the dust and grime, limiting the camera’s “vision.” Use a microfiber cloth to regularly clean the cameras or when night vision video is cloudy or unclear. -
Page 27: Troubleshooting
TROUBLESHOOTING HOW TO IMPROVE THE WIRELESS SIGNAL qUALITY If possible, remove obstacles in between camera and receiver that might reflect the signal. These could include furniture, cabinets, and walls. If the wireless signal is not improved, relocate the camera closer to the receiver. TROUBLESHOOTING If... - Page 28 If... Try this... No image appears • Make sure the power adaptor is not damaged or defective and is plugged into an electrical outlet with power. • Relocate the camera to obtain the best reception of wireless signals. • Make sure the camera is properly configured in the app.
- Page 29 If... Try this... Memory card Make sure the memory card is correctly inserted and error formatted. Please backup the data before formatting. This Format function will erase all data on the memory card. Wrong date and • Make sure you’ve selected the correct time zone. time are shown Unexpected date and time can result in an incorrect recording schedule.
-
Page 30: Specifications
SPECIFICATIONS General Power 100~240V switching power supply DC 5V/1.5A Power Consumption 750mA max Camera Body Dimension 96mm x 48mm diam. Weight (Main Body) 7.3 oz (210g) Operating Temperature 14° ~ 122°F (-10° ~ 50°C) Network Wireless Technology IEEE 802.11 b/g/n Network Connection Ethernet (10/100 Base-T/Base -TX);... - Page 31 Audio/Video Image Compression H.264 HD 1280x720 Image Resolution Recording Frame Rate 720P@20FPS Supported Mobile Internet Device Android Requirement Android 4.1x or above iOS Requirement iPhone 4s, iPad Mini, iPad 2with iOS 7.0 or above Hardware Requirement • 1.5GHz dual core or above • 1GB or above internal memory...
-
Page 32: Warranty
Terms of Warranty: Uniden Aust warrants to the original retail purchaser only that the Guardian App Cam 25 (“the Product”), will be free from defects in materials and craftsmanship for the duration of the warranty period, subject to the limitations and exclusions set out below. - Page 33 Product, together with satisfactory evidence of your original purchase (such as a legible copy of the sales docket) to Uniden at the address shown below. You should contact Uniden regarding any compensation that may be payable for your expenses incurred in making a warranty claim.
- Page 34 © 2014 Uniden Australia Pty Limited.