Table of Contents

Related Manuals for Sony a5110


Summary of Contents for Sony a5110
- Page 1 4-543-701-11(1) Interchangeable Lens Digital Camera Instruction Manual E-mount “Help Guide” (Web manual) Refer to “Help Guide” for in-depth instructions on the many functions of the camera. http://rd1.sony.net/help/ilc/1430/h_zz/ ILCE-5100...
- Page 2 “Help Guide” is an on-line manual. You can read the “Help Guide” on your computer or smartphone. Refer to it for in-depth instructions on the many functions of the camera. URL: http://rd1.sony.net/help/ilc/1430/h_zz/ Viewing the Guide This camera is equipped with a built-in instruction guide. MENU (In-Camera Guide) In-Camera Guide The camera displays explanations for MENU items and the setting values.
-
Page 3: Important Safety Instructions
• Do not incinerate or dispose of in fire. • Do not handle damaged or leaking lithium ion batteries. • Be sure to charge the battery pack using a genuine Sony battery charger or a device that can charge the battery pack. - Page 4 • Keep the battery pack out of the reach of small children. • Keep the battery pack dry. • Replace only with the same or equivalent type recommended by Sony. • Dispose of used battery packs promptly as described in the instructions.
-
Page 5: Regulatory Information
The number below is for the FCC related matters only. Regulatory Information Declaration of Conformity Trade Name: SONY Model No.: ILCE-5100 Responsible Party: Sony Electronics Inc. Address: 16530 Via Esprillo, San Diego, CA 92127 U.S.A. Telephone No.: 858-942-2230 This device complies with Part15 of the FCC Rules. Operation is subject to the... -
Page 6: For Customers In Canada
For EU product compliance: Sony Deutschland GmbH, Hedelfinger Strasse 61, 70327 Stuttgart, Germany Hereby, Sony Corporation, declares that this equipment is in compliance with the essential requirements and other relevant provisions of Directive 1999/5/EC. For details, please access the following URL: http://www.compliance.sony.de/... - Page 7 Some certification marks for standards supported by the camera can be confirmed on the screen of the camera. Select MENU t (Setup) 5 t [Certification Logo]. If display is not possible due to problems such as camera failure, contact your Sony dealer or local authorized Sony service facility.
- Page 8 Table of contents Preparing the camera Step 1 P. 9 – Checking the supplied items – Identifying parts – Inserting the battery pack – Charging the battery pack – Attaching/removing the lens – Inserting a memory card (sold separately) – Setting the clock Basic operation Step 2 P.
-
Page 9: Checking The Supplied Items
Checking the supplied items First check the model name of your camera (page 8). The accessories supplied differ depending on the model. The number in parentheses indicates the quantity. Supplied with all models • Instruction Manual (this manual) • Camera (1) •... -
Page 10: Identifying Parts
Identifying parts I Microphone J Lens K Lens release button L Mount M Image sensor N Lens contacts Do not cover this part during movie recording. Do not touch this part directly. When the lens is removed A Shutter button B ON/OFF (Power) switch C Hook for shoulder strap (N Mark) -
Page 11: Control Wheel
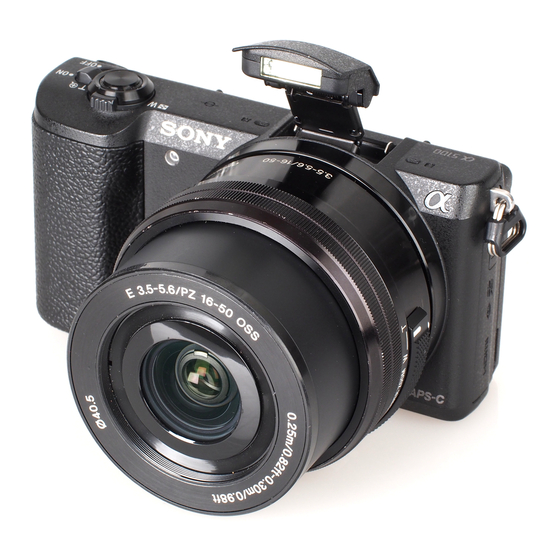
PW20 AC Adaptor (sold accessories for the Multi/Micro separately). Insert the connection USB Terminal, visit the Sony plate into the battery website, or consult your Sony dealer compartment, and then pass the or local authorized Sony service cord through the connection plate facility. - Page 12 Lens E55 – 210 mm F4.5 – 6.3 OSS (supplied with See page 39 on the specifications of ILCE-5100Y) the lenses. E PZ 16 – 50 mm F3.5 – 5.6 OSS (supplied with ILCE-5100L/ILCE-5100Y) A Zooming/Focusing ring B Zooming lever A Focusing ring C Mounting index B Zooming ring...
-
Page 13: Inserting The Battery Pack
Inserting the battery pack Battery eject lever Open the cover. Insert the battery pack. • While pressing the battery eject lever, insert the battery pack as illustrated. Make sure that the battery eject lever locks after insertion. • Closing the cover with the battery inserted incorrectly may damage the camera. -
Page 14: Charging The Battery Pack
Charging the battery pack For customers in the USA and Canada Power cord (Mains lead) Charge lamp Lit: Charging Off: Charging finished Flashing: Charging error or charging paused For customers in countries/ temporarily because the camera is not regions other than the USA within the proper temperature range and Canada Connect the camera to the AC Adaptor (supplied),... -
Page 15: Charging By Connecting To A Computer
• When charging is finished, disconnect the AC Adaptor from the wall outlet (wall socket). • Be sure to use only genuine Sony brand battery packs, micro USB cable (supplied) and AC Adaptor (supplied). • Power is not supplied during shooting/playback if the camera is connected to a wall outlet (wall socket) with the supplied AC Adaptor. - Page 16 • The number of images that can be recorded is for shooting under the following conditions: – Using a Sony Memory Stick PRO Duo™ (Mark2) media (sold separately). – When an E PZ 16 – 50 mm F3.5 – 5.6 OSS lens is attached.
- Page 17 Attaching/removing the lens Set the power switch of the camera to OFF before you attach or remove the lens. If the cap or the packaging lid is attached, remove it from the camera or the lens. • Quickly change the lens somewhere away from dusty locations to keep dust or debris from getting inside the camera.
-
Page 18: Removing The Lens
Removing the lens Lens release button Press the lens release button all the way in and turn the lens counterclockwise until it stops. Notes • If dust or debris gets inside the camera while you are changing the lens and adheres to the surface of the image sensor (the part that converts the light source to a digital signal), it may appear as dark spots on the image, depending on the shooting environment. -
Page 19: Memory Cards That Can Be Used
Inserting a memory card (sold separately) Ensure the notched corner faces correctly. Open the memory card/terminal cover. Insert the memory card (sold separately). • With the notched corner facing as illustrated, insert the memory card until it clicks into place. Close the memory card/terminal cover. -
Page 20: Setting The Clock
To remove the memory card/battery pack Memory card: Push the memory card in once to eject the memory card. Battery pack: Slide the battery eject lever. Be sure not to drop the battery pack. Notes • Never remove the memory card/battery pack when the access lamp (page 11) is lit. This may cause damage to data in the memory card. - Page 21 Shooting still images/movies Shutter button W/T (zoom) lever W: zoom out T: zoom in MOVIE Shooting still images Press the shutter button halfway down to focus. When the image is in focus, a beep sounds and the z or indicator lights.
-
Page 22: Viewing Images
Viewing images W: zoom out T: zoom in Control wheel Select images: B (next)/b (previous) or turn the (Playback) control wheel Set: z (Delete) Press the (Playback) button. Selecting next/previous image Select an image by pressing B (next)/b (previous) on the control wheel or by turning the control wheel. -
Page 23: Menu Items
Introduction of other functions Other functions can be operated using the control wheel, MENU button, etc. MENU Control wheel Touch panel Control wheel DISP (Display Contents): Allows you to change the screen display. ISO (ISO): Allows you to set the sensitivity based on the brightness. (Exposure Comp.): Allows you to compensate the exposure and brightness for the entire image. - Page 24 Quality Sets the image quality for still images. Panorama: Size Selects the size of panoramic images. Panorama: Direction Sets the shooting direction for panoramic images. File Format Selects the movie file format. Record Setting Selects the size of the recorded movie frame. Sets whether to simultaneously record an XAVC S Dual Video REC movie and MP4 movie or an AVCHD movie and...
-
Page 25: Custom Settings
Sets the function to track a subject and continue Center Lock-on AF focusing when pressing the center button in the shooting screen. Selects to detect faces and adjust various settings Smile/Face Detect. automatically. Sets to automatically release the shutter when a smile is detected. Soft Skin Effect Sets the Soft Skin Effect and the effect level. - Page 26 Sets auto review to display the captured image after Auto Review shooting. Sets the screen display modes that can be selected by DISP Button pressing DISP on the control wheel. Enhances the outline of in-focus ranges with a Peaking Level specific color when focusing manually.
- Page 27 Custom Key Settings Assigns a desired function to the button. MOVIE Button Sets whether to always activate the MOVIE button. (Wireless) Send to Smartphone Transfers images to display on a smartphone. Backs up images by transferring them to a computer Send to Computer connected to a network.
- Page 28 Slide Show Shows a slide show. Rotate Rotates the image. Enlarge Image Enlarges the playback images. Outputs still images in 4K resolution to an HDMI- 4K Still Image PB connected TV that supports 4K. Protect Protects the images. Specify Printing Adds a print order mark to a still image.
- Page 29 Format Formats the memory card. Sets the method used to assign file numbers to still File Number images and movies. Changes the selected folder for storing still images Select REC Folder and movies (MP4). Creates a new folder for storing still images and New Folder movies (MP4).
- Page 30 PlayMemories Online or other network services may not be available in some countries or regions. • Use the following URL for Mac applications: http://www.sony.co.jp/imsoft/Mac/ • If the software PMB (Picture Motion Browser), supplied with models released before 2011, has already been installed on your computer, PlayMemories Home will overwrite it during the installation.
-
Page 31: System Requirements
System requirements You can find the system requirements for the software at the following URL: www.sony.net/pcenv/ Installing PlayMemories Home on a computer Using the Internet browser on your computer, go to the following URL, and then install PlayMemories Home. www.sony.net/pm/ •... -
Page 32: Adding Functions To The Camera
You can add the desired functions to your camera by connecting to the application download website (PlayMemories Camera Apps™) via the Internet. http://www.sony.net/pmca/ • After installing an application, you can call up the application by touching an NFC-enabled Android smartphone to the N mark on the camera, using the [One-touch(NFC)] function. -
Page 33: Notes On Continuous Movie Recording
Movies The table below shows the approximate total recording times using a memory card formatted with this camera. The recording time for XAVC S and AVCHD movies is the recording time when shooting with [Dual Video REC] set to (h (hour), m (minute)) Capacity 2 GB 64 GB... -
Page 34: Notes On Using The Camera
• The duration of time available for movie recording is as follows when the camera starts recording with the camera’s default settings after the power of the camera has been turned off for a while. (The following values indicate the continuous time from when the camera starts recording until the camera stops recording.) Ambient temperature Continuous recording time for movies... - Page 35 On using the lenses and accessories It is recommended that you use Sony lenses/accessories designed to suit the characteristics of this camera. Using the products of other manufacturers may cause the camera not to operate to its...
- Page 36 No guarantee in the case of damaged content or recording failures Sony cannot provide a guarantee in the case of failure to record or loss or damage of recorded content due to a malfunction of the camera or recording media, etc.
-
Page 37: Specifications
Camera type: Interchangeable lens Speed range: digital camera Still images: 1/4 000 second to Lens: Sony E-mount lens 30 seconds, BULB Movies: 1/4 000 second to [Image sensor] 1/4 second (1/3 EV step), Image sensor: APS-C format (23.5 mm 1080 60i-compatible device up to ×... - Page 38 File format: Output voltage: DC 5 V, 0.5 A Still image: JPEG compliant (DCF Ver. 2.0, Exif Ver. 2.3, MPF Rechargeable battery pack Baseline), RAW (Sony ARW 2.3 NP-FW50 Format) Battery type: Lithium-ion battery Movies (XAVC S format): Maximum voltage: DC 8.4 V MPEG-4 AVC/H.264 XAVC S...
- Page 39 Lens E16 – 50 mm zoom E55 – 210 mm Lens lens zoom lens ILCE-5100L/ Camera ILCE-5100Y ILCE-5100Y Equivalent 35 mm-format focal 24 – 75 82.5 – 315 length (mm) Lens groups/elements 8 – 9 9 – 13 Angle of view 83°...
- Page 40 • YouTube and the YouTube logo are of Sony Corporation. trademarks or registered trademarks • XAVC S and of Google Inc. registered trademarks of Sony • Eye-Fi is a trademark of Eye-Fi, Inc. Corporation. • In addition, system and product • “AVCHD Progressive” and names used in this manual are, in “AVCHD Progressive”...
- Page 44 Additional information on this product and answers to frequently asked questions can be found at our Customer Support Website. © 2014 Sony Corporation Printed in Thailand...