Table of Contents
Advertisement
Quick Links
Download this manual
See also:
User Manual
Advertisement
Table of Contents

Related Manuals for Kyocera G2GO M2000


Summary of Contents for Kyocera G2GO M2000
- Page 1 G 2 G O M 2 0 0 0 u s e r g u i d e User Guide...
- Page 2 All other trademarks are the property of their respective owners. Copyright © 2009 Kyocera Wireless Corp. All rights reserved. This manual is based on the production version of the Kyocera Ringer Tones Copyright © 2000-2009 Kyocera Wireless Corp. M2000 phone. Software changes may have occurred after this printing.
-
Page 3: Air Bags
guidelines are based on standards that were developed by Additional information on SAR can be found on the Cellular independent scientific organizations through periodic and Telecommunications and Internet Association (CTIA) web-site at thorough evaluation of scientific studies. The standards include www.ctia.org. -
Page 4: Resetting The Phone
Observe restrictions, and follow any regulations or Accessories rules. Use only Kyocera-approved accessories with Kyocera phones. Potentially explosive atmospheres—Turn off your phone Use of any unauthorized accessories may be dangerous and will when you are in any area with a potentially explosive void the phone warranty if said accessories cause damage or a atmosphere. - Page 5 I and Phase II E911 Mandates issued by the FCC. www.fcc.gov/cgb/dro. Hearing Aid Compatibility (HAC) with Mobile Phones Kyocera Communications Inc. Some mobile phones and hearing devices (hearing aids and www.kyocera-wireless.com cochlear implants), when used together, result in buzzing, To purchase accessories, visit humming, or whining noises detected by the user.
-
Page 7: Table Of Contents
Table of Contents Get Started ......9 Recent Calls..... . 30 Phone Battery . - Page 8 10 Camera ......53 Camera Tips......53 Take a Picture .
-
Page 9: Get Started
Get Started Phone Battery Charge the Battery You must have at least a partial charge in the Install the Battery battery to make or receive calls. 1. With the back of the To charge the battery: phone facing you, 1. Remove the rubber press on the back cover USB cover and connect and slide it to the... -
Page 10: Battery Safety Guidelines
Battery Safety Guidelines • Replace the battery only with another qualified battery. Use of an unqualified • Do not disassemble or open the battery. battery may present a risk of fire, • Do not crush, bend, deform, puncture, or explosion, leakage, or other hazard. If you shred the battery. -
Page 11: Memory Card
Memory Card Remove the Memory Card To remove the memory card: Install the Memory Card 1. Remove the rubber memory card cover. To install the memory card: 2. Use your finger nail to 1. With the front of the phone facing you, press and release the locate the rubber memory card cover on the memory card in the slot... -
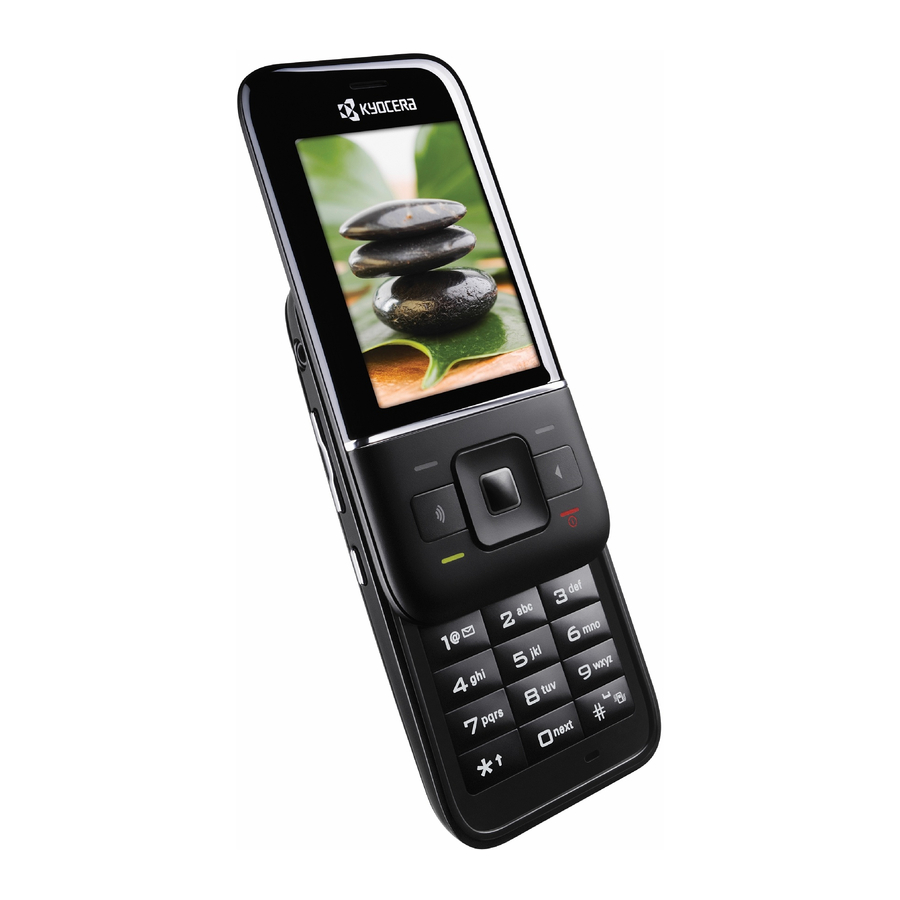
Page 12: Phone Overview
Phone Overview Get to Know Your Phone The following shows the front of the phone with the slide closed. 1. LED indicator. 2. Rewind, Play/Pause, and Fast Forward keys for the Music Player. Press the Play/Pause twice to activate the Music Player. - Page 13 The following shows the phone’s QWERTY keypad with the slide open. 1. Right softkey selects items that appear on the lower right of the display. 2. Enter key generates a carriage return in text entry. 3. Back key erases characters in text entry or returns you to the previous screen when navigating through menus.
-
Page 14: Led Indicator
The following shows the back of the phone with the slide closed. 1. Accessory eyelet (for optional straps and lanyards). 2. Jack for AC adapter (included). 3. Jack for a hands-free headset (sold separately). 4. Memory card slot. 5. Camera lens. 6. -
Page 15: Screen Icons
Screen Icons These icons may appear on your phone’s screen. New text message. The phone is operating in IS2000 (1X) digital mode. New voice and text message. The phone is in airplane mode. New voice message. The alarm clock is set. The phone is not receiving a signal. -
Page 16: Main Menu
Main Menu Press the OK key or select Menu when the phone is in idle state to access the main menu. Idle State > Level 1 > Level 2 Menu Phone Info Access these options: Build Info, Icon Keys, and User Guide. -
Page 17: Guide Conventions
Guide Conventions In this guide, the following conventions are used when describing phone features. Select means to press the Left softkey, Right softkey or OK key to select an item seen on the display. For example, “Select Menu” tells you to physically press the left softkey to choose Menu from the display. -
Page 18: Call Features
Call Features Redial a Number This section describes the basic features related to calls. 1. Press the Send key to open your call history. Power Phone Up 2. Highlight a phone number or contact and • To turn your phone on, press the End key press the Send key. -
Page 19: Volume Control
Volume Control number as a contact and assign a speed dial location to it. See “Assign Speed Dials to Adjust Volume during a Call Contacts” on page 27. Press the Volume key up or down to adjust the To call a contact that has a speed dial location: earpiece volume during a call. -
Page 20: Text Entry
Text Entry Enter Numbers with QWERTY Keypad You can enter letters, numbers, and symbols in contacts, text messages, and your banner. From the text entry field, select Options > Numbers Only and press the number key to Text Entry Modes enter your number. - Page 21 Rapid Entry with QWERTY Keypad When you press a series of keys using Rapid entry, your phone checks its dictionary and guesses at the word you are trying to spell. From a text entry field, select Options > Rapid Entry to speed up word completion. To enter words, press a key once.
-
Page 22: Text Entry Quick Reference
Text Entry Quick Reference This table gives instructions for entering letters, numbers, and symbols. To.. Do this.. Enter a letter In Normal Alpha mode, press a key. Enter a number In Numbers Only mode, press a key. Enter a symbol Use Normal Alpha mode, press the Symbol key and then a key. -
Page 23: Phone Info
Phone Info View Version Information Select Build Info to check your phone’s software and hardware information. View Phone Icons Select Icon Keys to view the icons used in your phone. Access User Guide From User Guide, access the user guide for your phone. -
Page 24: Contacts
Contacts Use Contacts to store information about a person or company. Contacts Menu Select Contacts from the main menu to access the following functions: Level 1 > Level 2 > Level 3 Contacts View All Access your existing contacts list. Add New Add a new entry to your contacts list. -
Page 25: Add Contacts
Use Fast Find Add a Code or Extension With Fast Find enabled, you can press one or When saving the phone number of an two keys to view closer matches in your automated service, you may include a pause contacts list. See “Call Contact using Fast for dialing an extension. -
Page 26: Customize Contacts
Send a Contact vCard Assign Ringers to Contacts 1. From View All, select a contact. 1. From View All, select a contact. 2. At the contact details screen, select the 2. At the contact details screen, highlight the contact name. contact name. -
Page 27: Erase Contacts
Erase Contacts Assign Speed Dials to Contacts 1. From View All, select a contact. Erase Contact Details 2. At the contact details screen, highlight a 1. From View All, select a contact. number. 2. At the contact details screen, highlight a 3. -
Page 28: Contact Groups
Contact Groups Add or Remove Contacts from Groups 1. From Groups, highlight a group. You can assign your contacts to groups. Your 2. Select Options > Edit. phone comes with default groups. You can also create your own groups. 3. If you are modifying a group you created, select Next. -
Page 29: Speed Dial List
Assign Pictures to Groups Erase All Groups 1. From Groups, select a group you have From Erase Contacts, select Groups Only > created. Yes > Yes to erase all your groups. 2. At the group details screen, scroll to the Note: You cannot recover deleted information group name. -
Page 30: Recent Calls
Recent Calls Recent Calls Menu Select Recent Calls from the main menu to access the following functions: Level 1 > Level 2 > Level 3 Recent Calls See a list of all voice calls. Incoming See a list of all voice calls you have received. Outgoing See a list of all voice calls you have made. -
Page 31: Erase Call List Records
Erase Call List Records Manage a Missed Call Alert When you have missed a call, “Missed Call” Erase a Single Record appears on your screen. You can do one of the 1. At a call list, highlight a contact. following: •... - Page 32 View Home Calls Timer View Outgoing Calls Timer Select Home Calls to view the number of calls Select Outgoing Calls to view the number of and the total call time. Select Done when calls and the total call time. Select Done when finished.
-
Page 33: Media Gallery
Media Gallery Use Media Gallery to retrieve and playback media files and other downloads. Media Gallery Menu Select Media Gallery from the main menu to access the following functions: Level 1 > Level 2 > Level 3 Media Gallery Images Access these options: Camera Pictures, Saved Images, Wallpapers, Wallpaper Shuffle, Screensavers, and Caller IDs. -
Page 34: Sounds
Assign a Caller ID Access a Playlist 1. From Caller IDs, select an image. 1. From Music, select Playlists. 2. Select Assign. 2. Choose a playlist and select Play. 3. At the contacts list, select a contact. Use the Navigation key to control the playback tools displayed. - Page 35 Assign a File Add Files to a Shuffle 1. From a media file list, highlight a file. 1. From a media file list, highlight a file. 2. Select Options > Assign and choose how 2. Select Options > Shuffle to add the file to to assign the file.
-
Page 36: Erase Media Files
Erase Media Files Erase All Sound Files From Delete All, select Sounds Only > Yes to Erase a Single File erase all files in the Sounds folder. 1. From a media file list, highlight a file. Note: You can only erase unlocked files. 2. -
Page 37: Messaging
Messaging Use Messaging to send, receive, and erase messages from your phone. Messaging Menu Select Messaging from the main menu to access the following functions: Level 1 > Level 2 > Level 3 Messaging New Text Msg Compose a text message. Voicemail Shows how many voicemails are waiting. -
Page 38: Send Messages
Send Messages Add Recipients from Contacts 1. At the compose message screen, select Create a Text Message Options > Contacts when entering a phone You can only send text messages to phone number or email address. numbers capable of receiving them or to email 2. - Page 39 Use Preset Text Save Recipients as Contacts 1. At the compose message screen, select Add Preset Text Options > Save Address when entering a 1. At the compose message screen, select phone number or email address. Options > Insert QuickText when 2.
-
Page 40: Manage Received Messages
Change the Callback Number 3. Press the OK key to change the time. – Scroll left or right to move between the 1. When entering the message, select Options hour, minute, and AM/PM. > Msg Settings > Callback Number. – Scroll up or down to change the hour, 2. -
Page 41: Forward Messages
Forward Messages Lock Messages 1. When viewing a received message, select When viewing a received message, select Options > Forward. Options > Lock Msg to protect it from accidental deletion. To unlock the message, 2. Enter a number or address. select Options >... -
Page 42: Check Your Voicemail
Check your Voicemail Check Message Status in Outbox When you receive a voicemail message, a Use the following symbols to check your notification with a voicemail message icon Outbox for the status of messages sent but still appears at the top of your screen. in process. - Page 43 Set Page Alerts Set your Signature 1. From Alerts, select Page Alert. You can create a signature to appear at the end of all outgoing messages. 2. Select an alert for pages. 1. From Signature, enter your signature. If you select an & Remind alert, the phone notifies you once when receiving a new 2.
-
Page 44: Message Groups
Enable Auto-Erase Erase Recent List Use Auto-Erase to set your phone to erase From Erase Recent List, select Yes to clear messages automatically when it needs memory the list of recipients you have recently sent for incoming messages. messages to. From Auto-Erase, select one of the following: Message Groups •... -
Page 45: Erase Messages
Send Text Messages to Message Erase a Message Group Groups 1. From Message Groups, highlight a group. 1. From Message Groups, highlight a group. 2. Select Options > Erase > Yes. 2. Select Options > Send Text Msg. Erase Messages 3. -
Page 46: Tools & Games
Tools & Games Tools & Games Menu Select Tools & Games from the main menu to access the following functions: Level 1 > Level 2 > Level 3 Tools & Games Brick Attack Play Brick Attack. Voice Memo Access these options: Record New and Recorded Memos. Scheduler Access these options: Add New Event, View Month, View Day, Go to Date, View All Events, and Settings. -
Page 47: Voice Memo
Voice Memo – Scroll up or down to change month, day, and year. Use Voice Memo to record and play back Press the OK key to save and move to the audio memos. next field. Record Voice Memos 4. Press the OK key to change the time, if needed. -
Page 48: View Events
View Events Return to the Current Date From View Day, select Options > Go to View Events by Month Today to return to the current date. 1. From View Month, scroll through the Sort Events by Time month view. (Days with events are highlighted.) From View All Events, select Options >... -
Page 49: Change Scheduler Settings
Change Scheduler Settings Copy an Event 1. From View Day, select an event. From Settings, you can modify the following features. 2. At the event details screen, select Options > Copy. Set Scheduler Hours 3. Enter a new name for the event. 1. -
Page 50: Alarm Clock
Alarm Clock 2. Choose a time. (A notification shows the quick alarm is on.) You can set up to four alerts with your phone’s When the quick alarm rings, select Off to turn three alarm clocks and one quick alarm. off the alarm, or Reset to set the quick alarm Note: The alert occurs only if the phone is on. -
Page 51: Use Timer
Use Stopwatch 4. Select Exit to return to the menu, or Options and one of the following: From Stopwatch, select from the following – MS replaces the value currently stored options: in memory with the displayed result on • Start begins counting. the screen. -
Page 52: World Clock
Call a Number in a Memo Set World Clock If you have a phone number in a memo, you 1. From World Clock, first scroll left or right can call it. to select a time zone. 1. From View Memos, highlight a memo. 2. -
Page 53: 10 Camera
10 Camera Camera Tips 3. To take a picture, press the OK key. The picture is saved to Camera Pictures. Your phone has a camera. Before using your 4. Select Send > Via Bluetooth (to send to a phone’s camera, here are some tips: Bluetooth-enabled device) or To Printer •... -
Page 54: Other Camera Options
Enable Date/Time Stamp Set Colour Tone From camera mode, select Options > Settings 1. From camera mode, select Options > > Date/Time > On to place a date/time stamp Settings > Colour Tone. on each picture taken. 2. Scroll left or right to select a colour tone. icon indicates when the date/time Look at the viewfinder to see how each stamp is on. - Page 55 Go to Camera Pictures From camera mode, select Options > Camera Pictures to see all of the pictures you have taken. These are located in Camera Pictures. Take a Picture in a Frame 1. From camera mode, select Options > Frames.
-
Page 56: 11 Music Player
11 Music Player Use Music Player to play and manage media Note: You do not have to install any additional files. software when using the phone in Mass Storage mode. Play a Song 4. From your phone’s main menu, select Settings >... -
Page 57: Repeat A Song
Repeat a Song Access a Playlist To place the song your are currently playing 1. From Music Player, select Options > into a playback loop, select Options > Repeat Music Library > Playlists. Track ON. 2. Choose a playlist. 3. Select Play to start the playlist or Options View Song Details to access more functions. - Page 58 Set Auto Off Duration Use Auto off to set the duration for which your phone is paused or stopped before automatically turning off Music Player. From Auto off, select one of the following: • 10 Minutes automatically turns off Music Player after the phone pauses or stops for 10 minutes.
-
Page 59: 12 Settings
12 Settings Settings Menu Select Settings from the main menu to access the following functions: Level 1 > Level 2 > Level 3 Settings Bluetooth Access these options: On/Off, My Devices, and Settings. Sounds Access these options: Ringers, Ringer Mode, Volume, Slide Sounds, Pwr On/Off Sound, and Keypad. -
Page 60: Bluetooth
Bluetooth 3. At the device list, highlight a device and select Add. The Bluetooth® wireless technology (not Accept the pairing if prompted. available on all phones) enables wireless 4. If necessary, enter the password provided connectivity with accessories such as portable with the Bluetooth device and select OK. -
Page 61: Sounds
View Device Services Enable OBEX Authentication A Bluetooth device paired with your phone From OBEX Authentication, select Enabled. may have more than one service profile (such With object exchange (OBEX) authentication as Headset, Handsfree, and so on). Do the enabled, you need a user name and password to following to check the services available: transfer files via Bluetooth. - Page 62 Volume – View Ringer Shuffle 1. From Ringer Shuffle, select View. Only From Volume, you can modify the following the files used in your shuffle appear. settings. 2. Select Edit to modify the shuffle list or Set Ringer Volume press the Back key to exit. 1.
-
Page 63: Display
Set Power On/Off Sounds Wallpaper Shuffle 1. From Pwr On/Off Sound, select Power Enable Wallpaper Shuffle On Sound or Power Off Sound. From Wallpaper Shuffle, select Enable to 2. Select a sound to play when your phone turn on wallpaper shuffle. powers on or off. -
Page 64: Set Theme
Backlighting 2. Select a file. You may need to resize or crop the file. Set Display Duration 3. Select Done. From Backlighting, select Display Duration Set Theme and one of the following: From Themes, select a colour theme for the •... -
Page 65: Convenience
Set Time and Date Format make or receive calls, send text messages, use Bluetooth, but you can play games, use the From Time/Date Format, select a time and Scheduler, set the clock, and make emergency date format. calls to designated emergency numbers. Please check with uniformed personnel before Convenience operating your phone in Airplane mode. - Page 66 Use 1-Touch Dialing Place a Call on Hold The 1-Touch Dialing feature is the fastest way You can place a call on hold with Answer Hold enabled. to call a speed dial location. To call a contact Note: If you are already on a call and you with speed dial, press and hold the speed receive another call, you cannot place the dialing location.
-
Page 67: Accessories
Accessories Enable Frequent List From Frequent List, select Enabled. With Set Headset Sounds Frequent List enabled, the last 15 of your most frequently called contacts appear at the With a headset attached to your phone, you can beginning of your contacts list. Scroll past the play the ringer through the headset or phone double line to view the entire contacts list. -
Page 68: Network
Network Connect to TTY Device You can connect the phone to a teletype (TTY) Enable Privacy Alert device for the hearing impaired. (TTY device From Privacy Alert, select Enabled to set sold separately.) your phone to alert you when enhanced digital Note: Enable TTY only when using the phone CDMA privacy is lost or regained. -
Page 69: Security
Set Roaming Restrictions Lock Phone You can restrict your phone from making a call Set Lock Phone when roaming. With your phone locked, you can call only From Roam Option, select Automatic (to emergency numbers or your service provider’s allow roaming) or No Roaming (to disallow customer service number. -
Page 70: Memory Status
Change Lock Code Change your lock code from the default. 1. From Security, enter your four-digit lock code. 2. Select New Lock Code > Yes. 3. Enter a new four-digit code. 4. Re-enter your new lock code. Memory Status Check Phone Memory From Phone Memory, check how much memory is being used by your phone. -
Page 71: 13 Get Help
Phone Accessories For additional questions, you may contact the Kyocera Communications Inc. Customer Care To shop for phone accessories, visit Center in any of the following ways: www.kyocera-wireless.com/store. You may • Web site: www.kyocera-wireless.com. - Page 72 Become a Product Evaluator...
-
Page 73: Index
Index Numerics activating, 1-touch dialing, adding devices, changing phone name, connecting, accessories, connecting devices, headsets, deleting devices, T-coil hearing aid, OBEX authentication, TTY device, pairing, airplane mode, renaming devices, set date and time, visibility, alarm clock, Brick Attack, alerts calls, LED, calculator, lights only,... - Page 74 calls editing, alerts, erasing, answering, groups, any key answer, number types, auto answer, sending messages, call lists, sending vCard, emergency, viewing, ending, contacts list, limiting, conventions, using this guide, making, countdown timer, missed, customer support, placing on hold, redialing, display, silencing, brightness, timing,...
- Page 75 viewing, erasing, groups list, locking, modifying, moving, headset sounds, playing, headsets renaming, auto answer, sending, help, getting, zoom, hold calls media gallery, activating, media player, changing message, auto turn off, Bluetooth, icons, do not disturb, images looping tracks, erasing, shuffle, sending, memopad, inbox,...
- Page 76 tools, navigation shortcuts, message groups, notifications messages messages, adding addresses, voicemail, adding contacts, number prefixes, adding groups, number types, adding preset text, alerts, callback number, OBEX authentication, calling numbers, outbox, checking status, outgoing calls, completing drafts, creating, pages erasing, alerts, forwarding, phone incoming calls,...
- Page 77 access, sorting events, accessing, work hours, creating, screensavers, power on sounds, security, preset text, Select, primary number, sent messages folder, product evaluation, settings accessories, camera, quick alarm, convenience, display, ringer shuffle network, activating, scheduler, editing, security, viewing, sounds, ringers silent mode, assigning, slide sounds, roaming...
- Page 78 ringers, T-coil hearing aid, speakerphone, teletype device, text entry, wallpaper shuffle modes, activating, numbers, editing, text messages, time interval, themes, viewing, timer, wallpapers, tip calculator, world clock, tools, alarm clock, calculator, memopad, scheduler, stopwatch, timer, tip calculator, voice memos, world clock, user guide, vibrate mode, voice memos,...
- Page 79 User Guide...
- Page 80 Kyocera Communications Inc. www.kyocera-wireless.com 82-R6023-1EN, Rev. 003...