Table of Contents
Advertisement
Quick Links
Advertisement
Table of Contents

Related Manuals for Synology DX213


Summary of Contents for Synology DX213
- Page 1 DX213 User’s Guide...
-
Page 2: Table Of Contents
Table of Contents Chapter 1: Getting Started PackageContents ExpansionUnitataGlance LEDIndicatorBehavior Default/ManualSwitchBehavior HardwareSpecifications SafetyInstructions Chapter 2: Setting Up ToolsandPartsforDriveInstallation InstallDrives ConnectwithSynologyDiskStation ConfirmConnectionandManageStorageSpaces LearnMore Syno_UG_DX213_20141127 ... -
Page 3: Getting Started
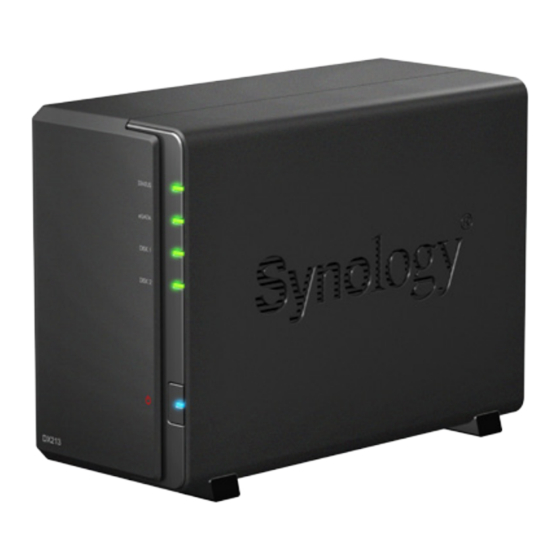
Getting Started ThankyouforpurchasingthisSynologyDX213expansionunit.This productisspeciallydesignedtoexpandthestoragecapacityofaSynology DiskStation.Inthechaptersbelow,we'llprovideinstructionstosetupand startusingthisexpansionunit. PackageContents Beforestarting,pleasecheckthepackagecontentstoverifythatyouhave receivedtheitemsbelow. Main unit x 1 AC power cord x 1 AC power adapter x 1 Screws for drives Screws for case User’s guide x 1 Expansion cable x 1 x 10... - Page 4 ExpansionUnitataGlance Front LED Indicators POWER Button Back Expansion Port Default/Manual Switch RESET Button Power Port Article Name Location Description ThePOWERbuttonisusedtoturnDX213onoroff. Pressandholdthebuttonfor7secondstoshutdown DX213. Note:DX213willbeturnedonoroffautomaticallywhen POWER Button Front theconnectedSynologyDiskStationpowersonoroff. However,thePOWERbuttonhasnopower-offfunction whenvolumeiscreatedtopreventaccidentalvolume damage. Chapter1:GettingStarted...
- Page 5 Article Name Location Description Displaysthestatusofinternaldrivesandthesystem. LED Indicators Front Formoreinformation,pleaseseeLED Indicator Behaviortablebelow. Inthedefaultmode,DX213canautopoweron/off withtheconnectedSynologyDiskStation,whileinthe Default/Manual manualmode,DX213cannotautopoweronwiththe Switch DiskStationwhenusingitsindependentvolume.For moredetails,pleaserefertothetable:Default/Manual Switch Behavior. ConnectSynologyDiskStationhere.Forthelist Back Expansion Port ofsupportedmodels,pleaseseetheHardware Specificationstablebelow. Disposesofexcessheatandcoolstheexpansionunit. RebootDX213andrestoreitssettingstofactory RESET Button default. Power Port ConnecttheACpowercordhere. LEDIndicatorBehavior Indicator Color Status Description Green Static Poweredon...
-
Page 6: Chapter 1: Getting Started
Default/ManualSwitchBehavior Mode Expansion-Ready Units eSATA-Only Units Default Autopoweron/off Autopoweron/off Manual Autopoweron/off Noautopoweron/off Note: 1 YoumustturnoffyourDX213beforeswitchingbetweendefaultand manualmodes. 2 Itisrecommendedtousethedefaultmode. HardwareSpecifications Internal Drives SATA(II)x2 Expansion Port # Maximum Raw Capacity 12TB(2x6TBdrives) Size (HxWxD) (mm) 165x100x225.5 Weight (kg) 0.87 System Fan 1x(92x92mm) Power Recovery SyncwithDiskStation(DefaultMode) -
Page 7: Safetyinstructions
Note: 1 Pleasevisitwww.synology.comforthelatestcompatiblemodels. 2 DSMneedstobeupgradedtoversion4.0-2240orabove. 3 Cross-volumemodelsrefertothosemodelsdesignedtobepairedwith expansionunits,suchasDS1513+. Independent-volumemodelsrefertothosemodelswhich,whenpaired, donotsupportexpandingexistingvolumesacrossthemainunit andexpansionunits,suchasDS213+.Expansionunitspairedwith independent-volumemodelscanonlyformindependentvolumes. SafetyInstructions Keepawayfromdirectsunlightandawayfromchemicals.Makesure theenvironmentdoesnotexperienceabruptchangesintemperatureor humidity. Placetheproductrightsideupatalltimes. Donotplacenearanyliquids. Beforecleaning,unplugthepowercord.Wipewithdamppapertowels. Donotusechemicaloraerosolcleaners. Topreventtheunitfromfallingover,donotplaceoncartsorany unstablesurfaces. Thepowercordmustplugintothecorrectsupplyvoltage.Makesure thatthesuppliedACvoltageiscorrectandstable. Toremoveallelectricalcurrentfromthedevice,ensurethatallpower cordsaredisconnectedfromthepowersource. Riskofexplosionifbatteryisreplacedwithanincorrecttype.Disposeof usedbatteriesappropriately. Chapter1:GettingStarted... - Page 8 Chapter1:GettingStarted...
-
Page 9: Chapter 2: Setting Up
Setting Up ToolsandPartsforDriveInstallation • Ascrewdriver • Atleastone3.5”or2.5”SATAdrive (Pleasevisitwww.synology.comforcompatibledrivemodels.) Warning:Ifyouinstalladrivethatcontainsdata,thesystemwillformatthedrive anderasealldata.Ifyoustillneedthedata,pleasebackitupbeforeinstallation. InstallDrives 1 Pushtheuppercaseinthedirectionasshownbelow.Lifttheuppercaseand setitaside. 2 Loaddrivesinthedrivetrays: • For 3.5” drives: Slidethedriveintotheharddrivebay,andpushitallthe wayuntilit’sfirmlyconnectedtotheSATAconnector.Securethedrivewith thescrewsprovided. Drivesarenumberedasshownbelow. - Page 10 • For 2.5” drives: a Placethedriveinthe2.5"DiskHolder(TypeC,soldseparately),andthen tightenthe2.5"screwstosecurethedrive. b Slidethe2.5"DiskHolderintotheharddrivebay,andpushitalltheway untilthedriveisfirmlyconnectedtotheSATAconnector.SecuretheDisk Holderwiththeprovidedscrews. Drivesarenumberedasshownbelow. Note:Makesurethetrayispushedinalltheway.Otherwise,thedrivemightnotbe abletofunctionproperly. 3 Replacetheuppercase,andtightenthescrewsonthebackpanel. Note:IfyouwanttocreateaRAIDvolume,werecommendallinstalleddrivesbe thesamesizeinordertooptimizedrivecapacityusage. ...
-
Page 11: Connectwithsynologydiskstation
ConnectwithSynologyDiskStation 1 ConnectoneendofthepowercordtothepowerportofDX213,andthe othertothepoweroutlet. Power Port 2 ConnecttheexpansioncabletotheexpansionportsofDX213andSynology DiskStation. e S A e S A DX213 DiskStation Expansion Port 1 Expansion Port 2 Aftertheconnectioniscomplete,DX213willbeturnedonoroffautomatically whentheconnectedDiskStationpowersonoroff. ... -
Page 12: Confirmconnectionandmanagestoragespaces
ConfirmConnectionandManageStorageSpaces 1 LogintotheDiskStationManager(DSM)ofthemainDiskStationunit. 2 GotoControl Panel>External Devices>ExternalDevicestoconfirmthe expansionunitissuccessfullyconnected. 3 GotoStorage Managertomanagestoragespacecreationorexpansion. • If you want to create a new volume on the expansion,clickCreateand followtheinstructionsofthewizard. ... -
Page 13: Learnmore
• If you want to expand an existing volume with expansion unit,select thevolumeyouwanttoexpandfromthevolumelist,clickManage,and followtheinstructionsofthewizard. Fordetailedinformationaboutvolumemanagement,gotoStorage Manager andseeDSM Help. Limitations:Beforeusingthisexpansionunit,pleaseseethelimitationsbelow. •ThisexpansionunitcanbelinkedtoonlyoneSynologyDiskStationatatime. •ThedataofsomeDSMpackagescanbestoredontheexpansionunitonlyifyou createanexpandedvolumewithit.Thedatacannotbestoredontheexpansion unitifanindependentvolumehasbeencreatedonit. •DrivespreviouslyusedinaSynologyDiskStationarenotreadablewhendirectly insertingthemintothisexpansionunit,andviseversa. LearnMore Congratulations!Yourexpansionunitissetupnow.Formoreinformationor onlineresources,pleasevisitwww.synology.com ... - Page 14 TOTHE PRODUCTS. IFYOU DO NOTAGREETOTHETERMS OFTHIS EULA, DO NOT USETHE PRODUCTS CONTAINING THE SOFTWAREOR DOWNLOAD THE SOFTWARE FROM WWW. SYNOLOGY.COM, ORANY OTHER CHANNEL PROVIDED BY SYNOLOGY. INSTEAD, YOU MAY RETURN THE PRODUCT TO THE RESELLER WHERE YOU PURCHASED IT FORA REFUND IN...
- Page 15 Section 10. Support.Duringtheperiodspecified use of the Software and destroy all copies of the in the Section 9, Synology will make available to Softwareandallofitscomponentparts. youthesupportservices.Followingtheexpirationof Section 16. Assignment. You may not transfer theapplicableperiod,supportforSoftwaremaybe or assign your rights under this EULA to any third...
- Page 16 Customer, is downloaded equipmentorsoftware;(6)anywarrantyofthehard by Customer at the Web Site, or is pre-installed diskifinstalledbyCustomeroranyotherthirdparty; on the Product by Synology, and includes any or (7) any warranty of compatibility with the hard firmware, associated media, images, animations, disk....
- Page 17 OR (D) CLAIM INTORT (WHETHER BASED ON elects to replace any Product under this Warranty NEGLIGENCE, STRICT LIABILITY, PRODUCT set forth in Section 2.1, then Synology will ship a LIABILITY OR OTHER THEORY). SYNOLOGY replacement Product at Synology's expense via...
- Page 18 E n t i r e A g r e e m e n t . T h i s Wa r r a n t y by Synology with respect to the Product or the constitutes the entire agreement, and supersedes...
- Page 19 forthinawritteninstrumentsignedbythepartyto beboundthereby....
- Page 20 P/N15-06B0101B2 PrintedinTaiwan...