
Related Manuals for Baumatic PD659SS-ANZ


Summary of Contents for Baumatic PD659SS-ANZ
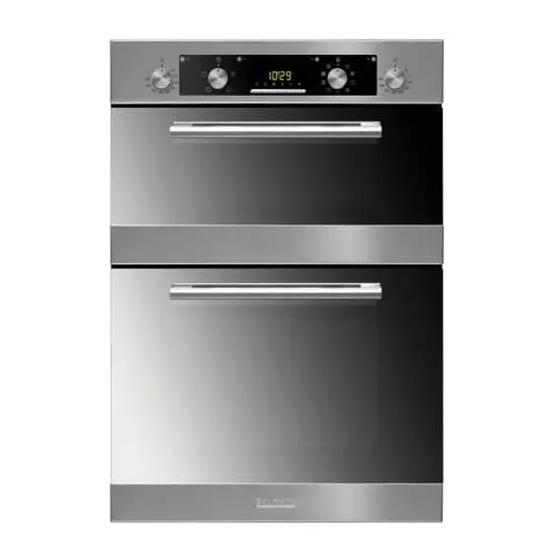
- Page 1 HOD885SS PD659SS-ANZ 0 cm Built in multifunction 60cm Built-in Multifunction electric double oven. Electric Double Oven...
- Page 2 User Manual for your PD659SS-ANZ 60cm Built in Multifunction Electric Double Oven NOTE : This User Instruction Manual contains important information, including safety & installation points, which will enable you to get the most out of your appliance. Please keep it in a safe place so that it is easily available for future reference;...
-
Page 3: Table Of Contents
Contents Environmental note Important safety information 5 – 7 Specifications 8 – 11 Product and aperture dimensions Product specifications Standard accessories Cooling fans Electrical details Control panel Oven programmer/timer Initial set-up of your oven 11 – 12 Selecting manual operation mode Setting the time of day Before first use Timer functions... -
Page 4: Environmental Note
Environmental note o The packaging materials that Baumatic uses are environmentally friendly and can be recycled. o Please discard all packaging material with due regard for the environment. -
Page 5: Important Safety Information
This appliance complies with all current safety legislation. Baumatic do wish to emphasise that this compliance does not remove the fact that the appliance surfaces w ill become hot during use and retain heat after operation. - Page 6 Child Safety o Baumatic strongly recommend that babies and young children are prevented from being near to the appliance and not allowed to touch the appliance at any time.
- Page 7 Baumatic Ltd. declines any respon sibility for injury or damage, to person or property, as a result of improper use or installation of this appliance.
-
Page 8: Specifications
pecifi cations Product Dimensions Aperture dim ensions Height: 885 mm 875-878 mm Width: 595 mm 565 mm D epth: 562 mm 565 mm (min) roduct specifications: o Energy efficiency class: A/A LED full programmer o 2 x Cooling fans o Thermostatically controlled grills Triple-glazed removable doors o Removable inner door g lass... -
Page 9: Standard Accessories
Standard accessories: o 3 x Safety shelves o 1 x Enamelled baking tray wi th handle o 2 x Telescopic runners o Catalytic self-c leaning liners Removable side racks 1 pizza stone Cooling fans o Two tangential cooling fans are fitted inside of this appl iance, to make the internal temperature of the oven stable and the external surface temperature lower. -
Page 10: Control Panel
ontrol Panel 1) Top oven thermostat knob 2) Top oven operating light 3) Top oven function selection knob 4) Top oven power indicator light 5) Oven programmer/timer (see 16-18, below) 6) Main oven power indicator light 7) Main oven function selection knob 8) Main oven operating light ) Main oven thermostat knob... -
Page 11: Initial Set-Up Of Your Oven
Initial set-up of your oven Selecting manual operation mode After your appliance is connected to the mains supply for the irst time, the numbers on the timer display will flas h. Before ou can select a cooking function or set a temperature, you must set the appliance into manual operation mode. -
Page 12: Timer Functions
o After the oven cavities have cooled, they should then be cleaned with warm soapy water, using either a sponge or soft cloth. No abrasive cleaners should be used. o Outer parts of the oven should be cleaned with warm soapy water, using either a sponge or soft cloth. -
Page 13: The Duration Function (Main Oven Only)
The duration function (main oven only) This function will allow you to set a countdown time similar to the minute minder function, however the oven will switch off at the end of the cooking time. o Use the main oven function selection knob (7) to select the mode of cooking that you require. -
Page 14: The End Cook Function (Main Oven Only)
The end cook function (main oven only) This function is similar to the duration function, however instead of selecting a period of time that you wish the oven to switch off after, you select the time of day that you wish the oven to switch off at. o Use the main oven function selection knob (7) to select the mode of cooking that you require. -
Page 15: The Start And End Time Function (Main Oven Only)
The start and end time function (main oven only) This function will allow you to set a time in the future that the oven switches on at and a time that the oven will switch off at. o Use the main oven function selection knob (7) to select the mode of cooking that you require. -
Page 16: Selecting A Cooking Function And Temperature
Selecting a cooking function and temperature Selecting a main oven function o The main oven function selection knob should be used to select the particular mode of cooking that you require. o The appliance will utilise different elements within oven cavity, depending on the oven function that you select. -
Page 17: Main Oven Thermostat Control Knob
FAN AND GRILL: This method of cooking utilises the top element in conjunction with the fan, which helps to provide a quick circulation of heat. This function is suitable where quick browning is required and “sealing” the juices in, such as steaks, hamburgers, some vegetables etc. -
Page 18: Selecting A Lower Oven Function
Selecting a top oven function o The top oven function selection knob should be used to select the particular mode of cooking that you require. o The appliance will utilise different elements within oven cavity, depending on the oven function that you select. -
Page 19: Oven Operating Lights (Main And Lower Oven)
Oven operating lights (main and top oven) o These lights will come on to indicate that oven’s heating elements are in operation. o The lights will switch when temperature set on thermostat control knob been reached. o They will cycle on and off throughout the cooking time. You should not place food inside the cavity, until the correct cooking temperature has been reached. -
Page 20: Warnings
o Before cooking, check that any accessories that are not required are removed from the oven. o Place cooking trays in the centre of the oven and leave gaps between the trays to allow air to circulate. o Try to open the door as little as possible to view the dishes. o The oven light will remain on during cooking. -
Page 21: Oven Shelves
Shelf positions Your oven will come supplied with the following oven furniture: (A) Oven shelf (B) Enamelled baking tray o The numbers 1 – 4, indicate the different shelf positions that you can utilise within the oven. (Image for reference only – actual product may differ slightly) o You should use the shelf position(s) that you find are best suited to your personal cooking preferences. -
Page 22: Cleaning And Maintenance
Any damage that is caused to the appliance by a cleaning product will not be fixed by Baumatic free of charge, even if the appliance is within the guarantee period. -
Page 23: The Stay Clean Liner Cleaning Process
The stay clean liner cleaning process (main oven only) IMPORTANT: should never chemical cleaners, including soap, on or in the vicinity of the stay clean liners. Your appliance is fitted with stay clean liners on the sides of the main (bottom) oven cavity. The stay clean liner cleaning process listed below should be followed once a week or more frequently if there have been food spillages inside of the cavity. -
Page 24: Replacing The Oven Bulb
Replacing the oven bulb IMPORTANT: The oven must be disconnected from your mains supply before you attempt to either remove or replace the oven bulb. o Remove all oven shelves and accessories. o Using a screwdriver, remove the lamp cover (1). o Unscrew the bulb (2) in a clockwise direction and remove it from its holder. -
Page 25: Removing The Oven Door For Cleaning
Removing the oven door for cleaning To facilitate the cleaning of the inside of the oven and the outer frame of the oven, the door can be removed as follows:- o The hinges (A) have two movable bolts on them (B). o If you raise both of the movable bolts (B), then the hinges (A) are released from the oven housing. -
Page 26: Removing The Oven Door Glass For Cleaning
Removing the inner door glass for cleaning o Do not use any abrasive cleaner that could cause damage. o Remember that if the surface of the glass panel becomes scratched, this could lead to a dangerous failure. o To facilitate cleaning, the inner door glass can be lifted out. o Unscrew the bracket latch that is in the corner of the top of the door. -
Page 27: Removing The Side Racks
Removing the side racks IMPORTANT: You can remove the side racks of the oven for ease of cleaning. You can wash the side racks with detergent and/or wash them in a dishwasher. o Pull the side racks free of their securing clips, by pulling them down and away from the clips on oven walls. -
Page 28: Installation
INSTALLATION The installation must be carried out by a suitably qualified person Before connecting the appliance, make sure that the supply voltage marked on the rating plate corresponds with your mains supply voltage. WARNING: THIS APPLIANCE MUST BE EARTHED. o This appliance should be wired into a 20A double pole switched fused spur outlet, having 3 mm contact separation and placed in an easily accessible position adjacent to the appliance. -
Page 29: Connecting The Mains Supply Cable
Connecting the mains supply cable o The mains terminal block is located on the rear of the oven and the terminals are accessible by removing the terminal block cover. You should remove the cover screw to access this. o The cable connections must be made in accordance with the diagram below:- o NOTE: For 3 core cables, only terminals 1 and 2 need to be connected with the brass link –... -
Page 30: Replacing The Mains Supply Cable
Replacing the mains supply cable o If the mains supply cable is damaged, then it must be replaced with a suitable replacement. o The mains supply cable should be replaced in accordance with the following instructions: o Switch the appliance off at the socket. o Open the terminal block on the back of the oven. -
Page 31: Installing The Oven Into The Kitchen Cabinet
Installing the oven into the kitchen cabinet Positioning the appliance o Ensure that the aperture that you will be fitting the oven into is of the size given in the above diagram. o The oven must be fitted into a housing unit with the ventilation cut-outs shown in the “Ventilation requirements”... -
Page 32: Ventilation Requirements
Ventilation requirements (Figure shows the ventilation and cut-out requirements for the installation of the appliance into a tall housing unit). o Ensure that the oven has been securely fixed into the housing unit. The fixing of the oven into the housing is made by using four screws. -
Page 33: My Appliance Isn't Working Correctly
My appliance isn’t working correctly o The ovens aren’t coming on. * Check that the oven is in manual operation mode. * Check that you have selected a cooking function and a cooking temperature. o There appears to be no power to the ovens. * Check that the appliance has been connected to the electrical mains supply correctly. - Page 34 o The oven light is not working * Refer to the “Replacing the oven bulb” section. o I am getting condensation in my oven * Steam and condensation is a natural by product of cooking any food with high water content, such as frozen food, chicken etc. * You may get condensation in the oven cavity and forming between the oven door glasses.
- Page 35 Baumatic has been completed. Please refer to the conditions of guarantee that appear on the warranty card that you receive with the appliance.
-
Page 36: Cooking Tables
Cooking Tables FAN OVEN: This method of cooking uses the circular element while the heat is distributed by the fan. This results in a faster and more economical cooking process. The fan oven allows food to be cooked simultaneously on different shelves, preventing the transmission of smells and tastes from one dish onto another. - Page 37 CONVENTIONAL OVEN (top and lower element): This method of cooking provides traditional cooking, with heat from the top and lower elements. This function is suitable for roasting and baking on one shelf only. Food Weight Preheat Tray Temperature Cooking (kg) (minutes) position setting...
-
Page 39: Contact Details
Service Telephone 1800 444 357 Website www.thinkappliances.com Applico Ltd. Private Bag 92900 Onehunga, Auckland 1061, New Zealand Website www.baumatic.co.nz United Kingdom Baumatic Ltd., Baumatic Buildings, 6 Bennet Road, Reading, Berkshire RG2 0QX United Kingdom Sales Telephone (0118) 933 6900 Website: www.baumatic.co.uk...