Table of Contents
Advertisement
Advertisement
Table of Contents

Related Manuals for Brother P-touch PT-D400


Summary of Contents for Brother P-touch PT-D400
- Page 1 Read this User’s Guide before you start using your P-touch. Keep this User’s Guide in a handy place for future reference. Please visit us at http://support.brother.com/ where you can get product support and answers to frequently asked questions (FAQs). www.brother.com...
- Page 2 Compilation and Publication Notice Under the supervision of Brother Industries, Ltd., this manual has been compiled and published, covering the latest product’s descriptions and specifications. The contents of this manual and the specifications of this product are subject to change without notice.
-
Page 3: Table Of Contents
INTRODUCTION Contents Safety Precautions....................3 General Precautions ....................5 GETTING STARTED..............6 Unpacking Your P-touch labeler ................6 LCD Display & Keyboard ..................6 Power Supply and Tape cassette ................7 Turning Power On/Off .................... 9 Feeding Tape......................9 Setting LCD Display....................9 LCD Contrast.................... - Page 4 INTRODUCTION LABEL PRINTING ..............20 Label Preview ...................... 20 Printing Labels ..................... 20 Single and Multiple Copy Printing..............20 Cable Flag Printing ..................20 Numbering Printing..................21 Mirror Printing ....................21 Setting Margin...................... 21 [Full]/[Half]/[Narrow]..................21 [Chain] ......................22 Adjusting the Label Length .................. 23 Using Sample Labels: To create and print labels from pre-designed templates.
-
Page 5: Safety Precautions
INTRODUCTION Safety Precautions To prevent injury and damage, important notes are explained using various symbols. The symbols and their meanings are as follows: Indicates a potentially hazardous situation which, if not WARNING avoided, could result in death or serious injuries. Indicates a potentially hazardous situation which, if not CAUTION avoided, may result in minor or moderate injuries. - Page 6 AC adapter and Do not touch metal parts around remove the batteries, and contact the print head immediately after Brother customer service. printing. When the P-touch labeler is not being used, store it out of the reach of children. In addition, do not allow children to put the P-touch labeler parts or labels in their mouths.
-
Page 7: General Precautions
• Do not use the P-touch labeler in any way or for any purpose not described in this guide. Doing so may result in accidents or damage the P-touch labeler. • Use only Brother TZe tapes with the P-touch labeler. Do not use tapes that do not have the mark. -
Page 8: Getting Started
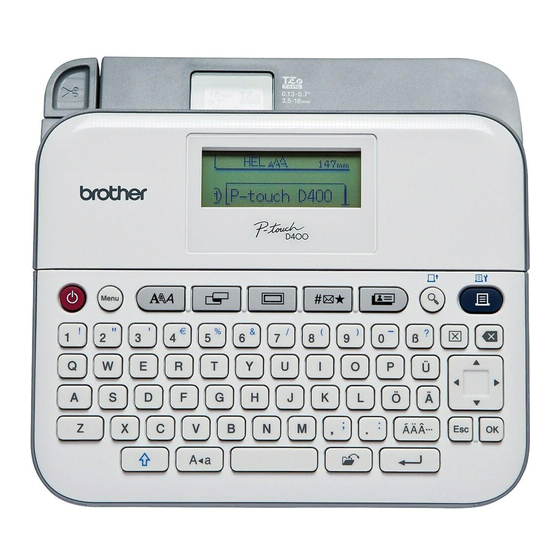
GETTING STARTED Unpacking Your P-touch labeler Carton Contents P-touch labeler Starter Tape Cassette AC adapter User’s Guide LCD Display & Keyboard 9 11 19 20 Unpacking Your P-touch labeler... -
Page 9: Power Supply And Tape Cassette
GETTING STARTED Caps mode 15. Font 26. Escape 2-5. Style guidance 16. Label 27. Accent Tape length 17. Frame 28. Enter Line number 18. Symbol 29. File Start Line 19. Sample Labels 30. Space End Line 20. Preview 31. Caps 10. - Page 10 GETTING STARTED NOTE • When using AC adapter (AD-E001): Insert the plug on the adapter cord into the AC adapter jack on the side of the machine. Insert the plug into the nearest standard electrical outlet. For memory back up, we recommend using AA alkaline batteries (LR6) or Ni-MH batteries (HR6) together when using the AC adapter.
-
Page 11: Turning Power On/Off
GETTING STARTED NOTE • When inserting the tape cassette, make sure that the tape and ink ribbon do not catch on the print head. • If you cannot close the tape compartment cover, check to ensure the release lever is in the up position. If not, lift the lever, and then close the cover. -
Page 12: Editing A Label
EDITING A LABEL Entering and Editing Text Adding a New Line Move the cursor to end of the current line and press ( Line 1 Line 2 Label image NOTE There is a maximum number of lines of text that can be entered for each tape width. -
Page 13: Setting Symbol History
EDITING A LABEL Setting Symbol History Up to 15 recently used symbols are added to [History]. The default setting is [On]. [Symbol History] ) or ( [On/Off] or ( Symbol List Category Symbols Punctuation Bracket/Arrow Mathematics Currency/Unit (Number) [Number] School/Office Kitchen DIY/Hobby Season/Holiday... -
Page 14: Entering Accented Characters
EDITING A LABEL Category Symbols Vehicle Sign Electrical Astrology Pictograph Entering Accented Characters Enter the character Select accented character ) or NOTE Caps mode can be used with the Accent function. Accented Character List Character Accented Characters Character Accented Characters Entering Accented Characters... -
Page 15: Setting Character Attributes ([Font]/[Size]/[Width]/[Style]/[Line]/[Align])
EDITING A LABEL Character Accented Characters Character Accented Characters Setting Character Attributes ([Font]/[Size]/[Width]/ [Style]/[Line]/[Align]) You can set character attributes by label or by each line both before and after entering text. Setting Character Attributes by Label Select an attribute Set a value for that attribute or ( NOTE You can view an example of the selected character attribute on the... - Page 16 EDITING A LABEL • The actual printed font size depends on the tape width, number of characters and number of input lines. Once characters reach a minimum size, the selected font will default to a custom font which is based on the Helsinki style. This allows labels to print using the smallest text possible on narrow or multi-line labels.
-
Page 17: Setting Auto Fit Style
EDITING A LABEL Attribute Value Result Attribute Value Result Width Width x 1/2 x 3/2 x 2/3 Style Normal Style Italic Bold Bold Italic Outline Outline Italic Shadow Shadow Italic Solid Solid Vertical Italic Line Line Strikeout Underline Align Left Align Right Center... - Page 18 EDITING A LABEL Frames Category Frames Basic 1 Basic 2 Home School/Office Appointment DIY/Hobby Season/Holiday Setting Frames...
-
Page 19: Setting Label Attributes ([Length]/[Margin]/[Tab Length])
EDITING A LABEL Setting Label Attributes ([Length]/[Margin]/[Tab Length]) (Refer to “Adjusting the Label Length” on page 23, “Setting Margin” on page 21 and “To change tab length:” on page 10.) Select an attribute Set a value for that attribute or ( NOTE [Length] can be set within the range 30 mm - 300 mm. -
Page 20: Special Character List
EDITING A LABEL Bar Code Settings Attribute Value CODE39, CODE128, EAN-8, EAN-13, Protocol GS1-128 (UCC/EAN-128), UPC-A, UPC-E, I-2/5 (ITF), CODABAR Small Width Large Under# (characters printed below bar code) C.Digit (check digit) (only available for the CODE39, I-2/5 and CODABAR protocols) Special Character List CODE39 CODABAR... -
Page 21: Editing And Deleting A Bar Code
EDITING A LABEL CODE128, GS1-128 (UCC / EAN-128) Special Character (SPACE) FNC3 FNC2 FNC4 FNC1 Editing and Deleting a Bar Code To edit bar code parameters and bar code data, position the cursor beneath the bar code mark on the data entry screen and then open the Bar Code Setup screen by pressing ( ) and selecting [Bar Code Setup] with... -
Page 22: Label Printing
LABEL PRINTING Label Preview You can preview the text before printing. Press to scroll the preview to the left or right. Press to change the magnification of the preview. Printing Labels To cut off the label, press the tape cutter lever on the upper left corner of the machine. -
Page 23: Numbering Printing
LABEL PRINTING Numbering Printing ) + ( [Numbering] ) or ( Select start point ) or ( Select end point ) or ( Select the number of labels to be printed ), ( ) or ( Select the highest number you wish to be printed when setting the number. -
Page 24: [Chain]
LABEL PRINTING [Chain] Use this setting when printing several labels with minimum margins. Enter text (ABC) [Margin] [Chain] ) or Select the number of copies ), ( ) or The message [OK to Feed?] appears Clear the text and enter text for the next label (DEF) Select the number of copies ), ( ) or (... -
Page 25: Adjusting The Label Length
LABEL PRINTING Adjusting the Label Length [Adjustment] ) or ( [Label Length] [-5 - +5] ) or ( NOTE Approximately 1% of the total label length will be adjusted by 1 level. Using Sample Labels: To create and print labels from pre-designed templates. - Page 26 LABEL PRINTING Sample Label List Category Sample Label File Storage Box Kitchen Name Badge Garage Scrapbooking Gardening Address Gift Caution Using Sample Labels: To create and print labels from pre-designed templates.
-
Page 27: Using The File Memory
USING THE FILE MEMORY Saving Label Files You can save up to 50 labels and recall them for printing at a later date. A maximum of 80 characters can be saved per file. You can also edit and overwrite the stored label. Save Type text and format label [Save]... -
Page 28: Resetting & Maintaining Your P-Touch Labeler
RESETTING & MAINTAINING YOUR P-TOUCH LABELER Resetting the P-touch Labeler Resetting the data to factory settings Turn off the machine. Press and hold down ( ) and ( ). While holding down ( ) and ( ), press ( ) once and then release ( ) and ( NOTE •... -
Page 29: Cleaning The Tape Cutter
RESETTING & MAINTAINING YOUR P-TOUCH LABELER Cleaning the Tape Cutter Tape adhesive can build up on the cutter blade after repeated use, taking the edge off the blade which may result in the tape jamming in the cutter. NOTE • About once every year, wipe the cutter blade using a cotton swab moistened with Isopropyl alcohol (rubbing alcohol). -
Page 30: Troubleshooting
• All files stored in the internal memory are deleted if the previously are now batteries are weak or the AC adapter was disconnected. empty. A tape jam which • Please contact Brother customer service. cannot be cleared keeps occurring. What to do when... -
Page 31: When An Error Message Appears On The Display
The length of the label to be printed using the text entered is longer than the length setting. Edit the text to fit within Too Long! the set length or change the length setting. System Error XX Please contact Brother customer service. When an error message appears on the display... -
Page 32: Appendix
Maximum wet bulb temperature: 27 °C (80.6 °F) *1 Visit us at http://support.brother.com/ for the latest information about the recommended batteries. *2 Actual character size may be smaller than maximum print height. Contact Information Website: www.brother.ca Specifications... - Page 33 Printed in China LAE979001A...