
Related Manuals for Toro TimeCutter SS 4216 74616


Summary of Contents for Toro TimeCutter SS 4216 74616
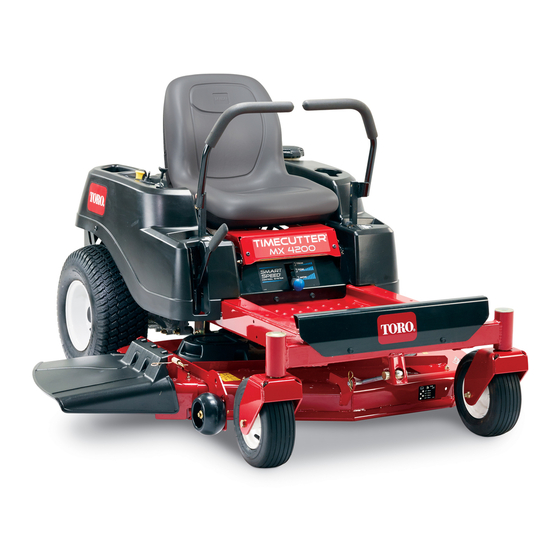
- Page 1 Form No. 3379-638 Rev A TimeCutter ® SS 4216 Riding Mower Model No. 74616—Serial No. 313000001 and Up *3379-638* A Register at www.Toro.com. Original Instructions (EN)
-
Page 2: Introduction
Important: This engine is not equipped with a spark arrester muffler. It is a violation of California Public You may contact Toro directly at www.Toro.com for product Resource Code Section 4442 to use or operate the engine and accessory information, help finding a dealer, or to register on any forest-covered, brush-covered, or grass-covered your product. -
Page 3: Table Of Contents
Cleaning and Storage ..........40 Troubleshooting ............41 Schematics ..............43 Introduction ..............2 Safety ................4 Safe Operating Practices........... 4 Toro Riding Mower Safety ........6 Slope Indicator ............7 Safety and Instructional Decals ......... 8 Product Overview ............11 Controls ...............11 Operation ..............13 Think Safety First ...........13... -
Page 4: Safety
In these instances, others from serious injury. Toro has refined the statement to convey the meaning of the • Always follow the recommendations for any application standard while better matching the product this Operator's of counterweights. - Page 5 A hitch kit is available for this machine and can be obtained • Keep the machine free of grass, leaves, or other debris by contacting an Authorized Toro Dealer. Do not tow build-up. Clean up oil or fuel spillage fuel soaked debris. without first installing this manufacturer approved hitch. The Allow the machine to cool before storing.
-
Page 6: Toro Riding Mower Safety
• Maintain or replace safety and instruction decals as necessary. • Use only genuine Toro replacement parts to ensure that original standards are maintained. Toro Riding Mower Safety The following list contains safety information specific to Toro products or other safety information that you must know that may not be included in the ANSI standards. -
Page 7: Slope Indicator
Slope Indicator G011841 Figure 3 This page may be copied for personal use. 1. The maximum slope you can safely operate the machine on is 15 degrees. Use the slope chart to determine the degree of slope of hills before operating. Do not operate this machine on a slope greater than 15 degrees. Fold along the appropriate line to match the recommended slope. -
Page 8: Safety And Instructional Decals
Safety and Instructional Decals Safety decals and instructions are easily visible to the operator and are located near any area of potential danger. Replace any decal that is damaged or lost. 93-7009 1. Warning—don't operate the mower with the deflector up or removed;... - Page 9 119-8815 1. Parking position 4. Neutral 2. Fast 5. Reverse 3. Slow 121-2989 1. Bypass lever position for 2. Bypass lever position for pushing the machine operating the machine Battery Symbols Some or all of these symbols are on your battery 1.
- Page 10 119-8874 1. Low speed 2. High speed 120-2239 1. Warning—read the Operator's Manual. 5. Warning—do not use split ramps, use a full ramps when transporting machine. 2. Warning—read the instructions before servicing or performing 6. Loss of traction/control hazard, slopes—loss of traction/control maintenance;...
-
Page 11: Product Overview
121-0771 1. Choke 4. Slow 2. Fast 5. Power take-off (PTO), Blade control switch 3. Continuous variable setting Product Overview Figure 5 Control Panel 1. Throttle/Choke 3. Blade control switch (power take-off) 2. Ignition switch Figure 4 Ignition Switch 1. Deflector 6. - Page 12 Blade Control Switch (Power Take-Off) The blade control switch, represented by a power take-off G014521 (PTO) symbol, engages and disengages power to the mower blades (Figure 5). Motion Control Levers and Park Position The motion control levers are speed sensitive controls of independent wheel motors.
-
Page 13: Operation
Operation Note: Determine the left and right sides of the machine from the normal operating position. Think Safety First Operating Safety Please carefully read all of the safety instructions and decals in the safety section. Knowing this information could help you, your family, pets or bystanders avoid injury. -
Page 14: Before Starting
• The blades are disengaged. DANGER • The motion control levers are in the park position. In certain conditions during fueling, static electricity can be released causing a spark which The safety interlock system also is designed to stop the engine can ignite the gasoline vapors. -
Page 15: Starting The Engine
Filling the Fuel Tank empty space in the tank allows the fuel to expand. Overfilling may result in fuel leakage or damage Make sure the engine is shut off and the motion controls are to the engine. in the park position. Tank maximum capacity is 2.9 gallons. 3. -
Page 16: Operating The Blades
Figure 13 1. Control panel 4. Off 2. Ignition key—run position 5. Run Figure 12 3. Ignition key—start position 6. Start 4. Fast 1. Control panel 2. Throttle/choke 5. Continuous variable lever—choke position setting 5. After the engine starts, move the throttle lever to Fast (Figure 12). -
Page 17: Testing The Safety Interlock System
3. While sitting on the seat, move the blade control switch to Off, and lock the motion control levers in the park position. Start the engine. While the engine is running, engage the blade control switch, and rise slightly from the seat;... - Page 18 WARNING Removing your hands from the motion control levers while the machine is in motion can result in a loss of control causing harm to you or bystanders. Always stop the machine and move the motion control levers to the park position before adjusting the Smart Speed™...
-
Page 19: Stopping The Machine
G014476 G008953 Figure 19 Figure 20 To go straight, apply equal pressure to both motion 1. Height-of-cut lever 3. 115 mm (4.5 inch), control levers (Figure 19). Transport position 2. Height-of-cut positions To turn, release the pressure on the motion control lever toward the direction you want to turn. -
Page 20: Positioning The Seat
2. Move the control lever to the next set of holes. Secure the lever with the 2 bolts (Figure 23). g019929 Figure 21 1. Anti-scalp roller 4. Upper hole—the mower G014970 deck in the 63mm Figure 23 (2-1/2 inch) and below height-of-cut positions 1. -
Page 21: Grass Deflector
Grass Deflector The machine is now able to be pushed by hand. The mower has a hinged grass deflector that disperses clippings to the side and down toward the turf. DANGER Without the grass deflector, discharge cover, or complete grass catcher assembly mounted in place, you and others are exposed to blade contact and thrown debris. -
Page 22: Blade Maintenance
Check the cutter blades daily for sharpness, and for any wear or damage. File down any nicks and sharpen the blades as necessary. If a blade is damaged or worn, replace it immediately with a genuine Toro replacement blade. -
Page 23: Maintenance
Maintenance Note: Determine the left and right sides of the machine from the normal operating position. Recommended Maintenance Schedule(s) Maintenance Service Maintenance Procedure Interval • Change the engine oil. After the first 5 hours • Check the safety interlock system. •... -
Page 24: Engine Maintenance
Engine Maintenance 3. Clean the grease fittings (Figure 25 and Figure 26) with a rag. Make sure to scrape any paint off of the front of the fitting(s). Servicing the Air Cleaner Service Interval: Before each use or daily—Clean and check the air cleaner foam element. -
Page 25: Servicing The Engine Oil
Servicing the Engine Oil Oil Type: Detergent oil (API service SF, SG, SH, SJ, or higher) Crankcase Capacity: 1.0 l (34 ounces) when you do not change the filter; 1.05 l (36 ounces) when you change the filter. Viscosity: See the table below. Figure 28 1. -
Page 26: Servicing The Spark Plug
Important: Do not overfill the crankcase with oil 11. Install the oil fill cap/dipstick. and run the engine; engine damage may result. Changing the Oil Filter Changing the Oil Service Interval: Every 100 hours Service Interval: After the first 5 hours Note: Change the oil filter more frequently when the Every 100 hours operating conditions are extremely dusty or sandy. - Page 27 Installing the Spark Plug 3. Disconnect the wire from the spark plug (Figure 33). 1. Install the spark plug and metal washer. Note: Ensure that the air gap is set correctly. 2. Tighten the spark plug to 20 N-m (15 ft-lb). 3.
-
Page 28: Fuel System Maintenance
Fuel System 5. Remove the filter from the fuel lines. 6. Install a new filter with the flow direction arrow coming Maintenance from the fuel tank and pointing to the engine. Move the hose clamps close to the filter (Figure 35) to secure DANGER it in place. -
Page 29: Electrical System Maintenance
Electrical System 5. Slide the rubber cover up the positive (red) cable. Disconnect the positive (red) cable from the battery Maintenance post (Figure 36). Retain all fasteners. 6. Remove the battery hold-down (Figure 36) and lift the battery from the battery tray. WARNING CALIFORNIA Proposition 65 Warning... -
Page 30: Servicing The Fuses
Figure 37 1. Positive battery post 3. Red (+) charger lead G014540 2. Negative battery post 4. Black (-) charger lead Figure 38 1. Main-30 amp 2. Charge circuit-25 amp Note: Do not run the machine with the battery disconnected, electrical damage may occur. 4. -
Page 31: Drive System Maintenance
Drive System 2. Rotate the shaft forward to release the brake. Maintenance Checking the Tire Pressure Service Interval: Every 25 hours—Check tire pressure. Maintain the air pressure in the front and rear tires as specified. Uneven tire pressure can cause uneven cut. Check the pressure at the valve stem (Figure 39). -
Page 32: Cooling System Maintenance
If a blade is damaged or worn, replace at all times. it immediately with a genuine Toro replacement blade. For Use a dry brush to clean grass and accumulated debris from convenient sharpening and replacement, you may want to the air intake screen and around the engine. - Page 33 3. Measure from the tip of the blade to the flat surface here. Figure 41 1. Cutting edge 3. Wear/slot forming G009680 2. Curved area 4. Damage Figure 43 Checking for Bent Blades 1. Blade, in position for measuring 2. Level surface Note: The machine must be on a level surface for the 3.
-
Page 34: Removing The Blades
1. Install the blade onto the spindle shaft (Figure 46). of the machine, use genuine Toro replacement blades. Replacement blades made by other manufacturers may result Important: The curved part of the blade must be in non-conformance with safety standards. -
Page 35: Leveling The Mower Deck
Leveling the Mower Deck 7. Move to the left side of the machine. Check if the side carriage bolt is in the fixed or slotted position (Figure Check to ensure the mower deck is level any time you install 50). the mower or when you see an uneven cut on your lawn. -
Page 36: Adjusting The Front-To-Rear Blade Slope
2. Move the motion control levers outward to the park G015323 position, stop the engine, remove the key, and wait for all moving parts to stop before leaving the operating position. 3. Set the height-of-cut lever to middle position. Note: Check and adjust the side-to-side blade level if you have not checked the setting;... -
Page 37: Removing The Mower
[1-1/2 inch (38 mm)]. 5. Lift the mower deck and hanger brackets clear of 4. Using a spring removal tool, (Toro part no. 92-5771), the rear lift rod and lower the mower carefully to the remove the idler spring from the deck hook to remove ground (Figure 57). -
Page 38: Installing The Mower
6. Spring removal too 5. Route the new belt around the engine pulley and mower pulleys (Figure 58). 6. Using a spring removal tool, (Toro part no. 92-5771), G005303 Figure 59 install the idler spring over the deck hook and placing tension on the idler pulley and mower belt (Figure 58). -
Page 39: Cleaning
Cleaning WARNING A broken or missing washout fitting could Washing the Underside of the expose you and others to thrown objects or blade contact. Contact with blade or thrown Mower debris can cause injury or death. Service Interval: After each use—Clean the mower housing. •... -
Page 40: Storage
Storage section. With the spark plug(s) removed from the engine, pour two tablespoons of engine oil into the spark plug hole. Use the starter to crank the engine and Cleaning and Storage distribute the oil inside the cylinder. Install the spark plug(s). - Page 41 Troubleshooting Problem Possible Cause Corrective Action The engine overheats. 1. The engine load is excessive. 1. Reduce ground speed. 2. The oil level in the crankcase is low. 2. Add oil to the crankcase. 3. The cooling fins and air passages 3.
- Page 42 Problem Possible Cause Corrective Action There is abnormal vibration. 1. The engine mounting bolts are loose. 1. Tighten the engine mounting bolts. 2. The engine pulley, idler pulley, or blade 2. Tighten the appropriate pulley. pulley is loose. 3. The engine pulley is damaged. 3.
- Page 43 Schematics G014644 Electrical Diagram (Rev. A)
- Page 44 Notes:...
- Page 45 Notes:...
- Page 46 Toro importer. If all other remedies fail, you may contact us at Toro Warranty Company. Australian Consumer Law: Australian customers will find details relating to the Australian Consumer Law either inside the box or at your local Toro Dealer.
-
Page 47: Emission Control Warranty Statement
Such use will not reduce the warranty obligations of The Toro Company. 10. Add-on or modified parts that are not approved by The Toro Company may not be used. The use of a non-approved add-on or modified parts by the purchaser will be grounds for disallowing a warranty claim. - Page 48 Warranted Parts The following emission warranty parts are covered, to the extent these parts were present on the Toro engine/equipment and/or Toro supplied fuel system: 1. Fuel System Parts • Carburetor and internal parts • Cold starting enrichment (primer or choke) •...