
Related Manuals for Bosch WBN 6000-30-H-E-N/L-S2400


Summary of Contents for Bosch WBN 6000-30-H-E-N/L-S2400
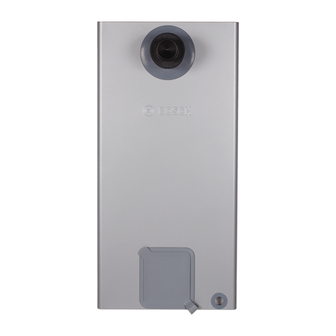
- Page 1 Gas boiler Gaz 6000 W WBN 6000-30-H-E-N/L-S2400 Installation and maintenance instructions for the contractor...
-
Page 2: Table Of Contents
2 | Contents Contents Key to symbols and safety instructions ....3 Service menu settings ....... 18 Key to symbols . -
Page 3: Key To Symbols And Safety Instructions
Key to symbols and safety instructions | 3 – Do not use the telephone or ring doorbells. Key to symbols and safety instructions ▶ Turn off the gas at the meter. ▶ Open windows and doors. Key to symbols ▶ Warn your neighbours and leave the building. ▶... -
Page 4: Product Details
4 | Product details On the data plate, you will find details on the appliance output, approval Product details information and the series number. WBN 6000-30-H-E-N/L-S2400 are appliances for central heating. Description of appliance • Gas boiler only for external installation Standard delivery •... -
Page 5: Dimensions And Minimum Clearances
Product details | 5 Dimensions and minimum clearances Ø100 Ø60 ≥ 100 ≥ 100 R 3 / 4 R 1 / 2 R 3 / 4 R 3 / 4 67.75 139.5 132.75 112.75 8 716 473 216-03.2O Fig. 3 Gaz 6000 W 8 716 473 216 (2014/09) -
Page 6: Appliance Layout
6 | Product details Appliance layout 8 716 473 216-04.4O Fig. 4 Expansion vessel [20] Front cover for outer casing [21] Main cover for outer casing Combustion chamber [22] Back plate for outer casing Burner pan with blast tube connection [23] Interface cap Ignition electrode [24] Type plate... -
Page 7: Electrical Wiring Diagram
Product details | 7 Electrical wiring diagram DIAG 3 WAY PUMP N PE L a 6 720 810 000-10.3O Fig. 5 Differential pressure switch [12] Hot water temperature sensor(N.A) [13] 240 V power cable Flow temperature sensor [14] OTM connection or on/off controller Temperature limiter for heating block [15] Connection for outside temperature sensor Monitoring electrode... -
Page 8: Technical Data
8 | Product details Technical data WBN 6000-30 Unit Max. rated heat output (P ) 80/60 °C Max. rated heat input (Q ), central heating 33.2 33.2 Min. rated heat output (P ) 53/47 °C Min. rated heat input (Q ), central heating 10.2 10.2... -
Page 9: Regulations
Regulations | 9 Not suitable for pool or spa pool application. Regulations Where no specific instruction is given, reference should be made to the following standards: • AS/NZS 5601 Gas Installations, Important notes • AS 1596 LPG storage and handling, ▶... -
Page 10: Checking The Size Of The Expansion Vessel
10 | Installation Mono-lever taps and thermostatic mixer taps Siting the appliance All mono-lever taps and thermostatic mixer taps can be used. Regulations concerning the installation site To protect the appliance against excessive pressure: ▶ Fit a pressure regulator with a safety valve. Checking the size of the expansion vessel The following diagram provides you with a rough estimate of whether the installed expansion vessel is sufficient or whether an additional... -
Page 11: Fitting The Appliance
Installation | 11 ▶ Pluming will occur at the terminal so terminal positions where this Fitting the appliance could cause a nuisance should be avoided. ▶ Fix the mounting template supplied with the documents to the wall, ▶ The air supply and the flue gas exhaust must meet the applicable observing a lateral clearance of at least 100 mm (... - Page 12 12 | Installation Taking out inner foam Flipping down the front cover 1. Take out the down foam. 1. Undo screws. 2. Take out the upper foam. 2. Flip the front cover down. 1. 1. 8 716 473 216-13.1O Fig. 10 1.
-
Page 13: Installation Of The Supply Pipes
Installation | 13 1. Undo screws. • Check all joints for leaks with an approved leak tester after connection. 2. Pull the control unit down. 3. Flip the control unit down. Refer to AS/NZS 5601 Installation Code for pipe sizing and details.Ensure that the gas pipe size is correct. -
Page 14: Electrical Connections
14 | Electrical connections Fixing the flue pipe Control unit terminals 1. Fix the short flue pipe. NOTICE: Cable residues can damage the control unit. 2. Fix the flue weather seal. ▶ Only remove the insulation from the cable outside the control unit. -
Page 15: Replacing The Power Cable
Commissioning | 15 6.3.2 Replacing the power cable Commissioning Use only original power cable. The control unit must be opened to connect the power cable. ▶ Disconnect the ignition cable. ▶ Remove cover. ▶ Remove old cable. ▶ Plug new cable connector on the conductor board. ▶... -
Page 16: Displays
16 | Commissioning Displays ▶ Press + or – to call up service function 2.b.d ( page 21). ▶ Press OK to switch to the service function. The value flashes on the display. ▶ Press + or – to set the required value. ▶... -
Page 17: Setting The Heating Control Unit
The speed of the heating pump can be changed at the pump terminal ▶ how to heat economically and save energy. box. H [m] The Bosch TRZ200 Open Therm controller (programmable heating controller) can be used. After commissioning ▶ Check the gas supply pressure ( page 22). -
Page 18: Service Menu Settings
18 | Service menu settings Service menu settings Operating the service menu The service menu enables the convenient adjustment and checking of many appliance functions. The service menu splits into three submenus: • Menu 1, for setting level one service functions ( page 19) •... - Page 19 Service menu settings | 19 Service function Possible settings/display 1.2.C Venting function The venting function can be activated after maintenance. The following settings are possible: • 00: Venting function off • 01: Venting function is switched on and after completion automatically reset to 00 Default setting is 00.
-
Page 20: Menu 2
20 | Service menu settings 9.2.2 Menu 2 To call up a service function in this menu: ▶ Hold down “Back”, + and – at the same time until L.1 is shown on the display. ▶ Press + until L.2 is shown on the display. ▶... -
Page 21: Menu 3
Service menu settings | 21 Service function Possible settings/comments/displays 2.9.A Permanent operating mode This function permanently sets an operating mode. The following settings are possible: • 00: Standard operation; the appliance runs according to controller specifications. • 01: The appliance runs at minimum output. •... -
Page 22: Converting The Appliance To Different Gas Types
10.1 Converting to a different gas type The following gas conversion kits are available: Appliance Conversion to Part no. WBN 6000-30-H-E-N/L-S2400 LPG 8 733 201 156 8 733 201 155 Table 14 DANGER: Risk of explosion! ▶ Turn off gas valve before working on gas-carrying components. -
Page 23: Flue Gas Testing
Flue gas testing | 23 ▶ Measure the O or CO level. Never commission the appliance above or below these ▶ Select service function 1.2.F and operating mode 00 ( page 19). values. Identify the cause and rectify the fault. Where that ▶... -
Page 24: Environment / Disposal
For an overview of faults, see page 29. Environmental protection is a fundamental corporate strategy of the Bosch Group. The quality of our products, their efficiency and environmental safety are all of equal importance to us and all environmental protection •... - Page 25 Inspection/Maintenance | 25 Flipping down the front cover 1. Undo screws. 2. Pull the control unit down. 1. Undo the screws. 3. Flip the control unit down. 2. Flip the front cover down. reset press 5s mode Fig. 29 Removing the front casing The front casing is secured with two screws against unauthorised removal (electrical safety).
-
Page 26: Cleaning The Burner Pan, Nozzles And Burner
26 | Inspection/Maintenance 13.1.3 Cleaning the burner pan, nozzles and burner 13.1.4 Cleaning the heat exchanger ▶ Loosen five screws and lift out the combustion chamber cover by 1. Disconnect the cable. pulling it forwards. 2. Remove screw fittings. 3. Pull the heat exchanger out towards the front. Fig. -
Page 27: Checklist For Inspection And Maintenance
Inspection/Maintenance | 27 13.2 Checklist for inspection and maintenance Date Call up the last fault saved in the electronics, service function 1.6.A ( page 19). Perform a visual check of the air/flue gas routing. Check the gas supply pressure, mbar (... -
Page 28: Displays
28 | Displays Displays Fault mode The display shows the following (tab.Fig. 18 andFig. 19): 15.1 Troubleshooting Value displayed Description DANGER: Risk of explosion! Number, point, number or Service function ▶ Turn off gas valve before working on gas-carrying letter, point followed by a (... -
Page 29: Faults That Are Shown On The Display
Fault mode | 29 15.2 Faults that are shown on the display Display code Description Remedy Temperature sensor for hot water is faulty. ▶ Check the temperature sensor and connecting lead for breaks or short-circuits; replace them if required. Cylinder temperature sensor not detected. Check cylinder temperature sensor and connecting lead. -
Page 30: Faults That Are Not Shown On The Display
30 | Fault mode 15.3 Faults that are not shown on the display Appliance faults Remedy Flow noises ▶ Correctly set the pump speed at the pump terminal box. Heat-up takes too long ▶ Correctly set the pump speed at the pump terminal box. Flue gas readings incorrect;... -
Page 31: Commissioning Report For The Appliance
Commissioning report for the appliance | 31 Commissioning report for the appliance Customer/system user: Surname, first name Street, house number Telephone/fax Postcode, town System installer: Order number: Appliance type (Complete a separate report for every appliance!) Serial number: Date commissioned: ... - Page 32 If minor installation faults are identified on Bosch components during commissioning, Bosch is fully prepared to rectify these faults once consent has been given by the customer. This does not imply any liability for the installation performance.
- Page 33 | 33 Notes Gaz 6000 W 8 716 473 216 (2014/09)
- Page 34 34 | Notes 8 716 473 216 (2014/09) Gaz 6000 W...
- Page 35 | 35 Notes Gaz 6000 W 8 716 473 216 (2014/09)