
Related Manuals for Kenwood KDC-MP4029


Summary of Contents for Kenwood KDC-MP4029
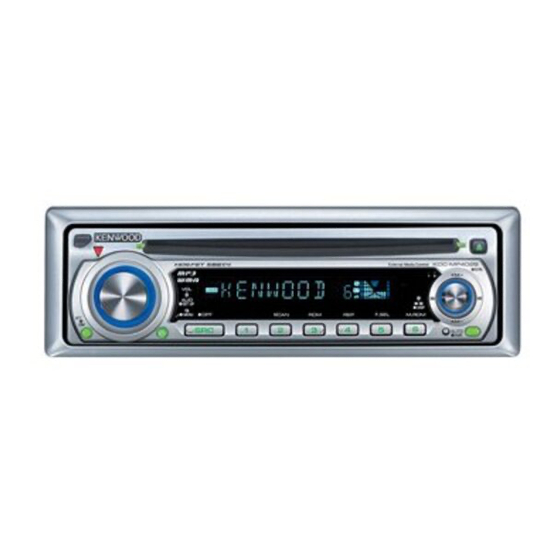
- Page 1 KDC-MP4029 KDC-MP4029G KDC-MP3029 KDC-3029 KDC-3029R KDC-2029 CD-RECEIVER INSTRUCTION MANUAL © B64-2928-00/00 (MW)
-
Page 2: Table Of Contents
Contents Safety precautions Notes About CDs About MP3 and WMA General features Power Selecting the Source Volume Attenuator System Q Audio Control Audio Setup Speaker Setting Switching Display Dimmer Control Theft Deterrent Faceplate TEL Mute Tuner features Tuning Tuning Mode Station Preset Memory Auto Memory Entry Preset Tuning... -
Page 3: Safety Precautions
KENWOOD disc changers/ CD players released in 1998 or later can be connected to this unit. Refer to the catalog or consult your Kenwood dealer for connectable models of disc changers/ CD players. Note that any KENWOOD disc changers/ CD players released in 1997 or earlier and disc changers made by other makers cannot be connected to this unit. -
Page 4: Notes
Notes • If you experience problems during installation, consult your Kenwood dealer. • If the unit fails to operate properly, press the Reset button. The unit returns to factory settings when the Reset button is pressed. • Press the reset button if the disc auto changer fails to operate correctly. -
Page 5: About Cds
About CDs Handling CDs • Don’t touch the recording surface of the CD. • CD-R and CD-RW are easier to damage than a normal music CD. Use a CD-R or a CD-RW after reading the caution items on the package etc. •... -
Page 6: About Mp3 And Wma
Playable Audio file • MP3, WMA: KDC-MP4029/MP4029G/MP3029 • Attach the correct extension for the Audio file (MP3: ".MP3", WMA: ".WMA") • Do not attach the extensisons to the other files besides the Audio file. -
Page 7: General Features
General features Release button ATT/DIM LOUD indicator ATT indicator Power Turning ON the Power Press the [SRC] button. Turning OFF the Power Press the [SRC] button for at least 1 second. Selecting the Source Press the [SRC] button. Source required Tuner External disc (Optional accessory) Auxiliary input (Optional accessory) -
Page 8: System Q
General features System Q You can recall the best sound setting preset for different types of music. Select the source to set Press the [SRC] button. Select the Sound type Press the [Q] button. Each time the button is pressed, the sound setting switches. -
Page 9: Switching Display
Track title (In External disc source or KDC- "T-TITLE" MP4029/MP4029G/MP3029 internal CD source) Track number & Play time "P-TIME" Clock "CLOCK" In Audio file source (KDC-MP4029/MP4029G/ MP3029) Information Display Song title & Artist name "TITLE" Album name (MP3 only) & Artist name "ALBUM" Folder name "FOLDER"... -
Page 10: Theft Deterrent Faceplate
General features Theft Deterrent Faceplate The faceplate of the unit can be detached and taken with you, helping to deter theft. Removing the Faceplate Press the Release button. The faceplate is unlocked, allowing you to detach • The faceplate is a precision piece of equipment and can be damaged by shocks or jolts. -
Page 11: Tuner Features
Tuner features Band display Tuning Selecting the station. Select tuner source Press the [SRC] button. Select the "TUNER" display. Select the band Push the Control knob to [FM] or [AM]. Each time the knob is pushed to [FM], it switches between the FM1, FM2, and FM3 bands. -
Page 12: Station Preset Memory
Tuner features Station Preset Memory Putting the station in the memory. Select the band Push the Control knob to [FM] or [AM]. Select the frequency to put in the memory Push the Control knob to [4] or [¢]. Put the frequency in the memory Press the desired [1] —... -
Page 13: Tuner Features (Kdc-3029R)
Tuner features Band display Tuning Selecting the station. Select tuner source Press the [SRC] button. Select the "TUNER" display. Select the band Push the Control knob to [FM] or [AM]. Each time the knob is pushed to [FM], it switches between the FM1, FM2, and FM3 bands. -
Page 14: Auto Memory Entry
Tuner features Auto Memory Entry Putting stations with good reception in the memory automatically. Select the band for Auto Memory Entry Push the Control knob to [FM] or [AM]. Open Auto Memory Entry Press the [AME] button for at least 2 seconds. When 6 stations that can be received are put in the memory Auto Memory Entry closes. -
Page 15: Rds Features (Kdc-3029R)
RDS features TI indicator Traffic Information Switching to traffic information automatically when a traffic bulletin starts even when you aren’t listening to the radio. Press the [TI] button. Each time the button is pressed, the Traffic information function turns ON and OFF. When it’s ON, "TI"... -
Page 16: Pty (Program Type)
Function of the KDC-3029R RDS features PTY (Program Type) Selecting the Program Type and searching for a station. Enter PTY mode Press the Control knob. During PTY mode the "PTY" indicator is ON. • This function can’t be used during a traffic bulletin or AM reception. -
Page 17: Changing Language For Pty Function
Changing Language for PTY Function Selecting the Program Type display language. Enter PTY mode Refer to <PTY (Program Type)> (page 16). Enter Changing Language mode Press the [TI] button. Select the language Push the Control knob to [FM] or [AM]. Each time the knob is pushed, the language switches as shown below. -
Page 18: Cd/Audio File/External Disc Control Features
F .SEL SCAN RDM/ F.SEL M.RDM Disc number Track time Function of the KDC-MP4029/MP4029G/3029/ 3029R/2029 Playing External Disc Playing discs set in the optional accessory disc player connected to this unit. Press the [SRC] button. Select the display for the disc player you want. -
Page 19: Fast Forwarding And Reversing
Fast Forwarding and Reversing Fast Forwarding Hold down on [¢] of the Control knob. Release your finger to play the disc at that point. Reversing Hold down on [4] of the Control knob. Release your finger to play the disc at that point. •... -
Page 20: Scan Play
When it’s ON, "MGZN RDM" is displayed. • When the Control knob is pushed to [¢], the next song select starts. English Function of the KDC-MP4029/MP4029G/MP3029 Function of Audio file Folder Select Quickly selecting the folder you want to listen to. -
Page 21: Menu System
Menu system MENU RDS indicator Menu System Setting during operation beep sound etc. functions. The Menu system basic operation method is explained here. The reference for the Menu items and their setting content is after this operation explanation. Enter Menu mode Press the [MENU] button for at least 1 second. -
Page 22: Security Code
Menu system Function of the KDC-MP4029/MP4029G/3029/ 3029R/2029 In Standby mode Security Code Because authorization by the Security Code is required when it’s removed from the vehicle, personalizing this unit is by using the Security Code is a help in preventing theft. -
Page 23: Synchronize Clock
Exit Clock adjustment mode Press the Control knob. Function of the KDC-3029R In Standby mode Synchronize Clock Synchronizing the RDS station time data and this unit’s clock. Display Setting "SYNC ON" Synchronizes the time. "SYNC OFF" Adjust the time manually. •... -
Page 24: Crsc (Clean Reception System Circuit)
Menu system Function of the KDC-MP4029/MP4029G/ MP3029/3029/2029 In FM reception CRSC (Clean Reception System Circuit) Temporarily have reception switched from stereo to mono to reduce multi-path noise when listening to the FM station. Display Setting "CRSC ON" The CRSC is ON. -
Page 25: Auxiliary Input Display Setting
Function of the KDC-MP4029/MP4029G/3029/ 3029R/2029 Auxiliary Input Display Setting For selecting the display when switched to Auxiliary input source. Select Auxiliary input source Press the [SRC] button. Select the "AUX EXT" display. Enter Menu mode Press the [MENU] button for at least 1 second. -
Page 26: Basic Operations Of Remote
Accessory of the KDC-MP4029/MP4029G/3029 Basic Operations of remote – FM/AM/FM Not Used [0] — [9] Loading and Replacing the battery Use two "AA"-size batteries. Slide the cover while pressing downwards to remove it as illustrated. Insert the batteries with the + and – poles aligned properly, following the illustration inside the case. -
Page 27: In Tuner Source
Audio Control [AUD] button Select the Audio item for adjustment. [VOL] buttons Adjust the Audio item. • Refer to <Audio Control> (page 8) for the operation method, such as the procedures of Audio control and others. In Tuner source [FM]/ [AM] buttons Select the band. -
Page 28: Accessories/ Installation Procedure
Accessories/ Installation Procedure Accessories Installation Procedure 1. To prevent a short circuit, remove the key from the ignition and disconnect the - battery. 2. Make the proper input and output wire connections for each unit. 3. Connect the speaker wires of the wiring harness. 4. -
Page 29: Connecting Wires To Terminals
Connecting Wires to Terminals KDC-3029 KDC-MP4029/ MP4029G//2029 A Front left output (White)/ Front right output (Red) B To KENWOOD disc To KENWOOD disc changer/ External changer/ External optional accessory optional accessory To connect these leads, refer to the relevant instruction manuals. -
Page 30: Accessories/ Installation Procedure (Kdc-3029R)
• If your car is not prepared for this special connection- ...2 system, consult your Kenwood dealer. • Only use antenna conversion adapters (ISO-JASO) when the antenna cord has an ISO plug. • Make sure that all wire connections are securely made by inserting jacks until they lock completely. -
Page 31: Connecting Wires To Terminals (Kdc-3029R)
Connecting Wires to Terminals (KDC-3029R) To KENWOOD disc changer/ External optional accessory FM/AM antenna Fuse (10A) input Wiring harness (Accessory1) TEL mute wire (Brown) If no connections are made, do not let the wire come out from the tab. Power control/ Motor... - Page 32 Connecting Wires to Terminals (KDC-3029R) Connector Function Guide Pin Numbers for Cable Colour ISO Connectors External Power Connector Yellow Blue/White Black Speaker Connector Purple Purple/Black Gray Gray/Black White White/Black Green Green/Black English 2WARNING Functions Connecting the ISO Connector The pin arrangement for the ISO connectors depends on the type of vehicle you drive.
-
Page 33: Installation
Installation non-Japanese cars Metal mounting strap (commercially available) Firewall or metal support Bend the tabs of the mounting sleeve with a screwdriver or similar utensil and attach it in place. Self-tapping screw (commercially available) Screw (M4X8) (commercially available) • Make sure that the unit is installed securely in place. If the unit is unstable, it may malfunction (for example, the sound may skip). - Page 34 Installation Screwing the Faceplate on the Unit If you want to fasten the faceplate to the main unit so that it does not fall off, screw in the provided screws in the holes shown below. Accessory5 • Never insert the screw in any other screw hole than the one specified.
-
Page 35: Removing The Unit
Removing the Unit Removing the hard rubber frame Engage the catch pins on the removal tool and remove the two locks on the upper level. Upper the frame and pull it forward as shown in the figure. Accessory2 Removal tool When the upper level is removed, remove the lower two locations. -
Page 36: Troubleshooting Guide
Troubleshooting Guide What might seem to be a malfunction in your unit may just be the result of slight misoperation or miswiring. Before calling service, first check the following table for possible problems. General The power does not turn ON. ✔... - Page 37 Troubleshooting Guide Disc source "AUX EXT" is displayed without achieving External disc control mode. ✔ Unsupported disc changer is connected. ☞ Use the disc changer mentioned in the <About CD players/disc changers connected to this unit> (page 3) of the section on <Safety precautions>.
- Page 38 Troubleshooting Guide The messages shown below display your systems condition. EJECT: No disc magazine has been loaded in the changer. The disc magazine is not completely loaded. ➪ Load the disc magazine properly. No CD in the unit. ➪ Insert the CD. NO DISC: No disc has been loaded in the disc magazine.
-
Page 39: Specifications
Frequency response (±1 dB) : 10 Hz – 20 kHz Total harmonic distortion (1 kHz) : 0.01 % Signal to Noise ratio (1 kHz) KDC-MP4029/MP4029G/MP3029: 105 dB KDC-3029/3029R/2029: 93 dB Dynamic range : 93 dB Channel separation : 85 dB...