Table of Contents
Advertisement
Available languages
Available languages
Quick Links
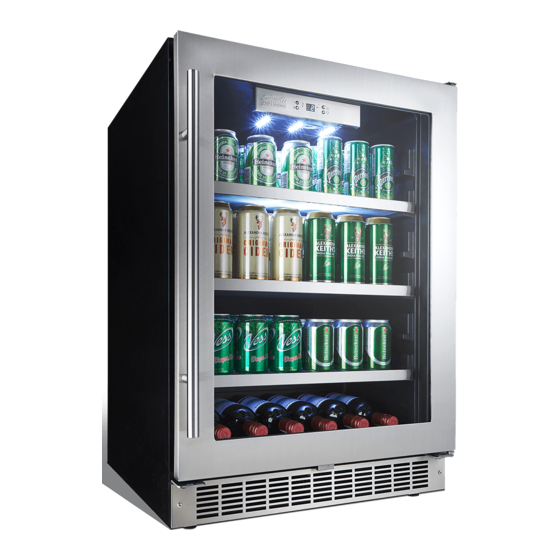
OWNER'S MANUAL
LE MANUEL DU
PROPRIÉTAIRE
DBC056D1BSSPR
CAUTION
Read and follow all safety rules
and operating instructions
before first use of this product.
PRÉCAUTION
Veuillez lire attentivement les
consignes de sécurité et les
instructions d'utilisation avant
l'utilisation initiale de ce produit.
Danby Products Limited, Guelph, Ontario Canada N1H 6Z9
Danby Products Inc., Findlay, Ohio USA 45840
1-844-455-6097
SLV2.04.14
Advertisement
Chapters
Table of Contents

Related Manuals for Silhouette DBC056D1BSSPR


Summary of Contents for Silhouette DBC056D1BSSPR
- Page 1 OWNER’S MANUAL LE MANUEL DU PROPRIÉTAIRE DBC056D1BSSPR CAUTION Read and follow all safety rules and operating instructions before first use of this product. PRÉCAUTION Veuillez lire attentivement les consignes de sécurité et les instructions d’utilisation avant l’utilisation initiale de ce produit.
-
Page 2: Table Of Contents
TABLE OF CONTENTS Important Safety Information Safety Precautions Grounding Instructions Operating Instructions Features of Your Beverage Center The Controls of Your Beverage Center Setting the Temperature Function instruction Wine Storage Shelf Instructions Installation Instructions Tools You Will Need Preparing the Enclosure Door Swing Reversal Care and Cleaning Helpfull Hints... - Page 3 Write down the model and serial numbers here. They are on a label located on the back of the unit. Model number DBC056D1BSSPR Staple your receipt to the inside Serial number back cover of this manual. You will need it to obtain service under Date purchased warranty.
-
Page 4: Important Safety Information
IMPORTANT SAFETY INFORMATION READ ALL SAFETY INFORMATION BEFORE USING WARNING DANGER, RISK OF CHILD ENTRAPMENT! An empty Beverage center is a very dangerous attraction to children. Remove either the gasket, latches, lids, lock and/or doors from unused or discarded appliances, or take some other action to guarantee it harmless. -
Page 5: Grounding Instructions
IMPORTANT SAFETY INFORMATION GROUNDING INSTRUCTIONS This appliance must be For best operation, plug this grounded. In the event of an appliance into its own electri- electrical short circuit, ground- cal outlet to prevent flickering ing reduces the risk of electric of lights, blowing of fuse or shock by providing an escape tripping of circuit breaker. -
Page 6: Operating Instructions
Operating Instructions Features of your Beverage Centre 1. Tempered Glass Door: 5. Handle Low-E glass - used to reflect and absorb heat. 6. Front Mounted Exhaust: Allows for integrated (built-in) applications. 2. Electronic Display and Controls: For viewing and regulating the temperature 7. -
Page 7: The Controls Of Your Beverage Center
Operating Instructions The Controls of your Beverage Center ° ° Indicator light illuminates to signify the cooling mode is currently in operation. 4. °C / °F 2. ‘ ’ Button Adjacent indicator light denotes which To control this appliance turn ON/OFF scale of temperature is displayed. -
Page 8: Wine Storage
Operating Instructions Fig.A Wine and beverage In order to achive the maximum storage capacity Storage of 6 bottles and 126 beverage cans. It will be necessary to position the cans in a direct line on the The *maximum capacity of the beverage center is 6 upper three glass shelves, (750ml) wine bottles and... -
Page 9: Installation Instructions
Installation Instructions - Intergrated Application Tools You Will Need FOR YOUR SAFETY: While performing installations described in this section, gloves, safety glasses or goggles should be worn. Preparing the It is recommended that you do The electrical outlet may be not install the beverage center positioned from within either Enclosure... -
Page 10: Door Swing Reversal
Installation Instructions - Door Swing Reversal Fig 1B Fig 1A Fig 1C Fig 1D Fig 1E 1 Bottom hinge (Right) 2 Screws 3 Door axis 4 Screws 5 Extrusion-board of lamp swith 6 Top hinge (Right) 7 Screws 8 Top hinge (Left) 9 Decorative nail Bottom hinge (Left) 1 When open the door 90 degree, take out 2 screws from lower door axis (3),... -
Page 11: Care And Cleaning
Care and Cleaning Helpful Hints Allow the beverage center NOTE: Be certain the door to remain open for a few power is off before minutes after manual cleaning cleaning any part of to air out and dry the inside of the beverage center cabinet. -
Page 12: Trouble Shooting
Trouble Shooting Occasionally, a problem is minor and a service call may not be necessary - use this trouble shooting guide for a possible solution. If the unit continues to operate improperly, call an authorized service depot or toll free at 1-844-455-6097 Problem Possible Cause What to do... -
Page 13: Warranty
LIMITED IN-HOME APPLIANCE WARRANTY This quality product is warranted to be free from manufacturer’s defects in material and workmanship, provided that the unit is used under the normal operating conditions intended by the manufacturer. This warranty is available only to the person to whom the unit was originally sold by Danby Products Limited (Canada) or Danby Products Inc. (U.S.A.) (hereafter “Danby”) or by an authorized distributor of Danby, and is non-transferable. - Page 14 Enregistrez ici les numéros de modèle et de série. Ces numéros se trouvent sur l’étiquette au dos de l’appareil. Numéro de modèle: DBC056D1BSSPR Agrafez votre reçu d’achat à l’intérieur de la couverture arrière de de guide. Il Numéro de série: sera requis pour faire une réclamation...
- Page 15 TABLE DES MATIÈRES Informations de sécurité importantes Précautions Instructions de mise à la terre Instructions de fonctionnement Caractéristiques de votre Centre de Breuvages 17 Commandes de votre Centre de Breuvages Réglage de la température Instruction de fonction Entreposage des vins Instruction des tabletts Instructions d'installation Outils néccesaires...
-
Page 16: Informations De Sécurité Importantes
INFORMATIONS DE SÉCURITÉ IMPORTANTES LISEZ TOUTES LES INFORMATIONS DE SÉCURITÉ AVANT DE FAIRE FONCTIONNER L’APPAREIL AVERTISSEMENT DANGER, RISQUE DES ENFANTS DEVIENNENT COINCER DANS L’APPAREIL Un refroidisseur de vin vide est une attraction dangereuse aux enfants. Enlever les joints étanch- es, les loquets, les couvercles ou les porte des appareils qui ne sont pas utiliser, ou faites de soit que l’appareil ne présente aucun danger. -
Page 17: Instructions De Mise À La Terre
INFORMATIONS DE SÉCURITÉ IMPORTANTES INSTRUCTIONS DE MISE À LA Cet appareil doit être mis à la Pour un meilleur rendement et TERRE terre. Dans l’éventualité d’un pour éviter que les ampoules court-circuit, la mise à la terre d’éclairage de la résidence procure un chemin direct de soient affectées d’un affaisse- contournement du courant... -
Page 18: Instructions De Fonctionnement
Instructions de fonctionnement Caractéristiques de votre Centre de Breuvages 6. Échappement sur le Devant : Pour 1. Portes en Verre Trempé: des applications intégrées cabinet. Verre à faible émissivité - Utilisé à réfléchir et à bsorber la chaleur. 7. Pieds de nivellement 2. -
Page 19: Commandes De Votre Centre De Breuvages
Instructions de fonctionnement Commandes de votre Centre de Breuvages ° ° 1. Le voyant s’allume pour indiquer que le cycle de refroidissement est presentment en marche. 2. Pour contrôler cet appareil allumer / éteindre 5. ‘ ’ HAUT bouton de commande Augmenter (Appuyez et maintenez ces bouton pour environ la température (plus chaud) par intervalle de 3 secondes). -
Page 20: Entreposage Des Vins
(3) éta- gères de verre du haut comme La capacité maximale* du illustré aux fig. A et fig. B. Cela DBC056D1BSSPR est de 6 permettre l’entreposage de quar- bouteilles de vin (750ml) et de ante-deux (42) cannettes de 350ml 126 cannettes (355ml). -
Page 21: Instructions D'installation
Instructions d’installation - Application Intégré Outils néccesaires Niveau Lunette de sécurité Gants POUR VOTRE SÛRETÉ: Lampe de poche Equerre de En faire les installations charpentier Ruban à mesurer décrites dans cette section, des gants, les lunette de Perceuse et jeu de scie cylindrique sûcurité... -
Page 22: Renversement De La Porte
Instructions d’installation - Renversement de la Porte Fig 1B Fig 1A Fig 1C Fig 1D Fig 1E 1 Charnière inférieure (droite) 2 Vis Charnière supérieure (gauche) 3 Axe de la porte Clou décoratif 4 Vis 10 Charnière inférieure (gauche) 5 Plaque d’extrusion de l’interrupteur d’é- clairage 6 Charnière supérieure (droite) 1.Ouvrez la porte à... -
Page 23: Soin Et Nettoyage
Soins et entretien Laissez la porte de la machine NOTE : Avant de nettoyer Conseils utiles ouverte durant quelques min- quelque partie que ce soit utes pour aérer et assécher l’in- de cet appareil, assurez- térieur de l’armoire après nettoy- vous que l’alimentation est age. -
Page 24: En Cas De Panne
En cas de panne Il peut arriver qu’un problème mineur se produise qui ne nécessite pas d’appel de service : consultez ce guide de dépannage pour trouver une solution possible. Si l’appareil continue de mal fonctionner, appelez un atelier de réparation autorisé... -
Page 25: Garantie
GARANTIE LIMITÉE SUR APPAREIL ÉLECTROMÉNAGER À DOMICILE Cet appareil de qualité est garantie exempt de tout vice de matière première et de fabrication, s’il est utilisé dans les conditions normales recommandées par le fabricant. Cette garantie n’est offerte qu’à l’acheteur initial de l’appareil vendu par Danby Products Limited (Canada) ou Danby Products Inc. (E.- U. d’A) (ci-après “Danby”) ou par l’un des ses distributeurs agréés et elle ne peut être transférée. - Page 26 All repair parts available for purchase or special order when you visit Model Modèle your nearest service depot. To request service and/or the location of the service depot nearest you, call the TOLL FREE DBC056D1BSSPR NUMBER. When requesting service or ordering parts, always provide the following information:...