Table of Contents
Advertisement
Quick Links
Advertisement
Table of Contents

Summary of Contents for Sansui DB-100
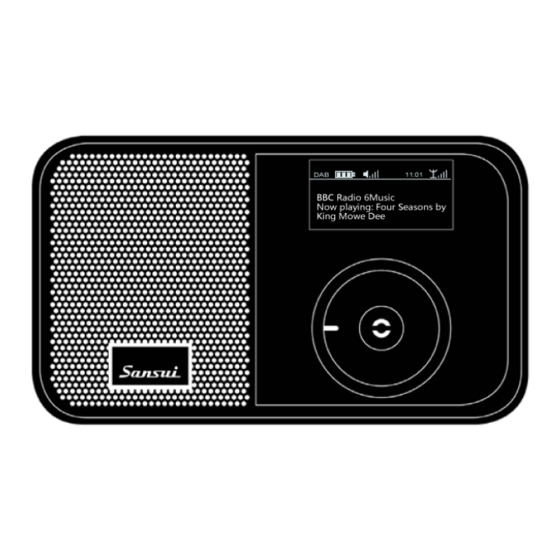
- Page 1 DB-100 DAB/DAB+ Pocket Radio User Guide www.sansui.co.uk...
- Page 2 Quick Start Guide Press and hold the Power Button for more than 3 seconds to turn on the radio. The green power indicator will flash and then stay illuminated and the start-up screen will appear. DAB Radio When the DAB mode is selected for the first time the radio will automatically search for local DAB and DAB + radio stations.
-
Page 3: Table Of Contents
User Manual Basic Operation ....................... 17 Brief Introduction ������������������������������������������������������������������������������������������������������� 5 Power on DAB for the First Time ................ 17 Packaging and Specifications ����������������������������������������������������������������������������������� 5 Power on DAB after the First Time ..............17 Packaging ........................5 Select Stations ....................18 Specifications ...................... -
Page 4: Brief Introduction
Brief Introduction System Setup Menu Introduction and Operation �������������������������������������������������� 28 Set Power Off Time ....................28 The Sansui DB-100 is a digital radio with DAB, DAB +, FM, MP3 and alarm clock Time Setup ....................... 29 function. Display Time & Date ................... 29 Set Time &... -
Page 5: Specifications
This device can support playing music file from SD card or flash memory. The Sansui DB-100 radio can receive and play all the Band III radio stations Playing mode supports the function for one time, repeat or shuffle function. -
Page 6: Button Functions
Button Functions Display Screen Back Button Playing Screen Short press back to upper menu. Long press (3 seconds) back to main There are three modes: DAB, FM, and MP3. menu under the function. Speaker Switch : Displays the battery charge level. Left is speaker off, right is Control Wheel : Displays the current volume. -
Page 7: Information Screen
Menu Screen The menu screen displays four options, with the currently selected option shows ‘>’. If more than four options are available, turn the Control Wheel up or down to select the others. Query Screen Note: Within DAB mode, FM mode or MP3 mode, you can use the <System Setup> and <Main Menu>... -
Page 8: Mode Switching
MP3 System Setup When the radio is powered for the first time, it will show the <Main Menu> after the start-up screen, There are 4 items, <DAB>, <FM>, <MP3>, and <System Setup> Users can select <DAB>, <FM> or <MP3> to select the desired mode. Power on: Press the Power Button for more than 3 seconds to turn on the radio. -
Page 9: Dab Menu
DAB Menu Local Scan DAB Menu structure Preset List Station List Local Scan Manual Tune Region DRC Record Searches for local stations using the part of band III allocated to the region, When Sort <Local Scan>... -
Page 10: Region
search is finished, the screen will display the number of radio stations found and Sort will play the first station found. If no stations are found, it will display “0”. When the The stations stored in the <Station List> can be sorted, either according to the fre- search is the radio will display the Playing screen. -
Page 11: Select Stations
Select Stations FM Radio Menu Introduction and Operation Turn to the Control Wheel in Playing Screen or Select <Station List> in the DAB FM Radio Menu Structure: menu display the <Station List> menu. Press the Enter Button to select the desired Preset List radio stations. -
Page 12: Channel List
Seek Mode Clear All Station Press Back Button to go back to the main menu, select <Seek Mode> and press To access the <Clear All List> menu during playing , press the Back Button to dis- the Enter Button, to search for stations automatically. play the FM main menu, and turn the Control Wheel to <Clear All List>... -
Page 13: Audio Setting
‘Strong Stations Only’? Press Enter Button, it will be set to search Strong Stations Record Only and return to the FM main menu Press Back Button, it will not select strong stations only but will return to the FM In the FM mode, you can record your favourite programmes. The recordings can be main menu stored in the internal Flash memory or the SD card. -
Page 14: Flash
Main Menu Play Mode Flash In the MP3 main menu, turn Control Wheel to <Flash>, press Enter Button to view Flash display and the audio files in Flash. If there are not any audio files or directories, it will display “NO FILE“. If there is an audio file, press the Enter Button to play. -
Page 15: System Setup
MP3 User interface for display Turn the Control Wheel to <EQ>, to set the equalizer as <Normal>, <Classic>, MP3 Playing Screen <Pop>, <Jazz>, <Bass> or <Rock>; From here, turn the Control Wheel to select the previous or the next; Turn the Control Wheel to select any one of the six types, then press the Enter Momentarily press the Enter Button to pause or play. -
Page 16: System Setup Menu Introduction And Operation
When you choose <Charging & Playing Mode>, the <USB MODE SELECT> screen Time Setup will disappear , and the previous mode will be displayed. Display Time & Date This menu can display current date, time, week. System Setup Menu Introduction and Operation Set Time &... -
Page 17: Backlight Brightness
there are 8 levels, 1 – 8. Rotate the Control Wheel to select the brightness values then select the desired value with a short press of the Enter Button to save the setting. A long press of the Back Button will not save this setting and will exit this screen. Backlight Timeout Selecting the <Backlight Timeout>... -
Page 18: Using The Antenna
charge when it is off in order to ensure the battery is fully charged. When the radio is off, plugging the USB 2.0 cable in causes the indicator to light Red during charging and extinguishes automatically after charging. Using the Antenna If headphones are not being used, be sure to use the supplied external antenna.


