Table of Contents
Advertisement
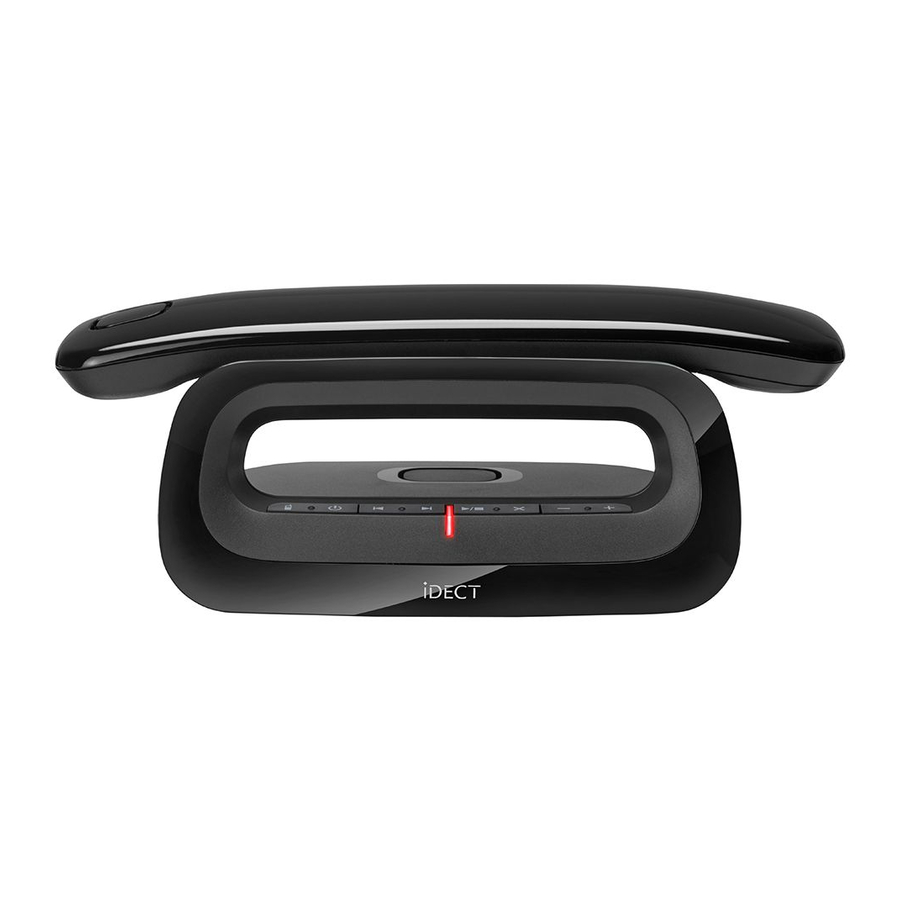
USER GUIDE
Loop Plus
Loop Plus Twin
Loop Plus Triple
Loop Plus Quad
DECT Telephone With
answering machine
Binatone Helpline
(for UK only)
Mon - Fri - 8.00am to 8.00pm
Sat - 8.30am to 2.00pm
Tel: 0844 557 9677
**Please note that all calls are
charged at local rate
Or visit our websites: www.binatonetelecom.com
www.iDECTonline.com
THIS EQUIPMENT IS NOT DESIGNED FOR MAKING
EMERGENCY TELEPHONE CALLS WITHOUT MAINS
POWER. ALTERNATIVE ARRANGEMENTS SHOULD BE
MADE FOR ACCESS TO EMERGENCY SERVICES.
Before operating this set,
please read these instructions carefully.
Advertisement
Table of Contents

Summary of Contents for iDect Loop Plus
-
Page 1: User Guide
USER GUIDE Loop Plus Loop Plus Twin Loop Plus Triple Loop Plus Quad DECT Telephone With answering machine Binatone Helpline (for UK only) Mon - Fri - 8.00am to 8.00pm Sat - 8.30am to 2.00pm Tel: 0844 557 9677 **Please note that all calls are charged at local rate Or visit our websites: www.binatonetelecom.com... -
Page 2: Technical Details
TECHNICAL DETAILS STANDARD DIGITAL ENHANCED CORDLESS TELECOMMUNICATION (DECT) FREQUENCY RANGE 1.88 TO 1.9 GHZ (BANDWIDTH = 20 MHZ) CHANNEL BANDWIDTH 1.728 MHZ OPERATING RANGE UP TO 300M OUTDOORS; UP TO 50M INDOORS OPERATING TIME STANDBY: 100 HOURS, TALKING: 10 HOURS BATTERY CHARGE TIME:15 HOURS TEMPERATURE RANGE OPERATING 0 C TO 40... -
Page 3: Table Of Contents
TABLE OF CONTENTS IMPORTANT SAFETY INSTRUCTIONS ........7 INSTALLING YOUR PHONE ..........10 2.1 Connecting the Base Station ............10 2.2 Installing and Charging the Rechargeable Batteries in the Main Loop Handset ..............10 GET TO KNOW YOUR PHONE ..........12 3.1 Handset Overview ................ 12 3.2 Base Station Overview (For Models With TAM base) .... - Page 4 4.9.1. Redial a Number from the Redial List ........23 4.9.2. Store a Redial Number into the Phonebook ......24 4.9.3. Delete a Redial Number ............24 4.9.4. Delete the Entire Redial List ............ 24 4.10 Find the Handset (PAGING) ............25 4.11 Make an Internal Call ..............
- Page 5 6.2.6. Set Alert Tones ............... 36 6.2.7. Set the Language (Varies Among Models) ......36 6.2.8. Rename the Handset .............. 37 6.2.9. Set the Auto Answer .............. 37 6.3 Base Settings ................37 6.3.1. Set the Base Ringer Volume ............ 38 6.3.2.
- Page 6 8.5.8. Turn On or Off the Base Screening .......... 51 8.5.9. Remote Access ................ 51 8.5.10. Change the Compression Rate ..........52 TROUBLESHOOTING ............55 10 DECLARATION OF CONFORMITY ........56 11 GUARANTEE AND SERVICE ..........58 11.1 While the unit is under Guarantee ..........58 11.2 After the Guarantee has expired ..........
-
Page 7: Important Safety Instructions
IMPORTANT SAFETY INSTRUCTIONS Please follow these safety instructions when using your telephone equipment to reduce risk of fire, electric shock and injury: Read and understand all the instructions. Follow all warnings and instructions marked on the product. Unplug this product from the wall outlet before cleaning. Do not use liquid cleaners or aerosol cleaners. -
Page 8: Package Contents
10) Do not use third party charging pods. Damage may be caused to the batteries. 11) Please ensure that the batteries are inserted in the correct polarity. 12) Dispose of batteries safely. Do not burn, immerse them in water, disassemble, or puncture the batteries. Package contents The package contains the following items: •... - Page 9 Handset & Base Connection 1) When purchased, all handsets are already registered to the base unit and should link to it when they are all powered up. 2) To use your cordless handset and base unit together, you must be able to establish a radio link between them.
-
Page 10: Installing Your Phone
INSTALLING YOUR PHONE Connecting the Base Station 1) Plug the mains power cable and telephone line cord into the base station. 2) Plug the power adapter into a 100 - 240Vac, 50 - 60Hz mains power socket, and the telephone line cord into a telephone line socket. -
Page 11: If You Have A Broadband Line
• The handset will give a double beep when it is properly placed on the base and the battery charging indicator on the base lights up to indicate charging. Note: The handset may become warm when the batteries are being charged or during prolonged periods of use. This is normal and does not indicate a fault. If you have a broadband line If you connect your telephone to a line with a broadband connection, you will need to insert a micro-filter between the telephone and the telephone line;... -
Page 12: Get To Know Your Phone
GET TO KNOW YOUR PHONE Handset Overview ⑫ ③ ② ① ⑥ ⑤ ④ ⑦ ⑧ ⑩ ⑨ ⑪... - Page 13 In idle mode: Press to access the main menu. In sub-menu mode: Press to confirm the selection. ① During a call: Press to access Intercom/Phonebook/ Redial List/ Call List. In idle mode: Press to initiate an intercom call. In main menu mode: Press to go back to idle screen. In sub-menu mode: Press to go back to previous menu.
- Page 14 In idle / predialing mode : Press to make a call. In Redial list / Call List / Phonebook entry: Press to ⑤ make a call to the selected entry in the list. During ringing: Press to answer a call. During a call: Press to end a call and go back to idle screen.
-
Page 15: Base Station Overview (For Models With Tam Base)
During a call: Press to turn on / off the speakerphone. In Idle mode / predialing mode / Redial list / Call List / Phonebook entry: Press to make a call with speaker- ⑧ phone. During ringing: Press to answer a call with speaker- phone. -
Page 16: Handset Lcd Display Icons And Symbols
Press to page your handset(s). ① Use during registration mode Press to turn the answering machine on or off. ② Press <REPEAT> to repeat the playing message. ③ Press <REPEAT> twice to play the previous message. Press <SKIP> to skip to the next message. ④... - Page 17 More blocks indicate a stronger reception signal. Less blocks indicate a weaker reception signal. Indicates a call is in progress. Flashes when there is an incoming call. Indicate that the ringer is switched off. Steady when an alarm is set. Flash when the alarm time set before reaches.
-
Page 18: Menu Structure
Menu Structure In idle mode, press <MENU/OK> will firstly access the Call List menu. Refer to the following for the menu structure. Main CALL LIST PHONE- BS SETTINGS HS SET- REGISTRA- DEFAULT ANS. MACHINE Menu BOOK TINGS TION (ONLY FOR MODELS WITH TAM BASE) Review Call Review... -
Page 19: Latin Character Set
3.5.1. Latin Character Set Alphanumeric Editing Number Editing (For phonebook name editing and renaming handset) (For phone number edi- ting, date/time editing) 10th press space 0, P (Pause) ‘ &... -
Page 20: Use Your Phone
USE YOUR PHONE Switch ON/OFF the Handset When the handset is in idle mode, press and hold to switch the handset off. To switch the handset on, press and hold Make a Call 4.1.1. Preparatory Dialing 1. Enter the phone number, maximum 24 digits. If you make a mistake, press to delete the last digit. -
Page 21: Search Alphabetically For Phonebook Entries
4.1.4. Search Alphabetically for Phonebook Entries 1. In idle mode, press to access the phonebook list. Press then to select PHONEBOOK. Press 2. Press the numeric key containing the first letter of the name you want. For example, pressing will show the entries starting with A. -
Page 22: Out Of Range Warning
4.1.8. Out of Range Warning When the handset goes out of range of the base, the screen will display “OUT OF RANGE”, and the call will be disconnected if you are on a call. When you move back within range, the handset will automatically reconnect to the base. -
Page 23: End A Call
End a Call During a call connection, press to end the call. Put the handset on the base or charger to end the call. Call Timer Your handset automatically times the duration of every call. The call timer will display for a few seconds after the call has been made. It is shown in hours, minutes and seconds format (HH:MM:SS). -
Page 24: Store A Redial Number Into The Phonebook
NOTE If there are no numbers in the redial list, the display shows “EMPTY”. 4.9.2. Store a Redial Number into the Phonebook 1. Follow Steps 1 and 2 in the section of Redial a Number from the Redial List. 2. Press to select ADD TO PB. -
Page 25: Find The Handset (Paging)
4.10 Find the Handset (PAGING) Paging is a useful way for finding lost handset(s). 1. Press on the base station. All the registered and available handsets will produce the paging tone and “PAGING” is displayed on the LCD. 2. Press on any handset or on the base station again to stop paging. -
Page 26: Call All Handsets
4.11.2. Call All Handsets 1. In idle mode, press and the screen displays all registered handsets. 2. Press to ring to all registered handsets. 4.11.3. Transfer an External Call to Another Handset During an external call: 1. Press to select INTERCOM. 2. -
Page 27: Private Phonebook
PRIVATE PHONEBOOK Your phone can store up to 100 private phonebook entries with names and numbers. Each phonebook entry can have a maximum of 24 digits for the phone number and 12 characters for the name. You can also select different melodies for your phonebook entries. -
Page 28: Writing Tips
5.1.2. Writing Tips - Press to delete the last character or digit. - Press and hold to delete all characters or digits. - Press to move backward or forward through the characters / digits. - Press and hold <0> to insert to pause (will appear as P) Review an Entry 1. -
Page 29: Edit A Phonebook Entry
Edit a Phonebook Entry 1. In idle, press to access the phonebook. 2. Press to select the entry you want to edit. 3. Press then to select EDIT. 4. Press then use the keypad to edit the name (if applicable). 5. -
Page 30: Check Phonebook Status
Check Phonebook Status You can check how many entries have been occupied in your phone and how many phonebook entries are available for you to store in the phonebook. 1. Press to access the phonebook. 2. Press then to select PB STATUS. 3. -
Page 31: Phone Settings
PHONE SETTINGS Your phone comes with a selection of settings that you can change to personalize your phone the way you like it to work. Date and Time Settings You will need to set the correct time and date so that you know when you received answering machine (applicable to model with answering machine) or call list entries. -
Page 32: Set The Time, Date, And Year
6.1.3. Set the Time, Date, and Year 1. Press to select HS SETTINGS. 2. Press to select DATE & TIME. 3. Press to select SET TIME. 4. Press then enter the time information according to 12 HR or 24 HR format. The time will be in the format you set. 5. -
Page 33: Alarm
3. Press any key except in idle mode to make a direct call to the number set. NOTE If DIRECT CALL is set to ON, and you want to change it back to OFF, Press to select HS SETTINGS, and follow the step 2 to 4 above to turn the feature off. -
Page 34: Set The Ringer Melody For External Calls
- During paging or ringing, the alarm will not sound when the alarm time is reached. However, if snooze function is enabled, the alarm will sound again at the end of the snooze period provided that it’s not ringing or in paging mode at the end of the snooze period. -
Page 35: Set The Ringer Melody For Internal Calls
NOTE The respective ringer melody will be played while you are scrolling through the melody list. 5. Press to confirm. 6.2.4. Set the Ringer Melody for Internal Calls You can set the melody to personalize your external ringer. A total of 10 melodies are provided for your selection. -
Page 36: Set Alert Tones
NOTE The respective ringer volume will be played during your selection. 5. Press to confirm. 6.2.6. Set Alert Tones A single beep is emitted when you press a key. You can turn on or off the key tone. You can also turn on the alert tones when low battery and out of range are detected. -
Page 37: Rename The Handset
6.2.8. Rename the Handset 1. Press to select HS SETTINGS. 2. Press to select RENAME HS. 3. Press and enter the name of your handset 4. Press to confirm. 6.2.9. Set the Auto Answer If you turn on the auto answer feature, you can pick up the call without pressing any key. -
Page 38: Set The Base Ringer Volume
6.3.1. Set the Base Ringer Volume You can set the ringer volume level. A total of 6 ringer volume levels including VOLUME OFF are provided for your selection. 1. Press to select BS SETTINGS. 2. Press to select RING SETUP. 3. -
Page 39: Change The System Pin Code
6.3.3. Change the System PIN Code A 4-digit system PIN code is used for changing the system settings of the base station. It is used to protect your phone against unauthorized use. The default system PIN code is 0000. 1. Press to select BS SETTINGS. -
Page 40: Register A Handset
Register a Handset Your handset is pre-registered to the base station. Up to five handsets can be registered to a a single base station. If for some reason, the handset is not registered to the base station, REGISTER” will be displayed on the handset screen, register your handset following the process below. -
Page 41: Deregister A Handset
Deregister a Handset You may need to deregister your handsets if you wish to change the designated handset number of your registered handsets. You are requested to enter the 4-digit PIN in order to de-register a handset from the base station. NOTE You cannot deregister the handset that you are currently using. -
Page 42: Caller Display (Network Dependent)
CALLER DISPLAY (NETWORK DEPENDENT) Call List This feature is available if you have subscribed to the Caller Line Identification service from your telephone company. Your phone can store up to 50 received calls with date/time information in the Call List. The number will be shown on the LCD when the phone is ringing. -
Page 43: Store A Call List Number Into The Phonebook
Store a Call List Number into the Phonebook 1. Follow Steps 1 and 2 in the section of View the Call list. 2. Press to select ADD TO PB. to enter the name. (See Entering Names) 3. Press 4. Press and then the selected call list number is displayed. -
Page 44: Call List Category
Call list Category You can choose to store all calls or only the unanswered (missed) calls into the call list. 1. Follow Steps 1 and 2 in the section of View the Call list. 2. Press to select ALL CALLS or MISSED CALLS. 3. -
Page 45: Answering Machine (For Models With Tam Base)
ANSWERING MACHINE (FOR MODELS WITH TAM BASE) A telephone with TAM base includes a telephone answering machine that records unanswered calls when it is switched on. The screen message counter (two digits) seven segment display on the base will show the number of the messages when the answering system is on. -
Page 46: Play Messages On Tam
Play messages on TAM If you have new messages, they are played first, and then saved as old messages, until they are deleted. Old messages are played again after all new messages are played completely. Using the telephone base: In idle: - Press <PLAY>... -
Page 47: Record Memo On The Answering Machine
3. Press to confirm. 4. Press to reconfirm and the display will be back to the precious menu after deletion. NOTE You cannot delete new messages, so you will have to play them before trying to delete. Record Memo on the Answering Machine You can record your memo message for another user. -
Page 48: Set The Tam Language (Varies Among Models)
4. Press to select ANS & REC or ANSWER ONLY. 5. Press to confirm. 8.5.2. Set the TAM language (Varies Among Models) 1. Press to select ANS. MACHINE. 2. Press to select TAM SETTINGS. 3. Press to select TAM LANGUAGE. 4. -
Page 49: Playback The Outgoing Message (Ogm)
7. Press to stop and save your personalized OGM. You new saved OGM will playback automatically. Alternatively, press to return to the previous screen without saving the personalized OGM. 8.5.4. Playback the Outgoing Message (OGM) Using the telephone base: Press briefly to listen to the current OGM Using the handset: 1. -
Page 50: Set The Answer Delay
3. Press to select OGM SETTINGS. 4. Press to select ANS & REC or ANSWER ONLY. 5. Press to select PLAYBACK. 6. Press to playback your personalized OGM (if you have recorded it before) and “PLAYING OGM” is displayed on the screen. 7. -
Page 51: Turn On Or Off The Base Screening
5. Press to confirm. 8.5.8. Turn On or Off the Base Screening You can select to turn on or off the call screening on base. to select ANS. MACHINE. 1. Press 2. Press to select TAM SETTINGS. 3. Press to select BS SCREENING. to select ON or OFF. -
Page 52: Change The Compression Rate
8.5.9.2 Change the 4-Digit Remote Access PIN 1. Press to select ANS. MACHINE. 2. Press to select TAM SETTINGS. 3. Press to select CHANGE PIN. 4. Press to enter the old PIN (default remode access PIN is 0000). 5. Press to enter the new PIN. - Page 53 Loop Plus system Remote operation Using a tone-dialling phone, dial your home number While your outgoing message is playing, press < * > Key in your remote security code The default code is 0000. For details of how to set a new code, see the User Guide 8.5.9.2 on page 52.
- Page 54 Keys While message is not While message is playing playing Delete the current message playing Repeat at playing the current message from the beginning. Press twice to skip backward to play the previous message Start playing Stop the current message playback messages.
-
Page 55: Troubleshooting
TROUBLESHOOTING If you have difficulty with your phone, please try the suggestion listed below. Please contact the technical support of the network provider for further information. This telephone is not equipped with a grounding function! Therefore some of the functions may be limited when used in PBX systems. -
Page 56: Declaration Of Conformity
China Brand: iDECT Model name: Loop Plus series complies with the essential protection requirements of R&TTE Directive 1999/5/EC on the approximation of the laws of the Member States relating to Radio Spectrum Matters, the Council Directive 2004/108/ EC on the approximation of the laws of the Member States relating to Electromagnetic Compatibility (EMC) and the European Community Directive 2006/95/EC relating to Electrical Safety. - Page 57 The conformity to the requirements is validated by the symbol. NOTE: In compliance with Directive 2002/96/EC, when you purchase a product that comes with the symbol shown on the right, you are required to dispose of electrical and electronic equipment by separate waste collection and you cannot dispose of the product as normal waste. This equipment and all its components, subsystems and consumable materials form an integral part of this product and when you decide to dispose of them you have to take them to a local recycling centre for appropriate waste disposal, in compliance with the current regulations. Details about the location of these centres can be obtained from your local authority. Notes for battery disposal Your product contains batteries covered by the European Directive 2006/66/EC, which must not be disposed of with normal household waste. Please be aware of the local rules on separate collection of batteries. The correct disposal of batteries helps protect the environment and prevent health hazards.
-
Page 58: Guarantee And Service
GUARANTEE AND SERVICE The phone system is guaranteed for 12 months from the date of purchase shown on your sales receipt. This guarantee does not cover any faults or defects caused by accidents, misuse, fair wear and tear, neglect, faults on the telephone line, lightning, tampering with the equipment, or any attempt at adjustment or repair other than through approved agents.