Table of Contents
Advertisement
Quick Links
Advertisement
Table of Contents

Related Manuals for Kawai PN81


Summary of Contents for Kawai PN81
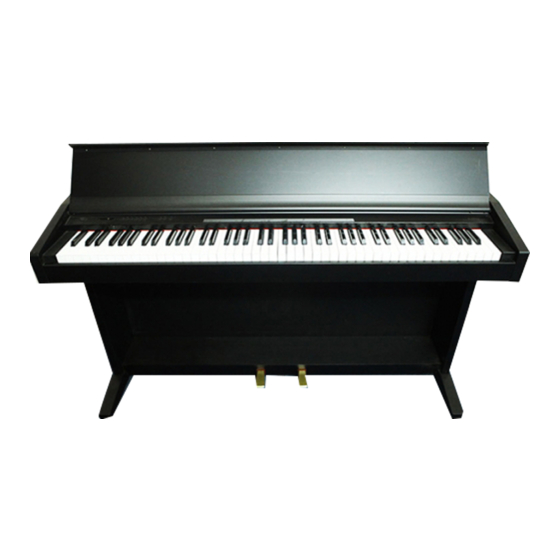
- Page 1 DIGITAL PIANO PN81 OWNER'S MANUAL...
- Page 2 – 2 –...
-
Page 3: Table Of Contents
Your new PN81 is a high-quality instrument offering the very latest in leading-edge music technology. This manual contains valuable information that will help you make full use of your PN81’s many capabilities. Please read it carefully and keep it handy for further reference. -
Page 4: Important Safety Instructions
Alerts the user to the presence of general cautions and warnings in the instruction manual accompanying the product. WARNING Use the AC adapter supplied with the product or one recommended by Kawai. 120V 230V 240V If you are going to use an AC power cord, make sure that its has the correct plug shape and conforms to the specified power voltage. - Page 5 Do not use the product in the following areas. Areas, such as those near windows, where the product is exposed to direct sunlight Extremely hot areas, such as near a heater Extremely cold areas, such as outside Extremely humid areas Areas where a large amount of sand or dust is present Areas where the product is exposed to excessive vibrations...
-
Page 6: Assembling The Stand
ASSEMBLING THE STAND Be sure that all parts are included before starting to assemble your unit. PARTS PROVIDED Side Panel (A) ..2 pcs. Back Panel (B) ..1 pc. Pedal Board (C) . - Page 7 Side view Rear view 3. Fasten (A) and (B) with four screws (H) from the front and fasten (B) and (C) with three screws (G) from the back. 4. Place the piano on the stand. Then, slide the piano backward to place it at the appropriate point for screws.
-
Page 8: Part Names
PART NAMES POWER BUTTON (A) This button turns the instrument on and off. Be sure to turn off the instrument when you are finished playing. VOLUME SLIDER (B) Move the volume slider to the right to increase the instrument’s volume. Move the slider to the left to decrease the volume. - Page 9 There are two kinds of jacks. One is for the enclosed pedals. Connect the pedal cord to this jack. The other is for the optional pedals, such as KAWAI F-1. Use this jack when you use the PN81 without the stand.
-
Page 10: Getting Started
(3) Choose a tone. Pressing a TONE button automatically changes the sound made by the PN81. The LED above the selected tone button will light to indicate which tone is currently in effect. -
Page 11: Transpose
When playing a piano, the volume of the sound produced increases in direct relation to how hard a key is struck. The PN81 offers the realistic feel of an acoustic piano for practicing music. The Touch Response function simulates the standard touch of the acoustic piano when the TOUCH LED is off. -
Page 12: Demonstration Songs
4. DEMONSTRATION SONG This digital piano incorporates 12 demonstration songs for your listening enjoyment. (1) Press the DEMO button. This PN81 will begin to play the twelve demonstration songs in the following order. C ..Fantasie-Impromptu (F. Chopin) C-sharp . -
Page 13: Digital Recording Functions
DIGITAL RECORDING FUNCTIONS 1. EASY RECORDING (1) Press the REC button. The PN81 will be ready for recording. To cancel the recording, press the REC button again. (2) Playing the piano will automatically start the recording. You can also start recording by pressing the PLAY/STOP button. -
Page 14: Playing Back A Song
(1) While holding down the REC button, press the CHOIR (Song 3) button to select Song No.3. Track 1 of Song No.3 will be selected and the PN81 will be ready to record. (To turn off the metronome’s sound, press the HARPSICHORD button before releasing the REC button. To cancel without recording, press the REC button again. - Page 15 (2) Play the piano with your left hand. Playing the piano will automatically start the recording. You can also start recording by pressing the PLAY/STOP button. (3) Press the PLAY/STOP button after you have finished playing. (4) Now, to play back the left-hand part, press the PLAY/STOP button. The left-hand part you have recorded (Track 1 of Song No.3) will be played back.
-
Page 16: Deleting A Song/Track
4. DELETING A SONG/TRACK This function allows you to delete songs that were not recorded correctly or songs that you do not want to listen to any more. (1) Simultaneously hold down the PLAY/STOP button and the REC button. The LEDs will light to show you where songs have been recorded. -
Page 17: Programming Mode
PROGRAMMING MODE The Programming Mode gives you access to many other useful features on your PN81. To use the Programming Mode functions, press a key on the keyboard while holding down the TOUCH and TRANSPOSE buttons. To exit the Programming Mode, release the TOUCH and TRANSPOSE buttons. -
Page 18: Tuning
TOUCH and TRANSPOSE buttons, the MIDI channel will decrease by 1 each time you press the key. (2) Release the both hands after selecting the channel. When the power is first turned on, the PN81 always selects channel 1. Raise the pitch Lower the pitch... -
Page 19: Turning Sending Program Number On And Off
(1) If you press any B-flat key while holding down the TOUCH and TRANSPOSE buttons, this function is set to “off” and the PN81 does not transmit the data corresponding to the tone selected on the panel. If you press the B-flat key again while holding down the TOUCH and TRANSPOSE buttons, this function returns to “on”... -
Page 20: Local Control On And Off
(2) Release both hands after selecting the desired setting. 7. RESET When the RESET procedure is used, most of the PN81’s original factory settings will be restored. The original factory settings restored with this function are: – MIDI Transmit Channel Channel 1 –... -
Page 21: Midi
When connected as shown in the illustration, data on how the digital piano is played (which keys are struck) can be sent to another MIDI instrument. Plus, the sound from the PN81 can be layered over the sound of the other instrument. - Page 22 DRP-10 NOTE: If using a sequencer or sound module and putting it on the top of the PN81, you should remove the fallboard. (1) Open the fallboard and you see the pivot with the spring down the right side of the board.
-
Page 23: Specifications
SPECIFICATIONS KEYBOARD TOUCH TYPES MAX. POLYPHONY TONES EFFECTS DIGITAL RECORDER OTHER FUNCTIONS DEMONSTRATION SONGS PEDALS JACKS SPEAKERS DIMENSIONS WEIGHT POWER 88 Keys 4 Types (Normal, Light, Heavy, Constant) 24 Notes 8 Tones (PIANO1, PIANO2, E.PIANO, CHURCH ORGAN, HARPSICHORD, VIBRAPHONE, STRINGS, CHOIR) Reverb, Wide, Chorus 3-Song, 2-Track, 1,200-Notes Transpose, Tuning, MIDI Functions... -
Page 24: Midi Implementation Chart
MIDI IMPLEMENTATION CHART KAWAI DIGITAL PIANO MODEL: PN81 FUNCTION Basic Channel (Default) (Changed) Mode (Default) (Message) (Altered) Note Number (True Voice) Velocity (Note ON) (Note OFF) After Touch Key’s Channel’s Pitch Bend Control Change Program Change True System Exclusive Common... - Page 25 – 25 –...