Table of Contents
Advertisement
Advertisement
Table of Contents

Summary of Contents for Culligan 12-WL2200-CUL
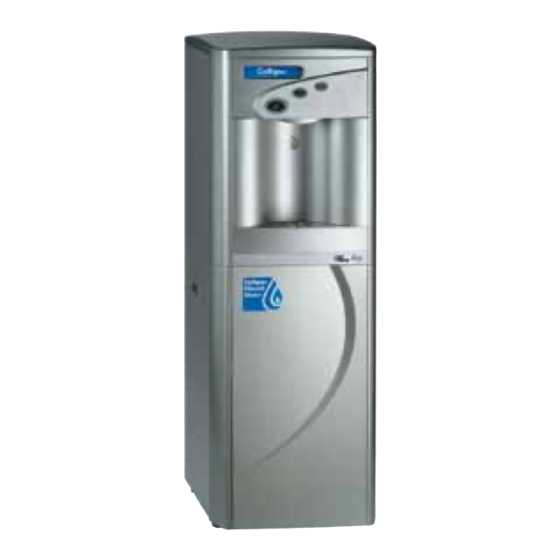
- Page 1 Cat. No. 01021716 Rev. B 06/01/10 DCO # 011761 Installation, Operation & Service Instructions with Parts List CULLIGAN ® Executive Bottle-free Cooler Featuring: • Biocote Protection ® • In-Tank UV Protection Models: 12-WL2200-CUL Printed in USA ©2010 Culligan International Com pa ny...
-
Page 2: Attention Culligan Customer
We encourage Culligan users to learn about Culligan products, but we believe that product knowledge is best obtained by con- sulting with your Culligan dealer. Untrained individuals who use this manual assume the risk of any resulting property damage or personal injury. -
Page 3: Table Of Contents
Instructions with Parts List Culligan Executive ® Bottle-free Cooler Models from 2010 Contents Attention Culligan Customer: ..........ii BioCote ................24 ® Key Pre-Delivery Activities ..........iv Electrical Wiring Diagram ..........25 Introduction ................ 1 Executive Cooler Wetted Parts List ......... 26 Executive Overview ............ -
Page 4: Key Pre-Delivery Activities
Executive AC50 RO—see Appendix D, Figure 21 on page 44. • Uses: AC50 inline post carbon filter and storage tank. • For detailed instructions about AC 50 components please refer to the complete Installation, Operation and Service Manual, Cat. No. 01018587. iv Cat. No. 01021716 Culligan® Executive Cooler iv... - Page 5 Pre-Delivery Activity: Prepare and Flush Water Treatment Components CAUTION! All RO Membranes will require a 24-hour flush to drain. All flushing of membranes and filters must be done with chlorine-free, filtered, softened water. Activity Executive Executive Executive LC- Executive AC50 Aqua-Cleer Aqua-Cleer RO 100 RO...
- Page 6 This page intentionally left blank. vi Cat. No. 01021716 Culligan® Executive Cooler vi...
-
Page 7: Introduction
Culligan Executive Cooler systems come with a 1 gallon (4 liters) cold tank with an 8-watt in-tank UV lamp. Therefore, the Culligan Executive Cooler systems are protected on the inside by UV and on the outside by BioCote providing the ultimate in cleanliness for your cooler. - Page 8 Use protective clothing and proper face or eye protection equipment when handling chemicals or power tools. NOTE The Culligan Executive Cooler is not intended for use with water that is microbiologically unsafe or of unknown quality without adequate disinfection either before or after the system.
-
Page 9: Executive Overview
Executive Overview Executive Overview Cold Tank The cold tank is manufactured from 304 Stainless Steel which is non-corrosive, inert and reflects Ultraviolet (UV) light. The cold water temperature is preset at approximately 41°F (5°C) by the factory. The capacity of the cold tank is 1 gallon (4 liters). -
Page 10: Main Parts Layout
Main Parts Layout... -
Page 11: Safety Information
Safety Information Electrical Safety • Only connect the power cord to a 120V, 15A (GFI preferred) properly grounded outlet. • Never pull the power plug from the outlet with a wet hand or allow the plug to get wet. • Keep the power cord out of heavy traffic areas. -
Page 12: Inspection And First-Time Setup Procedure
NOTE All preparation work should be done in a clean area. A separate room is recommended. A Culligan IQR form is shipped with each unit. Fill out the IQR form and return to Culligan Quality Department. Remove the top cover of the machine. This is retained by two screws located under the front edge at the bottom of the cover and two clips in the same location. - Page 13 Ensure the red switch on the rear of the unit is in the OFF position. Connect the power cord to the unit and to a power supply. 15A with GFI is recommended. NOTE It may take several minutes before the hot tank is full and water begins to flow from the dispensing head.
- Page 14 18. The Executive Cooler should be installed within 24 hours. NOTE Prepare all filters, RO cartridges, and the RO storage tank strictly in accordance with the instructions included in the Appendix section of the manual 8 Cat. No. 01021716 Culligan® Executive Cooler 8...
-
Page 15: Installing The Executive Cooler
Installing the Executive Cooler Position the Unit NOTE Per Culligan Corporate policy, you must install an external leak controller during install of the Executive Cooler (Part # D1018733) Locate the unit as close to an electrical connection and feedwater water supply as possible with a 3 inch (8 cm) clearance at both sides and back of the unit. - Page 16 Cool the water in the cold tank. When the unit has reached the set temperature, the compressor will stop running. The temperature may continue to drop as any ice that has formed on the sides of the tanks will start to melt and equalize the tank temperature. 10 Cat. No. 01021716 Culligan® Executive Cooler 10...
- Page 17 Test the water temperatures. Taste the water. If you are not satisfied with the quality of the water, check the filters and flush additional water through the unit. Inspect the Unit Check the unit to make sure it is electrically safe. Check that the unit is clean and functions to the customer’s satisfaction.
-
Page 18: Operating An Executive Cooler
Do not hold cup or place hands in dispensing area while dispensing water. c Do not dispense water in a stop-start style of vending. Hold button continuously until cup is full). c Never try to fill more than one vessel at a time. 12 Cat. No. 01021716 Culligan® Executive Cooler 12... -
Page 19: Dispensing Hot/Cold/Ambient Water
Dispensing Hot/Cold/Ambient Water Dispensing Cold Water (Default Mode) Push the dispense/cold water default button. The button backlight will light blue and the blue LED will blink. The machine will dis- pense cold water. Dispensing Ambient Water Push the room temperature water button on the right. -
Page 20: Maintenance And Service
(01001142). Sanitize the storage tank separately. 11. Plug the filter heads based on the configuration of the unit. Aqua-Cleer Filter Use bypass plugs (P1020279). ® Aqua-Cleer Use bypass plugs (P1020279). ® 14 Cat. No. 01021716 Culligan® Executive Cooler 14... - Page 21 LC 100 RO Use bypass plugs (01010098). Plug the restrictor outlet in the RO head with a 3/8" stem plug (01005650). AC 50 RO Attach empty housings to manifold. 12. On units using RO, remove the carbon post filter. Use a ¼” tube x ¼” tube connector (00403729) to join the product tubing where the filter was located.
-
Page 22: Sanitizing The Executive Cooler
On units using RO, reconnect the carbon post filter. Plug in the power cord. CAUTION! The unit is now live. Take suitable safety precautions. Reconnect the UV Light Replace batteries on external leak controller. 16 Cat. No. 01021716 Culligan® Executive Cooler 16... - Page 23 CAUTION! Do not remove the lamp from holder while illuminated and NEVER look into a lit UV light. Flush and Return to Service Slowly turn ON the water supply. Open the ball valve on the top of the full RO water storage tank. Flush 1–2 gallons (4–8 liters) of hot water, 1–2 gallons (4–8 liters) of cold water and 1 gallon (4 liters) of water through the unit to flush the new water treatment components and the water in the unit.
-
Page 24: Descaling The Executive Cooler
Remove all the filters from the unit and set them aside in a clean place. Place the Culligan Aqua-Cleer® sanitizing cartridge (P1020277) in the left-hand single head On units using RO, Turn off the tank ball valve, disconnect the storage tank from the product line tee and plug the tubing tee with a ¼”... - Page 25 Open the top cover and unplug one of the UV wire connectors. UV light can breakdown some descaling chemicals and cause taste problems. NOTE When mixing the descaling solution in the empty sanitizing cartridge, try adding a little red or green food coloring to the mixture.
- Page 26 Taste the water. Check the unit is clean and functions to the customer’s satisfaction. If you are not satisfied with the quality of the water, check the filters and flush additional water through the unit. Answer any cus- tomer questions regarding use of the unit. 20 Cat. No. 01021716 Culligan® Executive Cooler 20...
-
Page 27: Troubleshooting
Troubleshooting The following is a list of different problems that may be found while installing and operating the Executive Cooler. NOTE Fault finding must only be carried out by trained personnel. Symptom Possible Cause Solution NO FLOW OF WATER In this case, make sure that there is a water supply to the unit and that it is turned on. -
Page 28: Technical Specifications
Hot, Cold & Ambient 2.51 End of Life At the end of this product’s life, please ensure that it is disposed of in an environmentally friendly manner which is fully compliant with your Country requirements/guidelines. 22 Cat. No. 01021716 Culligan® Executive Cooler 22... -
Page 29: Warranty
Warranty Limited Warranty for the CULLIGAN Executive Water Treatment System ® This water treatment system is guaranteed to the original user only to be free of defects in materials and workmanship for a period of one (1) year from the date of purchase, or initial lease, but in no event longer than twenty-four (24) months from the date of manufacture. -
Page 30: Biocote
BioCote is effective against most common bacteria, mold, and fungi. ® NOTE BioCote is a second line of defense, it is not a replacement for your normal cleaning and sanitization ® processes. 24 Cat. No. 01021716 Culligan® Executive Cooler 24... -
Page 31: Electrical Wiring Diagram
Electrical Wiring Diagram Hot, Cold, and Ambient In-tank UV (AC120V) Mark Description Thermostat for overheat Thermostat for overheat Hot water heater LED1 Ambient water display LED2 Hot water display LED3 Cold water display Motor for compressor Power fuse Heater/Compressor switch SOL 1 Cold solenoid valve SOL 2... -
Page 32: Executive Cooler Wetted Parts List
Innowave Part Number Description 10-3067 1/4” to 1/4” Bluk Head Fitting 19-1054 1/4” PE Tube 12-5280 Culligan Filter Head 1/4” Equal Tee 12-1500 Solenoid Valve 5/16” to 1/4” Reducing Elbow 10-3062 5/16” PE Tube Cold Tank 1 Gallon (4 Liter) - Tower... -
Page 33: Executive Cooler Wetted Parts Illustration
Executive Wetted Parts Illustration Hot, Cold, and Ambient In-tank UV (AC120V) Figure 6. Wetted parts diagram C at. No. 01021716 Executive Wetted Parts Illustration... -
Page 34: Executive Cooler Main Parts List
12-1210 UV Lamp Retaining Nut 12-1360 Thermal cut-out 220°F 10-2500 Quartz Sleeve O Ring (105°C) - Manual 10-1400 Quartz Sleeve 12-5280 Culligan Filter Head 12-5265 Power Transformer 12-5285 PCB Cover 10-3010 CN UV Ballast 12-8003 Upper Base NOTE N/A = Customer Specific / Not Stocked for Resale. -
Page 35: Executive Cooler Main Parts Illustration
Executive Main Parts Illustration 12 13 Figure 21. Executive model. C at. No. 01021716 Executive Main Parts Illustration... -
Page 36: Single Head Manifold And Available Cartridges
P1021587 ASO (Automatic Shut Off Valve for RO Configurations) P1021588 Check Valve, ¼” Tube 01010098 Bypass Plug, Everpure Heads (For PS-250 and LC-100 Heads) 01021338 Plug, 3/8” Stem 01001142 Plug, ¼” Stem 00403729 Connector, ¼” Tube x ¼” Tube 30 Cat. No. 01021716 Culligan® Executive Cooler 30... -
Page 37: Appendix Overview
This page contains materials and DCO information. IT DOES NOT PRINT AS PART OF THE DOCUMENT! Materials & Description: Aqua-Cleer CC Ultra Bottle-less Cooler Size: 11” x 17” Booklet folded down to 8 1/2” x 11” Color: Black, 2 Sided Stock: 20# White Other:...