Table of Contents
Advertisement
VIDEO CASSETTE RECORDER
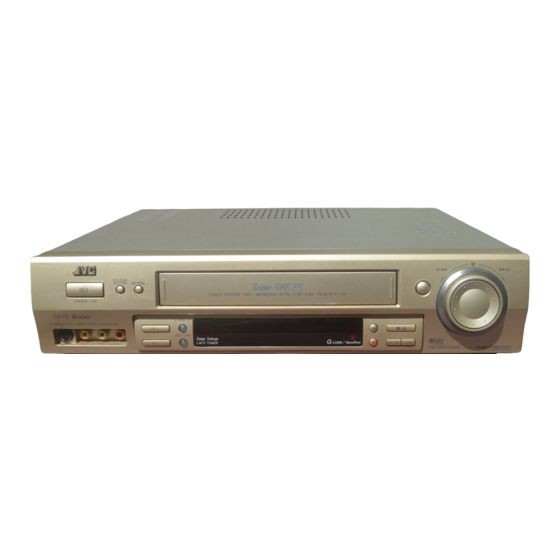
HR-S5700AM
CABLE/
VCR
TV
DVD/SAT
TV/VCR
AUDIO
1
2
3
2
4
5
6
VPS/PDC
DAILY/QTDN.
WEEKLY/HEBDO
7
8
9
0000
AUX
4
0
START
STOP
DATE
PR
DEBUT
FIN
EXPRESS
1
PROG
30 SEC
TV PR +
TV PR -
®
+8
VN LD
PR+
4
SP S
REVIEW
0
6
VPS/PDC
15dB
NORM
VCR
PR-
TM
525/625
INSTRUCTIONS
CONTENTS
Safety Precautions ...................... 2
Basic Connections ..................... 4
S-VIDEO Connection ................. 5
Video Channel Set ..................... 6
Auto Set Up ............................... 8
On-Screen Displays ................. 10
Select Language ....................... 11
Clock Set .................................. 12
Basic Playback ......................... 13
Playback Features ..................... 14
Basic Recording ....................... 17
Recording Features ................... 18
B.E.S.T. Picture System ............. 22
Programming ........................... 26
Express Timer Programming ..... 28
Recording ................................ 33
Remote Control Functions ........ 34
System ..................................... 38
Preparation For Editing ............. 39
Edit From A Camcorder ............ 40
TM
Recorder .................................. 41
Audio Dubbing ........................ 42
LPT0428-001A
ENGLISH
2
6
13
17
24
V
V
34
38
39
44
46
50
53
54
57
EN
Advertisement
Table of Contents

Related Manuals for JVC HR-S5700AM


Summary of Contents for JVC HR-S5700AM
-
Page 1: Table Of Contents
® VIDEO CASSETTE RECORDER HR-S5700AM CABLE/ DVD/SAT TV/VCR AUDIO VPS/PDC DAILY/QTDN. WEEKLY/HEBDO 0000 START STOP DATE DEBUT EXPRESS PROG 30 SEC TV PR + TV PR – PR– INSTRUCTIONS VN LD SP S REVIEW VPS/PDC 15dB NORM 525/625 ENGLISH CONTENTS SAFETY FIRST Safety Precautions ... -
Page 2: Safety First
Safety Precautions The rating plate and the safety caution are on the rear of the unit. WARNING: DANGEROUS VOLTAGE INSIDE WARNING: TO PREVENT FIRE OR SHOCK HAZARD, DO NOT EXPOSE THIS UNIT TO RAIN OR MOISTURE. CAUTION When you are not using the recorder for a long period of time, it is recommended that you disconnect the power cord from the mains outlet. - Page 3 ABOUT HEAD CLEANING Accumulation of dirt and other particles on the video heads may cause the playback picture to become blurred or interrupted. Be sure to contact your nearest JVC dealer if such troubles occur. Auto Head Cleaner A built-in head cleaner automatically cleans the video heads and head drum whenever a tape is loaded or unloaded...
-
Page 4: Installing Your New Recorder
Basic Connections Aerial terminal RF Cable (provided) Back of TV AV-IN terminals AV Cable (not provided) Mains Power Cord AUDIO OUT/ Mains outlet VIDEO OUT Connect the power plug to an AC outlet before installing the lithium battery. pg. 7 INSTALLING YOUR NEW RECORDER It's essential that your video recorder be properly connected. -
Page 5: S-Video Connection
S-VIDEO Connection Back of TV Aerial terminal S-VIDEO IN connector AUDIO IN connectors Audio cable (not provided) Mains outlet Mains Power Cord Back of Recorder To Connect to A TV With S-VIDEO/AUDIO IN Connectors . . . CONNECT RECORDER TO a–... -
Page 6: Initial Settings
Video Channel Set Video Channel (RF Output Channel) is the channel on which your TV receives picture and sound signals from the video recorder through the RF cable. PR– TEST SIGNAL The channel on which the screen to the left appear clearly in step 3 is your Video Channel. - Page 7 If you cannot obtain the two vertical white bars clearly with any channel between 28 and 60, consult your JVC dealer. FINISH VIDEO CHANNEL Press OK. If Auto Set Up ( pg.
-
Page 8: Auto Set Up
Auto Set Up IMPORTANT Don't press any buttons on the recorder or remote that are not directly related to the step you are performing while Auto Set Up is in progress. If you perform Auto Set Up successfully during installa- tion, there's no need to separately perform the Language Select, Clock Set or Channel Set procedures, but if adjustments become necessary they can be performed as... - Page 9 Major Countries Australia, New Zealand, Kuwait, U.A.E., Indonesia, Singapore, Thailand, Malaysia, Iran, Saudi Arabia, Egypt, Morocco, Lebanon, Iraq China, Mongolia, Russia Hong Kong U.S.A., Japan, S.Korea, Taiwan DO NOT press any button on the recorder or remote control while Auto Set Up is in progress. AUTO CH SET PLEASE WAIT START...
-
Page 10: On-Screen Displays
On-Screen Displays Turn on the TV and select the VIDEO channel (or AV mode). MENU The superimposed indication on the TV screen tells you what the recorder is doing. PR. 12 21 : 00 24. 12. 99 HIFI REMAIN 1 : 00 You can choose whether or not to have various operational indicators appear on screen, by setting this function ON or OFF. -
Page 11: Select Language
Select Language Turn on the TV and select the VIDEO channel (or AV mode). MENU TURN ON THE RECORDER Press ACCESS MAIN MENU SCREEN Press MENU. ACCESS INITIAL SET SCREEN Press PUSH JOG %fi to place the pointer next to "INITIAL SET", then press OK or PUSH JOG ACCESS LANGUAGE... -
Page 12: Clock Set
Clock Set Turn on the TV and select the VIDEO channel (or AV mode). MENU NOTE: If the year digits are automatically cleared, it is possible that you have input February 29th in a non-leap year. Input the correct data. PUSH JOG INITIAL SETTINGS (cont.) TURN ON THE RECORDER... -
Page 13: Playback
PLAYBACK Basic Playback Turn on the TV and select the VIDEO channel (or AV mode). PR– Clean the video heads using a dry cleaning cassette--TCL- 2UX--when: • Rough, poor picture appears while a tape is played back. • The picture is unclear or no picture appears. •... -
Page 14: Playback Features
Playback Features PAUSE PR– STOP High-Speed Search ACTIVATE HIGH-SPEED SEARCH During playback or still, turn the SHUTTLE ring all the way to the right for forward high-speed search, or to the left for reverse high-speed search. For forward search with a visible picture, turn the SHUTTLE ring all the way to the right and release it within 1 second. -
Page 15: Manual Tracking
Variable-Speed Search ACTIVATE VARIABLE-SPEED SEARCH During playback or still, turn the SHUTTLE ring to the right for forward variable-speed search, or to the left for reverse variable-speed search (refer to the illustration on page 14). During playback, press PUSH JOG The more times you press, the faster the playback picture moves. -
Page 16: Next Function Memory
Next Function Memory The Next Function Memory "tells" the recorder what to do after rewinding. Before continuing, ensure that the recorder is in the Stop mode. a– For Automatic Start Of Playback After Tape Rewind..press REW, then press PLAY within 2 seconds. b–... -
Page 17: Recording
RECORDING Basic Recording Turn on the TV and select the VIDEO channel (or AV mode). PR– RECORD Accidental erasure prevention To prevent accidental recording on a recorded cassette, remove its safety tab. To record on it later, cover the hole with adhesive tape. -
Page 18: Recording Features
Recording Features PR– 0000 Record One Programme While Watching Another Elapsed Recording Time Indication You can check the exact time of a recording. – –:– – PR +/– RECORDING (cont.) SELECT CHANNEL TO WATCH Once recording is in progress, all you need to do is to set the channel controls on the TV for the station you wish to view. -
Page 19: Bilingual Programmes
Instant Timer Recording (ITR) This easy method lets you record for from 30 minutes to 6 hours (selectable in 30-min. increments), and shuts the recorder off after recording is finished. START RECORDING Press RECORD on the recorder. ENGAGE ITR MODE Press RECORD again. - Page 20 PR– MENU ATTENTION S-VHS recording is possible only for PAL recordings made in the SP or LP mode, or NTSC recordings made in the SP mode. S-VHS ET recording is possible only for PAL recordings made in the SP mode, or NTSC recordings made in the SP mode.
-
Page 21: Super Vhs Et
PR– S-VHS ET This facility allows recording with S-VHS picture quality on VHS cassettes. You can play back those cassettes recorded in S-VHS ET on a recorder equipped with S-VHS ET. NOTES: To obtain the highest quality recording and playback pictures over a longer period on this model, S-VHS recording on S-VHS tape is recommended. -
Page 22: Picture System
B.E.S.T. Picture System Turn on the TV and select the VIDEO channel (or AV mode). PR– PLAY RECORD MENU The B.E.S.T. (Biconditional Equalised Signal Tracking) system checks the condition of the tape in use during recording and playback, and compensates to provide the highest-possible recording and playback pictures. -
Page 23: Start Recording
Recording START RECORDING Press and hold RECORD and press PLAY on the remote, or press RECORD on the recorder. DURING B.E.S.T. B.E.S.T. COMPLETE The recorder spends approximately 7 seconds assessing the condition of the tape, then begins recording. NOTES: The B.E.S.T. system works for both SP and LP (or EP) modes only after a tape has been inserted and the Record mode is first initiated. -
Page 24: Timer Recording
™/S CODE System Setup Turn on the TV and select the VIDEO channel (or AV mode). INFORMATION and S are different trademarks used to CODE represent the same easy recording feature, but only the term system will be used in the instructions. If you use the CODE system, follow the same instructions listed for the G-... - Page 25 MENU PUSH JOG ENTER RECEIVING CHANNEL POSITION NUMBER Press PUSH JOG %fi or NUMBER keys to input the number of the recorder's channel position on which the Guide Program NUMBER number's broadcast is received. Then press OK or PUSH JOG If the satellite broadcast is received on your recorder's auxiliary channel "L-1", select "L-1"...
-
Page 26: G- Code ™/Show View ™ System Setup . 24 G- Code ™/Show View ™ Timer Programming
™/S CODE Timer Programming Remember, the clock must be set before you can programme the timer ( pg. 10). INFORMATION and S are different trademarks used to CODE represent the same easy recording feature, but only the term system will be used in the instructions. If you use the CODE system, follow the same instructions listed for the G-... - Page 27 NUMBER STOP+/– PROG Satellite Tuner Users To timer-record a satellite broadcast using the G- system: Perform steps 1 – 6. Set the satellite tuner to the appropriate channel before the selected programme begins. Leave the satellite tuner's power on. RETURN TO NORMAL SCREEN Press PROG or OK.
-
Page 28: Express Timer Programming
Express Timer Programming Remember, the clock must be set before you can programme the timer ( pg. 12). Before performing the following steps: Insert a cassette with the safety tab in place. The recorder will come on automatically. Turn on the TV and select the VIDEO channel (or AV mode). Select the appropriate colour system by pressing the COLOUR SYSTEM button ( PR–... - Page 29 SP/LP/EP PROG SET TAPE SPEED Press SP/LP/EP ( RETURN TO NORMAL SCREEN After confirming all information is correct, press PROG or OK. "PROGRAM COMPLETED" appears on the screen for about 5 seconds, then normal screen WEEKLY appears. Repeat steps 1 – 8 for each additional programme. ENGAGE RECORDER'S TIMER MODE Press ‰...
- Page 30 START+/– MENU Check, Cancel And Replace Programmes PR +/– SP/LP/EP PUSH JOG To cancel or replace a programme... TIMER RECORDING (cont.) DISENGAGE TIMER MODE Press ‰ ‰ ‰ ‰ ‰ , then press ACCESS PROGRAMME CHECK SCREEN Press ‰ ‰ ‰ ‰ ‰ ?. PR START STOP 8:00 10:00 10:00 10:45...
- Page 31 START+/– When programmes overlap each other If “PROGRAM OVERLAPPED” appears, you have another programme overlapping the programme you have just made. The Programme Check screen appears and conflicting programmes will start blinking. PROGRAM OVERLAPPED PR +/– Example: Programme 1 (you have just made) and Programme 4 overlap each other.
-
Page 32: Auto Timer
Auto SP → LP Timer If, when timer-recording in SP mode, there is not enough tape to record the entire programme, the recorder automatically switches to LP mode (with PAL broadcasts) or EP mode (with NTSC broadcasts) to allow complete recording. For Example . -
Page 33: Automatic Satellite Programme Recording
Automatic Sat- ellite Program Recording PR– NOTES: Auto Satellite Prog recording is only possible with the rear AUDIO/VIDEO IN connectors. When the Auto Satellite Prog Rec mode is engaged or the recorder's power is turned off after Auto Satellite Prog recording is finished, the recorder will not enter the Timer mode even though “AUTO TIMER”... -
Page 34: Special Features
Functions NUMBER "1" Remote A/B Code Switching The remote control is capable of controlling two JVC video recorders independently; one set to respond to the remote control's A code control signals and another set to respond to B code control signals. The remote control is preset to send A code signals because your video recorder is initially set to respond to A code signals. - Page 35 NUMBER keys. IMPORTANT Although the provided remote control unit is compatible with JVC televisions, as well as many other models, it may not work with your TV, or in some instances, may have limited function capability. TV BRAND NAME...
- Page 36 NUMBER @ # +/– IMPORTANT Although the provided remote control unit is compatible with JVC satelite receiver and DVD, as well as many other models, it may not work with your unit, or in some instances, may have limited function capability.
- Page 37 Cable Box or Satellite Re- ceiver Multi-brand Code CABLE BOX BRAND NAME AMSTRAD CANAL+ CANAL SATELLITE D-box ECHOSTAR FINLUX GALAXIS GRUNDIG HIRSCHMANN JERROLD KATHREIN LUXOR MASPRO NOKIA PACE PANASONIC PHILIPS PHONOTREND SALORA SKYMASTER VIDEOWAY WISI DVD Multi-brand Code DVD BRAND NAME CODE MATSUSHITA PHILIPS...
-
Page 38: System Connections
Connecting/ Using A Stereo System Stereo Amplifier Speaker Television Mains outlet AUDIO OUT MAKE CONNECTIONS Connect the AUDIO OUT L and R connectors on your video recorder to the AUX IN or TAPE MONITOR terminals on your stereo system's receiver or amplifier. NOTES: When connecting your recorder's audio output connectors to a stereo amplifier, make sure you connect L and R correctly. -
Page 39: Editing
EDITING Preparation For Editing Turn on the TV and select the VIDEO channel (or AV mode). MENU Advantages Of S-VHS Video Recorders You can edit from VHS to S-VHS, from S-VHS to VHS, or, from S-VHS to S-VHS. From VHS to S-VHS: Record VHS playback signals in the S-VHS mode. -
Page 40: Edit From A Camcorder
When using a monaural camcorder, connect its AUDIO OUT connector to the AUDIO L input connector on your recorder. When a Master Edit Control-equipped JVC camcorder is used, the camcorder is capable of controlling the recorder. Refer to the camcorder's instruction manual for operating procedure. -
Page 41: Edit To Or From Another Video Recorder
Edit To Or From Another Video Recorder Player TV Receiver VIDEO CHANNEL RF Cable (provided) Another recorder Recorder Recorder Your recorder (MONO) AV Cable (not provided) Another recorder Player You can use your video recorder as the source player or the recording deck. -
Page 42: Audio Dubbing
Audio Dubbing PR– CD Player etc. CD Player etc. Audio mixer Mixer output Original sound AUDIO OUT PR– NUMBER "0" PLAY Audio dubbing replaces the normal audio sound of a previously recorded tape with a new soundtrack. Normal audio track Video/Hi-Fi audio track AUDIO... - Page 43 PR– AUDIO PLAY PAUSE STOP START DUBBING Engage the audio component's Play mode, then press PLAY to start the tape in your recorder. Audio dubbing begins at this point. " " blinks and " " is displayed on the front display panel.
-
Page 44: Information On Multi-System Compatibility
In the NTSC4.43 mode, with some TVs, on-screen displays (Programme screen etc.) may roll up or down and there may be a loss of colour. When this happens, select the AUTO mode. HR-S5700AM Multi-system tuner (B/G, I, D/K, M) Mode Description Usually set to this mode. -
Page 45: Tape-To-Tape Editing
TV system you have selected at the TV System Select screen. Tape-To-Tape Editing There are 4 different types of recorded tape, depending on the signal recorded. Recorded tape MESECAM SECAM NTSC HR-S5700AM Built-in RFconverter K, I, G, M, H Playback equipment HR-S5700AM MESECAM... -
Page 46: Tuner Set
Turn on the TV and select the VIDEO channel (or AV mode). MENU IMPORTANT Perform the following steps only if auto channel set has not been set correctly by Auto Set Up function ( you have moved to a different area or if a new station starts broadcasting in your area. -
Page 47: Manual Channel Set
SELECT TV SYSTEM Press PUSH JOG %fi to place the pointer next to the appropriate TV system, then press OK or PUSH Auto Channel Set will start. AUTO CH SET PLEASE WAIT START FINISH RETURN TO NORMAL SCREEN Press MENU. NOTE: If you perform Auto Channel Set when the aerial cable is not connected properly, "SCAN COMPLETED -NO SIGNAL-"... -
Page 48: Delete A Channel
Delete A Channel ACCESS TUNER SET SCREEN Perform steps 1 – 3 of "Auto Channel Set" on page 46. ACCESS CHANNEL LIST Press PUSH JOG %fi to place the pointer next to "CH EDIT", then press OK or PUSH JOG SELECT CHANNEL Press PUSH JOG %fi... - Page 49 Fine-Tuning Channels ACCESS TUNER SET SCREEN Perform steps 1 – 3 of "Auto Channel Set" on page 46. ACCESS CHANNEL LIST Press PUSH JOG %fi to place the pointer next to "CH EDIT", then press OK or PUSH JOG SELECT CHANNEL TO FINE-TUNE Press PUSH JOG %fi...
-
Page 50: Troubleshooting
15) Press PR +/– few times to remove the noise bars from the screen. Engage and adjust tracking manually. pg. 15) Consult your JVC dealer. Select the correct colour system by pressing the COLOUR SYSTEM button. ( pg. 44) Once recorded, the signal cannot be corrected. - Page 51 RECORDING SYMPTOM 1. Recording cannot be started. 2. TV broadcasts cannot be recorded. 3. Tape-to-tape editing is not possible. 4. Camcorder recording is not possible. TIMER RECORDING SYMPTOM 1. Timer recording won't work. 2. On-screen timer programming is not possible. 3.
-
Page 52: Other Problems
OTHER PROBLEMS SYMPTOM 1. Whistling or howling is heard from the TV during camcorder record- ing. 2. When scanning channels, some of them are skipped over. 3. The channel cannot be changed. 4. Channel settings that were made manually seem to have changed or disappeared. -
Page 53: Questions And Answers
QUESTIONS AND ANSWERS PLAYBACK Q. What happens if the end of the tape is reached during playback or search? A. The tape is automatically rewound to the beginning. Q. Can the video recorder indefinitely remain in the still mode? A. No. It stops automatically after 5 minutes to protect the heads. -
Page 54: Index
FRONT VIEW COLOUR RE-VIEW SYSTEM STANDBY/ON S-VIDEO(S-2) VIDEO(MONO) L–AUDIO–R STANDBY/ON Button COLOUR SYSTEM Button REVIEW Button pg. 16 Cassette Loading Slot PLAY Button pg. 13 JOG Dial pg. 14 SHUTTLE Ring pg. 14 S-VIDEO(S-2)/VIDEO/AUDIO Input Connectors pg. 40 PR +/– Buttons pg. -
Page 55: Rear View
REAR VIEW Mains Power Cord pg. 4, 5 AUDIO/VIDEO OUT Connectors AUDIO/VIDEO IN Connectors S VIDEO OUT Connector S VIDEO IN(S-1) Connector DISPLAY PANEL 15dB NORM B.E.S.T. Picture System Display Audio Level Indicator Symbolic Mode Indicators STILL: SLOW: PLAY: FF/REW VARIABLE RECORD: SHUTTLE SEARCH: RECORD PAUSE:... -
Page 56: Remote Control
The remote control can operate not only the video recorder but also some of your TV, cable box, satellite receiver and DVD functions. To operate your video recorder, first press the VCR button to set the remote control to the Video mode. To operate your TV, first press the TV button to set the remote control to the TV mode ( To operate your satellite receiver, cable box or DVD, first press the CABLE/SAT/DVD to set the remote control to the satellite receiver, cable box or DVD mode. -
Page 57: Specifications
SPECIFICATIONS GENERAL Power requirement Rating : AC 110 – 240 V`, 50/60 Hz Operating : AC 090 – 260 V`, 50/60 Hz Power consumption : 22 W Temperature Operating : 5°C to 40°C Storage : –20°C to 60°C Operating position : Horizontal only Dimensions (WxHxD) : 400 x 94 x 347 mm... - Page 58 MEMO...
- Page 59 MEMO...
- Page 60 ® Registered Trademark owned by VICTOR COMPANY OF JAPAN, LTD. COPYRIGHT © 2000 VICTOR COMPANY OF JAPAN, LTD. ® VICTOR COMPANY OF JAPAN, LIMITED Printed in Malaysia 0800IYV...